Now there are no general rules for installing a TV. Everyone has a different home, room layout, appliances, and different preferences. Not to mention all the smaller factors like lighting, wall placement and how it will fit into your decor.
Plus, it seems like every week a brand new 4K TV or announcement of a high-tech feature shakes up the home theater market meaning there's always something else to consider purchasing a picture-perfect TV next, but before that you have to get it set up right your TV screen.
Setting up your TV screen
The good news is that as more and more advancements in TV display technology, such as 4K Ultra HD resolution, HDR, and wide color gamut, are made available, more of them are hitting the market. This means that the picture quality you can get these days with even a budget TV can be very decent.
The good news is that fine-tuning your screen isn't difficult, and you really can't do it wrong. Even if you get into multi-color motion blur. You have an easy way to fix this, just go back to factory settings.
What parameters to set when setting up
Correctly set TV settings will help avoid mistakes when setting up the picture. A high-quality picture is obtained subject to the following conditions:
- The format (size) of the image is adjusted by two triangles. Cut off triangle vertices indicate an error. Before carrying out work, you should disable the scaling function.
- Brightness. Adjustable by dark colored cells. If configured correctly, the tone of each subsequent cell will be different from the previous one. If this is not the case, work on setting the brightness should continue.
- Contrast. Adjustable with gray scale. Clear boundaries between cells of different shades of gray indicate proper operation.
- Color or saturation. For installation there is a picture depicting women with different skin colors. After working with regulators, women's skin should look natural. Red skin color indicates incorrect color and color temperature settings.
- Sharpness. The parameter is set after working out the first point. Looking at the screen, we should see all the lines exactly.
What sources and connections should the TV have?
It may seem obvious, but to get the best out of your TV, you need to put the best into it.
This comes down to using high resolution sources. For watching movies and TV shows on disc, regular DVD players are the bare minimum of what's acceptable, but if you're after quality, they really should be sidelined in favor of a decent Ultra HD Blu-ray player.
The amount of 4K broadcast content is currently minimal, but 4K consoles like the Xbox One X and PS4 Pro are taking the gaming world by storm. There are also many 4K streaming devices available these days, such as the Apple TV 4K.
However, if you really want to buy into 4K content, then you should consider one of the best TV streaming services that have a huge amount of 4K HDR content.
Read: What is HDR video technology?
Of course, once you have a TV it is very important that you use the correct connections. You've probably used Sky+ HD over a SCART connection at some point over the years.
By and large, the only connection you should be using nowadays is HDMI, unless there is an overriding reason for choosing a legacy interface. Owners of older Panasonic TVs can still have a DisplayPort connection, which is used to connect a PC, and it can deliver equally high-quality signals.
Connecting your TV to the Internet
Online video streaming services are becoming increasingly popular with a huge catalog of TV shows and movies in different formats, including 4K, available on Netflix and Amazon Prime Video. To access all these treasures, you need to connect your TV to your home network. Time-lapse services such as BBC iPlayer and many other smart applications found on modern TVs also require an Internet connection.
Most often, this can be done in the “Network” section of the settings menu. Despite the convenience of connecting using Wi-Fi (especially if the TV is located far from the router), we traditionally recommend a more stable and reliable Ethernet connection.
This will be especially true for those who frequently watch streaming or broadcast content in 4K format - they will not have to deal with interruptions or stops in the signal.
How to connect a TV screen?
Original components and Blu-ray players usually have different display options, but usually manage themselves depending on the display they are paired with, thanks to the EDID (Extended display identification data) information they encounter. You can intervene manually.
The best way to check this is to go into the display settings of your Blu-ray player or game console to set exactly what they output. Ideally, you're looking for them to output 4K, but many Full HD boxes won't be able to do that.
If you watch 4K content online it will also usually just downgrade the quality to what your TV can output.
If you're a little confused as to what your TV can support, then we'd suggest choosing the highest option available and just seeing what happens.
Most sources will briefly show an image designed to test whether your TV can support the settings you've chosen. And if this image is not displayed, then you can safely assume that your device cannot support it.
Simply scroll through the settings until you find the highest option your TV can display.
To further complicate matters, some cheaper 4K TVs will only support 4K on a portion of their shared HDMI ports (usually the first two). If your new 4K Blu-ray player cannot output Ultra HD to your screen, try connecting it to a different HDMI port to resolve the issue.
Viewing angle and distance
The screen should be located at eye level of the seated viewers, so take care of a high-quality stand of the required height, on which you can place other necessary devices - a set-top box, Blu-ray player or sound bar.
This rule must also be observed when placing the TV on the wall. Don't follow fashion and install the TV above the fireplace - you will feel like you're in the front row of a movie theater. If you want to hang your TV above eye level, at least rotate it down for a more comfortable viewing experience.
There is no specific recommendation regarding viewing distance - it depends on both the screen size and the resolution of the TV.
On average, for Full-HD models it is worth choosing a place at a distance of 1.5 to 2.5 screen diagonals, and for 4K TVs - from 1 to 1.5 diagonals.
How does the light in a room affect the perception of images?
One of the important characteristics of LCD screens is that each one behaves differently depending on the level of ambient light in your room. Since LCD is a backlit display technology, it becomes increasingly torch-like in a darkened room.
What looked like a black image in a room with medium ambient light becomes gray (either dark gray or light gray) in a darkened room. Panel makers will try every trick from filters to backlight tricks to hide this fact.
OLED or plasma screens are self-luminous displays and do not suffer from this torch-like trait. They even perform better in low-light rooms, making them a great choice for movie buffs.
Read: OLED vs QLED, compare technologies and choose the best TV
Next time you go to the cinema, check out the black level presentation. The average projected image is also quite gray.
However, if you want to improve picture quality, consider placing a light source, such as a lamp, behind your TV.
Where to place the TV?
Installing the TV in a suitable place, and not at the first available point near an outlet, is the simplest thing that will help you achieve the best quality.
First of all, try to provide as many spectator seats as possible directly in front of the screen. When viewed at an angle, colored and black objects become faded - this is especially true for LCD TVs. For OLED models, the problem is less acute, since the image does not noticeably lose quality when viewed at an angle - but we still prefer to sit directly in front of the screen so that the entire picture is in the palm of our hand. If the dimensions or shape of the room do not allow this, a TV with a swivel stand will help.
Consider reflections: Most windows have curtains or blinds, and you can turn off the lights - but a dark room can also strain your eyes towards the end of a long film.
To provide ambient lighting without disturbing viewing, consider installing a lamp behind the TV to provide backlighting.
How to set screen modes on TV?
Many will tell you that most of the preset pictures on your TV actually degrade the picture and that the only way to get a great picture is to do it yourself or pay a professional to come and set up your TV for you.
This, of course, is nonsense.
The engineers responsible for the picture quality on the screen you just bought want you to have a great picture without having to adjust it yourself.
The key point is that the different presets and modes exist for a reason.
For most content and viewing conditions, the Standard or Normal setting provides the best starting point: black levels are likely to be spot on for your particular panel, colors are suitably optimized and contrast nice and fast.
Dynamic mode is essentially a store mode and should be avoided while movie modes are intended for viewing only in low light conditions.
Preset Picture Modes
Most TV models have a few preset modes to get you started. They vary from manufacturer to manufacturer and model to model, and usually go by names like "standard", "dynamic", "cinema", "game", "sports", and the increasingly common "HDR".
Avoid the “dynamic” mode (sometimes called “live”): the picture in this case looks impressive, but oversaturation of colors and overheating of whites lead to a loss of detail.
It's best to start with "standard" or "cinema" (sometimes called "warm" or "pro"); the latter usually has the most accurate color palette.
4K HDR TVs automatically switch to HDR mode when playing 4K HDR content. It maximizes brightness and contrast to meet its standards.
There are some other modes that may be useful in certain circumstances. For example, owners of game consoles should choose “games”. It disables most processing technologies for faster response times, which is especially important for first-person shooters.
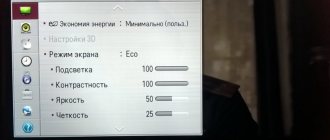
Also, many models today have an “eco” mode. But while we're all about protecting the environment, it's best not to choose it - it reduces screen brightness and can lead to image instability. For some models, the “eco” mode is located in another section of the general image settings; It makes sense to review its details and disable everything unnecessary, especially any options whose name hints at “room light sensor.” They have to adjust the image to its level, but as a result the picture becomes too faded.
And sports fans should not be tempted by “sports” modes, in which it becomes blatantly unrealistic.
Tips for setting TV screen modes
Heavy image processing is anathema to gamers, as even the slightest lag can lead to a humiliating defeat at the hands of online rivals.
To address this, manufacturers now offer a special low-lag preset that maximizes performance.
They turn off most processing. If your set doesn't come with a game pre-installed, it's probably worth manually disabling as much image processing as you can for your game input.
These milliseconds of competitive advantage will undoubtedly be useful to you the next time you fire up a game.
If your TV supports it, try enabling Game Mode only for the HDMI port your console is connected to so that other content can benefit from the advanced picture processing your TV offers.
Customer reviews and answers to questions
Nesons no internet connection
Model 50PU615S Restored to factory settings, I can’t set up the Internet connection. It says no connection. Or the page was not found. You may need to enter some IP and gateway data. November 25, 2018, Rossosh.
After resetting the TV to factory settings, you need to enter the Menu and set the connection type - wired or wireless. Next, in the window that appears, select the network login from the list and enter the login password that was set when setting up the router. A modern TV can easily connect to a home network automatically, without specifying IP values, gateway, subnet mask, etc.
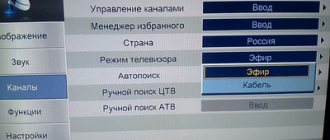
How to set up TV channels
3.9.2019 NESONS 43PF535S Rostov-on-Don How to tune channels on TV
9.27.2019 Nesons 32R553T2 Novorossiysk “We can’t set up viewing of the program guide by channels. Well, like a program in a newspaper, only on the screen. A regular digital set-top box shows this easily. And on TV you can only see what is on at the moment, but not what kind of program will be next. "
No sound when playing via USB
10/8/2019 Nesons 32PR530 Gelendzhik No sound when playing via USB port, a message appears: unsupported audio format.
Indeed, the TV does not support absolutely all possible audio and video formats. Write to the flash drive for viewing only files of supported formats.
Setting the time
20.10.2019 Nesons R590T2 Rostov-on-Don How to correctly set the time on the TV, it is displayed 7 hours more
1.5.2020 NESONS 32R590T2 Volgograd region, Chernyshkovsky district, the time on the TV shows 7 hours ahead of Moscow, there is no time setting in the settings, everything is fine on other TVs, digital broadcasting. This is what happened after the purchase.
When receiving digital broadcasting, the time on the TV is set by the TV signal provider, and you should contact it.
Connecting the set-top box
11.3.2019 Nesons 43h655t2s Simferopol When connecting the PS4 game console to a TV via the HDMI connector, it produces an image of 1080p and 60 Hz. I bought a TV with 4K, how do I set it up? I looked through all the settings and couldn't find it.
11/2/2020 Nesons 50pu515s Nesons Nevinnomyssk please help me figure out the issue on TV. The TV itself is 4k uhd hdr. When using my Sony Playion 4 with this TV, I can’t turn on HDR in the game, because the Ps4 system says that your TV does not support HDR. After reading on the Internet, I discovered that some people also had this problem, but they solved it by going to the TV Settings and turning on the hdr mode itself specifically for a specific hdmi output to which the Ps4 is connected. But the fact is that it was a Samsung TV. But when you go to the Nesons TV Settings, there are no such items in the settings menu. What should I do? Please tell me how to solve this problem? Because this TV was bought specifically for this purpose, and 30 thousand was thrown away.
TV turns off
30/3/2019 Nesons 43PF535S Maykop The TV turns off after about 15 minutes, only on IP television, the TV does not turn off on a regular antenna. All timers are disabled.
Try resetting the TV to factory settings through the Menu.
How to add RAM to your TV, install DRM encryption, remove unnecessary applications
06/23/2020 NESONS 42F577T2 Smart White (DVB-T2) Sochi “The Smart TV was purchased on December 18, 2017 and was practically not used (life circumstances), but all this time I was subscribed to the IVI application, watched movies both on the computer and on the phone, and on a tablet (IOS, Android - it doesn’t matter). But now I’m back in Sochi and turned on NESONS. I understand, slow loading of Applications (IVI and YouTube), I don’t even know how to load others, the customizer was already in May 2017. But very often the TV asks to clear the memory.
1) As I understand it, it is the RAM that is lame, is it possible to add more RAM? Or is there some other way to avoid this problem?
2) The question is related specifically to the content of Appendix IVI. A fairly large percentage of films “Watching is not available” tormented technical support, they explained this by the fact that, supposedly, with all the available capabilities of Smart TV, my NESONS does not have DRM encryption (literally - By connecting to a subscription, you agree to the user agreement, which specifies information that the device must support DRM encryption. The encryption itself is established by the copyright holder of the content and, unfortunately, we cannot influence the ability of the device to play such encryption. On the TVs you specified, copying does not occur and is not allowed, it’s just that their technical characteristics have the ability to play DRM encryption. But as they wrote earlier, unfortunately, not all devices have such a technical capability.) It is clear that it is a shame and supposedly Samsung, Philips, Sony, Haier, LG, Xiaomi, Toshiba have it! but in NESONS - no! Maybe you can somehow bypass this or connect it, or, if it’s Android, reflash a new version? 3) How to remove unnecessary cubes (Applications) on the screen, and load others, for example, I do not use Media Center, nor the Shopping Center Application, nor vKontakte, nor Facebook on the TV, I absolutely do not need to log into my email on the TV, as remove them or hide them, especially if the Memory is endlessly clogged with something. But I would connect Mnogogo and OKKO, for example.
1) It is impossible to add RAM to the TV. Do a factory reset, this will completely clear the RAM.
2) Today's reality is that only a few brands care about their image and test their equipment for compatibility with various operators and applications. Most others don't, which accounts for, among other things, their lower price.
3) After a factory reset, only the applications preinstalled by the manufacturer will remain. They are hardwired into permanent memory and cannot be gotten rid of.
How to adjust contrast on a TV screen?
Back in the days of cathode ray tube TVs, contrast management was a major headache.
Modern LED LCD screens do not have these problems and the contrast can be left comfortably high. Many modes will default to 100% and the resulting image will look dynamic and fast.
However, the last thing you want to do with your new screen is take away its visual anchor, so don't go below 90 percent on this scale.
While plasma screens have all but disappeared from general sale, a number remain in use and it is not recommended to set them to high contrast as this can contribute to image retention and (if you're really unlucky) screen burn.
The latter is where channel logos and other static image elements can end up leaving a permanent shadow burned into the screen. This was a problem with early plasma screens and much less so with later panels.
Unlike LED LCDs, OLEDs boast nearly infinite contrast and don't suffer from image retention like plasma. That's why they are often displayed in stores along with shots of fireworks. However, they are not actually as bright as LED LCDs.
Difference with HDR in photo
HDR modes in TVs and photographs have significant differences. If we talk about photos, the HDR format manifests itself in an acidic palette and unnatural contours. On television, completely different principles are used. Let's look at how HDR works on a TV screen and on a photograph to understand what the difference is.
TV support for the HDR standard means an extended dynamic range and the largest possible color palette. Together, these parameters make the image on the screen natural and realistic. Video signal parameters are not limited to standards such as HDTV, since the shooting process and studio processing capabilities have undergone significant modernization.
In photographs, HDR appears in several frames with different exposures. Based on this, a single frame is created that does not create, but simulates a wide dynamic range.
Based on this, we see that the solution to low brightness can be approached from different angles. HDR technology can be a streamlined process for maintaining natural images. The viewer will be able to see the natural quality of the picture captured on camera. The second approach is a collection of different frames to simulate a specific scene. Therefore, HDR in a photo is a lack of realism.
The HDR video stream looks natural. The viewer does not have the feeling that it was previously processed by a huge number of different filters. Naturalness is the key to success. Therefore, the image looks alive.
How to dim your TV screen?
The quest for ever deeper blacks has led to a number of image processing techniques that can reduce image quality rather than improve it. The black level boost and stretch options can make dark parts of the image appear blacker, but squash much of the fine shadow detail that makes dark areas convincing.
Dynamic Contrast changes the level of highlights by constantly adjusting in response to changes in image content. This can lead to unnatural image swapping. If you notice that it is running, try turning it off or minimizing it.
Few things affect the overall viewing experience on an LED LCD TV more than local dimming. Both edge LED TVs (common) and direct backlit LED TVs (not so many) use local dimming to adjust the brightness of different parts of the screen independently of each other according to picture requirements.
The technique can be a bit crude, resulting in splashing pools of light and hazy backlighting, while bright highlights in a dark scene can illuminate stripes of the screen and cause distracting side effects.
Set local dimming to a minimum to minimize such annoyances.
Playing external video signal
Page 16
- Image
- Text
PLAYING AN EXTERNAL VIDEO SIGNAL
15
This device is equipped with composite (AV), S−Video (S−VIDEO), component (YPBPR) video inputs and a SCART interface (SCART) and supports video playback in PAL, SECAM, NTSC 3.58, NTSC 4.43 and PAL60 color systems.
To play an external video signal, connect the external device to one of the video inputs on the rear panel of the device, shown on page 7. From the operating mode selection menu, select the desired video input as described on page 8 or 13.
NOTES
• The device automatically recognizes the type of video signal (composite or RGB video signal),
arriving via the SCART interface. To achieve the best image quality, use RGB video signal if supported by the signal source.
• The device automatically recognizes the video scan type (progressive Y Pb Pr
or interlace Y Cb Cr), coming from the component Y Pb Pr video input. To achieve the best picture quality, use a progressive Y Pb Pr video signal if supported by the signal source.
• To correctly display the external video signal, we recommend installing the color system
device to the AUTO position.
Settings in external video signal viewing mode
To configure TV viewing options in TV mode, press the MENU key
on the remote control or
MENU
on the left side of the device. The settings menu will appear on the screen.
• When displaying video input from the composite (AV), S−Video (S−VIDEO) video inputs
and SCART interface (SCART), the settings menu is as described on page 11.
• When displaying video signal input from component (Y Pb Pr) video input, setup menu
corresponds to what is described on page 13.
NOTE
• In external video playback mode, TV SETUP is not available.
How to adjust color on TV?
The latest generation of TVs is capable of producing a wider spectrum of color than before, thanks to technologies such as quantum dot and wide color panels. On LCD panels, they help red colors look less orange and make greens appear greener.
Some screens offer access to additional in-depth color management. These usually take the form of adjustments to the primary RGB color elements.
Some TVs also support adjustment of the cyan, magenta, and yellow secondary components. However, they should only be corrected in conjunction with color measuring equipment. In general, leave this mode alone.
Most TVs use sensors that can detect ambient light in your viewing room, allowing the TV to automatically adjust the edges of the picture to compensate for changing conditions. This can be annoying as the image starts to waver.
Generally speaking, our advice is that you should turn off all light sensors. You'll get a more consistent image.
Causes
Before performing certain actions, you need to determine the reasons why there is no color on the TV when you connect a digital set-top box. There could be several explanations for this:
- Incorrect TV color mode setting.
- Errors in connecting equipment to each other.
- Incorrect tuner setting.
- Malfunction of the set-top box or TV.
These are the main reasons why there is no color image when connecting a set-top box. To eliminate the malfunction, you must act sequentially, starting with simple steps, moving on to more complex checks.
How to adjust sharpness on TV?
If you think that by increasing sharpness you will get more detail in your TV images then you will probably be disappointed. Outside of this, the sharpness settings in all modes will invariably be set too high. Look at black text on a light background: does it have a white glow or ring around it?
This extra emphasis improves legibility when viewed from a distance, but does not improve detail; it actually hides it. And on a 4K TV designed for larger/closer viewing to appreciate the improved detail, it's best not to do this. Sharpness should be no higher than 10/15 on an adjustable sensor.
Usually standard default values are offered with overscanning On enabled. This means that the edges of the image are effectively lost outside the frame.
This rarely happens in the HD era, as the actual picture information is used across the entire 1920x1080 HD frame. Non-Overscan modes may have different menu names depending on the brand. Look for aspect ratio adjustments and watch for what causes the image to “pull back” and reveal a little more.
Plasma TVPanasonic VIERA TX-PR50V10
In continuation of the series of articles about the current line of Panasonic televisions, we offer a review of the 50-inch plasma TV VIERA TX-PR50V10, which belongs to the V series with advanced multimedia capabilities. Let us explain the announcement of the article. “Gophers” is slang for the afterglow effect that appears on plasma screens as a tail behind bright moving objects. This tail of a greenish tint was present on both previously tested Panasonic VIERA TH-R42PY85 and TH-R50PY800 plasma TVs, but the new Panasonic VIERA TX-PR50V10 TV with a 12th generation plasma panel has practically gotten rid of this feature.
Content:
- Delivery set, technical specifications and price
- Appearance
- Remote controller
- Switching
- Menu and localization
- Additional features
- Sound
- TV tuner
- Image Settings
- VIERA TOOLS
- Working with video sources
- Determining response time and output latency
- Assessment of brightness and color rendering quality
- Measuring the uniformity of black and white fields
- Acoustic noise level determination
- conclusions
Delivery set, technical specifications and price
Placed on a separate page.
Appearance
The TV screen and the relatively wide frame around it are covered with a glass plate, edged around the perimeter with a black aluminum alloy frame. The frame is matte-shiny on top, matte black on the sides and bottom. At the bottom, the frame smoothly thickens to accommodate the manufacturer's logo. The front glass plate is painted black from the inside around the perimeter so as to hide the non-working area of the plasma panel. Fingerprints and dust on a black background are noticeable, but can be easily and without consequences removed, since the glass surface, unlike plastic, is scratch-resistant. As a result, there is a good chance that the TV will delight the owner with a neat appearance for many years. The volumetric pad under the screen is made of plastic with a silver coating. In its center are grouped the power switch, IR receiver, light sensor, status indicator (dimming, glows red in standby mode and green during operation) and an indicator for the presence of an SD card in the slot (can be disabled in the menu).
When viewed from below, on the bottom edge you can find plastic grilles for the built-in speakers. The casing covering the rear panel is stamped from a thin sheet of tin and has a matte dark gray finish.
On the left side there are several audio/video inputs, to which it is convenient to connect mobile equipment (a video camera, for example), and there is also an SD card slot and a headphone output.
Control buttons are on the right side.
Connectors for permanent connection to equipment are located in a shallow niche on the rear panel.
These connectors are oriented backwards, perpendicular to the screen. The power connector faces down and slightly to the rear. The proprietary power cable is equipped with a special plastic latch that prevents it from falling out. The included plastic clamp with a clamp inserted into the holes on the rear panel will help tie the outgoing cables into a neat bundle. On the rear panel there are 4 round plugs (covering the holes for mounting on a wall bracket) and numerous ventilation grilles. Cooling is active, warm air is blown out by four fans located in the upper part. On the bottom edge, closer to the sides, there are rectangular recesses that make it easier to transport the TV. It takes two people to carry the TV, not so much because of the weight, but because of the dimensions. Note that the screen unit of this TV is 7 kg lighter and 20 mm thinner than the screen unit of the TH-R50PY800.
The standard stand is covered with plastic covers with a silver coating. The base of the stand is multi-layered: the top is protected by a layer of transparent plastic, and the bottom part uses plastic with a black smooth coating. The TV stands on the stand stably and strictly vertically.
It can only be rotated left and right by 10 degrees, while the TV assembly and stand rotate on a rotating base. At the back of the stand there is a hole for attaching a strap to prevent the TV from tipping over (the other end of the strap is attached to a table or stand).
Remote controller
The previously tested Panasonic VIERA TX-LR32V10 TV comes with exactly the same remote control. The shape of the case is ergonomic, the number buttons and the two most important rocker buttons are very large, there is a convenient four-way navigation button with an OK in the center, the labels for the buttons are contrasting and quite large.
The switch determines the operating mode of a group of buttons designed to control equipment connected to the TV. In the TV , signals from the remote control are transmitted to the TV and from it via SCART or HDMI interfaces ( Q-Link and VIERA Link ) to the connected equipment, and in the DVD/VCR , this remote control can directly control Panasonic equipment (VCR, DVD- player, etc.). The remote control is equipped with two IR emitters: one is directed forward, the other is forward and downward, which allows you to keep the remote control directed slightly upward - this is more convenient, and the button labels are better visible.
Switching
The TV is equipped, in general, with a typical set of interfaces. Note that, despite some inconsistency of Panasonic in relation to the SCART interface, this TV is equipped with two such connectors with high functional content. The functionality of the interfaces is described briefly here, in detail - in the manual. You can assign a name to the input by selecting from the list of preset ones or entering your own, and you can also mark the input as unused.
To use network features, the TV must be connected to a wired Ethernet network. The menu allows you to configure network connection parameters, including settings for working through a proxy server.
Menu and localization
The menu is large, the font is readable, navigation is convenient and economical. When adjusting the image, the menu disappears from the screen, leaving only one line with the parameter, which allows you to evaluate the changes being made without interference.
Parameters with multi-stage adjustment are assigned numerical values, except, for some reason, color balance adjustments. There is a short (1-3 items) context menu called up by the OPTION (when the VIERA Link , this button calls up the menu of the HDMI-connected device, if it is compatible with this function). There is a Russian version of the graphical interface. The translation is good. When working with media servers and with an SD card, Cyrillic is supported in the names of folders and files and in file descriptions, but even when choosing Cyrillic for the language of external text subtitles, Russian subtitles are displayed in an incomprehensible set of Cyrillic letters.
This Panasonic TV is no exception and all its features are described in detail and in Russian in a high-quality user manual.
Additional features
Selected TV channels and inputs (all at once or individually) can be locked with a PIN code (child lock). The shutdown timer has a range of 15-90 minutes. In Game , you can enable the display of the time of continuous operation in this mode at intervals of 30 minutes.
Sound
The TV has adjustments for the level of high and low frequencies, stereo balance, headphone volume, and additional volume level correction separately for each source and TV channel.
Three surround sound modes enhance the sound. speaker-wall distance setting affects the transmission of low frequencies. There are only two preset but editable profiles - Music and Speech . The speakers do not turn off when you connect headphones. To turn off the speakers, you need to use the button on the remote control or simply reduce their volume to zero.
Built-in acoustic systems convey mid and high frequencies well, but poorer low frequencies. There is a stereo effect. The volume is sufficient for an average-sized room, but there is no headroom. When a certain volume threshold is exceeded, the speakers at lower frequencies begin to choke. It’s better to immediately switch the Speaker-wall distance to Less than 30cm , this will reduce the likelihood that the TV will unexpectedly distract you from what’s happening on the screen with not entirely adequate sound. Well, in general, a TV of this level must be used in conjunction with an appropriate speaker system.
The sound in the headphones is clear, all frequencies are reproduced well, and the volume reserve is huge. At the volume level at which, at the peak of the signal, the sound volume approaches the pain threshold, the level of background noise remains below audible.
TV tuner
Traditionally for Panasonic TVs, the analogue TV tuner demonstrates high reception quality. When receiving with an indoor antenna in our test room, the TV found 17 stations: 7 showed very well, 6 were acceptable (sometimes fine-tuning of the antenna was required) and 4 were bad. The result is above average. The list of channels obtained as a result of auto-search can be sorted manually. In the channel properties you can edit: sound system, color system, name and skip flag.
In addition, you can adjust the frequency manually and start searching from the current channel. The TV shows teletext (for Russian you need to select Vostok1 in the settings) and decodes stereo sound (NICAM/A2).
Image Settings
Standard settings - Contrast , Brightness , Color , Sharpness - are supplemented with a list of Color Balance (three color temperature profiles) and the functions Color Management (usually no visible effect), Digital Cinema Color (color gamut control), Noise Reduction (video noise suppression) and 3D Filter COMB (removal of color artifacts in the case of a composite signal).
In case of NTSC signal, hue adjustment ( Raster background ) is available. Advanced users can adjust the color balance by adjusting the intensity of red and blue colors and their offset, as well as selecting a gamma curve profile (4 values).
Enabling Eco Mode activates the light sensor on the front panel - in the dark, the TV will lower the brightness automatically. Enable the Energy Saving function. slightly reduces brightness and, accordingly, energy consumption. There are five preset profiles, among them the certified THX , when selected, some of the settings are set to a fixed, unchangeable value. Changes made to the settings are automatically saved for each source; you can reset them to the ones originally corresponding to the selected profile using the menu, or simply by pressing the N on the remote control.
Geometric transformation modes 8: 16:9 - suitable for viewing 16:9 pictures and anamorphic films, 14:9 - for LetterBox in 14:9 format, Panoramic - uneven magnification (stretching from the center horizontally), option for viewing 4:3 pictures on widescreen TV screen, 4:3 - 4:3 picture in the center of the screen, on the sides - black bars, Magnification 1 - for LetterBox, Magnification 2 - for viewing anamorphic or widescreen films 2.35:1 without black bars at the top and bottom, Magnification 3 for LetterBox 2.35:1 without black bars. For HD signals with a 4:3 picture in the center, you can select 4:3 full screen . In Auto , the TV itself tries to select the most optimal type of transformation, using special flags/signals in the video signal or in the connector and analyzing the picture for the presence of black fields. In the case of plasma TVs, the correct choice of transformation is important both for the efficient use of screen area and for preventing the occurrence of image retention. For example, when watching Full HD video with a 2.35:1 picture format, it is advisable to select the Zoom 2 , in which the image will occupy the entire screen, but part of the picture on the right and left will go beyond the boundaries of the screen. If the selected mode still implies the presence of unused side bars, then it is recommended to slightly increase their brightness by setting the Sidebar to Medium or even High.
When Overscan Mode = On. The image is enlarged slightly so that possible perimeter interference extends beyond the display area. HOLD button on the remote control “freezes” the picture. There is a picture-in-picture ( PinP ) and picture-and-picture ( PandP ) function. The size and position of the additional window in PinP, as well as the picture format on the halves of the screen in PandP, are strictly specified, the sound corresponds to the main window, virtual screens can be swapped, but some restrictions are imposed on the combination of sources for the main/additional windows.
VIERA TOOLS
When you press the button with the same name, a menu of 7 large icons is displayed on the screen (you can include an option with simpler icons in the menu).
Selecting an icon activates the corresponding function from the VIERA TOOLS , however, most of them can be reached in an alternative way - through the menu, from the remote control, from the context menu, or simply by inserting an SD card. The first two - VIERA Link and Pause Live TV - relate to managing Panasonic equipment connected to the TV, the next three are viewing the contents of the SD card, the last two are network functions ( VIERA CAST and MEDIA SERVER ).
The TV can display JPG images from SD memory cards (it claims to support cards with a capacity of up to 32 GB inclusive and image sizes up to 30719×17279 pixels). There is a thumbnail mode and a slide show with a customizable image changing interval (5-120 s), transition effects (3 effects and random selection), the ability to turn on background music (3 types) and auto-repeat. When viewing images, you can rotate them in 90-degree increments. Images can be grouped by folders, by date, by month, or simply display thumbnails of all files in one list.
JPG pictures are displayed perfectly - they fit tightly into the screen, the proportions are maintained, the clarity and color rendition are excellent. Also stated is the ability to play video from SD cards: recorded on Panasonic camcorders in MPEG2 format (tested, everything is fine) and AVCHD (not tested, but there is no doubt about the functionality), as well as regular video files (*.divx and *.avi), encoded in DivX 3, 4, 5 and 6, resolutions up to 720x576 pixels at 30 fps, with multiple audio tracks (in MP3, MPEG and AC3) and with built-in or external text subtitles. Apparently, this TV had more recent firmware than the previously tested Panasonic VIERA TX-LR32V10, since compatibility with various types of video files has increased significantly. From the DivXTestCD version 2 test disc, the TV played almost all DivX files except DivX 3 and high-resolution files at 720p and 1080p, while supporting the Bframes, Qpel and GMC options. In the case of *.avi, the audio stream was reproduced in MP3 (2.0) and AC3 (5.1) formats, but the TV could not cope with MP3 in *.divx. Built-in graphic subtitles and external text subtitles in SubRip (*.srt) and MicroDVD (*.sub) formats are supported. The screen displays at least three lines of text subtitles and up to 40 characters per line. You can switch between audio tracks and embedded subtitle streams. The TV performs high-quality scaling of video files to the edges of the screen while maintaining the correct proportions (in the case of a 4:3 format, you need to select the 4:3 full-screen ), fast forward and backward (jerky) and the Intelligent Frame Creation . It can be assumed that a divx/avi file downloaded from the Internet and recorded on an SD card will most likely be able to be viewed without problems on this TV without connecting a player to it. Just in case, let us clarify that the resolution should not exceed 720x576 pixels, and files in MP4, MKV, OGM and WMV containers are not played.
VIERA CAST technology allows you to view online multimedia content provided by various providers. At the time of writing, support was announced for YouTube, Picasa Web Albums, Bloomberg television, weather service and the EuroSport channel. Unfortunately, the VIERA CAST is still not working on our network, so we will test this feature later.
MEDIA SERVER function plays multimedia content from servers such as those certified by DLNA (Digital Living Network Alliance). Support for JPEG, MPEG-2 (PS) and DivX is declared. As servers we used Windows Media Player 11 running under Vista OS and TwonkyMedia 4.4.4 under XP. The TV itself finds all available DLNA servers on the network. Compatibility with video files is approximately the same as when playing from an SD card. The ability to play MPEG-2 with a resolution of up to 1080i and in the case of TwonkyMedia *.divx files with MP3 tracks has been added, but there is no support for external text subtitles and the Intelligent Frame Creation . There were no problems with displaying JPEG and PNG images. The set of available functions is the same as when viewing pictures from an SD card: background music, transition effects, interval selection and the ability to display in a loop.
Working with video sources
with a VGA connection , but 1920 by 1080 pixel resolution is not supported.
In the case of a DVI connection (using a simple adapter cable from HDMI to DVI), the 1920 by 1080 mode is supported, and there is no interpolation; the picture is displayed pixel by pixel. Black-and-white grids of pixels through 1 are displayed clearly and without artifacts. The output quality of thin color lines is very high; for vertical lines one pixel thick, color saturation is maintained.
The HDMI connection was tested when connected to a Sony BDP-S300 Blu-ray player. The TV supports 480i, 480p, 576i, 576p, 720p, 1080i and [email protected] /50/60 Hz modes. The picture is clear, the colors are correct, the blockage in highlights and shadows does not go beyond safe boundaries, overscan is disabled. Brightness and color clarity are always very high.
When connected to analog video , picture clarity approaches the limit of the capabilities of the corresponding interfaces. The colors are correct, there are no artifacts. Subtle gradations of shades are displayed in both highlights and shadows (a slight rollover in the shadows does not exceed the boundaries of the safe range). In the case of a composite signal (and TV signal), characteristic color artifacts are completely eliminated on stationary objects.
The TV converts interlaced video signals into progressive images using a simple algorithm: changing areas of the image are displayed in fields, with trembling horizontal boundaries and reduced vertical clarity, stationary areas are composed of adjacent fields. If possible, it is better to connect your TV to a progressive signal source. The video noise suppression function works softly, the noise becomes a little less, but there is no tail of unresolved noise behind moving objects. When scaling from low resolutions, the boundaries of objects are smoothed—the jagged edges on the diagonals are not visible.
The Intelligent Frame Creation and 24p Smooth Film functions are two names for the technology for inserting intermediate frames, the difference is that the second is only available when the input signal is [email protected] The result is more noticeable when 24p Smooth Film - movements become smooth, at the maximum level, even for fast movements, the strobe is eliminated, artifacts, of course, occur, but they are visible only if you look closely. Overall, the insertion of intermediate frames function is implemented very well.
The image on a plasma TV, unlike, for example, an LCD TV, has very specific dynamics. In the language of physics, this means that the actual image on the screen depends in a complex way not only on the signal currently being applied, but also on the history of its changes. In lyrical terms, it can be argued that the picture on a plasma TV is more vibrant, more natural and more pleasing to the eye than the picture on an LCD TV. But this is a very subjective feeling, so when choosing between LCD and plasma, let everyone decide for themselves what they like best.
At a minimum distance from the screen and especially on dark objects, you can notice a periodic slight change in the brightness of individual pixels, caused by the use of dynamic color mixing (dithering) to convey all shades. The movement of white objects on a dark background is accompanied by a short trail of a yellowish tint, which is a significant improvement compared to the relatively long trail of the previous generation of plasmas, which is more noticeable due to the green color. Flashing a still picture for a long time causes an afterimage effect that is noticeable against a dark background and disappears after a couple of minutes. At the same time, as the manufacturer assures, irreversible degradation occurs very slowly - 100 thousand hours of operation are promised, which corresponds to 30 years of work 8 hours a day.
You can notice that the smaller the white area, the brighter it is, and when the white field is displayed over the entire area, its brightness is low, but in real images this effect practically does not appear. In Dynamic , the entire screen's black field appears completely black, but the appearance of any visible object immediately removes the absolute blackness. You can watch movies on this TV in ambient light, but in complete darkness the picture quality increases noticeably. For at least two reasons: firstly, the surface of the screen, although dark gray, still reflects light, which reduces the depth of black in ambient light conditions; secondly, in a brightly lit room, light scenes may look insufficiently bright, whereas in In the dark, even the transition from dark scenes to light ones will not cause a blinding effect due to the dynamic nature of the brightness change.
Hardware testing
Determining response time and output latency
The shades of all colors in a plasma panel are formed using pulse-width modulation, so determining the response time makes no sense. However, the decline in luminosity after pulses does not occur instantly—hence the short trail behind bright objects on a black background. In the new generation of plasma panels, Panasonic has used a new composition of phosphors with a shortened and balanced afterglow and changed the pulse sequence (see Panasonic's article at CEATEC 2009 - 3D cinema). As a result, the notorious “gophers” - greenish plumes - disappeared. The graphs below represent the time sweep of brightness (vertical axis) versus time (horizontal, in ms) when switching from a black field to a white field for this TV and for the TH-R50PY800, normalized by the height of the highest peak.
If we take its height as 100%, then in the case of the TH-R50PY800 the glow drops to 10% in 6.5 ms, and in the case of the TX-PR50V10 - in 3.4 ms.
With VGA and HDMI connections, the image output delay relative to the CRT monitor was approximately 30 ms. This delay value is not critical. When IFC is enabled, the latency increases to approximately 50ms .
Assessment of brightness and color rendering quality
To assess the quality of color rendering, a GretagMacbeth Eye-One Display LT colorimeter was used. Target gamma curve parameters: Gamma = 2.2, Whitepoint = 6500 K. Connection – HDMI.
| Color balance | Color temperature on the gray scale, K (delta uv) | |||
| 25% | 50% | 75% | 100% | |
| Normal | 6800 (0,666) | 6790 (0,712) | 6700 (0,736) | 6500 (0,755) |
| Red and blue correction | 6540 (0,046) | 6490 (0,037) | 6530 (0,01) | 6520 (0,034) |
The color temperature in the case of the Normal on a white field is exactly 6500 K, but our calibrator detected a slight lack of green. After adjusting the intensity settings for the red and blue colors, the lack of green was removed, but the characteristic wavy nature of the gamma curve remained. This is what the correction lines looked like before and after adjusting the balance:
The color gamut is slightly larger than sRGB, but not so much that the colors look oversaturated.
The brightness of the white field in the center of the screen was determined using an Argus-02 brightness meter. By reducing the area of the white field in favor of the black field, the brightness of the white field increases and power consumption decreases. The graph below illustrates exactly how.
Power consumption depends on the selected mode and the nature of the image. For example, we were able to achieve a maximum power consumption of 553 W when outputting a red-white grid. We estimate the average power with the economy mode turned off to be about 400 W.
Measuring the uniformity of black and white fields
The brightness measurements of a small area of the screen were carried out with a highly sensitive sensor. When measuring the uniformity of the white and black fields, the sensor was sequentially placed at 25 points on the screen, located in increments of 1/6 of the screen width and height (screen borders are not included). The table shows the average values and the minimum and maximum deviations from the average values.
| Parameter | Average | Deviation from the average | |
| min., % | max., % | ||
| Black field brightness | 0.0042 cd/m² | -77 | 55 |
| White field brightness | 64 cd/m² | -5 | 6,0 |
| Contrast | 21700:1 | -54 | 224 |
The brightness uniformity of the white field is very good. The uniformity of the black field and, as a consequence, the contrast is low, but with such a low brightness value of the black field, this does not affect the quality of the picture in any way. In addition, it is very difficult to reliably determine the brightness of the black field at such values. Of course, the contrast between a full-screen black field and a white field does not characterize the actual contrast in the frame (especially in this case), so we measured the contrast when outputting a checkerboard field, something like ANSI, but applied to a TV. This ANSI contrast turned out to be 1685:1 , which is very good.
Acoustic noise level determination
The cooling system is active, which means there is noise from the fans. If you sit in front of the screen at a distance of approximately its diagonal, then in complete silence you can hear the faint rustling of the fans, which, however, does not interfere at all when watching movies and TV shows. At this point, measurements using a sound level meter gave a sound pressure value of 24.5 dBA, which, for example, is less than the noise level from the quietest cinema projector we tested.
conclusions
V series determines expanded multimedia capabilities, and if we can’t say anything about VIERA CAST yet, support for playing video files from SD cards or from a media server is already at a level that allows practical use of this function. Everything has been fine with viewing JPG images for a long time. It is also worth noting the progress of plasma technology compared to last year's models. The most important thing is that we practically managed to get rid of the afterglow effect, shortening it and balancing it in color. In addition, new plasma TVs are noticeably thinner and lighter than their predecessors.
Advantages:
- excellent image quality (clarity, contrast, color rendition);
- function of inserting intermediate frames, increasing the smoothness of movement in movies;
- excellent analog TV tuner;
- viewing JPG pictures, DivX files and videos in MPEG2 and AVCHD formats from SD cards;
- interactive access to VIERA CAST network services and support for DLNA servers;
- PinP and PandP functions;
- easy-to-use remote control and menu;
- strict design;
- excellent Russification.
Flaws:
- weak built-in speakers;
- 1920 by 1080 resolution is not supported with a VGA connection.
How to set up motion control on the TV screen?
One of the most challenging aspects of picture performance for LED LCD TVs is motion processing. All sorts of frame interpolation are offered to smooth out images and remove film shake, but they come with serious caveats.
Read: What is Dolby Vision technology on TV?
Aggressive motion control will result in motion distortion, typically appearing as a blurry halo around moving objects. A running soccer player's legs will shimmer unnaturally, galloping horses may have extra legs, and a game of tennis will appear to be played with multiple balls.
High motion interpolation also results in videos like sheen. The most expensive blockbuster can look like a cheap television drama (hence the oft-cited term "soap opera effect").
Generally speaking, these modes, called Intelligent Frame Creation or IFC (Panasonic), Trumotion (LG), Motionflow (Sony), and Motion Plus (Samsung), as well as a host of others, should be kept away from their highest settings. Mid is usually a decent compromise for sports and studio content, while Low or Off is best for movies and movie-like TV dramas.
Many manufacturers allow you to customize motion processing settings with adjustable sliders for blur and judder. This is often the best choice.
Some LG TV models have one such mode, a customizable custom mode with variable de-judder (judder effect) and de-blur. Set the former to around 5-7, and the latter to 0, and motion distortion will be reduced to almost zero. The result is a decent compromise for both sports and movies, but as with Game mode, it's best to tweak the input based on your connected devices.
Do you need a disc with a THX optimizer?
At the editorial office, we use special configuration templates before testing TV, and a disk with a THX optimizer can be very useful.
You can find the THX calibrator in the supplementary materials of many THX-certified DVDs and Blu-ray discs, such as Star Wars, Pirates of the Caribbean and Pixar films.
There are also free THX apps for Android and iOS. We will consider the main parameters below.
If you want to cancel the changes you have made and start over, select the “Restore Factory Settings” menu item.