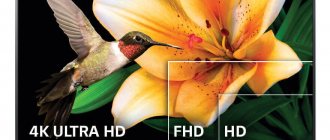
TV contrast is the ratio of the brightness of the lightest part of the picture to the darkest part. Contrast directly affects the quality of the image and how viewers perceive it, and therefore is one of the most important characteristics of a TV. However, the parameter is measured using special instruments, and an ordinary buyer has to believe the information on the TV box without the ability to check it. Taking advantage of this, manufacturers often inflate real indicators to attract buyers.
Basic settings
The default settings are set from the factory. But sometimes they are changed in the store, so for basic settings it is better to reset them - it will be more convenient and easier.
What to put on your new TV:
- dynamic image change. This feature automatically adjusts screen colors in response to lighting conditions. It is disabled because the color format sometimes changes dramatically;
- brightness. The parameter affects the turned on screen backlight, making it brighter. There is no exact value - everyone sets what they like best;
- contrast. The color rendering of white depends on this parameter. Adjust so that the shades differ from one another and white, light gray, black and light black tones are clearly distinguishable;
- sharpness. This option adds detail to the image. On new TVs, the resolution is already high, so there is no need to adjust sharpness.
It is recommended to check and adjust the values once a year, since the backlight of the equipment dims over time, which is reflected in the display of the picture.
Setting the screen on your TV.
What level of clarity should I choose?
The high level of image clarity is not always as good as it seems. Because of it, the picture may look unnatural and hide small details. In most cases, it is better to set its value no higher than 30%.
To adjust this setting, turn on the image in HD or 4K mode with smooth edges and look at them, increasing the clarity from the ground up. At some point, you will notice that the contours become unnaturally sharp and a halo appears around them; go back a little until it disappears.
Closely related to clarity is the phenomenon of overscan, which arose long before the advent of HD broadcasting; in this case, frame outlines are used to hide unnecessary information. To get the whole picture, you need to disable this option.
Go to the aspect ratio settings menu and make sure it's set to "Full", "1:1" or similar.
Connecting sources
It's time to think about what you plan to add to your TV. Some owners use an AV receiver and connect all sources to it, others prefer to connect them directly to the TV.
In both cases, the best and easiest way to connect the TV to other components is through HDMI cables. This approach provides the best picture quality from HD and 4K sources by transmitting audio and video signals simultaneously over one cable.
Many inexpensive soundbar models connect to your TV via a digital optical connector. If this is what you have, when purchasing a TV, make sure it has the required output.
If your soundbar has an HDMI interface, connect it to the HDMI connector on your TV marked “ARC” (Audio Return Channel). In this case, you can transmit audio from connected sources to the soundbar. The same applies to AV receivers, which will be able to amplify the sound of TV programs.
When purchasing a 4K TV, pay attention to the presence of the HDCP 2.2 mark on one or more HDMI inputs. This is the name of the copy protection technology built into 4K-compatible devices; You will need this input to connect 4K sources - Blu-ray players, game consoles or receivers.
Check for HDR (High Dynamic Range) support. Please note that not all 4K HDR TV models support all HDMI connections in HDR.
Some older TVs only support 4K HDR on two of the four HDMI inputs. Make sure you connect your 4K Blu-ray Disc player to the correct HDMI input to get the full benefit of 4K HDR images.
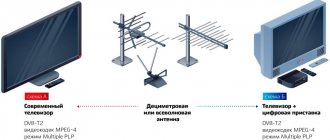
If you connect a satellite set-top box or cable TV module via the HDMI input, it will be through them that the channels will be searched. If you are using a built-in digital or satellite tuner, connect the antenna or cable and start the automatic scanning procedure in the TV's channel setup menu.
Useful tips
Settings vary, but there are other factors to consider:
- TV location. Placing the TV in front of or next to a window is not a good idea. Light will hit the screen and create glare, which will reduce the overall picture quality;
- The optimal placement of the TV panel is when 70% of the display is located below the eye line;
- You cannot place the TV close to the wall. The equipment heats up during operation, so it needs at least 10 cm of free space for air circulation;
- To achieve the highest quality picture, you should use the HDMI interface, designed for transmitting high-definition multimedia.
Adjusting the picture on an LG TV is not as difficult as it seems. Fortunately, new TVs have many parameters and technologies that can be adjusted “to suit you.” It is also worth understanding one thing - the model with the brightest screen (if compared in a store) is not necessarily the best. This is a race of manufacturers, where everyone wants to stand out by providing a “rich, bright and detailed picture.”
How to set up PAL and SECAM system
The most common cause of a TV color defect is a failure of the color system. The problem is that state channels are encoded using the SECAM system - a Soviet-French analogue color reproduction concept. But all digital and cable programs are tuned to PAL with progressive phase change. Therefore, one or several channels may lose color on a modern device, and not all at once.
Therefore, if you suspect that the channel settings are messed up, proceed as follows:
- Enter the menu.
- Find "Image Format" or TV Format.
- Select PAL from the drop-down menu.
- The color should come back.
If this does not help, there may be a settings conflict. Use the “Return to factory settings” button or contact service.
How to display test pictures on TV?
To display test images on the screen, use a USB drive (after having written files from the archive onto it), if your TV is equipped with a USB input; if there is no USB input, output the image from your PC/laptop.
You can download the archive with files from this link. Save this file and unzip it. Write the unzipped files onto a USB flash drive, and then plug it into the appropriate TV connector.
Is it difficult to set up your TV correctly? Will I need professional help?
Achieving the correct display of the picture is no more difficult than setting up the channels. It will take no more than 20 minutes of your time. To make your TV pleasing to the eye, you only need to adjust the picture settings so that the test pictures are correctly displayed on the screen. You will see below exactly how it should be “correct”. Test pictures are selected by experts so that after adjustment you can enjoy any scenes in terms of brightness, color, clarity and contrast.
Noise reduction and motion processing
Noise reduction/edging
Noise reduction and other similar features often reduce the sharpness of a good HD or 4K picture, sacrificing detail to reduce noise.
The opposite is true for edge correction, which amplifies noise in an attempt to improve resolution.
Both of these features may only be useful when watching TV in standard definition; in other cases it is better to do without them.
Motion transmission
It is one of the most important components of image processing; But despite notable recent improvements, smooth object movement still comes at the expense of overall picture stability.
Depending on the manufacturer, this feature may be called Trumotion (LG), Motionflow (Sony), or Motion Plus (Samsung). It analyzes the image and inserts repeated or empty frames to avoid motion jerks.
Setting the processing level to high results in unpleasant blurry halos around moving objects. In films, this approach creates a “soap opera effect”: a Hollywood blockbuster shot at 24 frames per second begins to look like an episode of a television series at 60 frames per second.
Sports fans may prefer a smoother image and accept some artifacts.
Technology has matured in recent years, so we recommend using a low level of motion processing when watching movies if necessary (or turning it off completely if you don't mind a little judder). It's all a matter of personal preference, so don't be afraid to try different options.
The best results are achieved by separating motion processing into blur and judder control (LG OLED models and Samsung QLED TVs offer this option). If your TV allows it, turn off shake reduction and adjust the blur level to suit your taste.
Important nuances
If it seems that the TV has lost brightness, you need to know some nuances:
- Perhaps the problem is trivial and the user just started having vision problems. To find out the reason, you need to ask your household members to watch the same image on the TV screen. If it is really dim, then the problem is with the device.
- The second possible reason is the presence of a thick layer of dust on the screen.
- If there are no problems with vision and dust, then you will have to adjust the equipment.
If you can’t restore the TV’s brightness after tuning, you should invite an experienced technician to diagnose your TV equipment. It is not advisable to solve this problem yourself, since it can cause serious damage to the purchased equipment.
First of all, it must be said that most TVs provide two brightness settings at once: backlight intensity (the brightness of the screen as such) and signal brightness. Historically, adjusting the black level of a signal was called “brightness,” which is still misleading. Consider the brightness of the backlight.
Let's say you've already decided on your favorite picture mode, but there's something bothering you about the overall brightness of the screen - for example, it's too harsh on your eyes in the evening. To adjust the screen brightness on an LCD TV, you need to find the item “Backlight” , “Backlight Brightness” or “Backlight” (if the menu is in English) in the picture settings.
By changing the backlight brightness, you change the overall brightness of the screen without affecting the signal parameters. In principle, there are no special rules here: you just need to achieve comfortable viewing based on your home conditions.
As you can see, when adjusting the brightness of the backlight, the most important thing is not to overdo it! At first, an overly bright image may seem more pleasant and realistic, but after a while this will result in reduced comfort and increased eye fatigue. In addition, a lot depends on the actual contrast of the TV: having good anti-glare and decent black depth, the image will look quite vibrant and deep even at moderate brightness. Here everything depends on the specific model and its capabilities, beyond which you will not be able to jump.
Basic image parameters
Every manufacturer is interested in having a hardware store visitor buy its TV. For this purpose, the basic picture settings are set in such a way that it looks as rich as possible (especially in stores with good lighting). But, having bought a TV and installed it at home, it turns out that the image is not so colorful, so you have to adjust it further.
To set it up correctly, you need a little time and a remote control that has a “Menu” or “Settings” button. To adjust the basic parameters, go to the “Image” section.
Intensity
This term refers to color saturation. One of the common mistakes when setting up occurs when the user wants “as many colors as possible” and turns the intensity to maximum. Yes, the picture turns out juicy, but unnatural, which is why your eyes will quickly get tired.
To ensure the screen produces optimal colors, this parameter is set to medium values. For ease of adjustment, it is recommended to select a test image with relatively desaturated colors, for example, a natural landscape.
Brightness
This term is the balance of black in relation to the entire palette. To put it simply, the parameter determines the quality of display of dark areas. On many TVs, including LG, the brightness is set to extremely high, so most users are accustomed to thinking that brighter is better. In fact, this is not the case. If you adjust the brightness too high, blacks become gray, reducing picture clarity.
If you set the brightness to low, dark pixels become more visible, but it is more difficult to distinguish similar shades of black. This parameter must be configured in the room where the TV will be installed. The level of illumination is also taken into account. As a rule, people watch TV early in the morning or in the evening, after work, that is, in the dark. Therefore, adjustments are carried out in low light conditions.
You can find the optimal brightness by eye. To do this, they turn on the film and, when there is a picture with textured black and shadows on the screen, they pause it. As you decrease the brightness, the blacks will become more intense and the shadows will appear darker.
The optimal setting is when black is perceived as truly black and not gray (high value). At low brightness, dark areas appear less detailed.
Contrast
This setting is the opposite of brightness. It determines the white level, how intense the light parts of the image will be. The goal of the adjustment is to achieve a bright picture in which individual details are clearly visible.
The easiest way to check contrast is in scenes with clouds - set it to maximum and gradually lower it until details are visible instead of white spots.
On many LCD monitors, the contrast level is set to 80 - 90%. It’s better to reduce it to 65% and dance from this mark. In the case of plasma TV, it is recommended to set lower values to avoid panel burnout.
Adjusting the contrast on your TV.
Do you need a disc with a THX optimizer?
At the editorial office, we use special configuration templates before testing TV, and a disk with a THX optimizer can be very useful.
You can find the THX calibrator in the supplementary materials of many THX-certified DVDs and Blu-ray discs, such as Star Wars, Pirates of the Caribbean and Pixar films.
There are also free THX apps for Android and iOS. We will consider the main parameters below.
If you want to cancel the changes you have made and start over, select the “Restore Factory Settings” menu item.
Does the screen need to be adjusted? Didn't the manufacturer take care of this?
This is partly true. Large production volumes do not allow the manufacturer to fine-tune the screen, be it Samsung, LG, Sony, Toshiba, Sharp.
The operating conditions of the TV play an important role. They will always be different: the signal sources are different, the TV is installed at different heights, the distance to the TV is different, the room lighting is different and many more aspects. Therefore, it makes no sense to adjust the image either at the manufacturer’s factory or in the store, but you need to do it at home, in the place where the TV will be installed.