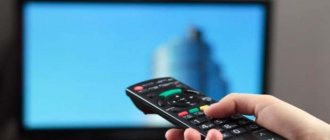
Tips and help TV, Audio, Video
Eldoblog tells how to connect a digital set-top box to your TV to watch your favorite shows, movies and TV series in high quality.
1
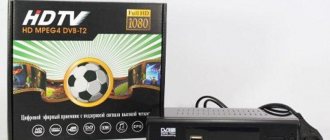
Why do you need a TV set-top box?
The set-top box expands the functionality of the TV. If your TV does not receive modern channels in DVB-T2 format
, connect an additional device capable of decoding the digital signal.
Set-top boxes for cable (DVB-C) and satellite (DVB-S) television
also work . There are also combined set-top boxes that work with two or even three formats.
A separate category - set-top boxes with smart TV function
, which are also called TV-Boxes. They connect any TV with a suitable connector to the Internet.
TV set-top boxes are relatively inexpensive - from 1000 rubles, or from 200 rubles when concluding an agreement with a company that provides subscriptions to channels. Premium models costing from 5,000 rubles offer additional functions - Internet connection, control from a smartphone, improved image quality.
2
What is needed to connect the set-top box?
DVB-T2 set-top boxes and DVB-S2 satellite tuners require antennas. It is better to check their parameters with professionals - the quality of reception depends on the terrain, building density, orientation of the house to the cardinal points and other factors. Don’t forget about the antenna cable - you should calculate its length in advance and take a small reserve.
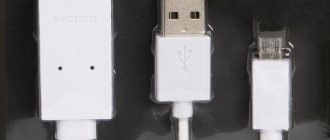
All set-top boxes, regardless of broadcast format, need a wire to connect to the TV. For modern TVs you need an HDMI cable, for models older than 5-7 years - a SCART or RCA. To determine the connection method in advance, look in the instructions or on the back of the TV.
3
- 6 ways to connect your TV to the Internet: via Wi-Fi, cable, adapter, set-top box
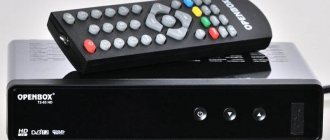
What is included in the standard set of the console?
How to connect a TV through a set-top box? The kit includes a cable for HDMI image transmission. Some models come with 2-3 wires at once - for new and old TVs.
There are several versions of connectors:
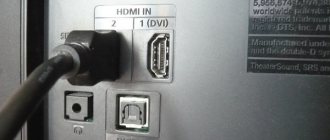
- for Full HD video (1920×1080) HDMI 1.2 is suitable;
- for 4K video (3840×2160) at 30 frames per second - HDMI 1.4;
- for 4K video at 60 frames per second - HDMI 2.0. This connector is needed for the Xiaomi Mi Box S, which is capable of displaying smooth ultra-high-resolution video.
HDMI also has separate lines for surround sound.
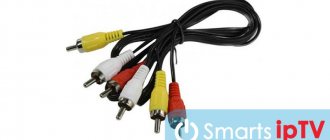
For analog TV, other connectors are used - SCART (wide rectangular), S-Video (round black with a plug in the middle) and RCA (round yellow, red and white). The image quality in this case will be lower - you can count on a resolution of 768x576 at 25 frames per second.
USB ports play videos, music and photos from flash drives, portable hard drives or laptops. For example, the Denn DDT114 set-top box also has a personal video recorder function - it will record your favorite TV shows. For Full HD, USB 2.0 ports are enough, for 4K you will need USB 3.0 connectors, for 8K - USB 3.1 Gen2 (20 Gbps and higher).
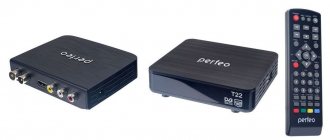
The set of on-air set-top boxes for receiving digital broadcasting includes only a control panel. But there are kits like “Remo TV Future Indoor DVB-T2”, which includes a set-top box, cable, antenna and adapters for connection. But set-top boxes for satellite TV are often sold as part of a set, which also includes wires, antennas and decoders for decoding the signal.
4
Additional equipment for set-top boxes
If you don’t know how to set up a TV set-top box yourself, look for a model with a wireless mouse and mini-keyboard. Such accessories are often included with models costing more than 5,000 rubles. They allow you to navigate the menu faster compared to the remote control. To record the program you will need a flash drive or portable hard drive with a capacity of more than 64 GB.
Additional accessories for set-top boxes with cable, satellite and digital TV - extenders, dividers and antenna cable splitters, necessary for connecting several TVs at different distances from the antenna. If all the equipment is already installed and ready for use, and the set-top box is purchased later, an adapter may be needed for connection - if the type of connectors does not match.
- 10 useful HDMI adapters (adapters) for computers and household appliances on Aliexpress
5
How to connect a digital set-top box
To a modern TV (via HDMI)
- Connect the set-top box to the power supply and antenna (if necessary).
- Find the HDMI connector on the back panel and insert one plug of the cable into it.
- Insert the second one into the same port on the back of the TV. If you plan to watch 4K movies, check the instructions to see which connector is compatible with that resolution.
- Turn on the set-top box using the remote control, then turn on the TV.
- Press the Input button on your TV remote, which may also be called Source.
- Select the HDMI port to which the set-top box is connected.
- If the setup menu or a picture of a TV channel appears on the screen, you did everything correctly.
- If there is no signal, check the instructions and repeat all the steps again.
There are set-top boxes without cable. For example, the flat set-top box Rombica Smart Stick 4K v002 has a built-in HDMI plug. It can be placed behind the TV, where it will not interfere with other wires.
To an old TV (via analog connectors)
The instructions on how to connect the set-top box to the TV will look the same. Only the connector types differ.
- The most common are RCA. Connect the cable to the set-top box. Make sure that the connectors and plugs match in color. Do the same with your TV. If the sockets in it are not highlighted in color, you will have to act by searching until an image appears on the screen. Don't worry - it's safe for your equipment.
- SCART is the easiest to recognize - it is a long rectangular connector with vertical flat plugs inside. It can only be connected on one side - the asymmetrical shape of the socket will not allow you to make a mistake.
- S-Video - one round connector, most often black or yellow. When connecting to a TV, it is important not to confuse it with RCA. If you're not sure which socket you need, check your TV's instructions.
Sometimes the set-top box only has a digital HDMI output, while the TV only has analog inputs. In this case, you need to buy a converter that converts the digital signal to analog. It gets power from the USB port that most set-top boxes have.
6
How to connect a set-top box to multiple TVs?
You need an HDMI splitter for 1000 rubles. It will copy the passing signal and send it to an additional port. To connect via RCA connectors, you need a divider for analog video (from 500 rubles). It works on the same principle, but significantly reduces image quality.
If you want to watch different channels in each room, you can connect 2 set-top boxes to one antenna - buy them separately or as part of a kit. You will need an antenna splitter that operates at 1000 MHz. It gives the same signal to both devices. Thanks to this, you can watch cartoons in the nursery, a series in the kitchen, and football in the hall.
You can also buy a ready-made kit for connecting 2 Tricolor GS B534M/GS C592 TVs. The antenna transmits the signal to the server set-top box, which duplicates it for the client set-top box.
7
- How to connect a laptop to a TV via a digital television set-top box?
Possible problems and their solutions
- The image disappears, breaks into pieces, or freezes for a few seconds.
Most often due to incorrect antenna position. Try moving it to another location where the signal quality will be higher. Also check the cable - it should be intact, without cuts, cracks or breaks, and the plugs and connectors should be free of dust and dirt. - The set-top box works, but shows a black screen or white noise.
Channel frequencies are out of order. This happens after a sudden power outage or firmware update. Try to find the channels again - below we will tell you how to set up the set-top box for your TV. - The picture is blurry - small details cannot be distinguished.
The resolution on the set-top box is incorrectly selected. Select the highest possible resolution, but no higher than the TV's specifications. - The set-top box does not read the movie recorded on the flash drive.
Perhaps it cannot recognize this format - this is written in the characteristics. - The smart set-top box does not connect to the Internet.
Make sure that a Wi-Fi network with a speed of 2-3 Mbps is available. If the connection is established, but the information is not loading, enter the set-top box menu and find the network settings. Specify the subnet mask as 255.255.255.0 and the DNS server as 8.8.8.8. - The signal quality depends on the time of day.
We need a more powerful active antenna with a noise and static filter.
8
How to set up TV channels?
To watch television, you first need to select a signal source. Go to the menu (MENU or SETTINGS), select the antenna and then the “Channels” (or “Broadcasting”) menu.
The first option for setting up a digital set-top box for your TV is to use the automatic selection function in this section of the menu. The set-top box itself will find the channels, adjust the frequency and remember them.
The worst option is to search manually. You will have to switch the buttons left and right or enter a specific channel frequency. You can find it on the broadcaster's website or in the TV program.
9
How to connect a TV set-top box to Wi-Fi
Go to the settings menu, select “Network” and “Connection”. Find the wireless network with the desired SSID, select it and enter the password. If the connection cannot be established, check the router settings - you need a channel from 1 to 12 (not 13), as well as the encryption type - WPA2/Personal.
If the set-top box has a Bluetooth module, it can be controlled from a smartphone. Install the application recommended by the manufacturer to turn your gadget into a smart remote control.
Eldorado has TV set-top boxes for every taste - for watching digital, satellite and cable television, as well as for connecting to the Internet.
Previously, we told you how to choose an HDMI cable for TV.
Send us your reviews of equipment and receive up to 1000 bonuses on your Eldoradosti card!
May 5, 2021 784RemoTricolorRombicaDennXiaomi
Products from the article
- Digital Terrestrial Receiver Denn DDT114
- Media playerXiaomi Mi Box S (MDZ-22-AB)
- Digital television setRemo TV Future Indoor DVB-T2
- Media playerRombica Smart Stick 4K v002 (SSQ-A0501)
The state program for a phased transition to the digital television broadcasting standard DVB T2 is approaching the final stage - a gradual reduction in the number of analogue repeaters. This suggests that the time has come to join new technologies and switch to digital. We will talk about the equipment necessary to receive a television signal in the new format, as well as how to properly connect a digital set-top box (receiver) to a TV or monitor.
Necessary equipment
To watch digital broadcasting, as opposed to analogue, you will need a receiver that decodes the signal. Many modern TV models (Philips, Samsung, Sony, Toshiba, LG, Panasonic, etc.) are equipped with such a unit. To make sure of this, you should refer to the user manual, this brief instruction is included with each product. At the same time, check whether the built-in tuner supports the DVB-T2 format; if not, you will need to purchase a receiver.
Receiver Supra
Depending on the set of functionality, the cost of such a device can vary from 800 to 3000 rubles. Note that many digital cable television providers provide receivers for rent to subscribers.
In addition, we will need to receive a digital signal. In cities and large towns this will not be a problem; just contact your local providers. Residents of rural areas will need to install a UHF antenna or satellite dish. The latter is preferable, since it is not a fact that your home is within the coverage area of the nearest digital repeater. In addition, the option with a satellite dish provides a wider selection of television channels.
Running rabbit on screen
Another option when the Rostelecom TV set-top box cannot work is if it is impossible to obtain the firmware via multicast (group broadcasting). Thus, nothing is loaded and the TV does not seem to be seen by the receiver. In some console models, a rabbit is displayed. Here, either the router is incorrectly configured and receives the wrong IP, or the problem is with the provider. If you understand the router settings, you can try setting up the port for the set-top box. And also check that IGMP Snooping is enabled (the process of monitoring IGMP network traffic).
Standard equipment for digital set-top box
Let's look at what is included in the standard set of the receiver; this information may be useful when connecting it to a television receiver.
Standard equipment for digital set-top box
Let's list what is shown in the figure:
- A – user manual, we recommend that you carefully read this manual to get a complete understanding of all the functionality of the device and its connection to the TV and antenna.
- B – “Tulip” cable (RCA) with characteristic connectors allows you to connect the set-top box to almost all modern models of television receivers.
- C – a device for decrypting and converting a digital signal into an analogue one (receiver).
- D – packing box.
- E – remote control for the device.
- F – batteries for the remote control.
- G – network adapter for connecting the device to a household power supply.
- H – warranty service coupon.
The basic configuration may differ slightly from what is shown in the photo (for example, the “Tulip” is replaced by an HDMI cable).
Do-it-yourself digital TV signal amplifier - diagram
Before we look at the instructions for assembling your own amplifier, let's study the types of antennas currently in use:
- Telscopic. Another name is core. It is characterized by simple manufacturing and is used at a distance of up to 5 km from the tower. It has circular polarization, which allows it to detect various radio waves.
- Patch antennas. Basically, rectangular elements protected by plastic are used in production. Has vertical and horizontal polarization. The main advantage is the increased coefficient of gain and the ability to accept re-reflection.
- Wave channel. Is the most used option. It is a structure of directors, reflectors and vibrators located on a traverse. The wave channel is often placed outdoors; models with reflectors can be found. They are also often equipped with amplifiers and filters.
- Zigzag. The main advantage is the ease of assembly and the ability to accept reflection. That is, zigzag antennas can be easily assembled at home.
You can amplify the digital signal of a TV antenna at home using the last option, that is, using a zigzag antenna. In this case, the gain will depend on the number of squares. This way you can assemble the structure yourself, spending a minimum of money.
If you have any questions or complaints, please let us know
The antenna amplifier can be easily assembled at home using the diagram. It will not require much power, will not cause interference, and the frequency range will not exceed 900 MHz. Low voltage equipment powered from 3 to 5V will consume no more than 3 mA.
What is the operating principle of such equipment? Pay attention to the diagram where input 1 is shown - voltage is supplied through it. Having a resistor labeled R1 connected to input 2 will shift the voltage to the operating area
Output 6 accepts the input signal, and the amplified signal will be taken from the third node and sent directly to the receiver.
Connectors and their purpose
There are various connectors on the back of the device; we’ll briefly explain what they are for.
Figure 3. Connectors of the SDT-96 receiver from the SUPRA range
Explanation of the picture:
- Antenna output.
- Connector for connecting a satellite dish, UHF antenna or cable from a local provider.
- A socket for an HDMI cable allows you to connect a monitor or TV equipped with such an input (digital output can transmit sound and image).
- Sockets for the “Tulip” cable (transmits an analog video signal, as well as stereo sound).
Some devices may be additionally equipped with a “SCART” connector; a TV, VCR or DVD player with a video recording function can be connected to it.
Receiver with SCART connector
In addition, you may find devices that have D-SUB (Fig. 5) or DVI outputs instead of an HDMI jack.
Fig 5. Digital set-top box with standard VGA (D-SUB) output
Please note that such interfaces do not transmit sound, so an additional connection using “tulips” will be required to transmit it.
The most common problems with Rostelecom television
First of all, for the operation of Rostelecom TV, a huge amount of software and hardware was used. Therefore, disruption of any link from the provider to the recipient of services will lead to problems with television.
Why the TV may not work:
- Problems on the provider's side;
- The set-top box is not configured, connected incorrectly, or is broken;
- The software is outdated or has a bug;
- The network is overloaded;
- The cable is damaged;
- The problem is with the router.
Let's figure out what to do if the set-top box stops working or turns off.
The process of connecting a digital set-top box to a new TV step by step
Important! All manipulations must be done with the equipment turned off. If you connect working equipment, there is a high probability of its failure.
Let us describe the order of our actions:
- You need to select the interface for connecting the set-top box to the TV. It can be analog (tulips, D-SUB, SCART) or digital (HDMI, DVI). The choice is made depending on the specific TV model. Despite the fact that many FULL HD television receivers have an analog input, it is better to feed them “digital”, since double conversion of the signal will negatively affect the quality of the “picture”.
HDMI input on the TV
This interface allows you to transmit video and audio, so the connection can be made with one cable.
If the TV does not have a digital input, it can be connected using any analog interface; the easiest way to do this is using tulips. In the case where the device only has a bulky SCART connector, you can purchase a tulip adapter for it. In this way you can connect almost any model, except for very ancient ones.
- We check the availability of the cable necessary for connection; it may come with the receiver or television set. If you cannot find one, you will need to purchase it.
- We remove the protective film from the set-top box (if any), install it in the chosen place and connect it to the TV. The cables are made in such a way that it is physically impossible to insert them into a connector not intended for this purpose. The exception is tulips, they can be mixed up. But to prevent this, manufacturers make nests for them in the appropriate color.
Standard colors of RCA interface connectors (tulips)
As you can see, the colors of the connectors match the colors of the sockets (4 in Fig. 3).
- Connect power to the console. If the network adapter is built-in, simply plug the plug into the socket; pre-connect the remote power supply to the corresponding socket of the receiver.
- We connect the provider’s cable, a decimeter antenna or a satellite dish to the antenna input (2 Fig. 3).
- We insert the batteries into the remote control, turn on the set-top box and the TV.
This completes the connection procedure, and you can begin setting up channels. If your TV does not have the interfaces listed above, do not worry, we will tell you how to get out of this situation.
No IP address
In such a situation, a corresponding message appears on the black screen. The reason may be technical problems with the operator, as well as the inability of the subscriber to access the network directly. Most often this is a cable or router settings. The cable must be checked for integrity and also ensure that it is connected correctly. Sometimes the TV tuner is simply connected to the wrong LAN socket. That is, the provider has allocated one such port for the receiver, and you plug it into another, so nothing will work.
As for the router, you can try rebooting it. If you set it up yourself, you may have done something wrong. Then it is better to consult with a support operator. This can be done by calling the 24-hour toll-free line 8 800-10-00-800. Other methods of communication with representatives of the consultation center can be found on the official website of Rostelecom https://www.company.rt.ru.
You can go to the router settings https://192.168.1.1 and see if there is a port for the receiver and a connection for IPTV. Don't forget to reboot the console. Sometimes it is used for too long without restarting, and this can lead to freezing or affect the data transfer speed. In this case, the question may arise about how to restart the Rostelecom set-top box, because it does not have the usual buttons. To do this, you just need to disconnect it from the network.
Sometimes you may notice that the indicator on the receiver lights up yellow. This indicates a faulty power supply. The second option is that the console has overheated. Perhaps it was covered with something or has poor air access, causing the temperature in it to rise too much.
Connecting to an old TV
The signal converter can work even with older models of television receivers when connecting them to the antenna output (1 in Fig. 3). To do this, you will need a piece of antenna wire of the appropriate length and two antenna plugs. In order not to bother with soldering, you can take special F-connectors; the procedure for installing them on the cable is demonstrated in Figure 8.
Installation on the F-connector cable
Procedure:
- We remove the insulation from the antenna cable, carefully so as not to damage the braiding (it is enough to clean 15 mm).
- We bend the braid as shown in the picture.
- Carefully remove the insulation from the central core.
- It is necessary to expose 10 mm of the central wire.
- We screw the connector clockwise.
- We do this until the central core protrudes 2 mm from the connector.
Using a manufactured cable, we connect the antenna input of the TV to the corresponding output of the set-top box. In this way you can connect any TV, be it Horizon 101 or the legendary KVN.
Settings
The set-top box is configured in the same way as a TV, namely:
- The menu is called up using the button of the same name on the remote control.
- Select the appropriate command to start scanning channels.
- When the scanning is completed, we save the list of detected channels; if desired, they can be grouped in a certain way, given a name, etc.
Detailed instructions and descriptions of functionality can be found in the user manual. In most cases, the menu interface is intuitive, so setting up the receiver is as simple as connecting a digital set-top box to the TV.
The topic of the conversation should rather have been called “How to connect a TV to a computer via HDMI.” Most beginners do the procedure incorrectly, asking questions that are difficult for a professional to answer. Let us remind you: HDMI is recognized as a high-performance digital interface for transmitting media content. Images, music, other entertainment content. It will be possible to listen to music from a TV or home theater. The HDMI port was invented as a high-performance means of transmitting information. Let's find out why the TV doesn't see HDMI and how to fix it.
Connecting a TV to a Computer HDMI
Recommendations
When repairing television set-top boxes at home, the main problem is finding replacement parts.
This works in the case of conductors, housing elements, and buttons. A swollen capacitor, input or board is replaced with a new part or picked up on the radio market, in a service center.
You should not undertake repairs yourself only in a number of cases. Among the most relevant reasons, we note the following.
Availability of a valid manufacturer's warranty. When you open the case yourself, in most cases the seals are broken. After this, it will no longer be possible to replace even a defective product under warranty. All that remains is to buy a new device. If breakdowns occur in this case, you must immediately contact the service center recommended by the seller or manufacturer.
The feasibility of repairing the set-top box yourself is limited by a rather narrow set of its modules. You can resolder the inputs, flash the memory, change the power supply or converter board.
When doing home renovations, it is important to prepare your work area thoroughly. You will need an insulating mat - it is convenient to lay out fasteners on it and perform soldering
The list of required tools should include screwdrivers, a soldering iron, and a multimeter.
Repair of a TV set-top box (DVB-T2 receiver) is presented in the video below.
Correctly connecting the TV using HDMI
Home theater owners should know the truth - a digital media device has a playback source menu. The easiest way to illustrate the fact is with old stereo systems. Traditionally, devices had three blocks:
- Cassette decks: recording, playback.
- Radio broadcast reception.
- Laser discs.
Moreover, the blocks refused to play melodies simultaneously. It was necessary to switch sections using a special lever. Even a modern telephone is often equipped with an FM button... Can’t guess why the TV doesn’t see HDMI? Go ahead. The back of a TV typically contains half a dozen output jacks. Among the troops we will find a “tulip” formed by three petals, sometimes VGA puffs up, and certainly HDMI. Traditionally, the list is not limited to a meager list; see the instructions for more details. From the remote control, with the elusive press of a button (with only one HDMI port), you can select a source from the menu. The selection tool can be the Source key. You need to find a menu listing sources, select the cable connection port. There can be more than two HDMI connectors; it is important to track the correct number.
The computer usually avoids such tricks. There is no direct option to select the direction of signal transmission. However:
Fn+F3 or F4
- On laptops, the function keys Fn+F3 (F4) will open a pop-up system menu listing interesting options:
- Computer only. The image will not be sent to the external monitor (TV). Most people choose the named option. Don't be surprised that the TV can't see the laptop.
- Duplicate. The laptop screen will be duplicated by the TV. This is what most people need.
- Expand. Some people like to drag player and browser windows onto the TV, making it more convenient to watch movies. Let's be afraid to judge (tastes are individual), select the Expand option, lengthening the desktop.
- Projector only. The laptop screen turns off. The image will be displayed individually on the TV.
- Desktop personal computers detect TV independently. Otherwise, take the trouble to visit the driver menu and select the required broadcast port.
It is easier to control a connected TV using the desktop context menu. First, right-click on the free space, select the Screen Resolution option. Successful TV detection makes the “Multiple Monitors” button available. You will see four options that are exactly the same as the laptop options. Read the values above. It happens that the computer does not see the TV via HDMI: it makes sense to look here and look at the context menu. The monitors will be numbered; you can swap ports by simply clicking and selecting the object for changing system parameters.
There is no “Multiple Monitors” button in case of inconsistency: the system does not see the TV. Both devices must be turned on (230 volt power supply).
We connect the TV and computer with a cable
Pros say: it is possible to hot-connect a TV and computer via HDMI. Avoid risking expensive equipment; perform procedures in the absence of power. The first thing you need to do is turn on the TV. In normal mode, devices see each other. Problems mean there is a breakdown. Is hot plugging possible or not?
Here is the Wikipedia page https://en.wikipedia.org/wiki/HDMI, in the characteristics of the standard there is the phrase Hot Pluggable: Yes. Translating into Russian, we see the docking of the connectors with the power on. Want to play it safe? Russia is a place where dealers and manufacturers implement regulations selectively. It's a pity for the equipment - play it safe.
Which end should you start connecting the cable to? No difference.
Not all channels broadcast
If all of the above has been checked and done, and the output of the TV with a satellite receiver and dish produces a weak signal, and in some places there is none at all, perform the initial setup of the receiver to receive a satellite signal:
- Open the menu, select the desired satellite and frequency.
- Information about specific channels can be taken from the “info” information. This data is also available on the Internet, in the public domain.
- Afterwards, select the correct port. Typically, this is a 4-port "DiSEqC".
- If colored stripes appear (signal quality), save the settings.
- Then, set up other satellites in the same way.
If your TV loses signals from the antenna from time to time, the tuner is to blame. More precisely, a decoder that needs to be flashed
It is important to note that decoder firmware and tuner firmware are two different things. For this purpose, it is recommended to take the tuner to a service center or replace it with a new one
Sound. Connecting a TV to a Computer HDMI
Since its creation by the committee (2002), the HDMI interface has been conceived as a combined solution for transmitting image and sound. See the available audio formats individually (Wikipedia page), we only note that in Windows you need to select the sound source. Now the TV is considered a system device, so these responsibilities can be assigned to it. To do this, it’s easier to right-click the lower right corner of the desktop (speaker icon) and select Playback devices in the context menu. If there is no icon in the lower right corner, you need to click the arrow to the right of the language selection symbol RU (EN), to the left of the clock. There will be a symbol there.
Audio volume mixer
After clicking, a window will open: playback devices will be listed. You will need to turn off everything except the TV, and, on the contrary, turn on the TV. In 90% of cases, after a couple of seconds the native speakers of the plasma panel will sound. Do we want Sound Around? A similar speaker system comes with a home theater. Look through the device description. There are a number of ways to transfer sound from a TV to a home theater; any will do, taking into account the need to purchase the required cable. Similarly, using the Source button on the home theater control panel, select the desired sound source.
On the TV side, the procedure is often transparent, and the device’s own speakers are turned off. Then don't worry if the movie soundtrack is recorded in mono. Every self-respecting home theater has a splitter inside that easily splits the sound into channels of the Sound Around format.