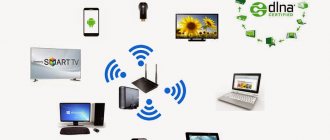
General information about DLNA
This technology is best suited for media streaming. The picture quality remains at the proper level, and the throughput and processing of large files will entirely depend on the load on the router channel, the characteristics of the processor, RAM and storage of the server and client.
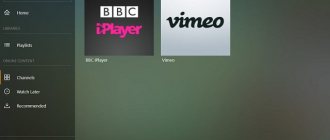
An Android client that supports DLNA technology can be any advanced player. The best in this regard are:
- VLC Media player is the best choice.
- Kodi is a heavy and feature-rich player.
- MX Player Pro is paid.
They allow you to play and view any media content, even ordinary phonographs loaded into the phone’s memory via Viber or WhatsApp. But to open access to data on an Android device via the DLNA protocol, you need to install a server on it.
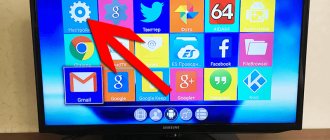
How to watch files from your phone on a tablet or TV is described in the following video:
Connecting devices
As mentioned earlier, most modern TVs and music centers natively support DLNA. What is this support? Essentially, this means that the TV can connect to a wireless or wired network on its own without additional devices. Well, and, accordingly, it is capable of receiving data via the DLNA protocol. In this case, to access shared files, you just need to press the corresponding button on the remote control, after which the TV will independently find the DLNA server. Next, you select the desired movie or other media file from the list that appears.
DLNA server
As a DLNA server for Android, it is recommended to use ready-made solutions in the form of software that configure everything for you. Among these are:
- DLNA Server for Android is very easy to set up. Plays video, audio, photos and playlists in m3u format (for IPTV).
- Plex is a program that can be used as a server and a client. In English, the design is easy to read.
- BubbleUPnP for DLNA / Chromecast / Smart TV – creating a server, viewing as a client, English interface, nice design.
- Media Server – works great with PlayStation 3 and Xbox 360, as well as some Smart TVs. Used as a server.
Pros and cons of technology
All the advantages of the technology are described above: a large list of devices that support DLNA by default, the ability to quickly exchange files and ease of use and configuration. The negative aspects include the following factors:
- Each company develops its own system for connecting devices. Although all these systems are based on the same DLNA, there are still differences in implementations, which can lead to incompatibility between different devices;
- Sharing high-quality video (HD, FullHD) is sometimes impossible, since not all devices support high quality. Although this problem is gradually disappearing as more and more devices are capable of playing HD and FullHD content;
- The issue of content sharing also includes supporting different formats on different devices. For example, not all devices are capable of running wmv video;
- File transfer is not instantaneous and depends on the speed of the wireless network or the quality of the connecting cable. Although there is no escape from this problem, because there is no other way to transfer files without third-party media;
- When creating a server, you need to take into account the issue of compatibility, so it is recommended to use software offered by the company that created the device.
Disadvantages of DLNA
Streaming playback sometimes slows down and freezes, especially if you stream a large video file. The speed and quality of transmission is greatly influenced by the router - inexpensive, weak models do not have enough bandwidth. You can avoid buying a new router - just turn off all downloads, online games, disconnect smartphones to reduce the load on the network.
Wires will also help improve the quality of the connection - if the client and server are connected to the router by cable, and not via Wi-Fi, the channel between them will become much more stable.
Not all types of files can be played, and Full HD videos are transmitted in worse quality. Convert rare video formats to standard AVI, which is supported by most manufacturers.
Nuances
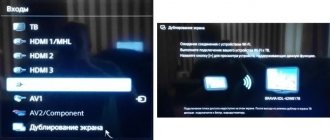
It is important that the device from which you will play media content supports DLNA. If this:
- Computer with Windows 10 operating system - use Windows Media Player to play content by first allowing “media streaming”.
- And then on the left, from “Other Libraries”, pull up the DLNA server data.
- TV without Wi-Fi or with an outdated Wi-Fi adapter - use the MiraScreen adapter. It supports DLNA/Airplay (streaming media on your home network) and Miracast (streaming content over a direct connection).
What it is?
DLNA is a specific technology for quickly transferring content between equipment carriers organized in a home group. Compatible devices according to this standard make it possible to play back large volumes of files, in particular music, videos and photos, from remote storage in real time. This is very convenient, because with this solution, access to collections and archives opens up from a new perspective for the most comfortable work with content.
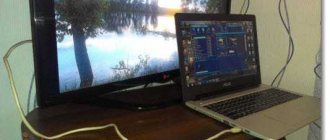
Stream content from your laptop to TVs throughout your home via DLNA.
DLNA technology is a unique next-generation intelligent solution because it typically performs most work operations surprisingly quickly, and network settings are almost completely automatic, ignoring the complexity and number of communication participants. The basis for the operation of such solutions is the operating environment, which can be either wired or wireless, based on Wi-Fi capabilities. A typical option is a home local IP network, which unites all devices into a single system and assigns each element its own address.
Settings
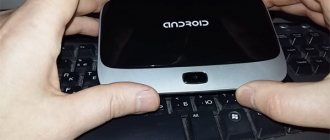
Install an application on your Android device that helps you create a DLNA server. Do the following:
- Launch the utility.
- Click the Plus icon and select folders or files to share.
- Click "Apply" and make sure that the path is selected for the desired folder.
- Then click on the start button (triangle).
- Wait a moment for the server to start.
It is important to understand that an active connection to the server will consume device power. Therefore, it is recommended to charge it before watching a movie on TV for two hours.
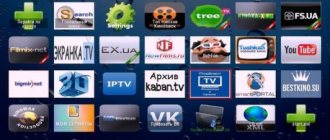
To enable media content:
- On another device, open VLC Media Player or the one you chose.
- Click "File" - "Local Network".
- Select the detected DLNA server.
- Open the shared content on it and enjoy viewing in excellent quality.
How much do TVs with DLNA cost?
TV with DLNA
The cost of a TV with DLNA support primarily depends on the size of the screen. Small TVs with a diagonal of 15–20 inches cost 10–30 thousand rubles . TVs with a diagonal of over 50 inches will cost 60–150 thousand rubles. The price of a TV is also affected by the availability of additional functions, brand and place of production. If the TV is assembled in Russia, then its price is slightly lower than for those made in Europe, the USA or Asia.
Ways to support technology on your TV
To synchronize and ensure clear interaction between certified devices, as well as implement the “receive-transmit” principle, DLNA uses a specific set of network protocols, and provides two types of technology support: built-in and external.
Built-in
Operates on the principle of Smart TV. The connection is made wired using a USB cable or “over the air” using a Wi-Fi module. The user is able to view files of various formats thanks to the installed drivers. However, the functionality of these programs is extremely limited: for example, there is no scaling and a number of other options that are directly responsible for the image quality during broadcast. In addition, the set of codecs is individual for each manufacturer.
External
This support option is used if the functioning of a home entertainment network is achieved through the integration of external devices - receivers, audio or video players. The method is relevant if you have an outdated TV model that does not have the required standard.
Each of the options described has its strengths and weaknesses. For example, native support makes it as easy as possible to use any DLNA-compatible device, except for one thing: it does not allow you to view CDs. To do this, you still need to connect a Blu-Ray player.
Setting up DLNA on SAMSUNG TV
Many SAMSUNG smart TVs are equipped not only with the DLNA option, but also with the Plug and Play standard. UPnP also allows devices to be shared on a single network, but has less flexibility in choosing content providers. In most cases, UPnP and DLNA devices are compatible.
AllShare and PC Share Manager programs have been developed for Samsung based on Tizen.
PC Share Manager proprietary software connects a TV and a computer or laptop into a single network, and also makes it possible to play multimedia data from a media server on TV. The program is compatible with all generations of Samsung TVs that support DLNA.
We configure the operation of PC Share Manager according to the following algorithm:
- Download and run the software on your computer from the official Samsung website.
- In the explorer located on the left, we find the necessary folders with media files.
- Let's celebrate them.
- Click on the folder with the check mark located above.
- Open shared access to folders: drag them into the right field; or right-click on them and select the appropriate item in the context menu.
- Next, go to “set device policy”, and in a new window select the desired device, that is, Samsung TV. Click on “Accept” and “OK”.
- We update the connection state: open “Sharing” and click on “Set state changes”.
- We are waiting for the updates to finish.
Having completed the setup on the computer, we move on to working with the TV:
- Open the settings and go to TV sources.
- Select PC Share Manager and Share Folder.
- After the manipulations have been completed, folders with media files that are located on the PC and are available for playback on the TV will be displayed.
Note! Only those files that belong to the photo, music and movie categories will be displayed on the Samsung TV screen. Media content that belongs to other categories will not be visible.
The setup via AllShare looks like this:
- Download the “AllShare” program to your computer from the official website and launch it.
- Following the Wizard’s prompts, click on the “Next” button.
- In the window that appears, select the device to connect – Samsung TV.
- We complete the process.
- Let's go to the folder settings and indicate the general folder where the files to be played will be located.
- We also set a folder for saving content from other devices.
- The next step is to set up the rights and allow access to TV.
When working with DLNA, it is recommended to watch videos with the DivX codec. With this format, the size of media content is significantly reduced without loss of quality.
The DivX codec in Samsung with the smart option is registered like this:
- In the TV menu we find the “System” section.
- Next, open the “DivX Video on Demand” subsection.
- Go to the official DivX website and register the device. Here you will need to enter the code that is located in the “DivX VOD” folder.
- Next, we move on to working on a PC, and download and launch DivX Player from the official DivX website.
- Here we register the device and complete the process.
Setting up DLNA data transfer on Philips
One of the components of the Smart TV platform in Philips models is the SimplyShare option (https://apkfab.com/philips-simplyshare/com.philips.simplyshare). It connects the TV with other DLNA devices. And allows you to play audio files from iPhone and iPod. Philips TVs from the 6000 series and above can play other content. These models are equipped with SongBird technology and codecs for format recognition.
Another way to set up DLNA is to use the universal Home Media Server program:
- We download and launch the above-mentioned software from the official website onto the server device.
- Next, we move on to setting up access to content on the PC. Expand the “Media Resources” tab and check the boxes next to the required drives: local, network or removable. Using the “Add” button, you can provide access not to the entire disk, but only to its individual elements. Click “OK” to complete the process.
- Using the corresponding button, we start transferring data to the TV.
- In the “Playback Devices” tab, select Philips. In this case, the TV must already be turned on and connected to the Internet.
- Go to the TV, and on the remote control click on the “Sources” button.
- In the “Sources” window, select the media network.
- We find a PC, expand the folder with files available for playback, and play the content.
Connection errors and solutions
Some users encounter a number of problems and errors when connecting devices using DLNA technology.
The most common problem is that devices do not see each other or do not start. In this case, most likely the answer lies in the Internet connection. You need to make sure again that all devices are on the same local network. When working with a smartphone, it is recommended to turn off any possible connection to the mobile Internet in advance.
The error may be due to an insufficient quality Internet connection.
Poor quality playback or program crashes may be a consequence of the low speed of the switch ports. You can try to solve the problem through the appropriate settings.
As you can see, DLNA technology is universal and quite convenient. To connect, all that remains is to choose the most suitable connection method, according to your goals and technical characteristics of the devices.
Definition
The abbreviation stands for “Digital Living Network Alliance,” which can literally be translated as “Digital Home Local Network Alliance.” So far, nothing is really clear. But in reality, DLNA is the ability to use a local network as a single unit to transfer media files. I'll tell you with an example.
There is a big friendly family at home. There is also a local network inside the house. Connected to it are: several computers, laptops, one printer, a phone with a tablet and a brand new large TV. DLNA allows you to use any media content: photos, videos, music - to all family members from any device.
For example, you can download a movie to your computer and watch it on any local device. At the same time, the film itself will still be on the computer. If you have a large library of films, music and photos at home, then you can view them on: TV, tablet, phone and other devices. Now you don't need to use inconvenient flash drives and hard drives.