DLNA - allows compatible devices such as a computer, TV, laptop, phone, tablet to transmit, receive or play various media content files. The function provides enormous opportunities for playing media content. A video file downloaded to a PC can be watched on the TV, and music downloaded to the phone can be listened to on the audio system. It is very comfortable. You just need to create a DLNA network.
- 2 Equipment for building a home network with DLNA
- 3 Connecting a DLNA-enabled TV to a wi-fi router
- 4 Add other DLNA-compatible devices to your home network
4.1 Laptop or other PC
4.1.1 Video: how to connect a laptop to a wi-fi network
- 5.1 Video: instructions for installing and configuring the Home Media Server program
- 7.1 Table: errors that occur when playing media content and methods for eliminating them
Equipment for building a home network with DLNA
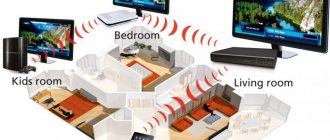
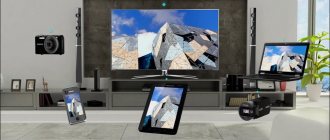
To create a DLNA network, you will need a computer or laptop with a media server configured on it. Using a wired or wireless Wi-Fi connection, it connects to a router, which, in turn, distributes a signal to other devices.
DLNA network turns your home into a media center
Such devices can be: TVs, laptops, tablets, phones, stereo systems. If you don’t have a router, you can configure signal distribution directly from your computer, but in this case you will need a Wi-Fi adapter for your computer. The principle of building a DLNA home network is similar to the Internet.
In the end you will need:
- computer or laptop;
- Wi-Fi router or adapter;
- at least one other device that supports DLNA.
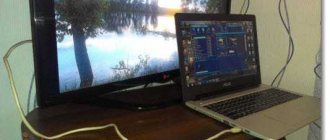
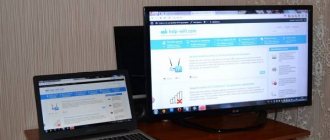
It is better to connect the TV to the computer via a cable connection. Wireless communication is convenient and modern, but when viewing powerful media content files, streaming data may be lost and, as a result, the TV may malfunction.
Emby
If you don't like Plex for some reason, Emby can be a great alternative. It is a full-fledged media server application built on a client-server system.
It offers a server application for multiple platforms which you can install on any device of your choice. You can add your local media content to Emby and it will organize all your files with the correct metadata and interesting details.
With the Emby client, you can stream content directly through a media server to any device.
Because the device you are using may not support the content format, so the Emby server will convert the file in real time so that you can play without any delay.
There is also a single portal for Emby on the web where you can access all your files by simply logging into your Emby account. It's like a complete Netflix repository, created by you and only for you. How cool is that?
In addition, there are parental controls; UPnP support, allowing you to easily transfer files between supported devices; Chromecast support for instant casting and of course cloud sync so you can access your content anywhere.
It also has Live TV and DVR support for recording TV shows. Emby has free and premium plans, so you can choose the one that suits you best.
Emby is a great media server app with front and back end client. As I said, if you are looking for a Plex alternative, just pick Emby and be done with it.
Key Features:
- Complete client-server media application
- Organize local files with cloud file synchronization
- Access content anywhere
- Live TV and recording
- Real-time transcoding and support for a wide range of media formats
- Single portal for web access
Available platforms: Windows, macOS, Android, iOS, Linux, Web, Roku, Apple TV, Android TV, Amazon Fire TV, NAS devices
Connecting a DLNA-enabled TV to a wi-fi router
You can connect a TV to your DLNA home network; this step will make it possible to fully use the installed server. First of all, you need to connect the TV to your Wi-Fi router. You can do this in one of two ways.
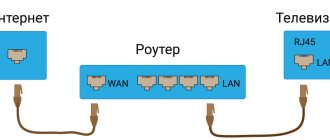
Simply connect the TV and router with an Internet cable with LAN connectors:
- Connect one end of the cable to the TV socket.
An internet cable is connected to the LAN socket of the TV.
- Connect the other end of the cable to the LAN connector of the router.
The wire connected to the TV with the second end is connected to the LAN connector of the router
The location of the LAN sockets on different TV models is different, but they are labeled everywhere and cannot be confused with outputs for other purposes.
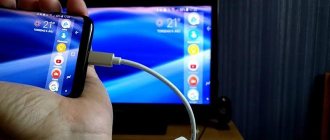
You can connect your TV to your router via a wireless wi-fi network. New TV models, as a rule, already have a built-in adapter. If the model is older, you will have to use an external wi-fi adapter. It needs to be inserted into the USB connector of the TV, and the system itself will detect it and put it into operation.
The Wi-Fi adapter must be connected to the TV via a USB port
Next you need to proceed to the procedure for setting up the TV:
- Pick up the TV remote control and press the Menu key.
- In the menu that opens, click “Network”, then “Network Settings” and select “Wireless (General)”.
- In the list that opens, select yours and click “Next”.
- In the window that opens, enter the password for your home network.
- If everything is done correctly, the connection will be established.
Adding other DLNA-compatible devices to your home network
By setting up a DLNA server on your PC, you can connect other devices to your wi-fi router. Connecting to your home network, possibly via a wireless connection or via cable.
Laptop or other PC
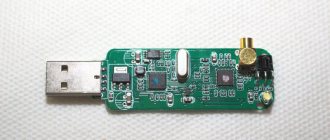
To add a laptop to your home network, you need to configure its connection to the router. In the case of a wired connection, it is enough to connect the LAN connectors of it and the router. When connecting wirelessly, you need to pay attention to the bottom right corner of the monitor. There you will find an icon in the form of gray sticks of different heights.
The icon on the panel indicates that the laptop is currently disconnected from the Wi-Fi network
By clicking on it, you will go to the network connection settings menu; all networks with connection capabilities are displayed here. Select the desired network, click the mouse.
On the “Sharing Center” tab, connect the desired wi-fi network
If the network does not have a password, the connection will occur automatically. Otherwise, a window will pop up in which you must enter a password.
X
Enter your home network password and click “Done.”
Video: how to connect a laptop to a wi-fi network
Before you can transfer media content to other devices, you need to configure the media server.
To add a laptop to your home network you need:
- Go to the “Start” menu, then “Control Panel” and go to the “HomeGroup” tab.
- If a home group has already been created on one of the devices, the system will prompt you to join it, click “Join”.
To connect the device you need to click the join button
- In the next window, enter the password generated by the system when creating the homegroup.
To connect to a homegroup you need to enter a password
Media player
To integrate a media player into your home network, simply connect it to your router. The player automatically connects found DLNA resources. It is enough to open shared access to folders for homegroup devices on the device acting as a media server.
Creating a DLNA server using built-in Windows 10 tools
In order for Windows 10 to act as a DLNA server for devices that support the technology, just follow these simple steps:
- Open Streaming Media Options (using search in the taskbar or control panel).
- Click "Turn on media streaming" (the same action can be performed from Windows Media Player under the "Stream" menu item).
- Give a name to your DLNA server and, if necessary, exclude some devices from the allowed ones (by default, all devices on the local network will be able to receive content).
- You can also select what types of media you want to share by selecting your device and clicking Configure.
Those. You don't have to create or join a HomeGroup (and homegroups are gone in Windows 10 1803). Immediately after the settings have been made, from your TV or other devices (including other computers on the network), you will be able to access content from the “Video”, “Music”, “Pictures” folders on your computer or laptop and play them (the instructions below also include information about adding other folders).
Note: with these steps, the network type (if it was set to “Public”) changes to “Private Network” (Home) and network discovery is enabled (in my test, for some reason, network discovery remains disabled in “Advanced sharing settings”, but is enabled in additional connection parameters in the new Windows 10 settings interface).
Adding folders for the DLNA server
One of the non-obvious things when enabling a DLNA server using the built-in tools of Windows 10, as described above, is how to add your own folders (after all, not everyone stores movies and music in system folders for this purpose) so that they are visible from the TV, player, console etc.
You can do this as follows:
- Launch Windows Media Player (for example, via search in the taskbar).
- Right-click on the “Music”, “Video” or “Images” section. Let's say we want to add a folder with video - right-click on the corresponding section, select "Manage video library" ("Manage music library" and "Manage gallery" - for music and photos, respectively).
- Add the desired folder to the list.
Ready. This folder is now also accessible from DLNA-enabled devices. The only caveat: some TVs and other devices cache the list of files available via DLNA and in order to “see” them, you may need to restart (on-off) the TV, or in some cases, disconnect and reconnect to the network.
Note: You can also turn the media server on and off in Windows Media Player itself, in the Stream menu.
Setting up DLNA on your TV
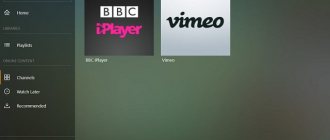
TVs connected to the home network automatically find the server and folders with content allowed for viewing. On LG TVs, folders of available media servers appear alongside pre-installed programs and features.
There are many alternative programs for creating a media server. The LG TV comes with a disk with a program called Smart Share, which can also be downloaded on the Internet. This program allows you to create a media server without using Windows tools. Just download it to your computer, click on its launch shortcut and wait for the installation to complete.
pp
A folder with the Smart Share logo will appear in the TV's programs and connections panel. On your computer, in the program settings window, you can assign folders for playing content. You can view photos and videos located in these folders on your TV.
Smart Share is a good program for those who are too lazy to delve into the Windows settings. It loads the system quite heavily. Even with the TV turned off, on a weak computer, its presence can be felt. For some reason, it does not always update the folder with added files. Sometimes you have to do this manually. It is better to set up a normal server using Windows.
There is a universal program that allows you to connect any TV that supports DLNA to a computer. It's called Home Media Server.
Video: instructions for installing and configuring the Home Media Server program
Creating a DLNA server using built-in Windows 10 tools
In order for Windows 10 to act as a DLNA server for devices that support the technology, just follow these simple steps:
- Open Streaming Media Options (using search in the taskbar or control panel).
- Click "Turn on media streaming" (the same action can be performed from Windows Media Player under the "Stream" menu item).
- Give a name to your DLNA server and, if necessary, exclude some devices from the allowed ones (by default, all devices on the local network will be able to receive content).
- You can also select what types of media you want to share by selecting your device and clicking Configure.
Those. You don't have to create or join a HomeGroup (and homegroups are gone in Windows 10 1803). Immediately after the settings have been made, from your TV or other devices (including other computers on the network), you will be able to access content from the “Video”, “Music”, “Pictures” folders on your computer or laptop and play them (the instructions below also include information about adding other folders).
Note: with these steps, the network type (if it was set to “Public”) changes to “Private Network” (Home) and network discovery is enabled (in my test, for some reason, network discovery remains disabled in “Advanced sharing settings”, but is enabled in additional connection parameters in the new Windows 10 settings interface).
Adding folders for the DLNA server
One of the non-obvious things when enabling a DLNA server using the built-in tools of Windows 10, as described above, is how to add your own folders (after all, not everyone stores movies and music in system folders for this purpose) so that they are visible from the TV, player, console etc.
You can do this as follows:
- Launch Windows Media Player (for example, via search in the taskbar).
- Right-click on the “Music”, “Video” or “Images” section. Let's say we want to add a folder with video - right-click on the corresponding section, select "Manage video library" ("Manage music library" and "Manage gallery" - for music and photos, respectively).
- Add the desired folder to the list.
Ready. This folder is now also accessible from DLNA-enabled devices. The only caveat: some TVs and other devices cache the list of files available via DLNA and in order to “see” them, you may need to restart (on-off) the TV, or in some cases, disconnect and reconnect to the network.
Note: You can also turn the media server on and off in Windows Media Player itself, in the Stream menu.
Video slows down and other problems
Sometimes annoying interference and malfunctions interfere with watching your favorite movies and prevent you from appreciating all the benefits provided by using the DLNA network. See the table provided for possible problems and methods for solving them.
Table: errors that occur when playing media content and methods for eliminating them
| № | Errors and malfunctions. | Causes of errors and malfunctions. | Possible Solution. |
| 1 | Devices cannot discover the network. | The wi-fi router may have malfunctioned. | Try rebooting your wi-fi router. |
| 2 | Low data transfer speed on a wired connection. | The cable is damaged or poorly secured in the LAN connectors. | Check the integrity of the cable and the tightness of its fastening in the connectors. |
| 3 | The media server is unavailable. | Errors in the operation of the media server. | Reboot the media server. |
| 4 | Media device is not available. | Errors in the operation of the media device. | Reboot your media device. |
| 5 | The video is slow. | The data transfer speed is insufficient to watch the movie. | Temporarily stop watching the movie to download enough data to watch it. |
| 6 | The system stops watching movies and indicates the reason - insufficient disk space. | There is not enough space to store temporary files. | Choose lower quality videos with a smaller frame size. |
| 7 | A message appears - the movie format is not supported by the media device. | The media device does not support this movie format. | Find a movie in a supported format. |
Often the reason why the TV slows down when watching movies is easily eliminated small details. The main reason lies in the unstable operation of the media server. For normal operation, periodically optimize and clean the system. Don't overload your computer with unnecessary programs.
Anyone can set up DLNA-enabled devices at home. It's not difficult at all. A TV connected to your home network gets a second wind. After spending half an hour connecting to the DLNA network, you can view any content from your devices on the big screen. Movies, photos, videos shot on your phone, now you can watch all this just by pressing a couple of buttons.
How to create a group using other programs?
If for some reason it was not possible to create a media server for a home network in the tenth version of Windows using a standard program, then you can use a third-party one. For example, you can download “Home Media Server” and use it absolutely free.
It is easy to work with even for those people who are not well versed in computers. First you need to install the application and run it. It will immediately offer settings that you can change to your taste, but it is recommended to leave the default ones. Then you can select folders that will be shared with other gadgets. This is what you should do, and then start the server using a special button. When the procedure is completed, you can start using your own group.
The positive aspects of this program include the minimum number of settings and the ability to stop the server if necessary. It is in Russian, so it will be easy to navigate for a person who does not know English. In addition, you don’t have to pay to use it or search for activation keys on the Internet. Yes, and it weighs little. That is why it is recommended to choose it among other similar programs.
If everything is done correctly, then you can control connected devices directly in this program. It will be enough to connect them to the created network and view them in the “Playback devices” tab. If the gadgets are not shown, then you need to click on the “Update” button.
You can try it on connected devices to see if everything works. If they still do not appear, then you need to check the connection and disable the anti-virus program, as it often blocks access to the group.
When the device appears, you can try to play the video on it - it should appear on the screen of the selected gadget. Now you can use this function as much as you like, connecting various gadgets. If something goes wrong, it is advisable to contact a specialist rather than looking for a solution on your own.
https://youtube.com/watch?v=O0VbDvic2JU