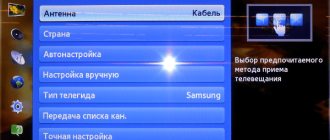
How to set up a Haier TV
The HAIER company has released a new line of Smart TVs, Haier TVs (Haier), thanks to their price category, can be afforded by everyone, because the cost of Haier Smart TVs is much cheaper than popular brands. HAIER Smart TVs have a built-in DVB-T2 and DVB-C tuner, which allows you to watch digital television and go online.
Next you will find out
- How to set up digital television on a haier TV (Haier)
- How to connect the Internet on a haier TV (Haier)
- How to set up Smart TV on a Haier TV
How to tune digital channels on Haier TV
In order to set up digital channels on your haier smart TV and watch digital television, find the MUNI button on your remote control and press it
Next, find Channel and click OK
Go to the DVB Antenna item and select Cable or Antenna
Next, select Auto-tuning or Manual search.
In the Auto Configuration item, select parameters.
In Settings mode, select DTV these are digital channels ATV these are analogue channels, if you want both digital and analog then select DTV and ATV
Next you need to select a country, leaving Russia.
We set the operator to Other, you don’t need to select operators from the list, just put Other and that’s it.
Select search type Full, if you know the frequencies of your operator, then select the network and enter the parameters below.
Next, turn on Auto Search and wait for the digital channels to tune in on your haier TV.
How to connect internet on Haier TV
Haier smart TV series TVs have the ability to access the Internet via Wi-Fi or cable connection.
In order to connect and set up the Internet on your Haier TV, go to the menu of your TV.
In the Menu, select Network
Next, find the item Network Configuration or All
Next, select the connection method Wi-Fi or cable
If we select Wi-Fi, then click Wi-Fi Configuration
Next we do a Wi-Fi auto search
and select the desired Wi-Fi and enter the password
Your Haier TV is connected to the Internet and you can use all the features of Smart TV.
How to set up Smart TV on Haier TV
Once you have connected and configured the Internet on your Haier TV, all Smart TV applications will immediately become available to you.
In order to watch YouTube, you just need to find the button on your remote control; if the YouTube button is missing, then press the HOME button and select the application you need. In addition to YouTube, there is also a browser for direct access to the Internet on the TV.
Also on your remote control there should be an APP button; by pressing it you will go to the applications that are downloaded to your TV.
Lately, digital television has caused a lot of excitement, this is due to the availability of content. This area is actively developing, many offices are appearing that provide services for maintaining and connecting digital TV. Setting up a TV on your own will not be very difficult even for a beginner.
It should be noted that there are various types of digital television. In this article we will look at ways to set up digital cable TV. We will also find out whether owners of old TVs can use the service.
How can I determine if Haier supports the DVB-T2 format?
Haier has released a new line of mid-price TVs.
Due to their low price and relatively good quality, new models are in great demand among the population. This is due to the fact that it has virtually no significant disadvantages. And the advantages include:
- Low cost.
- Multifunctionality. It is possible to watch digital TV and access the Internet.
- High image quality.
The most common question that TV owners have been asking lately is related to digital television support. You can find the answer to this in several simple ways:
- Look in the instructions. In the section on technical specifications there should be a paragraph that states support for the digital standard. If available, your TV supports digital TV.
- Find a description of the product in the online store. You need to open the “Characteristics” section, then the “Signal reception” sub-item, in which it should be written about DVB-T/T support.
- If there are no instructions or descriptions of the TV’s characteristics on the Internet, you can find out the necessary information at the manufacturer’s service center.
???? TV connected to Wi-Fi, but no internet connection
This “phenomenon” in 99% of cases is associated with the router settings and the quality of the Internet provider.
The TV has access to the router, but does not have access to the Internet / Connection status on TV
In general, I recommend connecting to the same network using a laptop (PC), entering the router settings and checking:
- Will there be access to the Internet on the laptop (if not -> I recommend this note);
after that, look at the Internet access parameters in the router’s web interface to see if they are lost (note: this data (connection type, password, IP address, etc.) can be found in the agreement with the Internet provider);
Setting up a PPPoE connection / Tenda router
Are there any restrictions in the router settings (for example, all devices except one or two can be blocked.) Usually, this thing is located in the “Bandwidth Control” section;
Bandwidth Control / Tenda Router
if the router settings are in order, and there is Internet on the laptop (PC) connected to the Wi-Fi network, try manually specifying DNS from Google in the TV settings: 8.8.8.8 (8.8.4.4). This option is in the advanced network access settings;
Setting up DNS - Samsung TV
If all of the above did not help, check the condition of the Internet provider cable, is it intact? Also try to find out if they have any preventive (restoration) work and if everything is okay with the network.
This also happens: the cable in the entrance of the house was barbarically cut off.
Source
Setting up television on older models
If your TV is more than 5 years old, there is a high chance that it does not support digital television. In this case, , which can be purchased in almost every specialized store, will come to the rescue
Depending on the TV model, the receiver can be connected in two ways: using a “tulip” or HDMI output. To receive the signal you need to use a decimeter antenna. The higher it is, the better. First of all, it should be turned towards the transmitter. You can find out its location by making a request on the Internet.
Having connected the equipment, you can start setting up:
- Go to the tuner menu.
- Select the “Settings” item.
- Finding our country.
- Select the signal type, in this case DVB-T.
- Click on the “Automatic configuration” item.
- We are waiting for the setup to complete.
After a few minutes, the procedure is completed and you can enjoy watching channels. Very rarely does automatic tuning fail. If this happens, you must use manual configuration. To do this, we repeat the same thing, but select the “Manual setup” item.
How to set up Wi-Fi on a TV - instructions from a professional
To play content on a big screen TV, you must first set up an Internet connection.
There are two synchronization methods - wired and wireless. With the first method everything is clear. The user connects the Ethernet cable to the LAN connector and gains access to the Internet. However, few people know how to connect a TV to Wi-Fi? There may be some difficulties with this. The specifics of the connection directly depend on whether the TV you are using supports Wi-Fi technology. If yes, then you just need to connect it to the router. However, if you are using an older model that does not support the transmission of an Internet signal over a radio channel, then you will have to use additional devices.
Nuances for devices with Smart TV function
First you need to connect the antenna. To do this you will need to do 3 steps:
- Connect the power cable.
- We connect the antenna to the appropriate connector.
- To connect to the Internet, connect the cable to the RJ-45 port. You can also use WI-FI. The second option is more comfortable.
To set up digital TV on Haier TVs, you need to do the following steps:
- Press and hold the MUNI button and go to the “Channel” item. Click “Ok”.
- Select the DVB item. Select “Antenna” or “Cable”.
- Select the required type of setting between manual and automatic.
- Set the settings. Select DTV and ATV in the “Setup Mode” item.
- Choose your country.
- No need to choose your operator. Just click on the “Others” item.
- Click the “Autosearch” button and wait for it to complete.
Found channels are automatically saved in the TV memory.
In this case, you will have to repeat the procedure again. This can happen when you accidentally press a button on the remote control, so it’s best to put it somewhere away.
The router is not configured correctly
In some situations, the TV does not connect to the Internet via Wi-Fi due to incorrect router settings. To configure your device, open Control Panel. To do this, you need to enter the appropriate combination of numbers in the address bar of your browser. The detailed process for opening the main menu of the router is specified in the user manual.
To change the settings of your TP-Link router, go to the “DHCP” section. Check if the DHCP server is actually activated and functioning correctly. If you disable this option previously, then the TV and other devices connected to your home network will not be automatically assigned an IP address. It is impossible to achieve high-quality routing without automatic IP configuration.
Go to the "Security" section in your router settings. Disable client MAC address filtering if this feature was enabled by default. On ASUS, D-Link, TP-Link, Huawei routers and devices from many other manufacturers, you can whitelist the device's MAC address. What does this give? In the future, devices added to this list will not be blocked. Therefore, communication through the router will be correct.
Why it doesn’t catch - the main reasons
There are cases when users set up digital channels correctly, watched them for a while, and then they disappeared somewhere. How to fix this problem? There are many reasons. Let's look at some of them:
- The antenna does not receive the signal well. To solve this problem, you need to purchase a new signal amplifier. If this does not help, the antenna needs to be replaced.
- Broken contacts connecting the antenna to the TV. To solve the problem, you should ring the cable.
- The tuner is not receiving a signal . It is possible that the set-top box does not support DVBT-2 format. Only buying a new receiver will help.
- The signal amplifier stopped working. It must be taken to a service center. A common cause of failure is a burnt-out power supply.
- Some channels are not working. Try to point the antenna towards the TV tower.
- Half the channels are gone. If the equipment works correctly, most likely the settings of the set-top box have gone wrong, and they should be changed again.
If problems occur with digital broadcasting, you must take the following steps:
- Check the integrity of the cable and connections between the antenna, set-top box and TV.
- Try reconfiguring the console. If automatic tuning does not produce results, use manual tuning.
- Orient the antenna towards the TV tower.
Possible connection problems
During the process of setting up a connection, the user may encounter various problems in the form of software failures and system errors. However, this kind of difficulty can be solved very easily. The simplest but most effective option is to reboot the equipment. Turn off your router and TV, and then plug them back in.
If the previous recommendation did not help, then you need to roll back to the default settings of the SmartHub program. You can do this as follows:
- Go to the applications section.
- On your remote control, press "Tools".
- Go to the reset user settings tab.
- Enter the updated security code - 0000.
- Wait for the process to complete, agreeing to all notifications.
The software will be reinstalled with default settings.
The third way to resolve problems is to update the firmware of the TV operating system if you are using a model that supports Smart TV. To update, go to the support section, and then switch to the “Software Update” tab. Use the “Update software over the Internet” command. Wait until the update installation process completes.
If you do not have access to the Internet, you can update by first downloading a new firmware version to a flash drive or hard drive. What to do if the suggested options did not help? Reboot your router, this may be the problem. Check whether other devices are connected to the Internet: smartphone, tablet or laptop. If the Internet is not available on all gadgets, then call your provider.
Source
Where can I get help if I have problems?
The specialist will answer all your questions, if necessary, diagnose the equipment, and give advice on its proper operation. Companies that sell equipment often install and maintain it free of charge.
If service workers are unable to come to your home, they will try to help the user understand the problem remotely (by telephone or by correspondence).
In this article we tried to figure out how to properly connect digital television on Haier TVs. We found answers to the questions that most interest console users. Installing and connecting equipment should not cause major problems. If you read the instructions for the TV in detail, you can find almost all the information you need.
“The more TV channels, the more there is nothing to watch”
With the appearance of a router in my sister’s apartment, the need arose to connect the old, but still vigorous plasma TV to the Internet. Since television receivers did not have the functionality required to work on the network in those ancient times, an external device was needed. The Haier DMA6000 set-top box was chosen for its compact size, good performance and favorable reviews from owners. And its main feature is a two-way remote control with a QWERTY keyboard and a gyroscope.
Our manufacturer is little-known, but it is a large Chinese company producing household appliances. Created in 1984 on the basis of a state enterprise. They have an informative website that supports a dozen languages.
On their website the DMA6000 is labeled as an Android Dongle
Selecting applications
The TV will already be loaded with the most popular applications for your smart TV. To surf the boarding school we use the Browser, by opening it you can visit any information site.
In order to watch online TV channels, we select services for watching IP-TV . The most popular are Forkplayer, OTT-Player, SS IPTV and others. They will work on your device without any problems. How to configure applications, see separate articles on our website. There are also streaming services such as Amazon Prime, Netflix, Disney+, but downloading is required to watch them. However, this is not available on all Hyer TV models. And of course YouTube. Many models have a separate button on the remote control to access the YouTube application. You can log in to your Google account and all the content that was shown on other devices will be shown on the TV.
Don't forget to clear your cache memory for better performance.
In addition to popular applications, there are many others; the list may vary for each model. But if you have Haier on Android TV , then you will get a huge number of downloads available on the Play Store.
Package
The contents of the cardboard box are neatly placed in bags, the chances of damage during transportation are minimal.
Contents of delivery
On the beveled edge there is an indicator for the operation of the set-top box; it glows green during operation, and red in standby mode. To cool the components, ventilation holes are made in the case.
If there is no Wi-Fi module?
It happens that the TV is equipped with a Smart TV function, but it does not have a built-in Wi-Fi module. Here a regular router will help us, which will be a Wi-Fi receiver. You just need to configure the router in adapter or bridge mode, connect the TV to the router and enjoy the SMART functions.
WI-FI makes it possible to connect your TV to the Internet and use all relevant services. The main thing is to perform the appropriate manipulations correctly. After that, tune in to TV channels, watch videos, listen to music and use all the Internet features on your TV.
Source
Setup and operation
This is roughly what the Haier DMA6000 looks like when connected.
When you turn it on for the first time, a welcome page is displayed and you can use it to complete setup.
The network search is done quickly, password-protected access points ( mic ) are shown, and one of the neighbors has an open point ( DIR )
Select your access point, enter the password, and you're done.
The main window displays the most recently used applications, a weather widget (Magnitogorsk is not in the list of cities, unfortunately), icons for going to settings and applications selected by the user.
The built-in Internet browser is quite convenient.
Allows you to add bookmarks, view history and save pages.
In addition to watching movies and listening to music online, installed programs allow you to play media files from external media. Supported formats:
• JPEG, GIF, PNG, BMP
• MP3, AAC, FLAC, WMA, WAV
• MPEG1, MPEG2, MPEG4, H.264, MP4, DivX, XviD
Removing Duration Time from the screen
The appearance of Duration Time on the TV screen blocks the operation of the buttons. To fix the problem, you need to go to the menu, select the sub-item Time . Here you can set the current time and set the parameters for switching the TV to standby mode. If all settings are correct, there will be no further operational problems.
conclusions
In essence, the Haier DMA6000 is a microcomputer on Android, and therefore, if desired, you can install any programs from a flash drive, but the bundled ones work well.
The technical characteristics are at a decent level, everything works quickly, nothing slows down.
For the convenience of surfing the Internet, you can connect a wireless keyboard and mouse set. Of course, at home there is a stationary PC or laptop for this, but when traveling this is an option.
The console has a lot of competitors, but there are not many models with keyboards among them. Therefore, the price of four thousand seems quite justified.
During the month of operation of the device, no disadvantages were identified.
PS Ten months have passed, the console is in another city and we hardly ever meet). It would be more reliable to ask any questions you may have in:
HAIER Unified Information Center:
Opening hours of the Unified Information Center:
Mon-Fri from 9.30 to 18.30 (Moscow time)
Sat, Sun, public holidays - days off
I contacted them by email and they said the console is being supported.
Also, at the end of last year, two full reviews of the Haier DMA6000 were published. Perhaps you will find the information you need there.
Connection options
There are several ways to connect to the network, which allows users to choose the most appropriate option.
For fans of the video format, we found a video with a story about all the possible ways to connect a TV to the Internet:
Using WI-FI
Connecting your device to the World Wide Web using Wi-Fi is the easiest and most convenient way. To perform the corresponding manipulation, enter the TV menu “Settings”.
To connect your TV via WI-FI, proceed as follows:
- select the “Network” column;
- go to the “Network Settings” submenu;
- click on the “Start” button;
- A window opens to select a connection, where you need to click on the “Wireless” column;
- click on the “Next” button;
- select the appropriate WI-FI network and click on the “Next” button;
- if necessary, enter the security key if the system has requested such data;
- After the connection is completed, exit the settings.
Wired connection
To connect your TV to your router using a cable, you will need the appropriate wires. When everything you need is stored, perform the following manipulations:
- The cable is connected to the router. To do this, the wire is inserted into the WAN socket, which is located on the device.
- Set up the router to connect to the Internet. How to do this correctly is indicated in the instructions that come with the device. Setting up a router depends on the brand. We will have a router from TP- as an example. We connect to a PC or laptop via Wi-Fi or Ethernet cable. In the browser, enter the router address 192.168.1.1 (indicated on the back of the device). Enter your login and password (if you haven’t changed them, then this is admin/admin) and do a quick setup of the router.
- One end of the wire is installed in the corresponding socket on the TV. The other end goes to the router.
If everything is done correctly, a light will light up on the router indicating connection. Next, set up the TV:
- use the remote control to enter the menu;
- select the “Network” column and go to the “Network Settings” subsection;
- install this connection method: via a LAN cable or “Wired connection”.
After this, automatic setup will begin. When the procedure is completed, you need to save the change by clicking on the “OK” button.
Via WPS, One Foot Connection or Plug & Access
Not all devices have such programs installed. It is recommended to check the availability of technologies before purchasing a TV.
To connect a device to WI-FI using WPS technology, you must simultaneously go to the TV menu, select the appropriate button there and at the same time press the external WPS button on the router and hold it for 10-20 seconds. This is enough to configure the receiver.
Using the One Foot Connection program, Samsung TVs are configured, but to perform the manipulation you will need a router from the same company. To access the network, you need to enable the corresponding function in the TV menu. You don't need to do anything else. One Foot Connection is only available for One Foot Connection devices.
You can also get Internet access from your TV using the Plug & Access program. To carry out the manipulation you will need an empty flash drive. The drive is first inserted into the USB socket of the router, and then into the TV. This manipulation is enough to connect the TV to the Internet.
Using a laptop
If you don’t have a router, you can connect your TV to the Internet using a laptop. The fact is that this gadget is equipped with a built-in router. It can receive a network signal and also distribute it to other devices. To do this, perform the following manipulations:
- enter the Start menu on the laptop;
- navigate to utility programs;
- enter the following symbols into the corresponding column: Netsh wlan set hostednetwork mode=allow ssid=My_virtual_WiFi key=Cleep keyUsage=persistent, where key is the WI-FI key, and key Usage is a parameter that allows you to save the key in the device’s memory;
- To distribute a signal, write the following symbols: netsh wlan start hostednetwork.
