Supports ARC and EARC audio formats
| Function | HDMI-ARC | HDMI-eARC |
| Cable Used | HDMI | HDMI with Ethernet |
| StereoSupport | Yes | Yes |
| Compressed 5.1 | Yes | Yes |
| Uncompressed 5.1 | No | Yes |
| Uncompressed 7.1 | No | Yes |
| High Bitrate & object based up to 192 kHz, 24 bit (Dolby Atmos, DTS) | No | Yes |
| Maximum Audio Bandwidth | 1 Mbit/s | 37Mbit/s |
| Discovery | CEC | eARC data channel |
| eARC Capability | CEC | eARC data channel |
| Lip Sync Correction | Optional | Mandatory |
| TV Mutes &Controls Volume | Yes | Yes |
| Powering TV Powers Adio Device | Yes | Yes |
| ARC Fallback | No | Yes |
The new HDMI 2.1 standard introduces a new audio return channel designation, eARC.
What is the difference between eARC, the bandwidth of the HDMI port has been increased and it has become possible to transmit not only 7.1 sound but also Dolby and DTS sound. Note: A new 2.1 cable is required to support all HDMI 2.1 features.
Why is AFR needed?
AFR (Auto Frame Rate) is the ability of a TV or set-top box to automatically change the frequency of the output signal to the frequency of the content being played.
Today, there is a generally accepted global frame rate standard for filming – 24 frames per second. In addition, there are many other common standards:
► 25 frames per second – frame rate during video shooting to convert to the European standard 625/50 resolution.
► 26 frames per second – shooting frequency for the Cinerama panoramic system.
► 29.97002616 frames per second – frame rate used in the NTSC television standard. The standard is widespread in North America and parts of Asia.
► 30 frames per second is the frame rate used in early versions of widescreen cinema and IMax.
► 48 frames per second is the frame rate used in modern IMAX HD and Maxivision 48 systems.
► 50 frames per second – frame rate in the European high-definition television standard.
► 59.94 frames per second - the exact half-frame frequency of high-definition television for the NTSC standard.
► 60 frames per second – filming frequency for the American high-definition television standard.
Add to this consoles, smartphones, video and action cameras, and streaming content recorded on a computer, which can also have its own frame rate and not match that of television.
As you can see, there are many different standards for video content production around the world, each with its own frame rate. At the same time, it is difficult to convert the number of frames from one standard to another standard without visible losses, artifacts or side effects.
What you need
The easiest way to connect a Sony BRAVIA TV to a laptop or computer is to connect the HDMI® connector of the computer and the HDMI® 1 connector of the TV. All you need is an HDMI® cable.
If your computer does not have an HDMI® connector, you can connect using VGA or DVI connectors.
To do this, you will need one of these cables: VGA-VGA, DVI-VGA or DVI-HDMI®. You will also need to connect the computer's audio output to the TV's minijack or RCA jack.
Setup and operation
The first step to use is to create an HDMI network. The minimum set required for this is a TV (or monitor) and a tuner (satellite, cable, T2, etc.). Once you've paired two CEC-enabled devices together and turned them on, you're ready to move on to the next step.
To use the technology, a special plugin is required. First, the TV switches to the tuner's data source. After this, a menu opens, the “Plugins” section. Find “HDMI CEC Setup”. Technology settings are located here. You need to make all the necessary changes, customizing its operation “to suit you”, and save them.
By opening the HDMI menu on your TV, you can get information about all devices connected through the interface. In the list you can see which of the connected equipment supports the extension we are interested in. Remote control will only be available for this list.
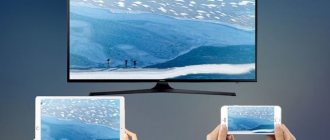
Connection via Miracast
Using Miracast technology, you can not only watch videos from your computer’s HDD/SSD from a shared folder, but also broadcast the entire contents of your PC screen. Those. Use your TV as a wireless monitor.
The first option involves using the built-in Windows functionality:
- Use the Win + P key combination to open the sidebar for projection settings. Select the marked item.
- Now you need to wait for the search to finish. If the TV was turned on in advance, the device will be found quickly and will appear in the list.
- At the same time, an image will appear on the second display. You can configure the display directly from this panel or in the way described at the beginning of the article.
With a stable signal and connection speed, you will get an ideal picture. However, to use this technology you will need a fairly powerful computer.
Setting up Xiaomi Mi TV Stick
The first step is to pair the remote control. Don't forget to insert batteries into the remote control!
Detailed instructions will appear on the TV screen, showing you how to bind the remote control. You need to press the center button of the joystick. If this doesn't work, the system will ask you to press the dots and circle button at the same time.
After connecting the remote control, you need to select a language.
Next, select the region.
The system will prompt us to configure the set-top box using the phone. You can either agree or skip.
Setting up using an Android phone is very convenient and fast. If you have an Android phone, you can automatically transfer your Wi-Fi settings and Google account to the Mi TV Stick. You just need to follow simple instructions.
If you skip setting up using your phone, then in the next step you will need to connect the Xiaomi Mi TV Stick to the Wi-Fi network. Select your network from the list.
Enter the password to connect to your network.
Next we will be asked to sign in to your Google account. And I highly recommend doing this. To be able to use all the functions. You will be automatically signed in to your YouTube account. You can also install applications from the Play Store. In principle, you can skip this step and log into your Google account later in the settings, but I recommend doing it right away.
I'll use the second option. First, enter your email or phone number to which your account is registered.
Next, enter the password (I didn’t take a photo). You may also need to confirm your login using your phone. If you entered everything correctly, you will be logged into your account.
We accept the terms of use.
We allow or deny access to geodata.
We allow or deny the set-top box to send diagnostic information to Google.
The next step is to install additional applications. The system will prompt you to install several applications. If you do not refuse (do not uncheck the box), they will be installed automatically in the background. I recommend canceling the installation of these applications (otherwise the set-top box will slow down after setup due to their installation). You can install all the necessary applications yourself from the market.
Let's get acquainted with some of the capabilities of our Xiaomi Mi TV Stick.
We accept the terms of use from Xiaomi.
That's it, setup is complete! The main screen appears.
You can use all the features of Android TV.
Other operations, Switching between digital and analog audio (input mode)
Switching between digital and analog audio, Input mode)
- Image
- Text
86
RU
F:\SONY SEM\Models_2009\Data_STR- DH800\JC090686_4131724511DH800_RUUA\4131724511\01RU09OTH_STR-DH800-RU3.fm
masterpage:Left
STR-DH800
4-131-724-51
(1)
Switch between digital and analog audio
(INPUT MODE)
When you connect components to both the digital and analog audio input jacks of the receiver, you can set either of these input audio modes, as well as switch from one mode to the other, depending on the type of material you are viewing.
1
Rotate the INPUT SELECTOR knob on the receiver to select the audio input.
You can also use the input buttons on the remote control.
2
Press the INPUT MODE button on the receiver several times until you select the audio input mode.
The selected audio input mode appears on the display.
Audio input modes
x
AUTO
When you have both digital and analog connections, digital audio signals are given priority. If there are no digital audio signals, the analog audio signal mode will be selected.
x
ANALOG
Sets the output of analog audio signals to the AUDIO IN (L/R) jacks.
Notes
•Some audio input modes
may not be set depending on the input signal.
•When using the ANALOG function
DIRECT audio input mode is automatically set to “ANALOG” and other modes cannot be selected.
•When HDMI 1–4 or DMPORT input is selected
“——” appears on the display and it becomes impossible to select other modes. Select an input mode other than HDMI 1–4 and DMPORT input, then set the audio input mode.
Other operations
How the unified control system is implemented in devices
HDMI CEC is implemented as a separate plug-in in the operating system. It works quite simply. There is a basic set of functions provided by the manufacturer. The user is required to adjust their availability, that is, enable those that are of interest and disable those that are useless. Typically the technique will offer the following options:
- general standby mode, when when the TV is switched to StandBy, all connected devices will do the same;
- translation preset, when switching channels on the TV, the connected receiver will do the same;
- One-touch recording, either recording to a drive connected to the TV or sending a command to an external device;
- touch playback, the TV will become the active control source for the connected player;
- setting up uniform timers for the entire system;
- playback control, sending commands to an external player;
- information system, review and check of all connected devices;
- tuner control, an extremely useful option for owners of digital television receivers;
- the menu of another device allows you to make settings or set operating modes of another piece of equipment;
- routing allows you to specify specific recipients of control signals if there are several of them in the common network;
- Name transfer works like polling of connected equipment.
Many HDMI CECs have a very convenient PassTrough option. It allows you to check the pairing of several devices by sequentially transmitting control commands. This is convenient when equipment from different manufacturers is combined into a single network. Using PassTrough, you can see exactly which modes are supported in overall control.
Setting up Sony Bravia
Advanced settings
Group of parameters Brightness. It includes the following parameters:
– Brightness. The screen brightness can be adjusted from 0 to 50. The higher the brightness, the brighter the image and the higher the energy consumption. – Contrast. Adjusts the ratio from 0 to 100 between the brightest and darkest areas of the image. The lower the contrast, the more inexpressive the picture. - Gamma. Changes the ratio between light and dark midtones in the range from -3 to 3. – HDR tone mapping. Either the maximum brightness preference or the transition preference is selected with the goal of having either the brightest HDR image or the most accurate one. – Black level. Changing the black color from 0 to 100 makes details in dark colors more visible. – Black level adjustment. Analyzes the brightness level of the picture and automatically adjusts the black level to improve contrast. Off / Weak / Medium / Strong. – Add. improved contrast. The image contrast changes automatically depending on the brightness. The degree of dependence Off / Weak / Medium / Strong can be selected. – Auto local blackout. The backlight of individual parts of the screen is adjusted to improve contrast. The degree of dependence of the backlight level on the brightness of the screen area is selected from Off / Weak / Medium / Strong. – X-Tended Dynamic Range. Redistribution of power (due to local dimming) from dark areas of the picture to light ones to increase peak brightness. The degree of redistribution is selectable: Off / Weak / Medium / Strong. – Maximum brightness. A parameter similar to the previous one, but on OLED TVs.
There is also a group of Color parameters. It can be used to change settings related to color rendering:
– Chromaticity. Adjusts the saturation of the image from pale to deep (0 to 100). - Color tone. Changes the hue of white, shifting it towards either red or green (R50 → Neutral → G50). – Living colors. Adjusts color intensity separately in each channel to enhance color brightness. Selectable from Off / Weak / Medium / Strong. - Shade. Shifts the hue of the image towards red or green. Typically used for analog TV.
The Clarity parameter group configures:
– Sharpness. Adjusts image detail and edge definition from 0 to 100. Reference value 50. – Create reality. This option, based on multi-frame image analysis, allows you to recreate lost details by controlling grain and noise. Selectable from Off / Auto / Manual. In the latter case, the grain size is adjustable from 0 to 100. – Reduction of background noise. Reduces spot noise in dark scenes. Selectable from Off / Low / Medium / Strong / Auto. – Digital noise reduction. Reduces noise resulting from digital video compression. Options: Off / Low / Medium / High / Auto. – Mastered in 4K. This option works in Cinema 1 / Cinema 2 picture modes. If enabled, it optimizes the image of Blu Ray discs with 1080/24p content. - Smooth transition. Evens out gradient transitions to reduce banding in monochromatic areas of the image (for example, a sky with varying shades across the screen). Off / Low / Medium / High.
We recommend using the last three parameters only for low-quality video. In other cases, this leads to a loss of detail.
Movement Group. Here the display of moving objects is optimized:
– Motionflow. Change frame rate to improve smoothness. Selectable from Off / Smooth / Standard / Clear / True Cinema / Custom. In the latter option, you can change the Smoothness (interpolation) and Clarity (black frame insertion) parameters, each from 0 to 5. – “Film” mode. Corrects content shot at 24p. Off / Low / Medium / High.
Video signal group. You can adjust the following parameters:
– HDR mode. Adjusts the image for a high dynamic range signal. Automatically turns on the mode with appropriate content. – HDMI video range. Selects the HDMI input signal range. – Color space. Changing the color reproduction range.
Finally, the Extras tab. color temperature settings (Advanced color settings).
- Basic settings. Here, for each of the three components of the video signal R, G and B, the span (level in light scenes) and offset (level in dark scenes) are adjusted. – Multiple points (20p or 10p). Color correction using special devices. – Customize each color. For each of the primary colors (yellow, green, red, magenta, etc.), you can adjust the hue, saturation, and lightness.
In any option, it is possible to reset the color temperature to factory settings.
Settings for viewing video from the HDMI input in 4K
Go to Settings > Channels and inputs > External inputs > HDMI signal format. Next, select the input to which the device that outputs high-quality content is connected, and set it to Enhanced Format (regular, Dolby Vision, 4K/120p, 8K). For other content, use Standard Format.
Dolby Vision Settings and Netflix Calibration Mode
When the native Netflix app is open, its calibration mode becomes available. Almost all parameters change automatically and it is better not to touch them, changing only the brightness according to preference.
Similarly, when viewing HDR Dolby Vision content in native modes, two additional picture modes become available – DV light and DV dark. Respectively for light rooms and dark ones.
Sony OLED Settings
These are expert settings specific to OLED panels and are associated with minimizing the risk of burn-in. These are Pixel Shift and Panel Update. Pixel shift reduces the possibility of burn-in due to the presence of fine, bright lines on an OLED screen. The panel update performs a full cycle of pixel-by-pixel restoration. It is recommended to carry it out no more than once a year.
Sony Screen Customization
This group of parameters allows you to select an aspect ratio that is adequate for the content and adjust the visible part of the screen:
– Widescreen mode. Adjusting the aspect ratio of the picture on the screen. – 4:3 default This option is specified to automatically select the 4:3 aspect ratio when displaying related video content. – Auto Region display. The visible part of the screen is automatically selected to best match the incoming signal. – Region display. In this case, the visible part is adjusted manually. – Screen position. The screen moves horizontally and vertically. – Vertical size. This option allows you to stretch the image vertically.
Thanks to knowing what each specific parameter controls, we now know how to set up a Sony Bravia TV. The ideal TV picture looks a little different for every user, so there's no way to say for sure which picture settings are optimal.
Additionally, not everyone uses the TV the same way, and settings also vary from one Sony Bravia TV to another. So give it a try and remember that you can always go back to factory settings, no matter how far you go with the changes. The main recommended settings are presented in the table below.
| System | |
| Energy saving | Off |
| Image | |
| Light sensor (Light sensor) | Off |
| Auto picture mode | Off |
| SDR | |
| Picture Mode | Individual |
| Contrast | 90 |
| Gamma | 0 |
| Black level | 50 |
| Max. brightness (X-Tended Dynamic Range) | Strong |
| Adjusting the black level | Off (or to taste) |
| Auto local blackout | Off |
| Contrast improvement | Off (or to taste) |
| Brightness | Depending on viewing conditions |
| Definition | |
| Sharpness | 50 |
| Creating reality | Off (for low resolution content you need to try) |
| Reduce background noise | Off (same as above) |
| Digital Noise Reduction | Off (same as above) |
| Smooth transition | Off (same as above) |
| Movement | |
| Motionflow | Individual |
| Smoothness | 1 (to remove jitter from external 60p sources - 0) |
| Definition | 1 or 2 (black frame insertion at 120 Hz), 3 (insert at 60 Hz) |
| HDR | |
| HDR mode | Auto |
| Picture Mode | Individual |
| Colorful temperature | Expert 1 |
| HDR Tone Mapping | Transition preference (if the image is not bright enough, then: |
| Brightness - maximum | |
| Add. improved contrast - Strong | |
| Max. Brightness (X-Tended Dynamic Range) - Strong | |
| Gamma - maximum | |
| Contrast - maximum | |
| Tone Mapping HDR - Brightness Preference) | |
| HDMI signal format | Extended Format |
| Dolby Vision | |
| Ports HDMI3, HDMI4 (v2.1) | Enhanced Format (Dolby Vision) |
How to set up a Sony TV2021-06-11T00:35:49+03:00 SemenSonyTVsSony TVs, as a rule, show a fairly accurate picture, even when they are used immediately after installation without additional settings. But if you're picky about the picture, there are a few settings you can tweak to tailor the screen image to your liking. The image settings of Sony TVs, in fact, differ very slightly from...SemenSemen EditorUltraHD
Advantages of HDMI arc
Thanks to the ARC port, it is possible to make the process of connecting multimedia devices to each other as simple as possible, because only one HDMI cable is required to broadcast audio and video.
Below you can get acquainted with the main advantages and disadvantages of this technology.
Advantages and disadvantages
Good throughput. Cable length up to 35 m. Supports CEC and AV. link. DVI compatible. There are various adapters on sale that allow you to connect various old equipment to your TV without such a port. ARC uses all the important features of CEC, so you can use your TV remote to control the volume of a device connected to your TV (for example, control the sound of a soundbar). There is no need to reprogram it first.
This technology is compatible with Dolby Digital systems, so it does not support new audio formats used in Blu-ray. To ensure good sound quality, it is advisable to use separate HDMI cables to connect external devices to the TV. Sometimes there are difficulties with setup. The sound quality of played films and audio tracks is often disappointing.
ARC has one more advantage that will please owners of old VHS video equipment. In TV models that support ARC, the analog audio signal is converted, then digitized and sent to external audio equipment.
Connecting with wires
The easiest way to connect a computer and a TV is to connect them to each other using a special cable. In this case, you will not need special settings or programs, since the PC detects external output devices in the same way, be it a computer monitor or a full-fledged TV. The only difference is the cord through which the devices will be connected.
Modern TVs use digital outputs, which in most cases are similar to the connectors on the motherboard of a PC or laptop. The most common option is HDMI. Below is an example of such a connector. Also on the back of the video card or on the motherboard are VGA or DVI ports.
If the second device has only one of the presented ports, then get a converter (adapter). You can purchase an adapter for HDMI to VGA, HDMI to DVI, and so on.
If we are talking about an analog connection method (via a tulip), then you won’t be able to do without an adapter, since the RCA format is not supported by computers. An example of connectors is shown below.
A correctly connected wire to one and the second device will give a positive result: the image will appear on two screens simultaneously. Modern Windows operating systems are able to automatically detect connected devices without installing additional drivers. After this, you need to configure the picture through the operating system settings.
Features of the SIMPLINK function
TVs that use the Simplink feature have unique characteristics. Let's discuss some of them:
Instant replay
By launching an external media device simultaneously with it, the TV is connected without additional commands.
Control with one remote control
Simplink makes it possible to control the TV remote control of pre-synchronized devices using a single device. If the TV uses the Magic function, some basic functions will be limited. These restrictions apply exclusively to Magic remote controls.
Power off
The remote control can control the automatic power supply. To do this, you will need to go to the Simplink HDMI-SEC settings synchronization menu. The configured synchronization will allow you to turn off all devices connected to the TV using the SIMPLINK program with one touch. The same goes for turning off any gadget connected to SIMPLINK - the TV will turn off along with it. However, this feature is not available on all devices.
Turning on the power
If the configured synchronization is set to ON in the SIMPLINK HDMI-SEC settings menu, then when you connect the TV, all other gadgets connected to the SIMPLINK system are automatically activated.
Possible difficulties with sound
If, in addition to the image, you want to broadcast sound, then its parameters must be set separately. To do this you need:
- Right-click on the sound icon on the taskbar and select “Playback Devices”.
- In the list, find the device related to the TV. Right-click on it and select the marked item in the menu.
What is LCN on TV
Each digital television service provider assigns serial four-digit numbers to TV channels in the transmitted signal. Therefore, the default channel order is identical for all subscribers. When searching, televisions and digital TV set-top boxes (DVB, T2) order them in ascending order of these numbers, which are called LCN.
LCN (Logical Channel Number) is translated as the logical channel number. Since the beginning of 2012, Roskomnadzor has been trying to regulate the following of TV channels, but given that in Russia there are about 2000 TV providers and more than 300 channels (including regional ones), this is practically impossible to implement. Let us note that the content providers themselves also claim “convenient” LCN numbers - for example, the TNT television company requires that its programs receive LCN number 11 from all providers, but for the majority this number is already occupied, and reconfiguring the equipment is extremely expensive.
What is CEC
The abbreviation CEC comes from the name Consumer Electronics Control, which means “control of consumer electronics.” This is a control protocol that allows you to manipulate any connected device via an HDMI cable, if this device supports such a standard.
Example: you connect a game console to your TV and configure its settings using the TV remote control. The benefit of such a technical solution is undeniable: there is no need to constantly change remote controls, getting confused about which one is responsible for what - everything can be configured using just one.
Technically, this is implemented through pin 13 in the interface. In any combination, the monitor or TV is considered the main device, and all the others adapt to it.
Join and become part of our Community!
- Community
- :
- Home Cinemas
- :
- Master classes
- :
- Connecting TV to PC
- Subscribe to RSS feed
- Mark as new
- Mark as read
- Bookmark
- Subscribe
- Email a friend
- Page in print format
- Report inappropriate content
Find out how to connect your PC to your BRAVIA TV and discover a whole new world of entertainment options. The guide also teaches you how to adjust your computer screen resolution to make the most of the higher resolution of Sony's HD Ready and Full HD TVs.
Why disable safe mode?
So, your TV, for reasons unknown to you, started working in safe mode. Usually in such cases they look for the cause, but it is not always possible to determine it. In addition, there is a possibility that the TV was switched to debug mode by mistake.
In any case, you get a device that has actually lost the “smart” console, and that’s what you bought the TV for, right? That is, you will no longer be able to use either already installed applications or new ones. Isn't this a good reason to exit debug mode?
But how safe is it for the TV? You can be sure that nothing threatens the physical health of TV. If there is a software failure, and a serious one, if the problem arose due to the incompatibility of one of the applications with the OS version, if the result of the transition is the impact of viruses, then in the future the situation may repeat itself, and then you will need to look for the cause. In the meantime, why not turn off the mode in which the TV cannot be called full-fledged?
Optimal image
Because BRAVIA HD Ready and Full HD TVs have higher screen resolutions than standard TVs, you may need to change the resolution of your computer screen to get the optimal picture.
If you have an HD Ready TV, you need to set the screen resolution to 1280 by 720 pixels.
If you have a Full HD TV, the resolution should be set to 1920 by 1080 pixels.
If your computer does not support your TV's full resolution, set the resolution to the closest resolution available to these values.
HDMI classification and types
The cable structure consists of:
- outer shell;
- braid or screen with copper conductors without insulation for soldering;
- another foil screen;
- shells made of polypropylene;
- shielded twisted pairs for information transmission;
- unshielded twisted pairs for SDA SCL signals;
- other conductive elements for power and control signals.
There are such concepts as protocol and Hdmi cable. A protocol is the rules by which data is transmitted from a source to a receiver. New protocol versions are constantly being released and, since 2002, there are already more than a dozen of them, from 1.0 to 2.1. Now they are released without numbering, so as not to confuse users. What’s good is that all versions are backward compatible, that is, the new ones, although they have more functions, interact perfectly with earlier versions.
To support protocols, there are the following types of cable:
- Standard. Not suitable for very demanding equipment. Supports resolutions of 720p and up to 1080i at 60Hz. With a transfer rate of no higher than 4.9 Gbit/s, color depth 24 bits.
- High Speed. Supports 2160p resolution at 30 Hz, can transmit 3D in Full HD, has a throughput of 8.16 to 10.2 Gbps, and a color depth of 48 bits.
- Premium High Speed. Can transmit data with ultra-HD (4K) resolution, 60 Hz frequency. 3D is also transmitted in ultra-quality. Speed – 18 Gbit/sec.
- Ultra High Speed. Supports resolutions up to 8K. Currently, the maximum data transfer speed is 48 Gbit/s, supporting all technology protocols.
- Standard Automotive Cable – designed for use in vehicles.
The types of connectors can also be different, divided into the following types:
- A. Full-size HDMI, most commonly found in large appliances, is 19-pin and can handle single-link DVI-D.
- V. 29-pin. Compatible with dual-channel DVI-D and practically not used in everyday life.
- C or miniHDMI. Suitable for many portable devices.
- D or microHDMI. It is even smaller in size than the previous type. Also used in portable equipment.
- E or automobile. It has an additional locking connector that prevents separation from vibration, and a shell to protect it from moisture and dust.
There are cables for connecting devices with the following connectors:
- HDMI-HDMI. Optimal connection to TV or home theater from other sources of multimedia content: the best quality of transmitted information.
- HDMI-MicroHDMI and HDMI-MiniHDMI. An excellent solution for transferring data from small devices: tablets, phones, etc. on a large screen with the ability to view in ultra-quality.
- MiniHDMI-MiniHDMI. Capable of transmitting data in 720p, 1080i and 1080. Bandwidth is limited to 10 Gbps.
- HDMI-DVI. Used if one of the devices has an older DVI technology input. Typically used when you need to display an image from a PC or laptop on a TV screen.
When connecting two devices, one of them will work as an input, and the other as an output (out). And you will need to enable the appropriate signal reception mode. We will consider the more detailed connection and configuration of this cable further.
Connecting a regular TV without built-in Wi-Fi
To connect a PC and TV, you will need an external Wi-Fi adapter or Smart TV set-top box. One of these devices is needed if your TV does not have proprietary software and interfaces.
To connect, you can use any Wi-Fi adapter that connects to the device via USB:
There are also external HDMI or USB set-top boxes that allow you to run the Android operating system on the TV screen and connect to third-party devices over the air.
The second option is to connect using a regular Bluetooth adapter. Both the computer and the TV must be equipped with this device. The PC must also have proprietary software from the adapter manufacturer installed.
Problems and solutions
The final setup step is to make sure your TV and soundbar/receiver know how to send or find the audio sent over the Audio Return Channel. If you have everything connected correctly and not working, it's time to dive into the settings. It should be easy enough in the menu, but if not, all user manuals are on the manufacturer's website.
Last thing to check. If everything seems correct but you still don't get sound, or only get sound from some sources, check the audio output settings on your TV or the problematic source. Find the option that allows you to change "bitstream" to "PCM" or vice versa. Switching may solve the problem.
Problems with 5.1 sound
As good as ARC is, there is one big problem: 5.1. Technically, TVs cannot transmit 5.1 audio over HDMI. In other words, if you are watching a movie on a Blu-ray player with 5.1 Dolby Digital or DTS, and it is connected directly to your TV (option 1 above), then the receiver will only be able to receive 2.0 sound.
TVs that can transmit multi-channel audio have a “5.1 passthrough” option. This restriction is not fully respected, so some TVs still transmit 5.1. Other TVs can output 5.1 through optical output, but not ARC.
Connecting a source such as Blu-ray directly to the receiver/soundbar has another benefit: Dolby True HD and DTS Master Audio. These more precise formats cannot be transmitted via ARC. But eARC will help here.
eARC to HDMI 2.1
The latest version of the interface is HDMI 2.1, and it offers many important changes. What's important to us here is eARC or enhanced audio return channel. While compressed Dolby Atmos can be delivered via regular ARC today (via Dolby Digital Plus), eARC offers an enhanced channel for high-quality Dolby TrueHD and DTS-HD Master Audio streams, including uncompressed Atmos.
The new format also has built-in lip sync compensation. This feature was optional in ARC, but is now in the protocol. What is the difference between ARC and eARC on TVs? Here are the main differences between eARC and ARC:
Video
Be sure to watch the connection video if you have difficulty with this procedure.
Read about how to connect a Sony TV to the Internet, laptop or computer, smartphone, headphones. How easy it is to connect a Sony PlayStation.
Modern LCD TVs can partially replace a computer. That is, you can connect additional devices to them, expanding the functionality and making control more convenient. But not all users understand exactly how to connect certain things. For example, some people are completely unclear what needs to be done to provide a Sony TV with the Internet in order for the Smart TV function to somehow work. Questions also arise about how to connect a Sony PlayStation to a TV - by the way, not necessarily a Japanese-made one. Let's tackle this difficult topic together.
The larger and more expensive the TV, the more devices you can connect to it. This rule is true, if not 100%, then at least 80% of cases. On the back wall of the 80-inch monster, you will most likely find as many as 4 HDMI connectors and only a slightly smaller number of USB ports. And that is not all! In the modern world, it is not necessary to use wires to connect any devices. Some TVs are equipped with Bluetooth and Wi-Fi modules, which are needed to interact with, for example, headphones and a router, respectively.
In this article we will talk about connecting a variety of devices. But do not forget that the above does not apply to all TVs. For example, simple LCD TVs sold at low prices may not have Smart TV support. This means that such a device, if it supports an Internet connection, is only for the purpose of regular firmware updates. Therefore, after reading the article, do not forget to look at the operating instructions - it will definitely be written there what types of connections can be implemented.
What is HDMI on TV
Hdmi is a technology that allows you to transmit multi-channel audio as well as video data in HD format at high speed. Many well-known companies are working on its development: Sony, Phillips, Hitachi, Thomson, etc. In addition, the interface is equipped with copy protection for transmitted data and, in addition to sound and image, can transmit an Ethernet signal, as well as control commands.
An HDMI cable consists of 19 wires. The digital signal is transmitted without compression over this cable at a speed of 4.9 Gbps. In addition, there is no need to transmit a separate audio signal, as was the case with analog data transmission. Thus, you can connect any equipment if you have the appropriate connectors for high-speed digital transmission of audio and video.
Why might such a connector be needed on a TV? Modern TVs are no longer just a device for watching TV shows and movies. Smart functions have significantly expanded their capabilities. Having a large number of outputs, including an HDMI port, has become a necessity. Let's figure out why you need hdmi on a TV.
The name hdmi means that this interface is a high-definition multimedia interface. You can connect a computer, laptop and many other devices to the TV and use it instead of a monitor. After all, a TV screen is larger than a PC monitor. Therefore, watching a movie or playing becomes much more convenient.
Connect Sony Bravia to the Internet
So, first of all, we will talk about the global web. If you bought a device with a Smart TV in a store, then you immediately want to understand how to connect the Internet to a Sony TV. There's really nothing complicated about it. It seems that you could easily cope without our tips. However, a little instruction will not hurt - it will definitely prevent you from doing anything wrong.
The first step is to decide exactly how the data will be transferred. If you have a router in your apartment, the easiest way is to connect to your home Wi-Fi network. But you should remember that this is not the most stable type of connection, which may affect watching videos in very high resolution.
A built-in module is used to connect to Wi-Fi. If your TV does not have one, you may need to purchase an external adapter. A complete lack of Wi-Fi support on TVs with Smart TVs, as a rule, is not found.
To set up the connection, press the “Home” button on the remote control.
- Then you should follow the path “Network->Network Settings”.
- From the menu that appears, select “Wireless Setup”.
- After that, you can click on the “Using WPS” button.
- A similar item is selected in the “PIN code entry method” field.
- Next, all you have to do is press the WPS button on the back of the router.
Do not miss:
- How to connect a Samsung TV to the Internet via wifi, smartphone,…
- How to connect a laptop to a TV via HDMI, VGA or Wi-Fi cable
- All about how to connect an LG TV to a computer, the Internet via...
Of course, your router may not have the above button. In this case, in the wireless network setup menu, you must click on the “Scan” button. The TV will immediately display all Wi-Fi networks that you can connect to. Select your network name and follow the TV's instructions. In particular, you will definitely be asked to enter a password and click the “OK” button.
Wired connection
As for the wired setup, it takes about the same amount of time. But first, you need to get a network cable, the ends of which are inserted into the router and the LAN connector of the TV. Connecting an Internet cable directly is not recommended - the TV may not recognize the type of connection used by the operator.
- When the wire is inserted into both devices, you need to press the “Home” button located on the remote control.
- After this, you need to follow the path “Network->Network Settings”.
- In the window that opens, select “Wired setup”, after which you just have to click the “Auto” button so that the TV independently selects the IP address and proxy server. Of course, these parameters can be entered manually if the situation requires it.
That's all, now you know how to connect a Sony TV to Wi-Fi or a network cable. As promised, there is nothing complicated about this. From now on, you can safely use Smart TV, downloading all kinds of applications and viewing content online. It is possible that the first thing the TV will ask you to do is update the operating system - be sure to do it!
How to connect a smartphone or tablet to a Sony TV
Many people don't like the standard remote control that comes with their TV. The fact is that using it to navigate between different applications is not as convenient as we would like. A way out of this situation may be to purchase a special remote control that works like a pointer or has a trackball. But such an accessory is very expensive, so many consumers are thinking about how to connect their phone to a Sony TV. This is very easy to do, as long as the device is not running the oldest version of the Android or iOS operating system.
First you need to make sure that both devices are turned on. Also, both the smartphone (or tablet) and the TV must be on the same Wi-Fi network. If your mobile device is currently working with the Internet via 3G or LTE, then forcefully turn on the Wi-Fi module by clicking on the corresponding icon in the notification panel.
Download and install the Video & TV SideView: Remote application. It was once a very advanced program that provided almost all the functions that were built into Smart TV. Since 2017, the application has been significantly simplified. However, it still works well as a remote control, providing more convenient navigation.
In the menu of this application you need to click on the “Connect to TV” button. The smartphone will scan the Wi-Fi network for the presence of Japanese-made TVs. When the search is complete, click on the name of your TV and follow the instructions of the application.
How to connect iPhone to TV
If you are thinking about how to connect an iPhone to a Sony TV, then the process is no different. You just need to download a separate version of the application contained in the AppStore.
Sometimes connecting a smartphone is required not to control the TV, but to provide it with Internet traffic. Well, if you want to distribute the Internet from your mobile device, then you need to use the Wi-Fi Direct function. To do this, you need to pick up your smartphone and go to “Settings”. Further actions depend on the specific firmware implementation. Most often, clicking on the “Wi-Fi” button is enough, but somewhere you will need to click on the “More” button, located in the “Wireless Connections” tab.
Be that as it may, somewhere you will definitely find a menu in which the “Wi-Fi Direct” button is located. You should click it, and then agree to the distribution of the Internet for other devices. On the TV, all you have to do is find your network in the wireless connection settings. In the same way, you can distribute the Internet from the TV itself, but this is supported by very few models.
Connecting a laptop or desktop computer to Sony
Any Sony BRAVIA TV can be used as a monitor. Why not? After all, this is also a device with a large LCD display and a number of video inputs on the rear wall. So, you don’t have to think long about how to connect your computer to a Sony TV?
Indeed, transferring pictures from a laptop or desktop computer to a Sony TV does not cause any problems. Especially if the laptop is equipped with an HDMI connector, since the connection using this particular socket is simplified to the limit. You just need to get an HDMI cable, the ends of which are inserted into the corresponding connectors on your laptop and TV. Then, by pressing the “Input” button, select the video input corresponding to the socket to which the cord is currently connected. That's all, you can enjoy the picture!
Of course, if you want to make such a connection on a regular basis, then it won’t hurt to turn off the display of the image on the laptop itself - the picture on it can only be distracting.
- To do this, go to the “Control Panel” located in the “Start” menu.
- Here you need to visit the “Equipment and Sound” section.
- Next, in one of the subsections you will find the “Turn off screen” button - after clicking it, you need to select the “Projector only” item.
The laptop or desktop PC screen will immediately go blank. Everything will return to its previous state immediately after you remove the HDMI cable from the socket of your laptop or TV.
You can also connect your computer to your TV using other connectors - these can be VGA or DVI. But the first option will lead to very low image quality, and you will have to look for an adapter (the VGA connector on Sony TVs is extremely rare). To connect via the DVI connector of a computer, you may also need an adapter - on the TV you will use the HDMI input in any case.
Now you should understand how to connect a laptop to a Sony TV. There is absolutely nothing complicated about this. Let us add that using a laptop is most relevant in cases where the TV does not have the Smart TV function.
Connecting headphones
Sometimes consumers also think about how to connect headphones to a Sony TV. It would seem that everything is very simple - just insert their plug into a 3.5 mm socket. But sometimes a person has additional questions. For example, you may want to output audio to both headphones and TV speakers at the same time. How to do it? And to do this, you need to press the “Home” button on the remote control and go to the “Settings” or “Settings” section. Here, follow the path “Sound->Connecting headphones with speakers.”
In this menu you will find a switch. Select “Off”, this will tell the TV not to respond to the connection of headphones by turning off the speakers. This function will be useful for a family that has a hard of hearing person.
Is it possible to connect wireless headphones to a Sony TV?
Yes and no. If you have a 2013 or 2014 model, then using the Bluetooth protocol you can only connect a special remote control and a wireless mouse. For headphones you will need a Sony TMR-BT10 Bluetooth transmitter, which is very difficult to find on sale. The list of TVs supported by this external module should be found on the manufacturer’s website.
On newer Sony TVs, support for Bluetooth headphones is found, but not too often. Be that as it may, the exact user actions will depend on the implementation of the specific model. Look through the instruction manual - everything will be described there in every detail. Roughly speaking, you need to get into the settings window, where you should look for Bluetooth settings. The TV needs to be ordered to scan the surrounding space for the presence of new devices, among which headphones will be found, if they are supported.
Please note that there are special wireless headphones for TV that use their own radio frequency instead of Bluetooth. They can be connected to any TV, even if they do not have Smart TV. These headphones come with a special base, the cord of which is connected to a 3.5 mm audio jack. And this base transmits the signal to the headphones, which you only need to turn on before listening. Also, don’t forget to power the docking station by plugging the AC adapter into a power outlet.
Connecting a home theater (speakers)
Do not miss:
- How to connect a Samsung TV to the Internet via wifi, smartphone,…
- How to connect a laptop to a TV via HDMI, VGA or Wi-Fi cable
- All about how to connect an LG TV to a computer, the Internet via...
It is a rare TV that has a large number of speakers and very loud sound. If you like to watch movies, then it is better to output the sound to an external audio system. There are many ways that can be used for this, it all depends on the specific TV model and the devices present in the home theater. For example, if you have a receiver, you can use an HDMI connection. But let's focus on typical cases when you need to output sound directly to speakers or a soundbar. This is done using the following connectors:
- Optical audio output is the best option, outputting multi-channel audio. It will be broadcast via fiber optic cable protected from electromagnetic interference. Unfortunately, budget speakers do not have an optical connector.
- Coaxial output (S/PDIF) is another good way to output digital audio in multi-channel format. The only difference is that the cable for connecting to such a socket can be used differently - its cheap variations do not have serious protection against electromagnetic interference.
- RCA or SCART - in both cases, sound is output analogue and only in stereo mode (a pair of speakers can only be supplemented with a subwoofer). You will need an RCA cable anyway. When using a SCART connector, you will also need an adapter.
- 3.5mm audio jack - usually used to connect headphones. However, in stores selling computer components, you can easily find a 3.5mm-RCA cable, thanks to which sound can be output to speakers. Of course, you will only get stereo sound; you will have to forget about 5.1, 7.1 or 9.2 formats.
When choosing an audio system, pay attention to the connectors on the back of the TV. If you can only output sound through “tulips,” then you can buy the cheapest speakers. If there is an optical or at least coaxial output, then you can fork out for a higher-quality audio system.
Connecting a TV set-top box
Some users also have questions about how to connect the set-top box to a Sony TV. We are talking about a device designed to display digital TV - terrestrial or cable. We have already talked about connecting such devices in a separate article. Here we note that most of the time will be spent setting up the TV set-top box. The connection itself takes just a few seconds - an HDMI cable is usually used for this. If you have a Sony CRT TV at your disposal, then traditional “tulips” will come to the rescue.
Connecting Sony PlayStation
How to connect Sony PlayStation to TV? Even a child can cope with this task. Moreover, the connection looks the same on any TV, regardless of the name of their manufacturer. You just need to connect the console to the TV panel using an HDMI cable. Next, you just need to go to the corresponding video input using the “Input” button located on the remote control.
It is possible that some adjustments to the image display will be required. But they are already made using the game console itself. In particular, the PlayStation 4 Pro can display images in 4K resolution, and any PS4 is capable of images with the HDR effect - as long as the TV itself supports all these capabilities.