Checking for digital TV support on DEXP
Before proceeding directly to the setup, let’s make sure that your equipment supports digital terrestrial TV reception. This function is only available on models that support the DVB-T2 broadcast standard.
To check for DTV support, enter your TV model number in the Search box in the table below. If it is found, feel free to start setting it up - your receiver can pick up “digital” without additional attachments.
| Model | Diagonal | DVB-T2 support |
| 22A7100 | 22 | + |
| 22A7200 | 22 | + |
| 24A7100 | 24 | + |
| 28A3000 | 28 | + |
| 32A3000 | 32 | + |
| 32A3100 | 32 | + |
| 32A3200 | 32 | + |
| 32A7000 | 32 | + |
| 40A7000 | 40 | + |
| 40A7100 | 40 | + |
| 42A7000 | 42 | + |
| 42A8000 | 42 | + |
| 42A8100 | 42 | + |
| 42A8200 | 42 | + |
| 42A9000 | 42 | + |
| 46A7000 | 46 | + |
| 49A8200 | 49 | + |
| 50A7000 | 50 | + |
| 50A7100 | 50 | + |
| 50A8000 | 50 | + |
| 55A8000 | 55 | + |
| F22B7000C | 22 | + |
| F22B7000E/B | 22 | + |
| F22B7000E/W | 22 | + |
| F22B7100EE | 22 | + |
| F22B7200C | 22 | + |
| F22D7100E | 21.5 | + |
| F24B7000C | 24 | + |
| F24B7000E | 24 | + |
| F24B7100EE | 24 | + |
| F24B7100K | 24 | + |
| F24B7200C | 24 | + |
| F24B7200VE | 24 | + |
| F24D7100E | 23.6 | + |
| F24D7200C | 23.6 | + |
| F32C7000B | 32 | + |
| F32C7100B | 32 | + |
| F32C7100B/W | 32 | + |
| F32D7000B | 32 | + |
| F32D7000C | 32 | + |
| F32D7000C/W | 32 | + |
| F39B7000VD | 39 | + |
| F39B7100E | 39 | + |
| F40B7000C | 40 | + |
| F40B7000E | 40 | + |
| F40B7000H | 40 | + |
| F40B7000K | 40 | + |
| F40B7100K | 40 | + |
| F40B7200C | 40 | + |
| F40B8300K | 40 | + |
| F40C7100C | 40 | + |
| F40C7100K | 40 | + |
| F40C8000H | 40 | + |
| F40D7100C | 39.6 | + |
| F40D7200C | 40 | + |
| F40D7200C/W | 40 | + |
| F42B7000ED | 42 | + |
| F42B7000M | 42 | + |
| F42B7000T | 42 | + |
| F42B8000H | 42 | + |
| F42B8100K | 42 | + |
| F42C7000E | 42 | + |
| F43B7200С | 43 | + |
| F43B7200S | 43 | + |
| F43B8000H | 43 | + |
| F43B8000K | 43 | + |
| F43C7000C | 43 | + |
| F43C7100K | 43 | + |
| F43C8000H | 43 | + |
| F43D7000K | 43 | + |
| F43D8000K | 42.5 | + |
| F43D8100H | 43 | + |
| F46B7000MD | 46 | + |
| F48B7000M | 48 | + |
| F48B7000V | 48 | + |
| F48C7200K | 48 | + |
| F48D7000K | 48 | + |
| F48D8000K | 47.6 | + |
| F49B7000T | 49 | + |
| F49B7200C | 49 | + |
| F49B8000K | 49 | + |
| F49B8100K | 49 | + |
| F49B8200K | 49 | + |
| F49C7000C | 49 | + |
| F49C8000H | 49 | + |
| F49D8100H | 48.5 | + |
| F50B8000H | 50 | + |
| F55B7000T | 55 | + |
| F55B7200C | 55 | + |
| F55B8000H | 55 | + |
| F55B8000K | 55 | + |
| F55B8100K | 55 | + |
| F55B8200K | 55 | + |
| F55C7000C | 55 | + |
| F55C8000H | 55 | + |
| F55D7000E | 54.6 | + |
| F55D7000K | 54.6 | + |
| F55D8000K | 54.6 | + |
| h29B7000С | 19 | + |
| h29B7000E | 19 | + |
| h29D7100E | 19 | + |
| H20B7200C | 20 | + |
| H20C7200C | 20 | + |
| H20C7200C/W | 20 | + |
| H20D7000E | 19.5 | + |
| H24B3000EE | 24 | + |
| H24B7000E | 24 | + |
| H24B7100 | 24 | + |
| H24C3000E | 24 | + |
| H24C7200C | 24 | + |
| H24D7000E | 23.6 | + |
| H28B7100C | 28 | + |
| H28B7100E | 28 | + |
| H28C7100C | 28 | + |
| H28D7200K | 28 | + |
| H28D7300K | 28 | + |
| H32С8000H | 32 | + |
| H32B3200CD | 32 | + |
| H32B3400ED/A | 32 | + |
| H32B7000C | 32 | + |
| H32B7100K | 32 | + |
| H32B7200C | 32 | + |
| H32B7200T | 32 | + |
| H32B7300C | 32 | + |
| H32B7400C | 32 | + |
| H32B8200K | 32 | + |
| H32C7100C | 32 | + |
| H32C7200K | 32 | + |
| H32C7300K | 32 | + |
| H32D7000E | 32 | + |
| H32D7000M | 31.5 | + |
| H32D7000Q | 31.5 | + |
| H32D7100C | 32 | + |
| H32D7100K/W | 32 | + |
| H32D8000Q | 31.5 | + |
| H32D8100H | 32 | + |
| H39D7000E | 39 | + |
| H39D7000Q | 38.5 | + |
| H39D7100E | 39 | + |
| H39D8000Q | 39 | + |
| U40B9000H | 40 | + |
| U42B9000K | 42 | + |
| U43D9100H | 42.5 | + |
| U43D9100K | 42.5 | + |
| U49B9000K | 49 | + |
| U49D9000K | 48.5 | + |
| U50B9000H | 50 | + |
| U55B9000H | 55 | + |
| U55B9000K | 55 | + |
| U55B9100K | 55 | + |
| U55D7100E | 54.6 | + |
| U55D9000K | 54.6 | + |
| U58B9900H | 58 | + |
| U65D9000K | 64.5 | + |
If your TV does not support digital TV
If your model is not found in the table, then the TV does not have a built-in DVB-T2 tuner. There are two ways out of this situation:
- Buying a new TV. In this case, it is necessary that the device works with the DVB-T2 standard. Prices for new models start from 8,000 rubles.
- Buying a digital set-top box. It allows any device to broadcast free over-the-air television. At the same time, the price of the issue is from 650 rubles. Check out our rating of digital set-top boxes. After purchase, the receiver needs to be connected and configured.
Automatic channel search
Automatic setup of digital TV on DEXP TVs is done as follows:
- Connect the antenna to the receiver input. It is located on the back cover. If the device does not support digital TV, you must additionally connect a set-top box via the RCA port.
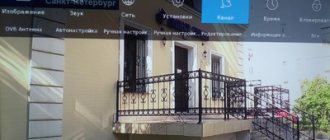
- Press the "Source" button on the remote control. A table with a list of operating modes will appear on the screen. In the “Country” item, select Norway or Finland (Russia often does not give the desired result, this is a disease of many DEXP models). Use the “Up” and “Down” buttons to select “DTV” (digital television). Click "Ok" or "Enter". Some DEXP TV models keep this window active for several seconds after all actions in it are completed.
- Press the "" button on the remote control. Use the “Up” and “Down” keys to select the “Channels” section and click on the “Auto Search” function. It allows you to find and connect all 20 digital channels.
- The automatic search process takes from 5 to 10 minutes. At this time, the TV will scan all available frequency ranges. At the end, the number of TV channels and radio stations found will be displayed on the screen.
Reviews and answers to questions
Channels are not tuning
2.1.2019 DNS DNS32D619 Engels, Saratov region. Two TVs are connected to the outdoor antenna, the signal is strong (direct line of sight to the transmitting device). One TV catches all 20 digital channels, but DNS only 18 (no Russia -1 and Russia 24). I tried auto-tuning many times, the result was the same.
5.30.2019 DNS E16A90 Chelyabinsk The buttons were blocked, they were unlocked and the channels do not work; auto tuning does not find more than one channel.
6.6.2019 DNS K32D619 Omsk I can’t set up 2 programs on DTV, this is channel 2 Russia, channel 1 and channel 7 Russia 24, the rest of the channels show everything perfectly. I set the automatic search to configure only 18 channels in DTV, Russia 1 used to be shown by analogy, now it’s turned off
24/12/2020 DNS M32DM8 Togliatti How to set up a TV when connecting to cable TV for the first time
The described problems arise in the absence, or significant weakening, of the level of the incoming TV signal from the over-the-air antenna (cable network)
Doesn't respond to the power button
23/10/2019 DNS M24AM2 Samara The indicator on the TV is on, red. Doesn't respond to the power button on either the TV or the remote control.
Password reset
13/12/2019 DNS V32D2500 N. Tagil’s son set a 4-digit password while we were at work and forgot it. Whatever was introduced. Now I can’t set up channels and everything else. Always requires a password. Help me please.
How to adjust the image
10/3/2019 DNS С28DC2000 Vyksa How to adjust the color on TV, the children turned it down all the way
How to unblock
06/08/2020 Dns E19a00 Yakutsk There is a child lock, but the path is broken. Is it possible to unlock a TV without a remote control?
Unlocking without contacting a service center is only possible using the remote control.
Source
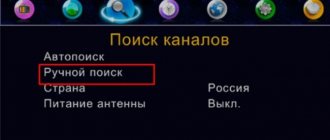
Manual setting
In some cases, automatic tuning of DEXP TVs does not give the desired result. The device may not find a single channel or connect only a small part of them. In such a situation, perform a manual search. The procedure depends on the type of television being received; we will consider all cases separately.
On-air channels
To catch them manually:
- On the TV remote control, press the "" button.
- Enter the section called “Channels”, select “Manual search” in it.
- Set the parameters - frequency and TVC number for multiplexes 1 and 2. This data is unique for each region and can be found on the CETV interactive map. To set the specified parameters, use the “Right” and “Left” buttons.
- Press the “Start” button on the remote control. All available channels will be found within 3-5 minutes.
Cable channels
Manual search for cable programs occurs according to the following algorithm:
- Connect your provider cable to your TV.
- Using the "" button on the remote control, open the settings window. In it, go to the “Channels” tab.
- After selecting “Manual search”, pay attention to the “Antenna” item. In it you need to select the “Cable” value.
- Start setting your search parameters. They can be obtained directly from the provider (look in the contract or call the hotline). Once the data has been entered, click on the “Start” button.
Satellite channels
When manually setting up satellite digital channels on DEXP TVs, you need to perform a little more manipulation than when searching for terrestrial and cable channels. Proceed according to the following algorithm:
- Connect the satellite dish.
- Go to the settings window through the “” button on the remote control. Going to the “Channels” tab, select the “Manual Search” function. Additionally, do not forget to change the signal reception to “Satellite”.
- Set up signal reception. This can be done by entering the parameters received from the provider. This applies to LNB power supply, DiSeqC mode, upper gen. LNB and lower gen. LNB.
- Select manual setting. To do this, use the standard “Up” and “Down” buttons to specify frequency information.
- Start the search process. This will take 7-10 minutes, since the number of channels is greater than on terrestrial TV.
General settings for TV and receiver
By nature, all present stages of setting up analog and digital TV
can be divided into three groups:
- Technical. Setting parameters for high-quality digital signal reception - processing speed and search frequency range.
- Search. The basic process of finding channels.
- Interface. Selecting a language, setting a password, sorting TV channels, etc.
Technical settings are complicated by the fact that depending on the frequency range, the choice occurs differently. For some models, it is installed automatically when you select the type of receiver (satellite, cable or antenna). Other receivers only support the ability to manually adjust the frequency value. It can be obtained from the receiver's operating manual.
Channel search is always a manual and automatic function. In the latter case, the user is prompted to find and save all channels at once. It is inconvenient if there are working channels from another receiver, because Autosearch removes them completely. Of course, it can be turned on for all types of broadcasting, but the channels of the previous TV will no longer be in their places.
The latest TV models support user profiles, in one of which you can save analogue TV channels, and in the other you can find digital programs.
The interface is user settings. They do not affect the search for channels and are needed for the convenience of using television, but the user constantly encounters them when connecting.
In most cases, you have to configure the following parameters:
- Region. Selecting a country to search for channels. On some TVs and set-top boxes, the “Russia” option may not be available and “Europe” is selected. This is related to exports. If the manufacturer's main supplies are focused on the American or Asian continent, the equipment will be poorly integrated for use in the European part.
- Sorting channels. A very useful function when connecting cable TV. Initially, it finds all TV channels, incl. not available according to the tariff. Considering the impossibility of activation without a set-top box, they are useless and can be removed by pressing a couple of buttons on the remote control.
- Password (PIN code). It is required to access system options and set restrictions on viewing individual channels. Serves as a means of protection against unauthorized use of television or unintentional modification of functions by children.
Some models ask for the interface language before basic settings. All set-top boxes and TVs support Russian. If it is not requested and English is installed, you can change it by going to the “Language” menu and selecting “Russian”.
For owners of modern TVs that have a built-in DVB-T2 tuner. It performs the same functions as the receiver - it decodes the signal and provides the viewer with a finished image in high resolution. Searching for digital channels on them is done using the same method as using a set-top box. The only difference is in the software functions and features of the menu of the TV itself. It is different for each model, so digital TV settings for each manufacturer will be discussed separately below.
Deleting and sorting channels
After all TV channels have been found, some of them can be deleted or sorted (assign a number on the remote control):
- Use the “Up” and “Down” buttons to select the desired program from the list of previously found ones.
- To delete a channel, press the red button on the remote control. After this, its broadcast frequency will no longer be monitored by the TV.
- To rename (in ATV mode), use the green button. After clicking it, you can change the name of the element selected from the list.
- To move the channel you will need the yellow button on the remote control. The selected item from the list becomes active. Using the “Up” and “Down” buttons you can move it to the desired position.
Setting up Samsung TVs
To start searching for channels with a connected digital antenna, you need to switch the TV to the desired operating mode - HDMI, USB and AUX. In this case, the first item is selected. The next task is to select the signal type - DVB-T2. A successful selection will be indicated on the TV screen by displaying the name of the channel that is activated. Next, an automatic search for the receiver and language will be performed.
If an antenna is not connected, a pop-up window will appear with several options:
- satellite TV;
- cable TV;
- terrestrial broadcasting.
The last item is selected, after which you need to return to the main menu and select the “Channel” item.
From this point on, semi-automatic setup on the TV follows, which is performed in the following order:
- PIN code. It must be entered for further work, as well as for setting restrictions (for example, children's mode) in the future. It includes four numbers that can be found in the owner's manual. If absent, enter the default password - 0000.
- Region. Depending on the specific model, you need to select the “Russia” or “Eastern Europe” option.
Afterwards, tabs will open asking you to save your selection for digital television, the settings of which can later be applied to analogue TV programs.
If you are using cable TV
Once your home is connected to digital television, you can watch it without an antenna for a small monthly fee.
To search for digital channels, you need to select “Cable TV” and select the following parameters:
- Frequency. For different TV models, you can select an interval or start and end frequency. Set the minimum and maximum values to 346 and 410 MHz, respectively.
- Transmission speed. In the list of options that opens, check 6956 kS/s.
- Modulation. 256 OAM, QAM or quadrature modulation (each TV is different).
Upon completion, all TV channels will be presented, incl. blocked, which are not available on the connected tariff. To delete them, you need to press the “C” button on the remote control and select the appropriate action. In the same menu, after clearing the list of paid programs, you can sort. Samsung Smart-TVs with IPTV digital TV format support several user profiles. For convenience, one of them can contain only analogue channels, another - digital, the third - children's, etc.
Possible problems and their solutions
The main problems when setting up digital TV on DEXP TVs are:
- Slowing down the picture.
Most often this problem occurs in stormy weather. The picture begins to slow down, the image breaks up into small fragments. In the worst case, it disappears completely. This problem occurs due to a weak signal. If channels are received through an antenna, you must first check the correctness of its mounting, direction and all elements installed on the way to the TV. If there are no problems with this, the trouble that has arisen can be corrected only by installing a signal amplifier. Read more about solving the problem with TV braking. - Poor signal reception.
In this case, the antenna may not be suitable for DVB-T2 reception. If this is the case, it must be replaced with a new one. Also, the reason for poor reception may be that the distance to the repeater is too great. In order to get rid of this problem, it is enough to purchase an antenna amplifier. - Not all channels are received.
The main reason for this problem is insufficient antenna gain. In addition, it may not be directed exactly at the repeater. In the first case, you will need to install an amplifier, in the second, you will need to adjust the direction. In addition, it is possible that the settings have been reset. If this happens, you need to perform the setup again manually. Read more about solving the problem with the loss of some channels.
Now you know exactly how to watch digital programs on DEXP TVs. If you have any questions, ask them in the comments, we will try to answer within 1 hour.
Source
Settings for Philips and Sony TVs
You can set up cable and digital TV on both TVs using the general guide, which will be discussed together. At the first stages, everything is according to the standard - language, region and PIN code. The frequency is set manually only when connecting a satellite dish; in other cases it is determined automatically based on the characteristics of the connected receiver.
Next will be the choice of provider. All major Russian operators (Rostelecom and MTS) are present, but the little-known regional provider will be conspicuously absent. In order not to make a mistake, it is better to select the “Other” item. This must be done in order to connect digital television and not return to the settings after changing providers.
The latest versions of Philips with Smart TV function have “Home” and “Shop” operating modes. The first one is selected, because only it opens all the functionality. The second is used by sellers so that they can let the buyer use the TV before purchasing.
Setting up channels on Dexp TV
The most common questions about DEXP TVs concern channel settings. Despite the fact that the manufacturer tries to simplify this process as much as possible, users often misunderstand the menus and instructions. Setting up digital channels on TVs of this brand has some nuances.
- 1. Checking digital television support on DEXP TV
- 2. What if the TV does not support digital TV?
- 3. Automatic channel search
- 4. Manual setting
- 4.1 On-air channels
- 4.2 Cable channels
- 4.3 Satellite channels
- 5. Setting up channels on DEXP TV without a set-top box
- 6. Removing and sorting TV channels
- 7. Possible errors during setup and their correction
What is digital television
Before you start looking for new programs, it would be nice to know what digital TV is and how it differs from its predecessor, that is, analog TV. It should be mentioned that viewing new programs is not initially available on all models. If you are the owner of an old TV model that does not support the new ones, you can watch them too. Then you will need to purchase a special set-top box, the cost of which starts from a thousand rubles.
For more information about setting up on an old TV, click on the link to read, digital channels on an old TV.
The operating principle of digital television is based on the fact that image and sound are transmitted to the receiving device using digital encoding using special protocols. Using this technology, transmission losses are minimal, as a result of which the picture remains equally clear under any conditions, unlike analog TV.
When using it, the quality of the signal can vary greatly depending on many factors, such as: distance from the television tower, weather conditions, the direction of the device for emitting and receiving radio waves, that is, the antenna, its power, and so on. When using a new TV, you don’t have to think about this: if you were able to catch a signal, the picture will remain equally clear throughout the entire viewing time.
In other words, when watching a new type of TV, the image will either show well or not work at all. However, if the signal is too poor, the image may sometimes disappear or become slow. To solve this problem, the receiving device must be directed directly towards the tower and raised higher, for example, by installing it on the roof.
Checking digital television support on DEXP TV
Before you begin the process of setting up digital TV channels, make sure that the TV receives digital terrestrial television in principle. The fact is that this opportunity is provided only for models that comply with the European broadcasting standard DTV-T2.
DTV-T2 implements broadcasting of digital terrestrial TV on the territory of the Russian Federation.
To make sure your TV supports this standard, refer to the instructions that came with your TV. Typically, such information is indicated at the very beginning, since the presence of a digital broadcast reception function is one of the main parameters regarding the functionality of any television.
What if the TV does not support digital TV?
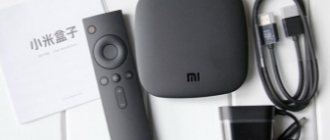
If your TV model still does not have its own internal factory tuner, but you are not ready to purchase a new TV, buy a special set-top box for broadcasting television for free.
It is better if you purchase a set-top box specifically for the DEXP TV. Prices vary from approximately 1000 to 1500 rubles.
The manufacturer offers quite a few options, from those that have the standard you need, for example:
After purchase, the set-top box will need to be connected and configured. The set-top box always comes with detailed instructions and step-by-step diagrams, with the help of which its purpose can be realized without unnecessary problems.
Automatic channel search
On DEXP TVs, auto search is performed as follows:
- Connect an antenna to the receiver input. The receiver is located on the rear panel, right on the cover. Does the device have no function at all to support the reception of digital television channels? Then you will have to additionally connect the set-top box to the RCA port.
- Find the "Source" button and click on it. You will see a table with a list of modes supported by the TV. Select "DTV". This is digital television. Next, click “OK” or “Enter”.
- Find the "Country" section and select either Norway or Finland, since choosing Russia on DEXP TV sometimes does not lead to the desired effect.
- Take the remote control and press the “” button on it. Also, by pressing “Up and Down”, go to the “Channels” section, then “Auto Search”. There are 20 free digital channels in your arsenal, you can find and use each one.
- Auto search will last no more than 15 minutes. Upon completion, a list of channels and radio stations will appear.
DEXP DZL-453 codes for device programming
Codes for TVs
| AIWA | 009 057 058 |
| AOLINPIKE | 033 053 056 079 |
| ANHUA | 017 001 032 047 |
| AOLINPU | 104 |
| AVEST TRB-2558 | 073 |
| AVEST 54ТЦ-04 | 013 |
| BENQ | 294 |
| BAIHUA | 016 025 033 053 056 079 |
| BAIHEHUA | 023 024 040 043 |
| BAILE | 016 025 012 019 026 027 028 029 030 031 042 |
| BAOSHENG | 011 025 016 |
| BaoHuaShi | 033 053 056 07 |
| BEIJING | 008 012 011 019 016 023 024 025 027 028 029 030 031 033 040 043 050 053 056 026 079 091 039 042 051 021 122 126 233 265 298 351 |
| CAILING | 102 |
| CAIHONG | 011 025 016 |
| CAIXING | 023 024 040 043 073 |
| CHANGCHENG | 011 016 017 023 024 025 033 040 043 053 056 001 012 019 027 026 028 029 030 031 042 079 |
| CHENGDU | 011 025 |
| CHANGFENG | 011 053 056 045 046 024 079 033 |
| CHANGFEI | 011 016 025 042 123 |
| CHANGHAI | 011 025 016 123 |
| CHUNLAN | 142 107 131 |
| CHUNFENG | 016 025 033 053 056 079 124 |
| CHUNSUN | 011 025 01 |
| CONROWA | 000 006 007 008 010 016 025 033 053 055 056 045 046 048 073 099 131 204 258 |
| CHANGHONG | 000 008 009 091 092 093 010 011 014 016 026 028 033 051 052 057 058 067 071 086 087 088 100 159 162 182 183 184 226 288 289 290 291 292 297 300 336 337 338 |
| CHUANGJIA | 073 101 |
| DUONGJIE | 073 097 101 |
| DONGDA | 016 025 |
| DONGHAI | 016 025 |
| DIGITEC | 214 150 147 |
| DONGLIN | 077 |
| DETRON | 212 |
| DAYU | 012 042 031 |
| FEILU | 011 016 025 |
| FEIYUE | 011 016 023 024 025 040 043 |
| FEILANG | 016 025 |
| FEIYAN | 033 053 056 079 |
| FUJITSU | 048 |
| FULI | 047 |
| GOLDSTAR | 009 019 023 024 040 043 098 140 |
| GANXIN | 011 017 023 024 027 040 041 043 |
| GANGTAI | 097 |
| HUAQIANG | 033 053 056 079 236 |
| HISENSE | 000 006 007 008 010 014 015 025 045 046 057 102 103 105 107 115 116 128 129 130 131 138 139 171 172 173 174 185 186 187 188 189 190 191 224 225 233 265 266 269 270 271 273 274 299 304 305 306 307 309 318 319 339 340 341 342 348 |
| Haier | 103 105 112 118 119 175 178 185 186 187 188 201 205 206 218 272 356 |
| HITACHI | 007 015 014 027 000 006 008 010 048 179 228 |
| HITCH FUFIAN | 007 011 015 023 024 028 033 034 040 043 053 056 060 061 065 079 102 |
| HUAFA | 007 016 025 |
| HUANGHE | 011 016 023 024 025 040 043 051 103 125 155 |
| HUANGHAIMEI | 016 025 |
| HUANGSHAN | 011 016 023 024 025 032 033 040 043 053 056 079 |
| HUARI | 007 033 053 056 079 |
| HAIYAN | 011 023 024 033 040 043 053 056 079 |
| HAIHONG | 016 025 026 027 028 029 030 077 103 268 |
| HAILE | 032 047 |
| HUANYU | 011 015 023 024 033 040 043 053 056 009 057 058 079 |
| HONGMEI | 003 011 016 018 023 024 025 033 040 043 056 009 057 058 079 |
| HONGYAN | 011 033 053 056 079 |
| HUANGLONG | 016 025 |
| HUIJIABAN | 101 |
| HUODAKEJI | 032 001 017 047 |
| INTEL | 213 |
| IMPERIAL COWN | 033 053 056 012 019 025 026 027 028 029 030 031 042 079 |
| JIALICAI | 016 025 028 033 053 056 079 124 178 |
| JINGXINGBAN | 104 |
| JINGLIPU | 038 057 |
| JIAN SHENG | 104 |
| JVC | 089 161 |
| JUHUA | 011 023 024 033 040 043 053 056 079 |
| JINGHAI | 009 057 058 099 |
| JINFENG | 001 011 021 022 |
| JINTA | 016 023 024 025 033 040 043 053 056 009 057 058 079 |
| JINQUE | 011 025 016 |
| JINQUE | 032 033 053 056 079 |
| JIAHUA | 017 047 001 032 033 101 149 207 |
| JINXING | 007 008 011 013 024 025 032 033 039 051 057 065 071 073 079 091 097 102 107 138 225 227 |
| KAIGE | 011 016 023 024 025 033 040 043 053 056 079 |
| KUNLUN | OO1 O11 O21 O22 O33 025 012 042 040 039 |
| KUAILE | 016 025 033 053 056 079 |
| KANGLI | 027 012 016 019 025 026 028 030 031 033 073 120 204 271 |
| KANGHONG | 009 058 057 |
| KANGLI | 016 023 024 025 040 043 011 026 027 028 029 042 005 |
| 016 023 024 025 040 043 011 026 027 028 029 042 005 | 016 025 033 053 056 079 121 |
| KONGQUE | 011 016 023 024 025 033 040 041 043 124 |
| KANGHUA | 103 |
| KONKA | 011 017 029 032 034 054 067 069 071 075 076 077 078 079 080 081 107 113 117 157 163 164 165 177 210 235 250 251 252 253 254 255 256 257 301 302 303 321 323 324 345 |
| KANGWEI | 077 101 104 |
| LONGJIANG | 011 033 053 066 079 |
| LIHUA | 011 |
| LG | 024 040 098 043 140 259 260 261 |
| MEILE | 011 023 024 033 040 043 053 056 009 057 058 079 |
| MUDAN | 001 002 011 016 020 021 022 025 032 033 039 040 043 053 056 059 063 065 079 101 107 145 146 149 218 223 |
| MENGMEI | 023 024 040 043 |
| MANTIANXING | 114 |
| MITSUBISH | 011 051 |
| NANSHENG | 011 033 053 056 079 |
| NIKON | 009 057 058 |
| NEC | 006 011 016 004 025 033 053 056 024 079 |
| NEC | 089 140 |
| NANBAO | 016 025 033 053 056 009 057 058 079 |
| OULIN | 101 |
| PANDA | 001 011 016 021 022 023 024 025 026 028 033 040 043 053 056 009 057 058 051 062 073 079 089 091 061 124 125 181 203 204 208 263 264 296 101 |
| PDLYTRON | 151 152 214 |
| PANASONIC (NATIONAL) | 020 001 002 014 015 021 022 059 066 |
| PHILIPS | 013 023 024 039 040 043 141 241 242 |
| QINGDAO | 001 011 021 022 033 053 056 079 |
| RIZHI | 073 097 |
| ROWA | 011 013 016 023 024 025 040 043 096 127 248 267 268 |
| RIHONG | 073 |
| RUBIN | 040 |
| Ruyi | 011 015 023 024 040 043 |
| RISHENG | 097 |
| SHARP | 003 018 016 025 135 136 137 |
| SHENCAI | 007 016 025 033 053 056 079 |
| SHANCHAI | 011 033 053 056 079 |
| SHANGHAI | 009 011 016 017 022 023 024 025 033 040 043 053 056 057 058 079 123 |
| SHAOFENG | 011 015 000 006 007 023 |
| SHENYANG | 011 016 025 046 045 033 |
| SAIGE | 011 025 016 |
| SONGBAI | 016 025 |
| SANYUAN | 003 011 016 018 023 024 625 040 043 |
| SANJIAN | 033 053 056 079 |
| SKYWORTH—RGB | 011 025 033 045 046 060 076 071 072 073 074 079 083 101 107 108 109 143 160 168 169 170 176 180 181 194 195 196 197 198 199 200 232 234 275 276 277 278 280 281 326 327 346 347 357 311 312 325 326 327 346 347 357 |
| SHANSHUI | 008 |
| SUMO | 214 |
| SANKEN | 215 |
| SONY | 041 049 005 094 106 148 237 238 239 240 |
| SAMSUNG | 008 011 016 021 024 025 033 037 039 040 043 050 051 091 113 123 |
| SANYO | 008 000 007 014 015 033 035 053 056 079 105 352 353 354 |
| SANLING | 036 044 |
| SHENGCAI | 057 101 |
| SHUYUAN | 131 204 |
| SONGDIAN | 101 |
| SEYE | 097 |
| SHENGLI | 004 |
| SHERWOOD | 016 025 |
| SHANGGUANGDIAN | 158 166 167 |
| TIANKEBAN | 101 |
| TIANGENGBAN | 101 |
| TAISHAN | 011 016 025 042 038 031 030 029 028 027 |
| TIANE | 003 011 018 |
| TONGGUANG | 033 053 056 079 |
| TOBO | 016 025 033 053 056 077 079 101 103 |
| TOSHIBA | 000 014 016 027 033 053 056 007 008 015 028 030 089 090 091 079 159 285 286 287 355 |
| TCL | 051 053 068 071 073 082 083 084 085 110 111 144 156 199 209 216 243 244 245 246 247 248 249 313 314 315 316 317 320 343 344 349 350 |
| WARUMAIA | 031 012 042 |
| WEIPAI | 016 025 |
| XIAHUA | 011 016 024 027 025 033 053 054 055 056 060 098 080 095 079 073 209 211 217 218 229 230 231 262 295 |
| XIHU | 011 023 024 033 038 040 043 053 079 098 131 204 219 220 221 222 |
| XIANGYU | 016 025 032 |
| XUELIAN | 023 024 040 043 009 057 058 |
| XINAGHAI | 016 025 033 053 056 079 |
| XINGMENBAN | 104 |
| XINSIDA | 123 |
| XIANGYANG | 033 053 056 079 |
| XINGFU | 016 025 |
| XINRISONG | 009 057 058 101 |
| YINGGE | 016 023 024 025 040 043 |
| YUHANG | 016 025 |
| YONGGU | 016 023 024 025 040 043 |
| YONGBAO | 009 057 058 |
| YOULANASI | 011 023 024 040 043 |
| YAJIA | 033 053 056 079 |
| YOUSIDA | 016 025 009 057 058 |
| ZHUHAI | 016 025 042 |
| 888 | 033 053 056 079 |
| OTHER BRAND | 036 044 057 073 077 097 101 102 103 104 106 114 178 293 328~335 |
…..
DEXP DZL-453 codes for DVD
| Brand | Code |
| KENWOOD | 075 204 205 206 |
| KETAI | 030 |
| KM-122 | 350 |
| KONKA | 139 207 |
| KY-1215 | 338 339 |
| LAFAYETTE | 225 |
| LASONIC | 208 209 |
| LEPON | 385 |
| LG | 008 |
| LIMITRON | 241 |
| LONGZHIPAI | 284 |
| MALATA | 002 009 023 024 073 146 147 151 297 313 398 399 400 401 402 403 404 |
| MAJESTIC | 210 265 |
| MARANTZ | 211 212 213 227 |
| MEGA TANS | 214 |
| MTB | 218 219 |
| MITSUBISHI | 215 |
| MITSUI | 216 217 269 |
| MITZU | 179 251 |
| NAKAMICHI | 220 |
| NAPA | 221 227 |
| NINTAUS | 003 035 071 079 080 081 082 090 093 129 130 291 320 322 |
| NORCENT | 222 |
| OKON | 072 |
| ONKYO | 043 223 224 |
| PANASONIC | 014 204 273 274 |
| PAIGAO | 327 |
| PANDA | 038 051 052 053 102 105 |
| PHILCO | 225 226 263 268 272 |
| PHILIPS | 012 143 152 153 154 227 264 |
| PHILIPS KARAOKE | 228 |
| PIONEER | 044 229 355 |
| POWER SOUND | 179 |
| PROSONIC | 252 |
| QISHENG | 005 037 092 098 101 282 305 306 307 308 323 331 365 366 367 368 369 373 375 377 378 379 |
| RCA | 230 231 386 |
| ROYAL | 225 272 |
| SAMSUNG | 004 006 017 049 104 149 202 232 266 |
| SANSUI | 013 046 351 353 |
| SANYO | 233 234 |
| SAST | 011 020 038 059 060 076 140 142 288 389 408 |
| SHARP | 235 236 237 |
| SHENGLI | 349 |
| SHERWOOD | 319 |
| SHINCO | 001 010 108 388 390 |
| SHUMALING | 039 |
| SKYWORTH -RGB | 022 025 032 034 058 096 097 100 119 121 293 301 314 321 346 347 359 360 391 392 |
| SMC | 238 |
| SONASHI | 304 |
| SONICO | 259 |
| SONY | 040 042 177 178 260 354 |
| SOUND TRACK | 257 |
| SOWA | 155 |
| STAR | 118 |
| SUPERSONIC | 225 239 272 |
| SVA | 108 |
| TCL | 000 015 039 054 055 120 315 393 394 |
| TEAC | 240 |
| THOMSON | 083 230 |
| TIANLI | 131 |
| TSINGHUA TONGFANG | 056 057 309 352 |
| TOP TEC | 241 |
| TOSHIBA | 041 069 242 243 |
| TP | 356 |
| UNIREX | 244 |
| UNITRON | 241 |
| VCD2 | 245 |
| VICTOR | 047 084 103 |
| VIDEO CD | 253 254 255 256 |
| VIFA | 050 |
| VOX | 246 |
| WANBAO | 296 |
| WANYAN | 126 146 |
| WEGA TANSS | 278 |
| XIANPAI | 070 |
| YAMAHA | 227 247 |
| YAMAKAWA | 248 |
| YISHANG | 357 |
| YMT | 303 304 |
| YOUBISHEN | 124 |
| YUXING | 115 156 |
| ZONDA | 249 250 |
| 2002004 | 333 |
| Other brands | 007 016 019 106 109 110 113 122 123 132 133 157 141 144 148 158 159 160 161 162 163 164 165 166 167 168 169 170 171 172 173 174 175 176 245 261 280 281 324 329 330 332 381 387 409 410 411 412 413 414 415 416 417 |
.
DEXP codes DZL-453 for VCD
| Brand | Code |
| AVLIGHT | 248 333 |
| BRAND | 216 217 |
| DONGAN | 024 025 249 |
| DVD | 173 |
| FF | 089 094 097 |
| Haoji | 220 250 |
| Hiter | 251 |
| JVC | 075 083 084 197 252 |
| LG | 165 253 |
| OKON | 223 254 255 |
| NPANASONIC | 053 |
| PHISONEER | 082 |
| RMS | 256 |
| SAST | 177 211 212 |
| SKYWORTH | 257 |
| TCL | 158 172 194 206 207 258 259 260 261 262 263 264 265 |
| THAKRAL | 105 106 107 108 109 |
| THOMSON | 234 |
| VCD | 150 151 164 266 |
| VICTOM | 080 081 |
| Victor | 199 |
| AONE | 267 |
| IDALL | 043 048 058 069 073 085 093 268 269 270 271 272 273 |
| AIERPRINCE | 218 219 339 |
| AIWA | 060 071 274 275 276 277 278 279 280 |
| ONKYO | 033 281 282 |
| BULANTE | 216 217 283 284 |
| BBK | 010 011 030 031 044 046 087 091 200 241 285 286 267 288 289 290 291 292 293 294 295 296 297 298 175 178 183 184 244 229 |
| CAINI | 079 299 |
| CAIXING | 238 245 |
| CHANGHONG | 028 029 042 300 301 302 303 304 |
| SKYWORTH -RGB | 157 188 189 210 181 246 247 305 306 307 308 309 310 311 |
| DAYU | 236 237 312 |
| DESAY | 182 225 310 313 314 |
| dihe | 034 315 |
| DIHE | 221 228 316 317 318 319 |
| DINGTIAN | 320 |
| DONGDA | 003 004 321 |
| DONPENG | 077 322 |
| TOSHIBA | 059 068 070 074 323 324 |
| dongzhIDVD | 195 |
| PHILIPS | 169 039 057 325 326 327 328 333 |
| F&D | 329 |
| GOLDSTAR | 144 |
| Haier | 330 |
| HISENSE | 331 332 333 334 |
| HUABAO | 185 213 214 215 335 338 337 338 339 |
| HIMAGE | 340 |
| JIABAO | 341 |
| KENWOOD | 032 096 226 342 343 |
| GIEC | 239 344 345 346 347 |
| JINGE | 036 037 187 348 349 350 |
| jiwangDVD | 190 |
| G.V.G. | 351 352 |
| NINTAUS | 088 090 098 099 100 101 102 103 104 152 153 161 222 230 231 232 233 240 243 353 354 355 356 357 358 359 360 361 362 363 364 365 366 367 |
| JINGWEI DVD | 168 |
| JUGAO | 368 |
| KONKA | 369 |
| KETAI | 186 370 |
| LINGSHUMA | 191 371 |
| LONGZHIPA | 372 |
| MARANTZ | 067 |
| PINGAO | 373 374 |
| QISHENG | 000 005 006 008 009 162 192 375 376 377 378 379 380 381 382 |
| QIXING | 242 |
| TSINGHUA TONGFANG | 208 383 209 |
| HITACHI | 035 |
| RISHENG | 110 111 112 113 114 115 116 117 118 119 120 121 122 |
| SAMSUNG | 174 201 384 385 386 387 |
| SANSUI | 170 198 388 389 |
| SVA | 334 390 445 |
| SHILONG | 391 |
| STAR | 392 |
| SIGAOBO | 393 |
| PANASONIC | 049 051 171 394 395 396 397 398 399 400 401 402 |
| SOWA | 403 |
| SONY | 002 013 014 015 016 017 018 019 020 021 022 023 404 405 406 407 |
| TANGLILING | 176 |
| TIANLONG | 076 145 146 147 148 149 408 |
| WANBAO | 409 |
| MALATA | 050 052 054 056 063 154 155 156 160 166 179 180 224 410 411 412 413 414 415 416 417 418 419 |
| WANYAN | 420 |
| WEIFA | 202 421 |
| SHAPP | 078 422 423 424 425 426 427 428 038 040 041 045 055 095 |
| PIONEER | 072 086 196 429 |
| SAST | 061 062 168 211 212 227 430 431 432 433 434 435 436 37 |
| JINGEWANGPAI | 433 434 435 436 437 |
| XIANHUA | 066 |
| HYUNDAI | 235 |
| SHINCO | 007 012 026 027 047 092 159 167 334 438 439 440 441 442 443 444 445 |
| TIANLI | 446 |
| PANDA | 193 203 204 205 447 448 449 450 451 |
| AKAI | 163 452 |
| YITONG | 123 124 125 126 127 128 129 130 131 132 133 134 135 136 137 138 139 140 141 142 143 |
| YINGZHIBAO | 001 453 |
| YOUBISHENG | 454 |
| YUXING | 455 456 |
| lingshuma | 437 |
| ZHAOWEI | 064 065 |
| XIANPAI | 221 |
| OTHER BRAND | 193 457 458 459 460 461 462 463 464 465 466 467 468 469 470 471 472 473 474 475 476 477 478 479 480 481 482 483 484 485 486 487 488 489 490 491 492 493 494 495 496 497 498 499 |
Manual setting
The manual search is performed based on the type of television being received.
On-air channels
Manually catch broadcast channels by following the instructions:
- Take the remote control, press "".
- Next “Channels” - “Manual search”.
- Enter in the parameters the frequency you need and the serial number of the TV channel. These parameters are different for any of the areas. Find your region's data on a special coverage map, for example this one - Digital TV coverage map
- When setting the found parameters, use the “Right-Left” buttons.
- Turn on “Start” on the remote control. In a few minutes you will have at your disposal the channels that are available in your region.
Coverage maps are easy to use. Just enter the name of your region in the search, or find it on the map using the mouse wheel. Next, you need to click on the picture of the television station shown on the region point. The purity and numbers of the channels you are looking for will be written there.
You can also watch the video instructions for manually setting up channels on DEXP TV:
Cable channels
To find a cable broadcast, you need to do the following:
1. Find the search parameters in your agreement with the provider. This data will come in handy.
2. Connect the provider cable to your TV.
3. Take the remote control. Tap "," then select "Settings."
5. Using the “Manual Search” menu, access the “Antenna” (or “Tuner Mode”) function. Select "Cable". In this example there are only two options; usually there is also the line “Satellite”.
6. Enter the data from the contract, click “Start”.
7. Do not turn off the search until the TV finds all the channels that are available.
Satellite channels
Setting up satellite TV manually is a little more difficult than terrestrial or cable. But the task is quite doable if you act like this:
- Connect the satellite antenna.
- Go to settings using the "" key on the remote control. Next, click “Channels”, and then “Manual Search”. Without leaving the settings, change the signal reception source to “Satellite”.
- Enter the parameters provided by the provider, such as LNB characteristics, DiSeqC mode, top and bottom generated LNBs.
- Enable manual settings. To do this, using “Up-Down”, enter the number of the frequency you need.
- The search will last about 15-20 minutes, since there are many more satellite channels than in other types of television.
When following point No. 3 of the above instructions, enter the data very carefully to avoid mistakes that will force you to enter everything again.
Setting up TV DNS
TV DNS instructions
DNS TV model DNS M32DM8, according to the operating instructions, has the following technical characteristics: Color system - Pal, Secam, NTSC Digital tuner - DVB-T/T2, DVB-C Maximum image resolution - 1366x768 Static contrast - 1000:1 Response time - 6.5 ms Power consumption - 65 W Supply voltage - 110-240V 50/60Hz Connectors - Component video input, composite video input, SCART video input, PC audio input, PC video input, 3 HDMI inputs, antenna input, digital audio output Information interface - USB 2.0, CI input Supported file systems - NTFS, FAT16, FAT32 Remote control - Range 7m, angle 30 degrees, infrared
TV remote control DNS
The DNS TV remote control with the designation of control buttons in various modes is shown in the figure:
STANDBY: Turn on the TV DNS / Go to standby mode MUTE: Instant mute / unmute button SOURCE: Select the signal source P.MODE: Select preset picture modes S.MODE: Select preset sound modes AUDIO: Select the audio language P.SIZE: Change screen format 0-9: Numeric buttons for entering the TV channel number FAV: Displaying a list of favorite channels SLEEP: Turning on the sleep timer RET: Button to return to the last watched channel MENU: Calling up the on-screen menu INFO: Displaying information about the current channel EXIT: Exiting the Menu UP: Cursor Up button OK: Confirm selection LEFT: Left cursor button RIGHT: Right cursor button DOWN: Down cursor button V+: Volume up V-: Volume down P+: Go to next channel P-: Return to previous channel TEXT: Turn teletext mode on/off HOLD: Turn on/off the hold mode of the current page TV/RADIO: Switch TV/Radio modes SUBTITLE: Turn on subtitles SIZE: Resize the teletext window SUBPAGE: Jump to teletext subpages REC: Start recording in digital TV mode EPG: Electronic program guide in mode digital TV Play: Play/Pause Stop: Stop playback Rev: Fast forward Fwd: Fast reverse Back: Previous file Go: Next file Color: Colored buttons provide quick access to the correspondingly colored objects at the bottom of the screen.
On our website you can download the TV remote control, location and designation of remote control buttons, as well as instructions and User Guide
How to set up TV DNS
How to set up DNS TV - for the first time. Connect the antenna cable to the RF-in connector. To set the menu language and system messages, press the left and right buttons in the corresponding item. Configuring the TV DNS to select the country of residence is necessary to install the regionally accepted color system and intermediate frequency audio parameters. Next, you need to configure the tuner to receive terrestrial DVB-T or cable DVB- From channels The next item - Autosearch - will allow you to configure DNS for digital, analogue or both digital and analogue television channels.
Main menu functions
The main menu of the DNS TV consists of several submenus: Picture menu: allows you to adjust the parameters of brightness, contrast, saturation, sharpness and color tone; image color temperature; aspect ratio of the picture; noise reduction and dynamic contrast. Sound settings menu: select a preset sound mode; adjusting the frequency response and sound balance; turning on panoramic sound, equalizer settings; turning on automatic volume level; turning on digital audio output Channel settings menu: allows you to select the type of incoming signal from an terrestrial or cable antenna; auto search for television channels; selection of country of presence and signal type (digital, analogue); scanning type - quick, full, additional; manual search for television channels individually Editing channels: here you can remove interference channels, sort television programs in the desired sequence Menu for blocking the TV system CSN: blocking individual channels, parental control, blocking buttons on the body, changing the password Settings menu: menu language can be configured; audio language; subtitles; mode for the hearing impaired; teletext settings; time settings; sleep timer and auto shutdown PC settings menu: automatic adjustment of image quality and its position on the screen;
Today digital television is becoming increasingly popular. It replaces the outdated analog TV. In this article we will talk about how you can set up new programs on your device.
Setting up channels on DEXP TV without a set-top box
There is one trick that allows you to set up a “digital” without a prefix. TVs can support digital broadcasting (Smart TV), but do not have Internet access.
Try setting up TV without a tuner. For this:
1. Connect the antenna cable to your TV.
2. Using the TB control panel, go to the configuration by pressing the “Source” button. You will see a table with the modes supported by the TV. Select DTV (which stands for Digital Television Broadcasting). Next, click “OK” or “Enter”.
3. Find "Auto Search" in the "Channels" section. Click Run to start the scan.
4. As soon as the search is completed, all detected channels will become available. The whole procedure takes no more than 5-10 minutes.
Connecting a smart TV to the Internet using a LAN cable
Before connecting your TV to the global network, you need to familiarize yourself with what can be useful for this. To organize a wired connection on your TV yourself, you will need:
- Ethernet cable. This is what will be used when connecting the TV to the Internet.
- TV equipped with a LAN port. Without it, it will not be possible to organize a wired connection.
- Router. Most often, people connect Smart TV to the Internet through a cable from the router, and not directly.
Additional Information! Also, before connecting the TV to the Internet, you need to determine the type of network in advance. To do this, you need to call the provider’s technical support and clarify which protocol they work with. It can be L2TP, PPTP or PPPoE.
Removing and sorting TV channels
When all the channels have been found, you can start sorting them to suit your needs. You definitely won’t need some programs, but for some you will want faster access.
Delete unnecessary channels, and for the rest, determine the numbers on the remote control, so that you can then switch the selected channels at once, rather than going through one at a time. This is done as follows:
- Using the Up and Down keys, select a specific channel to adjust.
- If you want to delete it, press the red button on the remote control. Renaming a program is done by pressing the green button and selecting a name. You can move a channel by pressing the yellow button. Move the channel through the list using Up and Down.
Setting up LG TVs
The search principle on these TVs is similar to Samsung, so you can consider the operation in a short version. At the very beginning, you are asked to select the region and interface language. There is no need to specify the broadcast type; it is automatically determined after selecting the frequency:
- for tuning cable television, the base value of 690,000 - 690,000 kHz is maintained;
- when connecting a receiver, the frequency should be changed to 114,000 - 862,000 kHz.
The transmission speed of the received signal is 6750 kS/s. To confirm the entered data, you will need to enter the password set by the manufacturer or 0000. Upon completion, select the broadcast type and start the auto search. Upon completion of the search for TV channels, information about the successful operation will be displayed on the TV. When connecting cable TV, a problem arises with blocked channels, which are deleted even easier than on Samsung - on the remote control you need to press the “C” button and select “sort active TV channels”. All found programs will move to the first positions one by one.