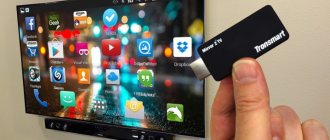
These instructions for connecting a computer and TV to a DLNA server via a local network running on a router will answer many questions related to the use of this technology. I have written a detailed guide to setting up media storage - both on a computer and on different models of routers. And you will learn about how to connect to it from a PC, TV set-top box or Android smartphone from this article.
general information
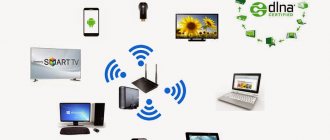
What is DLNA? This is a set of standards, a technology thanks to which compatible devices transmit and receive images, video, and music over a local network. Also, with the help of DLNA, media content can be displayed online. At the same time, connecting compatible devices to your home network is possible both wired and wireless.
3 groups of devices that support the technology:
- Designed for use on a home network - network storage, network media players, TVs, printers, etc.
- Mobile devices – smartphones, audio and media players, digital cameras that support file transfer via Wi-Fi, etc.
- Mobile devices for connecting mobile networks to home networks - for example, a modem.
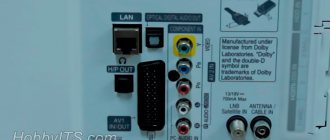
How do you know if your TV supports DLNA? Everything is simple - in the instructions or on the sticker on the receiver itself there will be the inscription: DLNA CERTIFIED. However, it must be taken into account that some large manufacturers have given a proprietary name to the technology. SAMSUNG SMART TV, which will be discussed below, has DLNA called AllShare.
About the M2TS extension format
The name of the M2TS extension is due to its origin from MPEG-2, a transport stream that includes different types of digital information: audio, video, text and many others.
This format is used to record movies, TV series, videos and other types of high-definition video data. M2TS is part of the HD “family”, namely BDAV technologies. This extension appeared relatively recently, so users, when faced with such files, sometimes do not understand what software tools can be used to play it.
Universal method
To connect a TV to a computer or laptop, there are specialized programs from the manufacturer’s developers. But there is also universal software that is compatible with all TV models - Home Media Server (UPnP, DLNA, HTTP).
Instructions for using the application are available in video format:
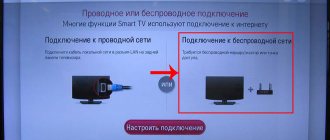
Before you start setting up, check that your TV and PC are connected to the same router - via cable or Wi-Fi, it doesn’t matter.
And now step-by-step instructions for working with the Home Media Server program (UPnP, DLNA, HTTP), which will help connect any TV to a computer:
- Install the utility on your PC or laptop: download the archive and run the installation file, then follow the prompts of the Installation Wizard.
- Launch the software and go to “Settings”, where in the “Media Resources” section you will need to select the files that you want to open on TV. To allow access for all content, you need to check the “Local drives” box.
- To be able to view videos, photos and listen to music from an external drive, click “Add” on the right and mark the desired device.
- After the settings, click “OK” and confirm scanning directories.
- After scanning is completed, look for “Launch” at the top and click.
- Turn on the TV and look for it in the “Playback devices...” section and click “Update”.
- We check the work. Click on “Movies”, “Music” or “Photos”, and the file to which we have given access will be displayed on the right in a separate window. Click RMB, then “Play to”, look for your TV.
You can open the necessary files directly from the TV:
- We leave the program running, you can simply minimize it.
- On the TV, go to the section that is associated with DLNA - for SAMSUNG it is “AllShare” (in some models the button is located on the remote control for convenience).
If the setup is done correctly, all files available for viewing will be displayed on the screen.
Connecting an Android phone to your home DLNA server
Currently, only a small number of phones have DLNA support. All DLNA phones have built-in WiFi, meaning you can easily connect them to your wireless router.
To watch videos on smartphones and tablets with the Android operating system, you will need a special universal application. There are many of them, I suggest using MediaHouse or Bubble UPnP.
You can download the program by entering the name in the Google Play application. After installing it, you just need to take a few simple steps:
- Select the source - your computer or other device with DLNA support and installed media server software from which you will watch the video
- Select the receiver, that is, your PDA on Android
- Select a video that is available for viewing
In addition to the mobile version, this program also has a computer version, with which you can share files.
As I said, this application is universal, that is, suitable for all Android devices. But each manufacturer usually makes its own for connection between its devices that support DLNA - tablets, phones, TV, etc. So, for Samsung it is AllShare, for LG it is SmartShare, etc. A complete list of programs will be given below.
I myself use the MediaHouse program - you can also get it from the Play Store. DLNA setup is not required here at all. You launch the server program on your computer, and it will immediately appear in the list of available connections.
We click on our server, select “Browse” and then there is a folder according to the type of files that we need.
Programs for SAMSUNG
What programs are there for this manufacturer to connect the TV to a PC:
- SAMSUNG AllShare is a home media server for sharing and playing content on devices that support DLNA.
- SAMSUNG PC Share Manager is a media server for combining a TV and an external device into a network.
AllShare
Watch a video about how the program works here:
To work, install the official media-server from SAMSUNG on your computer or laptop and launch it. Next, follow the Wizard’s prompts (after each step, click “Next”):
- Check the shared server.
- Turn on the device (sometimes AllShare activation on the TV is required).
- Configure the device network.
- Select the device to connect and click “Connect”. At the end, click “Complete”.
Now the setup:
- Select “Folder Settings”.
- Set up a shared folder - it will contain files to play.
- Set the save folder – content transferred from other devices will be stored here.
- Go to “Privilege Settings”.
- Allow access to the connected TV.
- Move the desired file to the created shared folder, select it in the list, and select the device to view.
Share Manager
The use of the software is relevant where there is no router. The TV and PC are connected directly with a cable or via Wi-Fi (of course, provided that both devices are equipped with a wireless module).
After connecting, both devices need to set an IP address. This is done in the “Network and Sharing Center...” in the connection properties. For example, for a PC we set the address 192.168.1.1, and for TV 192.168.1.2. We leave the subnet mask the same - 255.255.255.0.
Now you can run the installed program and do the following:
- Select the desired folder with files from the list.
- Click on the folder icon with a green check mark at the top.
- Next, click “Sharing”, then “Set device policy”.
- Change the status to “Accepted” and click “Set changed status”.
If everything is done correctly, the desired image will appear on the TV screen.
How to enable and configure DLNA on LG Smart TV
DLNA (Digital Living Network Alliance) technology allows you to connect devices (supporting this option) into local networks for the rapid exchange of various types of information. Simply put, using DLNA you can watch movies and TV series on one device, listen to music, and view photos that are physically located on another device. For example, you can watch a movie downloaded from the Internet to a laptop or tablet on a large TV screen, or send a photo to a printer directly from a digital camera without downloading the image to your computer.
How DLNA technology works
DLNA uses UPnP protocols. Information is transmitted using a local IP network. It can be used both via a cable (Ethernet connection) and wirelessly using Wi-Fi.
How do you know if your TV supports DLNA?
The DLNA function is supported by all modern LG TV models with the Smart TV option. Look for the DLNA Certified disclaimer on the device packaging, as well as in the User Guide.
All devices that support DLNA are usually divided into three groups:
- Home Network Devices. This includes TVs, printers, stereo systems, media players, etc.
- Mobile Handheld Devices. Mobile gadgets, including smartphones, tablets, digital cameras.
- Home Interoperability Devices. Gadgets that can convert content formats and also support additional communication standards.
How to connect LG TV to DLNA?
It is very easy to set up DLNA on your LG Smart TV yourself. It won't take much time and doesn't require much effort. All you need to do is follow simple instructions. In addition, you can connect and configure DLNA on your LG Smart TV in several ways.
The simplest one is using Smart Share.
The Smart Share program was developed by LG specifically to allow owners of the brand's TVs to play content from a computer, laptop or tablet on the TV screen. Here's how to set up DLNA using Smart Share .
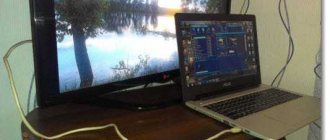
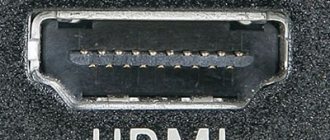
- Make sure that both your devices (LG Smart TV and laptop/computer/tablet) are connected to the same router (via network cable or wireless connection). You can also connect your computer and TV directly using an HDMI cable.
- Download the Smart Share program to the computer you are going to synchronize. It is recommended to download from the official LG website. (). Install it following the instructions. Smart Share will start automatically every time you turn on your PC.
- Set up the program. To do this, after completing the installation process, on the notification panel, right-click on the Smart Share icon that appears and select the “Smart Share program settings” section. Select "On" mode and activate it. This mode gives the TV access to information (not all, but only movies, music and photos) stored on the computer.
- Go to the “My Shared Files” section (Menu on the left side of the Smart Share pop-up panel). At this point, you can manually select which folders to open access to. By default, shared folders are added. To add additional folders to this list, click on the folder icon with a plus sign located in the upper right corner of the pop-up panel. Complete the setup by clicking the "Apply" button.
- If you want to change the name of your device (for example, to make it easier to find later), go to My Device Settings. If you do not do this, the device will be named automatically.
- Under Allow/Block other devices, you will see your LG TV if it is connected to DLNA. In the same section, you can block other devices (for example, if you have more than one TV in your apartment or house, and you do not want to open access to information on your computer to everyone).
How to play a movie from a computer on an LG TV?
After completing the setup process and connecting DLNA, you can watch movies from your laptop on your TV. Here's how to do it:
- On the remote control, press the Smart TV button.
- Find and select Smart Share.
- Open the Connected Devices folder and select the virtual server created on the PC.
- In the All Folders folder, you will see your content that you have shared on your computer.
- Launch the movie, series, or video clip you want in the usual way.
Problems that may arise when connecting your TV to DLNA via Smart Share:
If your TV, when Smart Share is turned on, does not “see” folders from the computer, but all the conditions are met correctly, the problem may be in the antivirus or firewall. Try turning them off, restarting your TV and computer, and try again.
You can also set up DLNA on your LG Smart TV using Windows Media
- Find Windows Media Player on your computer in the Start menu and click on the Stream section.
- In the menu that opens, activate the sections “Allow remote control of the player” and “Automatically allow devices to play my media.”
- Find the Arrange button at the top of the Windows Media panel. Select the "Manage Libraries" section. Select the types of content you want to share from the menu. “Music library” for audio files, “Video” for video files, “Gallery” for images of different formats. Then click on the “Add” button on the right side of the panel and manually add folders with the necessary files. This is necessary because, by default, Windows Media only allows the TV to access shared folders.
- The algorithm for working with the TV is the same as for the Smart Share method: find the Smart Share section in the menu on the LG TV, open the “Connected Devices” folder and select the desired media file in the folders.
Windows Media Player
To connect your TV to your PC and view any content on a big screen using DLNA technology, you don’t have to download third-party software - you can use the Windows tool. This is a standard audio and video player for Windows OS.
Here are the instructions using the “seven” as an example:
- We connect the TV and a computer or laptop to the same network - via cable or over the air. You can connect directly, without using a router - in this case, you need to set both devices to an IP address (as in the previous instructions).
- Launch the player and select the “Stream” tab. In the drop-down menu, we allow all actions: “Allow Internet access to the home multimedia library...”, “Allow remote control of the player...”, “Enable media streaming in the home group...”.
- Click the “Arrange” tab and select “Apply media information changes.”
- On a SAMSUNG TV, go to the “AllShare” section. If everything is in order, we will see the files available for viewing on the screen.
That's all. As you can see, taking advantage of DLNA technology is easy. The main thing is to choose a method that is convenient for you.
How to open
The operating system quickly detects the M2TS data format and by default opens the standard Media Player package application to work with it. Media Player is software and a universal media center. It opens video files of any known extension.
The application has the following additional features:
- legally purchase media content from the Internet;
- synchronize data between several devices over the Network;
- play audio files, including those downloaded via iTunes.
Installing Home Media Server (HMS)
Installation of HMS is carried out in the following sequence:
- Download the installer, preferably from the official website - https://www.homemediaserver.ru/index.htm
- Launch the installer. The window prompts you to select the directory into which the installation files will be unpacked. You need to select a directory and press the “Run” button.
- After unpacking is completed, the program installation will automatically start. There are various settings here. In this window, you need to select the directory to install the Home Media Server (HMS) program and the “Program Group” (folder in the Start menu).
- After the installation folder is selected, you need to do o, if necessary, and press the “Install” button.
- Upon completion of the installation, which lasts no more than a minute (depending on the equipment), the HMS is immediately prompted to start. The installation process is complete.
After installation is complete, it is better to delete unpacking files manually, because they are not automatically deleted.
Possible problems (errors) and their solutions
Possible problems when setting up Home Media Server as a DLNA server include the following:
- The server was found, but does not open on media devices . Making settings in the “Home Media Server (UPnP)” will help eliminate this inconvenience. Setting the settings in the “Device” (specify the old and new model version): “Authorization Service” - “Russian names of the main folders” - in the “Server” section, specify a permanent port (from 1024 to 65535).
- Errors occur, stop, slow down during playback . You need to select “Transcoding” for a smaller frame size and video content quality, then stop watching the movie so that a sufficient volume of the transcoded file is formed, and set a disk to store temporary transcoding files that is different from the one used for the swap file. We also need to optimize the system as a whole (disk fragmentation, list of automatically loaded programs).
- In some cases, a message may appear on the screen that the file type is not supported . After two or three restarts everything should be fine.
DLNA technology makes it easier to transfer files between Internet-connected devices. The process of setting up Home Media Server as a DLNA server is simple; the main thing is to accurately follow the step-by-step instructions given in the article.