Plasma TV and LED TV are designed differently, since the latter contains a much larger amount of microelements. But modern televisions are designed in a similar way, the circuits and boards in them are located in different places, but they perform identical tasks. This means that most of the breakdowns, both in the older models LG 42lv3700, LG 42pn450d, and the more modern LG 42pa4510, are approximately identical. Current instructions will apply to most models. Next we will tell you why the LG TV does not turn on and how to fix it.
Why doesn't my LG TV turn on?
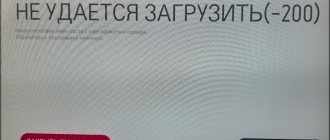
Conventionally, all problems when there is no image on the screen of a regular or Smart TV are caused by either mechanical or software problems. If the TV is broken and a black screen is displayed, in 30% of cases it is a breakdown of the operating system, and in 70% there is a physical malfunction of the LED backlight, matrix, power supply, etc. However, even mechanical failures in half of the cases can be diagnosed and corrected independently . It's time to move on to real situations and the reasons that could provoke them.
Electrical problems
Do-it-yourself repair of an LG TV when it does not turn on should begin by determining whether power is being supplied to it. The problem may not be in the TV itself, but in the lack of electricity on its board.
Victor Korolev website
Specialists in the repair of CRT television equipment have developed a whole range of measures, summarized in troubleshooting instructions for beginners. It provides for the case when the device for some reason does not turn on (this may manifest itself as a lack of light on the screen). In this particular situation, you must adhere to the following sequence of actions:
• First of all, you need to check the network cable, its plug and the TV power button (and sometimes just the presence of voltage in the outlet). All these simple elements and the network can be checked very easily if the household has a special measuring device - a multimeter. • The easiest way to verify that the power cord and plug are in good working order is to see that the standby LED on the front panel lights up.
Please note: When inspecting supply circuits, it is important to remember that the functionality of the switch should be checked both in the off and on state.
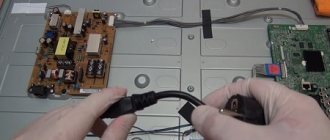
• Only after making sure that they are in full working order can you remove the cover of the television receiver, and then examine the power supply unit (PSU) and the load circuits connected to it.
If it comes to disassembling the TV , it is imperative to clean the internal spaces and all working elements from accumulated dust and dirt. Causes of malfunction and their detection When visually examining the power supply unit, you need to pay attention to suspicious areas covered with soot and with severe darkening on the printed circuit board. It is also important to inspect all electronic components for any bulges or visible breaks.
If you find suspicious components, you should not try to change them immediately. Typically, a burnt or swollen part is only a consequence of a malfunction, which may appear in a completely different place. Thus, electrolytes, for example, can swell from the long service life of a TV, as well as from overvoltages or short circuits in load circuits.
Therefore, it is necessary to carefully check (if possible, ring) all the details of the power supply in the sequence given below:
- If a swollen electrolyte or a cracked posistor is detected, you will need to remove this component from the board and replace it. After this, you need to clean it of carbon deposits, electrolyte residues and try to ring the fuses, diode bridge and other suspicious parts.
- In connected circuits, to do this, you will have to unsolder one leg of the element being tested and, if it is in good condition, reinstall it in place.
If no other problem areas are identified, you should proceed to a detailed diagnosis of the problem.
Diagnostics and solutions
To more accurately diagnose each of the described malfunctions, they should be considered separately. So, if the 3.15 Amp input fuse blows, the following actions must be taken:
- You should screw the ends of the wires from the socket with a 95-watt light bulb to the contacts of its terminal block, and then turn on the TV again.
- If after a certain time (about 20-30 seconds) it does not change the brightness of the glow, you need to turn off the TV and disconnect the kinescope demagnetization circuit.
- When, after turning on again, the incandescent lamp immediately goes out and the TV starts working, the fault lies in the posistor.
- Finally, you will need to replace it with a new element.
If, when the TV is not working (the screen does not light up), suspicious sounds are heard from the power supply area, reminiscent of a whistle or squeak and accompanied by light clicks, this means that an overload is possible. In this case, you should check the load circuits for 110 Volt power, including drain and vertical scans.
A possible cause of failure may be short-circuited diode elements, but usually the problem is not limited to them alone.
The horizontal scanning elements (the master transistor, for example) may be to blame for this. But this happens very rarely, so in this situation you can try replacing the TDKS . After replacing it (along with the fuse), the TV will most likely work.
If, when you turn on the TV, you can clearly hear the same clicks, but in a different place, you should check all the elements in the circuits of the horizontal transistor (it itself almost never fails).
Additional information: Experts still advise sometimes checking it by first removing it from the circuit.
We should not forget that BU808DF composite transistors with a protective diode are installed in the horizontal driving circuits. The cause of the characteristic squeak can also be failed capacitors, which can be detected visually by the swollen housing. If it is impossible to accurately determine other faulty elements, technicians advise replacing all high-voltage electrolytes just in case.
Other problems
Other possible problems that you can identify yourself include:
- Violation of the connecting contact in the TV power supply circuits.
- Mechanical damage to the screen (kinescope).
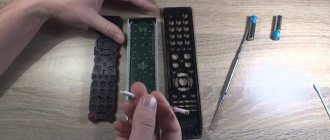
Failure of the remote control.
It is recommended to check the connecting contacts in the TV's power circuits at the very initial stage of repair work (even before diagnosing the malfunction). To do this, with the device turned off, you should first erase them, and if this action does not lead to the desired result, try to clean them with an eraser. If even after this the TV does not turn on (its screen does not light up), then contact failure in the connectors should be excluded from consideration. Mechanical damage to the kinescope can only be noticed upon careful examination. If it is detected, you will have to completely replace the product with a new one, for which you will need to invite an experienced specialist.
The simplest reason that the TV does not turn on may be a problem with its remote control, in which the battery has simply run out. That's why you should check the remote control before inspecting the power cord and switch.
VKontakte groups “Samodelkin”
In Odnoklassniki "Telemasterskaya"
How to disassemble an LG TV?
All TVs are different, but most of them are disassembled according to a similar principle. Here is the general disassembly algorithm:
- Unscrew the fasteners from the back of the case.
- Carefully disconnect the cables and unscrew the bolts that hold the board.
- We remove the metal protection from the decryptors; to do this you will have to unscrew the fasteners.
- Remove the front frame around the matrix by carefully prying it off with a knife.
- When removing the matrix, carefully disconnect the decoders on the rubber fasteners.
- We put the disabled matrix on the table.
Backlight repair
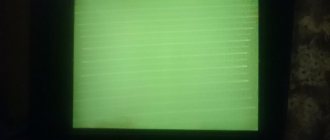
A common problem due to which an LG TV may not show anything is a malfunction of the LED backlight. Many people get scared when they find out what happened, thinking that they will have to change the entire LCD TV screen. But this is not true at all. The backlight is a completely repairable part.
The main sign that it’s all about the backlight: the display shows nothing else, despite the fact that there is sound and there was no external damage. Channels often also continue to change without problems.
You can finally make sure that a broken backlight is to blame by first darkening the room with curtains and turning off the lights. As soon as the room becomes dark, you need to shine any flashlight on the switched-on screen from a distance of about two feet. The image on it will become visible, although it will be extremely dark.
The main cause of backlight problems on LG TVs is the serial connection of all diodes. This leads to the fact that even if one of them burns out, the entire circuit stops working. To ensure that not a single light bulb works, there are protective microcircuits that turn off the entire diode strip at the slightest problem.
Important! Continuing to operate a device with burnt-out diode strips is not only extremely inconvenient, but also dangerous. This can cause a matrix rupture, the cost of which is 90% of the cost of the entire product.
LG TV backlight repair is carried out in one of three ways:
- at an official service center;
- in a private workshop;
- on one's own.
The first option is most suitable if the warranty has not yet expired at the time of the breakdown.
But it is worth considering that official services do not repair the LED backlight separately from the matrix, so it will not be possible to repair only the first one without a guarantee - you will have to pay more than 12 thousand rubles for the entire matrix. The warranty is issued for the TV itself for a year, and for new parts - up to three months. Replacing the backlight of an LG TV from a private technician is possible either at the owner’s home or in a workshop. The cost of such a procedure will be from five hundred to five thousand rubles, depending on the number of broken diodes, their type, screen size and brand of the device itself.
But many owners of such household appliances prefer to repair the Elgie LCD TV with their own hands, since it is not as difficult as it seems at first glance. The set of necessary tools is quite simple and can be found in almost any home:
- diode performance tester;
- screwdrivers of the required sizes;
- screwdriver;
- household hair dryer.
In order to find out what brand of LED strips you need, you need to refer to the technical documentation of the device. It indicates not only information about the original diode lamps, but also the types with which they are replaced if necessary.
Don't forget to prepare all the tools
The cost of the diodes themselves is low. For several hundred rubles you can order them in online stores. On average, the price of high-quality parts rarely exceeds two dozen dollars in equivalent. Used tapes will also work if their performance has been checked.
Repairs are carried out in this order:
- First of all, turn the TV over and unscrew the fastenings of the back panel in order to disconnect it. They do this as carefully as possible.
- At the second stage, the cables are disconnected from the chip boards.
- On the third, the latches holding the matrix are unfastened and the screws are unscrewed.
- Next, remove the top of the screen, which allows you to see the LEDs.
- The tester checks the strips with them and thus determines the one that has failed.
- At the sixth stage, turn on the hair dryer at maximum power and direct it to the place where the tape is attached.
- Once the adhesive melts, the strip will come off easily.
- The broken part is replaced with a new one, continuing to maintain the temperature of the adhesive with a hairdryer.
- At the ninth stage, a test connection to the electrical network is made. If no new problems are discovered with the operation of the TV, proceed to reassembly, starting with the matrix and ending with the rear panel.
Attention! Determining which diode has burned out is quite possible with the help of a routine inspection. The fact is that carbon stains remain around it.