From this article you will learn how to connect a TV to a computer via DNLA through a home media server. After you set up a media server on your computer, you will have a home multimedia network. Using it, you can transfer video from your computer to your TV, as well as other media content (photos, music) and play it in real time. This approach to playing video and audio files on your TV will save you from having to download media content to a USB flash drive every time and will create conditions for selecting the required file on the TV panel.
Setting up the Home Media Server + TV program
Before we begin the story about setting up the “Home Media Server” program, I would like to explain that this program will help solve the question “How to watch movies, listen to music from a PC on a TV with DLNA technology.” These include Samsung's All technology. You can download the Home Media Server program from this link.
Supported HMS operating systems:
- Windows 95, 98, ME, 2000, XP, 2003, Vista, 7;
- UNIX-like systems using Wine;
- MAC OS using WineBottler, CrossOver Mac.
Other options
The capabilities of the Home Media server reviewed do not end with DLNA. HMS can provide access to computer media resources using UPnP (Universal Plug and Play) technology and the HTTP protocol. This is more relevant for smartphones and tablets.
The Home Media Server program is used as a DLNA server for viewing content and listening to music from a computer and laptop on a TV. Home Media Server is ideal for these purposes and has various useful settings.
Adding directories of media resources to the Home Media Server program
- "Settings" button - "Media Resources" section - "Directory List" page - "Add"
- from Windows Explorer, drag (and release) the required directories with the mouse into the main form of the program (can be used with standard file search in Windows).
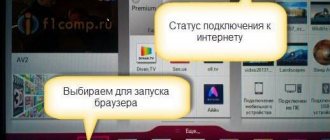
To access the server through a browser, you need to enable Web mode, set a permanent server port in the Settings - Server - “Port” field (value from 1024 to 65535). Accessing the server from a browser:
https://server IP address: specified server port.
The server IP address can be found in the Settings - Server - List of allowed network connections - Search section.
Launching the Home Media Server program
Pay close attention to all messages that may appear from firewall programs when you first start the server.
Click the “Launch” button in the button bar of the main program window. If the server starts successfully, the “Start” button will become unavailable, but the “Stop” and “Restart” buttons will become available, and the message log will contain lines
"Starting server [IP address]."
What to do in case of errors when starting a home server
- check the list of available network connections in the program settings (section Server - List of allowed network connections - Search). If the list of allowed network connections is not empty, compare it with the list of available network connections using the “Search” button.
- check the settings of the firewall program you are using, the “Home Media Server (UPnP)” program must allow network activity, for more stringent rules, UDP port 1900 must be open for incoming and outgoing packets, the server port specified in the program settings must be accessible to incoming connections.
You can generate a list of allowed network connections from the list of available network connections by marking the network connection to be included in the list in the first column. If a constant port number is specified for the media server in the program settings (section “Server” - field “Port”), then the availability of the media server can be checked from the browser at https://server IP address: specified server port. If yes, the media server welcome page will open. If the Web mode is enabled in the Program Settings - Device section, the top level of the media resource database will open.
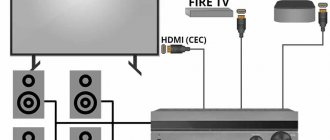
Options for connecting media devices to the server
You can find options for crimping network cables here. To avoid misunderstandings, a media device also includes a television.
- Computer - Media device. A crossover cable must be used for the connection.
- Computer - Switch - Media device. Straight cables must be used to connect devices.
- Computer - Router (router) - Media device. Straight cables must be used to connect devices.
- Computer - Wi-Fi router - Media device. You can find out more about the wireless connection method in the article “Setting up All” and “Smart TV”.
The operation and settings of the media server do not depend on the connection option. When using a router, enable the mode for automatically assigning IP addresses to devices; for details about setting up the router (router), read the article “Setting up a Wi-Fi router”. When using connection options 1 and 2, IP addresses are assigned manually, the addresses must be different in the last part of the IP address, the subnet mask is 255.255.255.0, the default gateway is the IP address of the computer, if necessary, you can specify the addresses of the DNS servers. Example: computer address is 192.168.1.4, media device address is 192.168.1.5.
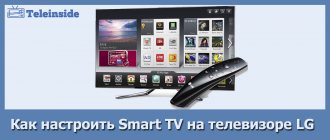
LG SmartShare
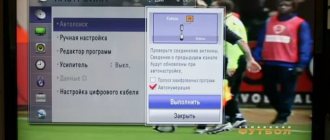
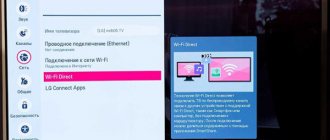
Working with a DLNA server will be shown using the example of an LG LN655V TV. Go to the main menu of Smart TV and select LG SmartShare.
First connection
When connecting the device to the TV for the first time, you must select “Connection Guide” in the lower right corner.
Next, select the “PC Connection” tab and click the “Next” button 3 times. Please note that in step 3 your home network is selected (wired or wireless, depending on how you connect the TV), otherwise select it.
In step 4 you should see your PC. If it's not there, restart the server, this usually helps. Next, select the device and go to the “Connected devices” item.
View Media
After the first connection, our device will be displayed in the last item of LG SmartShare – “Connected devices”. If it is not there, restart the server on your PC. For example, to watch movies you need to select the “Movies” folder, then “Media resource directories”.
Finding a server in a media device
The search for a server with shared folders is performed according to the user manual of the media device. If you have any questions, please return to the above-mentioned articles on All and Smart TV.
If the server is not found, but all connections are made correctly, then in the program settings (Server section) check that the list of allowed client devices is empty or the device’s IP address is in the list of allowed ones. When using the network protection program, check the rules for network access of the hms.exe module (if the server runs as a Windows service, then for the hmssvc.exe module), if possible, switch the network protection program to learning mode, restart the Home Media Server program ( UPnP)". If other media servers are used, it is better to turn them off at the setup stage.
What is DLNA?
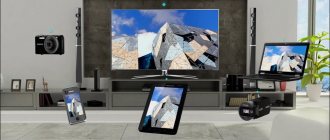
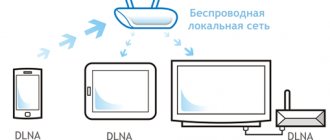
In English translation, Digital Living Network Alliance (DLNA) refers to certain standards, thanks to which compatible devices can transmit and receive various media content over a home network and display it in real time using wired and wireless channels.
Thanks to this technology, home computers, mobile phones, consumer electronics, and laptops are combined into a single digital network. When you use DLNA certified devices, they are automatically configured and connected to your users' networks.
Thanks to the transmitting device (server), information is transmitted to the TV. A PC, phone, camera, or camera can act as a server. The presence of DLNA support may mean that the device can receive video.
Such a wired or wireless network has its advantages:
- The ability to instantly access materials located on all the user’s home devices. You can watch a movie or photo immediately after downloading, and you can listen to music on the music center in the highest quality.
- For wireless connection there is no need to drill holes in walls and doors.
- With a wireless connection via Wi-Fi, you can download entire files to the desired devices for further viewing.
Disadvantages of DLNA include:
- To make a wired connection (for example, through reinforced concrete walls that block the radio signal), it is necessary to drill holes in the walls and doors, which will negatively affect the interior.
- The wireless connection is significantly affected by various obstacles in the form of steel reinforcement or thick concrete (brick) walls.
- As with the Internet, there is a possibility of file playback delays when streaming if the file is too large or the connection speed is not fast enough.
- Using a weak router can affect the speed and quality of data transfer.
- Not all file types can be played, and HD video may be of poorer quality.
Navigating through files on a media device (TV, media player)
If the device supports the Russian language, then in the program settings (Device section) you can enable the “Russian names of the main folders” mode, this affects the names of the main folders of the media resource database. If the Russian language is not supported by the media device, select the Translit mode for encoding Russian names; the “Russian names of the main folders” mode is turned on/off at the user’s discretion (if disabled, the names of the main folders of media resources will be in English).
Folder names can be changed in the main form of the program by right-clicking the mouse - selecting the "Change name" item.
Unnecessary folders of media resources can be deleted in the main form of the program by right-clicking the “Delete Folder” item, or the “Exclude empty folders when transferring information to UPnP devices” mode can be enabled in the Device section.
Slow navigation through the media resource database may be due to the operating characteristics of the media device, the inclusion of the “Exclude empty folders when transferring information to UPnP devices” mode, the presence of slow removable media in the system, frequent changes in media resource directories and the enabled “Automatic” mode. scanning directories when they change while the server is running.” The “Exclude empty folders when transferring information to UPnP devices” mode can be turned off, the “Removable media” folder can be deleted in all sections of media resources (Movies, Music, Photos).
Navigation through directories of media resources in the structure of their storage on disk can be done through the folder “Watch Folders” (Russian language is turned off), “Catalogues of media resources” (Russian language is turned on).
If some media resources are not visible on the media device, but are present in the main form of the program, then this may be due to the mime type transmitted by the server for this media resource. The Mime type can be changed in the program settings - Settings button - "Media resources" section - "File types" - selecting a file extension - Change button.
Watching movies from the server
The server can transfer films to a media device in their original form or through transcoding (converting a film into a format supported by the media device). The movie is automatically transcoded if the file extension is not included in the list of supported ones or if a transcoding profile is selected for the movie. Configuring movie file extensions supported by the media device: “Settings” button - “Device” section - “Built-in file support” - “Movies”. The list of file extensions is generated according to the media device user manual or information on the media device manufacturer’s website. If the film is played in its original form, then selecting the audio track and subtitles included in the film file is possible only if the media device supports this choice. When you select a movie through the Transcoding folder, you can select an audio track, internal and external subtitles, audio delay, and a transcoding profile to convert the movie.
Transcoding profile is a script (macro) that generates parameters for calling a transcoding program or performs transcoding using DirectShow. Editing transcoding profiles: "Settings" button - "Transcoder" section - "Profiles" button.
The transcoding profile used can be selected:
- for all films: Settings button - section "Transcoder" - "Transcoded file parameters" - Movies - "Transcoding profile"
- for movie files of a certain type (extension) - Settings button - “Media resources” - “File types” button - selecting a file extension - Edit button - “Transcoding profile”
- for a specific film: in the list of films of the main form of the program, using the right mouse button - “Transcoding profile” or through the navigation of a media device, if the film is selected through the Transcoding folder in the Settings folder, generated by the server for each film.
When playing movies, media devices usually stretch the video to fill the entire screen, so to maintain the proportions of the movie frame, the server generates parameters for adding color to the original frame size to the frame size specified in the settings. Setting the transcoded frame size and the color of the addition is set in the program settings - Settings button - section "Transcoder" - page "Codecs, frame" - "Frame size". Color addition is not supported by all transcoding programs, so if you select a transcoding profile different from the main ones, it may not be available.
Reasons for errors when playing movies from a home media server:
- select the original movie file in which the format, video or audio encoding is not supported by the media device, a possible solution to the problem is to select the movie through the Transcoding folder
- a movie is selected through the Transcoding folder, in which video or audio encoding is not supported by the transcoder program; a possible solution to the problem is to select a different transcoding profile for the movie; Problems with the audio track can also be solved by setting the number of channels in the program settings (section Transcoder - “Codecs, Frame” page) to 2
- Media device or server is unavailable: Reboot the media device or server.
Reasons why content playback stops slowing down:
- stopping viewing may occur due to insufficient disk space used to store temporary files; exceeding the file size supported by the device; exceeding the maximum size of the transcoded file specified in the program settings (section Transcoder - “Transcoded file parameters” - Maximum size).
- The transcoding speed of the film is not sufficient for viewing, you can check this in the main form of the program: perform test transcoding using RMB in the list of films - The transcoding speed (fps parameter) must be greater than the frame rate of the film. If the “Show transcoding panel” mode is enabled in the program settings (Transcoder section), then the transcoding speed can be viewed in it after selecting a movie on the media device. You can also turn on the transcoding speed indicator (section Transcoder - “Subtitles, speed indicator”), if the transcoding speed is less than the value specified in the program settings, the current transcoding speed will be displayed on the film frame in the place specified by the user.
Equipment synchronization methods
There are two options for supporting DLNA technology on a TV - built-in and external . In the first case, we have a wired connection organized via a USB interface or via a wireless Wi-Fi module. Codecs in the local firmware are responsible for playing content here, which significantly reduces the list of readable formats, because in a good half of cases standard players have modest functionality.
External DLNA support is provided using third-party devices: terrestrial, cable or satellite TV receivers, multimedia players, game consoles, etc. This option significantly expands the capabilities of content visualization and eliminates any conflicts of standards and problems with codecs.