Just a few years ago, only top TV models from various manufacturers could boast of a built-in Smart TV function. But competition does not allow progress to stand still, and today owners of even budget models have the opportunity to turn their Philips TV into a home minicomputer. We will tell you how to do this, what capabilities this function gives our TV and everything connected with it in our article.
Introduction to the topic
So, what is the Smart TV feature on a Philips TV? This is a set of special tools that allow us, using only a TV, to go online to watch movies, visit various sites, download and install numerous applications. Thus, it turns out that the Philips TV becomes, in its capabilities, if not a full-fledged PC, then certainly a tablet.
In the early stages of release, to implement Philips Smart TV technology, the company equipped its television products with various operating systems. However, this approach turned out to be not entirely convenient, and several years ago it was decided that subsequent models would use only the Android OS.
A little about SMART TV from Philips
I wouldn’t like to spill the water, but now you won’t surprise anyone with some “smart” TVs. Personally, I am a fierce fan of LG, at least Samsung. But I noticed that our readers are diligently switching to Sony Bravia and Philips TVs. I still don’t understand what’s special about it, apparently it’s a matter of habit, but the price tag and functionality are about the same.
Philips TVs operate on WebOS or Android operating systems.
Recently, there has been a fashion for switching to Android - it’s cool, fashionable, and familiar, and there are more than enough functions. But WebOS, as a transitional form between dead firmware and a full-fledged “axis”, is also not bad. In both cases, it’s easy to connect the TV to Wi-Fi, set up channels and install a third-party application. I would like to devote further narration to these questions.
Setting up from scratch
Let's start setting up your Philips TV from scratch - as if you just brought it home. There is nothing complicated, just do everything step by step and everything will definitely work out. But if anything, you can ask questions in the comments.
Basic setup
- Connect to the network. Turn it on with the remote control. The TV should turn on - how it will behave is unknown, there are a lot of models, versions too. So your experience may vary. In my case this is true, in yours it may be different. But the essence will definitely remain the same. So watch and do likewise.
- Select the language - Russian.
Network connection
It would be possible to configure the channels, but first I suggest connecting to your wireless network.
- Select the appropriate item:
Software Update
Immediately after connecting to the Internet, the TV will check for updates, and if it finds it, it will ask you for permission to update:
Setting up channels
Need to tune in regular TV channels? No problem.
- From the main menu, select “Install”:
Installing applications
The most difficult thing before installing programs is connecting to the Internet. If you have already done this, then everything else is simple. You look for the desired application store in your firmware and install anything. Below I suggest you watch 2 videos on installing applications for free IPTV with complete setup from scratch:
Where to begin
Before you start setting up Smart TV technology on your Philips TV, you must first determine whether it supports it or not. You can find this out either in the User Manual on the page with the characteristics of your device, or on the manufacturer’s website, or even visually: check for the presence of an input for connecting an Internet cable, a built-in Wi-Fi function, or simply look for a button on the remote control with that name.
After we have made sure that our Philips TV works with Smart TV, we can move on to the next step: install the latest current firmware update. This procedure must be done due to the fact that sometimes a bug or incompatibility with some equipment may be discovered in the operation of any device. In this case, the manufacturer corrects the error and releases a new update.
Setup procedure
As you can understand, the setup procedure is not complicated and is as automated as possible. Therefore, even people who have encountered Smart TV for the first time should not have any problems.
Next, the user will need to configure the channels, but before that, the developers recommend a full update. The latest firmware version will help avoid further errors.
Setting up channels
Instructions for setting up channels:
- The “home” button is pressed on the remote control.
- Select the “configuration” section.
- The “channel search” command is installed.
- The user's country of residence is selected.
- If the country is not in the list, you can select another.
- The TV signal source is set to cable or satellite.
- The channel search starts. It is better to configure it automatically, but you can also do it manually.
- Switches to the Quick Scan tab.
Important! On average, setup takes no more than 10-15 minutes.
Update instructions
Well, we understand the importance of timely updating of the firmware. Let's move on directly to the question of how we can update our Philips smart TV. In order for us to download and install the software code update, we need to set up an Internet connection.
Setting up an Internet connection
To this end, we should adhere to the following procedure:
- We go to the Main Menu of our TV, for which we look for a button with a picture of a house on the remote control and click on it.
- After this, we will see icons of the main sections of the Menu on the screen. We will need to select the icon that says “Configuration”.
- Among the settings items that appear, look for “Network Settings” and go into it.
- We will be offered 2 connection methods to choose from: wired and wireless, i.e. using an internet cable or Wi-Fi. We select the option that is convenient for us and click on it.
- Depending on the connection method, we select either our wireless network and enter a password for it, or we connect our TV to the router via cable.
- After this, a message should appear on the screen that the TV is connected to the network.
For a correct connection, the DHCP function must be enabled on the router.
It is also recommended to connect via a router to simplify the procedure: all network settings for your connection will be performed automatically. Otherwise, you will have to manually enter your provider's network parameters.
Firmware update
So, after gaining access to the Internet, all we have to do is download and install the latest firmware update for our TV. Our procedure is as follows:
- We go back to the Main Menu by pressing the key with the house icon.
- Again, select the icon that says “Configuration” and click on it.
- Next, find the item “Software Update” and go into it.
- We will be offered 2 options to choose from: update via the Internet or using a USB flash drive. Naturally, the easiest option would be to update via the Internet. A flash drive should be used if for some reason we were unable to set up our connection to the network. By the way, this may well be due to outdated firmware.
- After selecting the firmware via the Internet, our TV itself will search for the latest versions, and if it finds it, we will see a request to confirm consent to this operation. If our firmware is the latest, then the TV will also notify us about this. Then you won't have to do anything.
- After receiving consent to carry out the firmware procedure, our Philips will handle it on its own in a few minutes. To avoid possible failure, do not turn off the TV during flashing!
Now we are ready to move on to setting up our Philips Smart TV.
All about IPTV on Philips TVs
If you purchased a Philips TV, then you will definitely need to set up iptv on it. Our article will tell you about the capabilities of this technology and the basic rules for setting it up.
What is the technology and its advantages
Increasingly, models are being released onto the market that are equipped with the Smart function. Philips was no exception, and any of its advanced TVs have long provided such capabilities.
But what is iptv on a Philips TV and why is it even necessary? Today, iptv is the most modern solution for use in advanced models. When using iptv, you do not need a set-top box for the device, an antenna or a cable from the operator. All that is needed is a simple connection to the World Wide Web for full use of resources.
In the table you can evaluate the main advantages of iptv.
| Does not require additional connections | You don't need a set-top box, cable or other similar means. All that is needed is a connection to the World Wide Web and special software. |
| Low cost | Smart TVs are usually provided by services for free or at a very low price. |
| Easy to connect | For Smart, you just need to connect the model to the router, then download the software and configure it. |
| Huge number of channels | Smart TV offers hundreds of programs to watch, and you will not be limited in your choice. |
| Possibility of full control | On a device with smart technology, you can control playback, stop it, and view individual programs. |
That is, the advantages of the smart TV iptv technology installed on Philips are simply obvious. You don't need a set-top box, equipment installation, or a lot of connection time. Modern iptv on a TV from Philips allows you to completely organize your leisure time, provide the opportunity to use unlimited resources and watch many channels.
But to use the fashionable smart, you need to set up iptv, but on advanced Philips TVs it does not take much time.
About setting up smart TV on Philips
Now let's look at how to set up a smart TV on a modern Philips. To access Smart on your TV, you will first need to connect your TV to a wireless network. You can do this in the menu by simply finding your network. In order not to enter an access password, you can use a secure connection through the router button. Does not require additional connections
That is, the advantages of the smart TV iptv technology installed on Philips are simply obvious. You don't need a set-top box, equipment installation, or a lot of connection time. Modern iptv on a TV from Philips allows you to completely organize your leisure time, provide the opportunity to use unlimited resources and watch many channels.
But to use the fashionable smart, you need to set up iptv, but on advanced Philips TVs it does not take much time.
About setting up smart TV on Philips
Now let's look at how to set up a smart TV on a modern Philips. To access Smart on your TV, you will first need to connect your TV receiver to a wireless network. You can do this in the menu by simply finding your network. To avoid entering an access password, you can use a secure connection through the router button.
Let's move on and consider how to set up a smart TV on a Philips model. Now you need to press the Home button on the remote control to access the menu. It is necessary to check the relevance of the software used, and if necessary, immediately update it to the latest version.
To set up a smart TV on a Philips model, you will need to go to smart TV and accept the user agreement. Next, register your account in the iptv system and log in to it. Everything is standard here:
- First and last name.
- Floor.
- Date of Birth.
- Email.
- Password for access.
After registering your account, you need to log in, this is how direct activation is carried out. The next step is to register your device in the system. To do this, you simply need to enter the product number in the form provided, after which the system will determine your model for more accurate interaction.
If certain errors occur when registering an account and repeating the procedure does not help, then it is best to use a computer and then simply log into your account.
Once you have completed all the initial settings, you can see the main window of the Smart system on the screen. To begin with, you will be offered individual recommendations; you can turn them on or completely refuse the system’s advice. Next, you are given the opportunity to set parental controls. All applications and programs labeled 18+ will be prohibited from viewing. In the future, this feature can be turned off in the settings, but only when using your account settings.
After the last questions, a browser window appears in front of you. With its help, you can visit pages on the Internet, view video files and channels. The main screen of the “smart” mode contains installed channels, you can fully control their playback and organize convenient viewing.
What is dvb and its capabilities
But it’s not just the “smart” system that makes the latest models on the market valuable. Modern technology uses dvb modules; they open up new opportunities for the owner.
The latest devices from Philips are equipped with a dvb t2 module; you no longer need a set-top box from the operator. A modern dvb module processes the digital signal itself and allows you to adjust it for further playback.
This means you can save on expensive equipment from the operator, which is a big plus. But you will need the following items:
- A dvb antenna, you can purchase an inexpensive option, it can provide reliable reception.
- Cam module for decoding encoded signals.
- Access card from one of the operators.
You won't be able to simply connect an antenna and start watching. On the screen you will not see colorful digital channels, but simply a notification that the resource is encrypted. Companies transmit their signal in a special format, and you can only access them by purchasing a subscription and a card.
It turns out that the dvb t2 module on Philips will not be able to provide free viewing. There are also not entirely legal ways to use dvb sharing over the Internet. You actually buy access from one of the services for pennies, and it provides you with a connection through an official card and a full range of necessary capabilities.
In any case, the dvb module on the TV can be called a useful addition and can be used to receive digital TV.
(1 ratings, average: 5.00 out of 5) Loading…
resiverplus.ru
How to set up the Smart TV function
So, for those who want to know how to enable Smart TV on our Philips TV, we have prepared simple instructions:
- We go to the Main Menu, we are interested in the Net TV item (in older models) or Smart TV in recent models.
- When we click on it, we are connected to the Philips server and asked to accept the terms of service and create an account. We agree to the terms, and creating an account can be skipped as an optional item.
- In the next window, we are asked to activate the individual recommendations function, which, based on our actions on the Internet, will show us contextual advertising. Most users tend to ignore this functionality.
- Next, we may receive a proposal to install parental controls on 18+ content. If you have small children in your family, we recommend setting a password for such channels.
- After this, the initial setup is completed and there will be no such requests on subsequent visits to the Smart TV section.
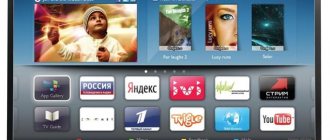
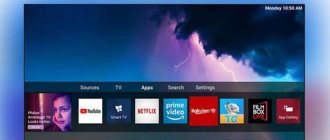
- A menu with pre-installed applications will open in front of us. Due to the fact that the OS of the Philips TV is essentially a slightly modified Android, we can log into our Google account and its saved application settings, etc. automatically activated on our TV.
As you can see, setting up the Smart TV function on your Philips TV for free is not difficult.
Problem solving
If you can't connect your Philips TV to Wi-Fi, try the following:
- Reboot your router and try connecting again.
- Make sure you entered the wireless security key correctly.
- Check the network settings on your TV:
- Press the “Home” button on the remote control, select “Installation”, then “Network settings” and “View network settings”;
- “Network mode” – should be “DHCP/auto IP”;
- “IP Address” – must be filled in;
- “Signal strength” – at least 80%.
- Unplug the receiver and disconnect all cables. Wait a while and try connecting your Philips TV to your router via Wi-Fi again.
- If your Philips TV does not see the Wi-Fi network, check your router settings. The network may be hidden.
Registration in the company club
To fully use Philips Smart TV, you will have to register with the official club. Once the TV is connected to Wi-Fi, a window will appear on the screen to create a new account. Registration is quick; to do this, follow the suggested step-by-step instructions:
Settings
Setting up channels is easy even for those users who have never dealt with a smart TV before. To set up Smart TV, you need to connect your Philips to Wi-Fi and take a few simple steps:
- Call the main menu on the TV screen using the “Home” button with the house icon, then go to the “Configuration” section.
- Launch “Channel Search” and select “Reinstall Channels”.
- From the list of suggested states, select the one in which you live.
- Then you will be asked to determine the signal source: cable or satellite television.
- A window will open where you need to click on the “Settings” button. Activate automatic search, as manually searching for TV channels is inconvenient.
- Go to the "Quick Scan" tab.
If television broadcasting will be carried out through a regular antenna, then activate the “Digital TV channels” column and start the search. It usually takes no more than ten minutes.
New features of our TV
After this simple procedure for connecting Smart TV, our device will get a second life. There will be many additional features, such as:
- Access to the play store with thousands of different games and applications.
- It will be possible to work and view media content on the Internet without the need to use a computer.
- It will be possible to install IPTV with many TV channels for every taste.
- Thanks to Google services, our TV will receive advanced multimedia functions and much more.
Your Philips Android TV with Smart TV will transform into a full-featured entertainment center with advanced features for every taste.
What kind of internet is on Smart TV Philips?
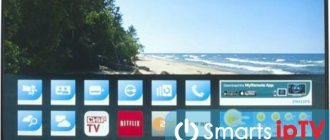
To surf the Internet from Smart TV, a browser is used. If the Browse TV symbol is displayed in the main menu, when you press it, the user will see applications displayed on the main screen.
To work with the network, use the “Internet” icon. If in the main menu there is only the YouTube add-on, there will be no access to free navigation on the network.
When you can’t add any sites, for example Google, look at the sticker to see what model of device it is.
Remember that you can add online add-ons only from standard sets.
Alternatively, to find standard add-ons, you can use Gallery. For example, select Google. There will be a program and news.
Remember that it cannot be used as a search engine. Also, users often say that it is impossible to find a social network such as Facebook. In this case, to navigate the Internet, you should use the icon of the same name, located on the main Philips page.
Important! Another common reason is that the service is blocked during the initial boot. In this case, clear the add-on memory.
Popular today
Installation of the most popular applications is also done in a couple of clicks: you just need to select what interests us, add it to the main page and that’s it! Now we can always use this program simply by launching it.
Today, applications such as:
- Ivi, which gives the viewer access to thousands of gigabytes of children's entertainment videos, TV series and cartoons.
- Amediateka, which is the most popular aggregator of TV series released in all corners of the planet.
- Stream Interactive is an application for watching television programs at a convenient time for us and many others.
Applications online
Functionality on Smart TV Philips
Philips TVs have come out on top in recent years. Technologies make it possible to provide support both through the TV itself and through the set-top box.
The main functions of this technique:
- Downloading or installing applications via an Internet connection. The work is carried out through the official system program, which is regularly updated.
- Connect and work with TV functions remotely (from a computer or any other device, including a mobile phone or tablet).
- Ability to record and play movies or TV shows. The broadcast can be paused, which is also convenient.
- Synchronize files on all devices belonging to a single network. This is done using a wireless network.
SimplyShare
This function is necessary to synchronize the main device and the personal computer. The process takes place via Wi-Fi access. This feature is available on all latest generation Philips TVs. Once connected, the TV itself will do everything necessary.
Important! Also, when using this function, you can play your favorite tunes directly from your gadgets.
Control
The Control function has received additional updates over the years. Now the user will be able to control the device using a mobile phone (tablet, laptop or other).
All the user needs to do is install a special application. This function can replace the usual remote control.
Net TV
The function is designed to provide quick access to the Internet. You can also quickly access the most popular services: Vimeo, YouTube, etc.
Note! All applications are configured automatically after connecting the device. Viewing from these resources is absolutely legal and accessible.
USB recording
One of the simplest but necessary functions. With its help, you can pause and record any movie or TV show on a portable storage device. This way the user can watch the video at any time convenient for him.
Some features
Section to familiarize yourself with the features of Philips TVs - for setup instructions, go to the following sections.
Each manufacturer will try to cram something special into their model. In this section we will post the features and differences of some functionality:
- SimplyShare is the basic functionality of content sharing. In the same LG it is SmartShare. In a general sense, we are talking about the DLNA service - the ability to connect to media servers on the home network and play photos, music, and films from them. And there is an interesting feature here. Personally, my TV constantly tries to resist new video formats, and only updating TVs helps. There is also a feature of SongBird - downloading the necessary codecs. That's why it's Android, to simply solve all problems.
- Control – a function for remote control of TVs over a network. Those. The infrared remote control is convenient, but if it is far away, or something happened to it, you can install the “My Remote” application on your phone and continue clicking on your favorite channels in a circle.
- The Net TV service is an application for viewing video content in familiar services like Youtube or Vimeo (the list is large, but is no longer intended for our Soviet space). YouTube looks fine, checked. To access it, simply select the item of the same name from the main menu. Some models simply don't have it - just live without it.
- FunSpot is a Flash games service. Those. If before it was a wonder to play on a TV (not on a console, but on a TV set), now he can launch small beautiful toys himself.
- Recording – Philips can delay recording of programs via USB to a flash drive. On wooden firmwares of the same LG there is no such functionality.
That's all for setup. If you have any questions or comments, write them in the comments. We will respond and supplement the article.
For many years, Philips has remained one of the largest TV manufacturers in the world. Today it ranks third after LG and Samsung in terms of the number of devices sold. Such a high position obliges the company to monitor the latest innovations in the field of television and promptly introduce them into its products.
Over the past few years, special attention of television equipment manufacturers has been focused on ease of use, expansion of functionality and availability of Smart TV technology in their products. Philips has not remained aloof from these trends and has noticeably increased both the quantity and quality of applications for Philips Smart TV.
