The IT technology industry does not stand still, but, on the contrary, is developing dynamically. Almost every day new devices appear that make everyday tasks much easier. Particular attention should be paid to the synchronization of television equipment and computer equipment.
To connect a laptop or PC to a TV, the HDMI interface is often used. This TV cable is significantly superior to other available cords, such as VGA or tulips.
Despite the fact that this method of synchronizing a laptop and TV has been used for quite a long time, few people know according to what criteria an HDMI cable is selected. In fact, it is extremely easy to get confused and make mistakes. Especially if you have no idea what meaning is hidden behind this English abbreviation.
High Definition Multimedia Interface or HDMI is a multimedia interface that provides the transmission of the highest quality video content and multi-channel digital audio signals.
The terminology is, of course, good, but let’s figure out how HDMI is better than conventional tulips. The fact is that using old interfaces, you will not be able to broadcast images with maximum quality to the TV screen. Therefore, to watch movies in Full HD, you should use HDMI and not any other cable.
If we compare this interface with DVI, it will also be more advantageous. Firstly, it is compact. Secondly, it is equipped with copy protection.
We are convinced of the relevance of the cord, but how to choose it? Let's consider the main criteria:
- version;
- price;
- length;
- thickness;
- material.
In the future, we will consider these criteria in detail and give specific recommendations for choosing a wire, but now we will analyze the areas of use of the cord.
Where are HDMI cables used?
The purpose of the interface is to transmit high-quality content. This cord is mainly used to connect laptops and TVs, but you can also use it to connect a smartphone, tablet and other devices.
Bandwidth capacity – 18 Gbit/sec. This protocol was created in 2002 and began to be actively used. The HDMI cable provides high-quality image transmission and clear sound from your computer to your TV. The interface is unique in that it replaces 5-6 cords at once.
What does the wire look like? In appearance, it is not much different from its analogues. Modern models are available in a fabric shell. Their advantage is that they are better resistant to mechanical damage.
We list the main functionality:
- image transmission in Full HD resolution;
- clear sound;
- copy protection;
- displaying pictures on a large screen;
- connecting game consoles;
- watching films, TV series, TV shows;
- playback content from Blu-ray players.
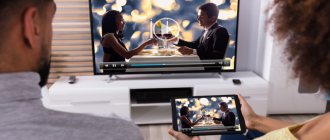
If the laptop is connected to the Internet, then you can watch your favorite movies or TV series online. How does the cable work? Elementary, just connect one end of the wire to the laptop and the other to the TV. Then select the appropriate signal source. After this, the desktop will be displayed on the monitor.
Possible connection methods
The method of connecting a digital television receiver to an old TV directly depends on the connectors that are present on each device. The greatest difficulty arises when you need to connect a lamp device or there is a mismatch of connectors between the set-top box and the TV, even if the latter is modern.
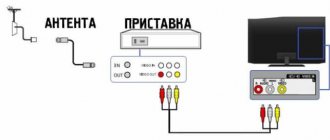
3RCA
The external one consists of three ordinary wires connected to each other, with plugs of different colors at the end of each. Cables and connectors are painted in identical colors to avoid confusion and to indicate the purpose of each connector. So, the yellow color indicates the transmission of a video signal, the white and red plugs indicate that the left and right audio channels are transmitted.
Due to the design of the plugs, which outwardly resemble tulips, the cord began to be called “tulips”. Sometimes you can hear the name “bells”.
The quality is inferior to the more modern HDMI. Tulips transmit an analog signal.
Additional Information. Better image transmission will be carried out by the same tulips, only with an increased number of connections (plugs and ports on the equipment). The cable is structurally the same, but with five tulips. If previously the video channel was transmitted only by the yellow tulip, then the component cable (as well as the interface) is divided into several video channels (red, blue and green). It is through separation that a higher quality picture is ensured. The audio is still broadcast by red and white tulips.
Instructions for connecting and setting up channels:
- All equipment is turned off by at least a control panel.
- To connect a TV set-top box with tulips, you need to insert the plugs of both ends of the cord into the receiver and the TV. All equipment is first turned off by at least a control panel. Carefully ensure that the colors match when connecting. Although it is difficult to mix up tulips, such situations still happen.
If the old TV has two tulips and not three, then you need to plug yellow and white into the connector. Red is left free. The sound will be reproduced in mono format without separation into right and left sounds. - Turn on the TV and then the tuner.
- Switch your TV to a different display mode. You must select AV mode. On very old models of television receivers, a button on the remote control with the same name “AV” may be responsible for switching the mode. Click on it until you see the console loading screen or its menu if it has already loaded. On modern models, the “SOURCE” button is responsible for selecting the display source. Often indicated by an icon of a plug with a wire. Press the button and select the desired one from the available modes.
New models can not only indicate the name of the mode, but also immediately show the connected equipment in the list. In this case, switching to a set-top box is even easier, since it will immediately be clear that this is necessary equipment.
- When you turn on the set-top box for the first time after purchase, if the receiver has not previously undergone initial setup, the device will prompt you to perform a basic configuration. Depending on the receiver manufacturer and model, the list of parameters may vary slightly. As a rule, you need to select the country, language, television broadcast standard, image resolution, and screen aspect ratio. When all the parameters are set, the next step (after pressing the “OK” button on the remote control) is that the set-top box can begin automatically searching for channels. If there are no problems with connecting all nodes, then the tuner will scan all TV channel numbers (the corresponding signal frequency ranges) and find channels broadcast by nearby TV towers. Channels will be added in lists of 10 channels (in Russia, multiplexes broadcast 10 channels each). In total, two multiplexes (packages) are broadcast, that is, you will be able to catch 20 free over-the-air channels. The exception is Moscow, where a third multiplex was launched as an experiment. Also, historically, 30 channels are available from Ukraine, in parts of Crimea and Simferopol. In Ukraine, you will be able to watch 32 channels, which are transmitted by 4 multiplexes with 8 TV programs each.
- When the channels are found and the search is completed, be sure to confirm saving the channels or agree to complete the setup. If the set-top box does not offer to do anything, then you can proceed to viewing.
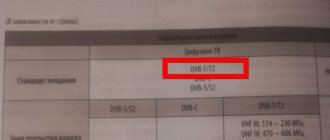
- The setup algorithm is slightly different if the set-top box is not turned on for the first time, and the initial setup has already been completed. Then you need to press the “Home” or “Menu” button on the tuner remote control. In the main menu, find “Search” in the list of sections. Make sure that the broadcast standard is “DVB-T2”. Next, perform automatic or manual tuning of TV channels by selecting one of the items.
Always do an auto search first, but you can first go to the manual search menu to look at the signal strength scale. It will show the strength of the received signal and allow you to adjust the antenna in real time to raise the level as high as possible. - A few words about the antenna power supply. If the antenna has a built-in or external amplifier, then it needs power. The amplifier can be powered in two ways - either through an external power supply or through a set-top box. To get rid of the external unit, you can remove it and activate the “Antenna Power” function in the “Search” menu. In this case, the voltage will flow through the antenna feeder, which connects the antenna to the attachment.
If automatic tuning does not produce results, or for some reason you want to use the manual search method, then go to the item of the same name in the tuner menu.
Then follow the link to open the map of digital terrestrial television (karta.rtrs.rf). Enter your address into the search bar, down to the house number. If the house number is not found automatically, then find it on the map. Next, left-click on the house. A pop-up block will appear with information about two repeaters that operate in the current area.
According to available data, you need to select the closest television broadcaster. The signal from it will arrive at the maximum level. Then record the data about the TV tower (write it down on a piece of paper, remember it, or simply open it through your phone in parallel with the setup).
To configure, you need the given TV channel numbers of both multiplexes. Each number corresponds to a specific frequency value. You can also tune in through the frequency, but it is much easier to enter the television channel number (TVC). The frequency will be automatically set to the one that matches the channel number. Additionally, it is recommended to verify the data by looking at the information about the TV tower on the map.
When the data is received, in the “Search” section, go to the “Manual Search” subsection.
Use the remote control to set the TVC number of the first multiplex. Start your search and save your changes when finished.
Then similarly search for the second multiplex.
Don’t forget to look at the signal scale after entering the TVC. If necessary, “play” with the antenna.
SCART
The “centipede” connector is built into equipment that is sold on the European market. Depending on the signal type, it is possible to transmit both digital and analog signals.
At the present time, SCART is rarely found in modern technology in the CIS market.
To connect the receiver via SCART, follow the algorithm below. It is no different from tulips:
- turn off the digital decoder and TV;
- insert both ends of the SCART cable into the corresponding connectors on the receiver and television device;
- turn on both devices and switch the TV to the “AV” signal source mode;
- set up TV channels on the set-top box, as described in the previous paragraph using tulips as an example. The setup instructions are no different. How the equipment is connected to each other does not change the setup algorithm in any way.
Connection with antenna cable
This connection is necessary when using a TV that is not equipped with any connectors other than an antenna. The latter is used to connect an antenna to watch analog programs.
Such devices may still be relevant. For example, you need to connect terrestrial T2 television to a dacha that is rarely visited, but you need to periodically turn on the TV for background use. Then, instead of a new TV receiver, you can purchase a set-top box, install an antenna, and organize the correct connection and configuration. This is much cheaper than buying a new TV panel.
The main problem is that the set-top boxes currently produced are designed to connect to more or less modern devices via tulips and HDMI.
Connection to old equipment via the antenna cable input can be organized in two ways:
- The set-top box must have on the rear panel not only an input jack for the antenna, but also an additional output jack.
Moreover, it must be high-frequency. Then the output acts as a modulator. And the connection itself to a very old TV is made with a coaxial cable. Often this output is used to connect another set-top box, which in turn connects to a second TV. But the output does not modulate the signal in any way, so in many cases such a prefix will not work. You need to find out about the characteristics of the set-top box, in particular the presence of an RF connector, in the store from the seller or look in the characteristics of the device. - An additional device in the form of an RF modulator will be required. First, the block is connected to the existing attachment through tulips. Then a cable is inserted into the antenna socket of the modulator, which is already connected and leads from the TV.
Types and versions
Several well-known companies worked on the creation of the interface: Thomson, Sony, Philips, Hitachi and others. As a result, in 2002 the emergence of a new standard was officially announced. For more than 15 years, HDMI has held a significant position in the digital technology industry. The developers do not stop there, constantly improving the cable.
To determine your HDMI version, check the specifications. Let's briefly look at the distinctive features of all existing versions:
- Version 1.0 appeared in 2002. Maximum throughput 4.9 Gbps.
- Two years later, modification 1.1 appeared. The developers have managed to improve sound processing for DVD-Audio playback.
- In 2005, the interface underwent major changes. Release 1.2 included a wide range of innovations:
- Supports 1-bit audio.
- Using a uniform color space.
- Interaction with low-voltage signal sources has been established.
- The remote control protocol has been added.
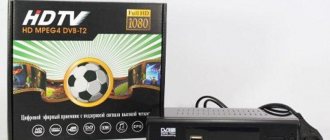
HDMI 2.0 4K 3D UHD CABLE
We've sorted out the versions, this factor must be taken into account when choosing a cable. After all, if you buy a cord for playing video in 4K format, but it is the first version, then nothing will come of it.
Now let's talk about the types of HDMI cables, there are also a lot of them. The high-speed cord specification identifies 5 types. Let's look at all the varieties and their specific features.
Standard
Standard View supports 1080i (Full HD) or 720p (HD) video content. Used to connect all kinds of home appliances with minor parameters: DVD, satellite receiver, plasma, LCD and LED screens.
This is a budget option designed for household devices. Suitable for users who are undemanding about high quality picture and sound. Characteristics:
- The maximum throughput is 4.9 Gbit/s.
- Video transmission frequency – 165 MP.
- Color depth – 24 bits.
That's all the average user needs to know.
High Speed
The high-speed type features support for almost all video formats, including 3D and Deep Color. Specifications:
- The maximum throughput is 10.2 Gbit/s.
- The video stream transmission frequency is 1080 megapixels.
- Color depth – 48 bits.
Support for reverse audio channel is implemented, which ensures the transmission of the highest quality audio without the use of additional cords. Naturally, connected devices (home theater or regular TV) must have this technology. Transmits a video signal with a resolution of 4096 x 2160 pixels.
Standard with Ethernet
Standard + Internet is absolutely no different from the first type cable, except that it is equipped with an additional channel for transmitting Internet data at speeds of up to 100 Mbit/s. The function will only be available if the connected device supports Ethernet HDMI technology.
This type of connection makes it possible to establish a high-speed Internet connection and distribute the received data to other devices connected via the HDMI interface. Audio Return Channel support is also implemented.
High Speed with Ethernet
By and large, this is an improved version of the previous type. As for the specifications, they correspond to the parameters of version 1.4. A universal cable that is suitable for receiving and broadcasting content with an Internet connection.
Automotive Standard
A special type that allows you to connect external HDMI devices to car media systems. Experts use this cable when installing an audio system in a car.
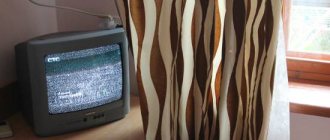
Old TV concept
A plasma flat-screen TV is considered modern, and can be connected to via different types of interfaces (at least via HDMI and 3RCA).
By old, many mean different techniques:
- Soviet tube convex TVs, on the back of which there is only an antenna connector;
- convex CRT models, but in new plastic cases with many connectors on the back or side panels.
The second device is connected to a set-top box in the same way as to a regular modern television receiver. Use a 3RCA cable (tulips), HDMI cable, VGA or SCART. Sometimes converters can be used if the interfaces do not match. But still, connecting the set-top box and the TV receiver does not cause much difficulty.
The situation is different when on the TV, except for the “ANT IN” connector for connecting the cable coming from the antenna, there are no more ports. In this case, the connection raises questions, since all modern devices, including receivers, have only new interfaces. Obviously, you will need to use some kind of adapter. In fact, in some cases you can do without additional modules if the set-top box can convert a low-frequency digital signal into a high-frequency one. To do this, the tuner must have an additional port with the appropriate purpose. We described in more detail below all the ways to connect an old TV to a digital television set-top box.
HDMI cable connectors
Previously, it was determined that the most progressive type is the High Speed with Ethernet cable in specification 1.4, and now we will talk about modifications to the connectors. Absolutely all types of HDMI are designated in Latin letters. Let's look at popular connectors:
- A – standard interface; this is the connector that manufacturers often equip digital equipment with. Suitable for connecting TVs.
- C (micro) and D (mini) – reduced HDMI connectors. Used to connect smartphones, cameras, laptops, tablets and other portable devices.
- B – the connector has an expanded video channel for broadcasting content with a resolution of more than 1080p. It is less popular than the previously listed types.
- E – equipped with a special lock that securely fixes the connector with the port when connecting the device. Used in cars when connecting audio systems.
How to choose the right connector? Consider the connection features, the size of the connector connector, as well as the goal that you set for yourself. For example, Type A is suitable for TVs, and C or D for smartphones.
HDMI cable length and thickness
Surely many users are wondering what length of HDMI cable is best to purchase? According to regulatory documentation, the maximum wire length is 10 meters. There is no such information in the specifications, but often this parameter varies from 75 centimeters to 10 meters.
It is possible that you will be able to find a longer wire. However, it is absolutely not necessary to buy a cord, which is called “with a reserve”. Dimensions that do not comply with regulated standards may later become a catalyst for problems during operation. For example, attenuation or distortion will appear - all this will negatively affect the quality of the broadcast picture.
The quality of transmission depends not only on the size, but also on the material from which the cord is made. For testing, let's take the standard view of version 1.4. These cables are often constructed using 24 AWG oxygen-free copper. As for the High Speed type, it is created from a similar material, but the thickness is 4 AWG greater. This comparison clearly demonstrates that the quality of the material and its thickness directly affect the functionality and service life of the conductor.
It should be emphasized: if a standard cable is made of really high-quality material, then it will provide signal transmission up to 15 meters. If the length of the cord is more than 15 meters, and after connection the loss of picture quality is noticeable with the naked eye, then be sure to use special signal amplifiers.
The high-definition interface must convey absolutely all data to the receiver without any distortion. Many manufacturers note that wires made from expensive metals demonstrate the highest speed of information transfer with the complete absence of interference and failures.
It is worth considering that the use of expensive metals directly affects the cost of the wire. When choosing a cable accordingly, take into account the tasks you set for it. For example, to transfer data from a tuner or satellite receiver, a very ordinary cord will do, since the information flow is not large. Viewing 3D content will require more expensive models.
Necessary elements for connection
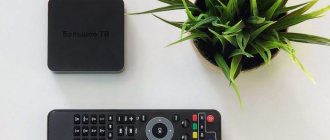
- The tuner itself (aka receiver, set-top box, decoder, DVB-T2 receiver). Applicable to digital TV, all listed terms have the same meaning.
If the TV is outdated, but not tube-based, and has at least a connector for tulips, then it is also better to take a set-top box with an AV interface (audio-video, audio-video). If the set-top box only has an HDMI port, you will have to use an adapter. But when television equipment runs on lamps, then in order to do without an external RF modulator, you need to take a set-top box that has an antenna high-frequency output. It should not just be an output, which is often used to connect a second set-top box, but be a high-frequency one. That is, it works on the principle of an RF modulator. Then the connection of the old model TV receiver such as “Ruby” and “Horizon” is done through a regular coaxial cable, instead of tulips or other multimedia cord. It is better to ask the equipment seller or online store support about this possibility, since often the output connector is not high-frequency. - Antenna.
To receive digital television channels, only a decimeter antenna is suitable.
Only such a design is capable of catching a signal transmitted by decimeter waves. An all-wave design will also be able to catch digital numbers. Then you will be able to configure the set-top box for analog and digital channels simultaneously.
Analog TV broadcasts are often available in many regions (local television). Regarding the old antenna with which you previously watched analogue broadcasts, you can remove it and throw it away, scrap it for metal. Since it will no longer be useful. The only option for using an analog antenna is to connect it simultaneously with a digital antenna to a TV in order to switch between watching analog city channels and DVB-T2 programs. The design for receiving “digits” can be purchased or made independently. If the TV signal repeater is no more than 15-20 km away from you, there are no obstacles in the path of the signal (high mountains or dense concrete buildings), even the most primitive antenna made of a cable (loop) or two beer cans can help. Otherwise, you will need to purchase a digital antenna receiver, preferably with a built-in amplifier. It is better to install the antenna outside, or at least on the balcony. It is necessary to direct as accurately as possible to the repeater. You can find out the exact direction of the TV tower on the public map of CETV using the link. The installation height of the antenna also affects the final level of the incoming signal. Problems often arise on the ground floor, since even low structures affect reception. Therefore, it is better to install it as high as possible, ideally on the roof of the house.
- Antenna cable (coaxial with a resistance of 75 Ohms).
If the antenna has not yet been installed, then you need to calculate the cable length with a margin in advance. Ideally, choose a cable route to reduce the length as much as possible. This is due to signal attenuation, which increases as the cable lengthens. If the DVB-T2 set-top box still has an antenna RF output, and you plan to connect a tube TV receiver, then you will need another piece of cable. It will lead from the set-top box to the TV, so it is also necessary to maintain the required length. - Connectors, plugs. Necessary for installation on the ends of the coaxial feeder in order to dock with the connectors of the TV and set-top box.
- Multimedia cords. Almost always included in the standard tuner package. The more common is 3RCA, popularly called tulips (or bells, but less commonly). Modern receivers are increasingly less likely to integrate tulips, as high-quality HDMI has replaced them. But the latter may not be present on old-style TVs. Therefore, there are two ways out of the situation - either take a set-top box with the ability to connect via tulips, or use an HDMI cable, but connect to the TV through an adapter from HDMI to 3RCA (HDMI2AV). In the latter case, you also need a 3RCA cable to connect the outputs of the converter (converter) to the AV interface on the TV.
- RF modulator. This additional link may look different structurally. But the operating principle is the same for all devices.
Serves to convert a low frequency signal to a high one. At a time when there was no digital television broadcasting, modulators were built into all multimedia devices. With the advent of digital technology, modulators were removed from the “filling” of the equipment and began to be produced as separate external units. The device allows you to connect to it with modern cables (the same tulips), and display the image on an old TV through the antenna output.
Expensive or cheap
As noted, the standards are clearly regulated. Therefore, the cable will either provide information transfer or not. Which HDMI cable is better to choose? German gamers conducted an interesting experiment regarding the effect of the cost of the wire on its operation. They purchased many different models from popular and unknown manufacturers.
Fans of video games connected a game console to the monitor and displayed the same images. Subsequently, a comparison of screenshots was carried out. For maximum accuracy, checksums were compared. These figures coincided 100%.
It would seem that the cost of choice does not affect the choice of an HDMI cable, but this experiment does not take into account sound transmission at all. Therefore, a repeat experiment was carried out. Again no difference was found. Therefore, there is absolutely no need to overpay for cable.