In connection with the transition of television broadcasting from analogue to digital, many people have a question: “How to do this?” How to prepare for the transition and what you need to purchase for this, how to connect an old TV to a digital set-top box. There are several options.
- Option 1. If you have a TV made in 2012 or younger, then you don’t need to do anything. New generation TVs already have built-in digital signal receiving devices. For example, Toshiba TV, Sharp TV.
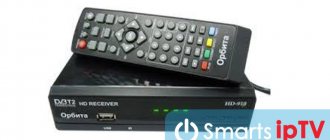
- Option 2. If the TV is manufactured before 2012. In order for a TV older than this year to receive a digital signal, you will need to buy a digital set-top box or receiver. This device will receive the signal and transmit it to the TV.
- Option 3. If you have a TV with a picture tube or a tube TV, it is best to buy a new one. Because old TVs are not designed to receive digital numbers.
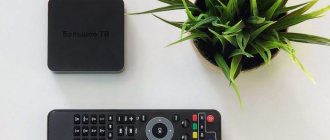
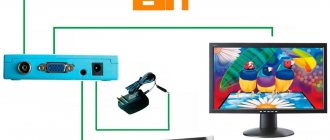
In this article we will look at the second option, how to connect an old TV to a digital set-top box. For this you need a good antenna and DVB-T2 set-top boxes. Digital set-top boxes come in different types and modifications. But there is only one task - to receive a digital signal and decrypt it. The cost of purchasing a set-top box will be small. Their price is from 700 rubles and above.
The antenna can be used indoors or outdoors. If the repeater is located near the house, then an indoor antenna will do. She will receive the signal well. If this is not the case, then an external antenna is needed to receive the signal.
Options for connecting an old TV to digital
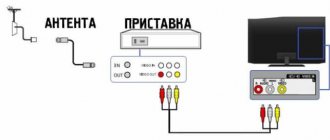
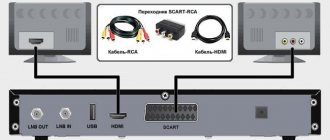
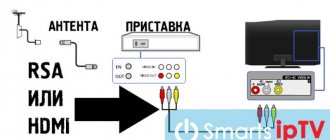
Let's look at the example of connecting to an old Samsung TV. This method is suitable for Panasonic TV and others. To connect a digital TV to an old TV, use a SCART to RCA adapter. It consists of colored connectors called tulips. On the TV panel we find the following connectors and connect them according to color: yellow to yellow, red to red, white to white. The yellow cable is responsible for video, red and white for audio. We find the same connectors on the tuner and connect to them. We carry out all manipulations only with the device turned off.
After connecting the set-top box, turn on the device to the network.
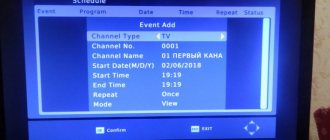
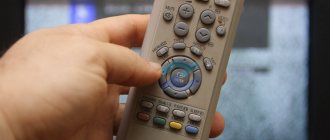
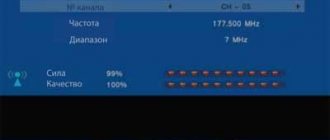
After turning on the TV, it must be switched to AV mode. To do this, press the AV/TV button on the remote control. And select the mode we need. To automatically search for channels, click on “Auto search”. If you want to search for channels manually, then select manual search accordingly.
How to connect a digital set-top box via scart
Even though older TVs do not have an internal digital tuner, they can still be used if you connect a set-top box receiver. There are many connection options, as well as adapters for all types of interface, so you can easily choose the one that is needed in a particular case.
Fixing the TV input selection via SCART
The familiar regular terrestrial analog television will sooner or later gradually go away, and more and more people are connecting various DVB-T2 set-top boxes to their TVs without DVB-T2 and watching only through them, without switching back to analog.
And, of course, this applies not only to old CRT TVs:
but also quite modern flat-screen widescreen TVs of the previous DVB-T standard, purchased just a few years ago:
And, as with other external devices, when working with set-top boxes, you need to select the appropriate input .
Typically, there are 3 types of TVs:
- the most convenient - it always remembers the input (even after turning it off with the 220V button or from the socket).
on duty - remembers while it is in standby mode (but not with the 220V button or from the socket).
Unfortunately, options 2 and 3 are the most common. But, unlike a rarely used VCR or DVD player, you will have to switch with the set-top box almost every day - first select the desired input with the TV remote control, and only then control the set-top box remote control.
Of course, set-top boxes with a learning remote control or purchasing a separate learning remote control will eliminate some of the issues - all this can then be done with 1 remote control, and not 2 as usual:
But in any case, you need to constantly remember this order of switching on, and especially, it is sometimes difficult for older people: first turn on everything, then press this, then select this, and only then watch the channels.
You can write all this down on a piece of paper, but you also have to remember where you last put the piece of paper.
However, if the TV has a SCART , this procedure can be significantly simplified by automating it, and then even a learning remote control will, in principle, not be particularly needed (but it won’t hurt either).
Additional options are listed at the very end.
After all, only SCART has the unique ability to forcibly switch the TV input to SCART itself by applying any control voltage from +4.5 V to +12 V pin 8
Of course, consoles are already being released with SCART output, but such models can be counted on the fingers of one hand. And the vast majority of set-top boxes on the Russian market have only regular RCA AV outputs for connecting with colored “tulips”:
And for this it will be enough to purchase an RCA > SCART , for example:
or with the IN-OUT switch (Input-Output), placing it in the IN :
They also come with an additional S-Video connector, also switched to IN PUT:
OUT adapters - for outputting signals from a TV:
- in the absence of the previous options, it will be easy to convert them into IN - for Signal Input, by transferring the yellow VIDEO from 19 - to 20 pins, and the red and white AUDIO from 1, 3 to 2, 6 pins:
So, let's take the adapter:
carefully open the halves of the case:
the wire from + to 8 , and from – to 4 or 5, 9, 13, 14, 17, 18 (i.e. to any GND - ground):
Any voltage from +4.5 V to +12 V can be used as a source.
For example, USB - you can solder a USB plug or take the tail from an old dead USB mouse:
And connect it to the USB connector of the set-top box itself or the TV (if it has USB).
Or to any USB power supply:
You can also power it from the injector (separator) of your antenna power supply +12V:
soldered in parallel with the wires coming from the SCART to the indicated contacts + and – :
Or - from some already unnecessary charge from an old phone.
I repeat: the source can be anything from +4.5 V to +12 V. Its current is unimportant, the main thing is only the voltage. Unfortunately, there are no such voltages inside the SCART itself.
On flat widescreen TVs, this voltage also controls the aspect ratio - ASPECT:
- 4.5 V – 7 V – 16:9 widescreen mode
- 9.5 V - 12 V - normal 4:3
Naturally, old CRT TVs will have 4:3 at any voltage.
And of course, in any case, you can set any required ratio in the console menu.
Thus, now turning on the TV, it will immediately wait for a signal from the SCART input.
Well, those who have at least a little understanding of TV circuits can find suitable +4.5 V - +12 V inside the TV without an external source and immediately apply them to pin 8 of the SCART connector. Of course, an RCA > SCART adapter is necessary in any case.
I note that despite the selection of the SCART input being fixed, it is still possible to switch various inputs with the TV remote control, incl. and an antenna input for viewing local analogue broadcasts.
Now grandparents and others will not need to first press the TV/AV or SOURCE button on the TV remote control each time and select the AV input from the list - the TV will always be ready from the very beginning.
- Some TV models (including those without SCART) have a function in the Menu to force input selection when turned on.
- Some also have a function called Auto-detection of the signal at a specific input (for example, only for the VIDEO-2 input):
When the DVD input signal is detected, the input mode will automatically change to VIDEO-2, and when the DVD input signal is not detected, the input mode will automatically change to RF of the previous input mode.
Thus, when you turn on the set-top box connected by “tulips” to this input, the TV itself will automatically switch to this input.
Carefully read the instructions for your TV to see if it has such capabilities.
- In addition, in some cases it is also possible to fix the video input in a special Service menu intended for Service Center engineers. But this will require searching for this technical information about your specific TV model, as well as being extremely attentive and careful while in this Service menu.
Fixing the TV input selection via SCART
The familiar regular terrestrial analog television will sooner or later gradually go away, and more and more people are connecting various DVB-T2 set-top boxes to their TVs without DVB-T2 and watching only through them, without switching back to analog.
And, of course, this applies not only to old CRT TVs:
but also quite modern flat-screen widescreen TVs of the previous DVB-T standard, purchased just a few years ago:
And, as with other external devices, when working with set-top boxes, you need to select the appropriate input .
Typically, there are 3 types of TVs:
- the most convenient - it always remembers the input (even after turning it off with the 220V button or from the socket).
- on duty - remembers while it is in standby mode (but not with the 220V button or from the socket).
- The most inconvenient one is that it starts working from the antenna input every time.
Unfortunately, options 2 and 3 are the most common. But, unlike a rarely used VCR or DVD player, you will have to switch with the set-top box almost every day - first select the desired input with the TV remote control, and only then control the set-top box remote control.
Of course, set-top boxes with a learning remote control or purchasing a separate learning remote control will eliminate some of the issues - all this can then be done with 1 remote control, and not 2 as usual:
But in any case, you need to constantly remember this order of switching on, and especially, it is sometimes difficult for older people: first turn on everything, then press this, then select this, and only then watch the channels.
You can write all this down on a piece of paper, but you also have to remember where you last put the piece of paper.
However, if the TV has a SCART , this procedure can be significantly simplified by automating it, and then even a learning remote control will, in principle, not be particularly needed (but it won’t hurt either).
Additional options are listed at the very end.
After all, only SCART has the unique ability to forcibly switch the TV input to SCART itself by applying any control voltage from +4.5 V to +12 V pin 8
Of course, consoles are already being released with SCART output, but such models can be counted on the fingers of one hand. And the vast majority of set-top boxes on the Russian market have only regular RCA AV outputs for connecting with colored “tulips”:
And for this it will be enough to purchase an RCA > SCART , for example:
or with the IN-OUT switch (Input-Output), placing it in the IN :
They also come with an additional S-Video connector, also switched to IN PUT:
OUT adapters - for outputting signals from a TV:
- in the absence of the previous options, it will be easy to convert them into IN - for Signal Input, by transferring the yellow VIDEO from 19 - to 20 pins, and the red and white AUDIO from 1, 3 to 2, 6 pins:
So, let's take the adapter:
carefully open the halves of the case:
the wire from + to 8 , and from – to 4 or 5, 9, 13, 14, 17, 18 (i.e. to any GND - ground):
Any voltage from +4.5 V to +12 V can be used as a source.
For example, USB - you can solder a USB plug or take the tail from an old dead USB mouse:
And connect it to the USB connector of the set-top box itself or the TV (if it has USB).
Or to any USB power supply:
You can also power it from the injector (separator) of your antenna power supply +12V:
soldered in parallel with the wires coming from the SCART to the indicated contacts + and – :
Or - from some already unnecessary charge from an old phone.
I repeat: the source can be anything from +4.5 V to +12 V. Its current is unimportant, the main thing is only the voltage. Unfortunately, there are no such voltages inside the SCART itself.
On flat widescreen TVs, this voltage also controls the aspect ratio - ASPECT:
- 4.5 V – 7 V – 16:9 widescreen mode
- 9.5 V - 12 V - normal 4:3
Naturally, old CRT TVs will have 4:3 at any voltage.
And of course, in any case, you can set any required ratio in the console menu.
Thus, now turning on the TV, it will immediately wait for a signal from the SCART input.
Well, those who have at least a little understanding of TV circuits can find suitable +4.5 V - +12 V inside the TV without an external source and immediately apply them to pin 8 of the SCART connector. Of course, an RCA > SCART adapter is necessary in any case.
I note that despite the selection of the SCART input being fixed, it is still possible to switch various inputs with the TV remote control, incl. and an antenna input for viewing local analogue broadcasts.
Now grandparents and others will not need to first press the TV/AV or SOURCE button on the TV remote control each time and select the AV input from the list - the TV will always be ready from the very beginning.
- Some TV models (including those without SCART) have a function in the Menu to force input selection when turned on.
- Some also have a function called Auto-detection of the signal at a specific input (for example, only for the VIDEO-2 input):
When the DVD input signal is detected, the input mode will automatically change to VIDEO-2, and when the DVD input signal is not detected, the input mode will automatically change to RF of the previous input mode.
Thus, when you turn on the set-top box connected by “tulips” to this input, the TV itself will automatically switch to this input.
Carefully read the instructions for your TV to see if it has such capabilities.
- In addition, in some cases it is also possible to fix the video input in a special Service menu intended for Service Center engineers. But this will require searching for this technical information about your specific TV model, as well as being extremely attentive and careful while in this Service menu.
>
How to set up the Selenga set-top box. Real connection experience
How to set up the Selenga set-top box. Real connection experience
Step-by-step instructions for connecting an old TV to a set-top box
- We connect the set-top box to the antenna.
- When the device is turned off, we find red, yellow and white connectors on the TV panel.
- We insert the connectors in strict accordance with the color.
- We connect to the console.
- We plug it into the network.
- We connect the TV to AV mode through the menu or the remote control button.
- We enable automatic channel search. To do this, use the receiver's remote control to enter the menu. Select “channel search”, then “auto search”. We wait a few minutes. You can also do it manually.
How to connect two or more TVs to a set-top box
You can also connect several TVs to a digital set-top box. But in this case they will show synchronously. A splitter is used to split a digital signal into several.
If you would like to watch different channels on different TVs, then you need to purchase separate receivers for them.
But there is one way to connect several TVs to one set-top box. This is to use a high frequency modulator. But its price is several times higher than the cost of the set-top box.
Solving the main difficulties
When connecting a set-top box to a TV, there are several main difficulties.
- The TV does not see the receiver
- Can't set up channels
- Bad image
A number of actions are possible to address these issues. Check the serviceability of the receiver. To do this, check again that the plugs are connected correctly. See if the wires are broken. And also try connecting it to another TV. If other TVs do not recognize it, then take it back to the store and exchange it using the warranty card.
To set up channels, it is best to use automatic search.
A poor digital TV picture may indicate that the antenna is not positioned correctly. Try turning the outdoor antenna towards the repeater. Often this is the reason that affects image quality.
Conclusion. In the article we have given several ways to connect an old TV to a digital set-top box. Using our recommendations and following the instructions, you can switch to digital television without any problems.
Philips provided two more receivers with built-in DVB -T2 tuners. These are models DTR 5520 and HDT 8520 . These receivers are suitable for watching open television channels. Let's consider their technical characteristics.
Philips DTR 5520
These receivers can receive digital terrestrial channels in Ukraine.
Specifications:
Built-in tuners: DVB-T2, DVB-T. Decoding: MPEG-2 DVB, MPEG-4 DVB Frequency range: 474 - 850 MHz Pass-through frequency range: 47-862 MHz Video output: HDMI AUX scart out: Audio L/R, CVBS, PAL, RGB Audio output: analog, digital (coaxial) USB: for software update only
The device also supports the functions of electronic guide, automatic power on/off, children's timer, and PIN code locking.
Video Decoding:
- Compression format: MPEG-2 MP @ ML (standard definition), MPEG-4 (SD), MPEG-4 (HD) - Resolution: up to 1920 x 1080 progressive - Screen format: 16:9, 4:3 - Copy / content protection: HDCP over HDMI - Video bitrate: up to 20 Mbps
Audio Decoding:
— Compression format: Dolby Digital, MPEG Layer I / II, MPEG4 HE-AAC, Dolby Digital Plus — Sound system: Dolby Digital, Stereo, Mono
Nutrition:
— Power supply: 230 V, 50 Hz — Power consumption: Dimensions — Box dimensions (WxDxH): 370 x 235 x 70 mm — Product dimensions (WxHxD): 290 x 37 x 160 mm — Weight: 0.8 kg — Weight with packaging : 1.4 kg
Philips HDT 8520
Specifications:
Built-in tuners: DVB-T2, DVB-T. Decoding: MPEG-2 DVB, MPEG-4 DVB Frequency range: 474 - 850 MHz Pass-through frequency range: 47-862 MHz Storage medium: hard drive (for a number of functions, for example Time Shift ) Hard drive type: 3.5 "HDD Hard drive capacity disk: 500 GB Video output: HDMI Audio output: analog, digital (coaxial)
Video Decoding:
- Compression format: MPEG-2 MP @ ML (standard definition), MPEG-4 (SD), MPEG-4 (HD) - Resolution: up to 1920 x 1080 progressive - Screen format: 16:9, 4:3 - Copy / content protection: HDCP over HDMI - Video bitrate: up to 20 Mbps
Power: Power supply: 230 V, 50 Hz Power consumption: Dimensions
Product width: 235 mm Product length: 210 mm Product height: 70 mm Box dimensions (WxDxH): 360 x 290 x 100 Weight: 1.75 kg Weight with packaging: 2.7 kg
For now, this equipment can only be purchased in foreign countries.
5/5 — (3 votes)
You can ask questions about digital television on the DVBpro forum
Author: Alexander Vorobyov, 24 Oct 2011 | Permanent link to the page:
