Previously, I already published detailed instructions for setting up a local network in Windows 10. But for the setup I used a home group, which was removed from Windows 10 (in version 1803 and higher). This means that the old instructions are no longer relevant, since there is no homegroup in Windows 10 1803. But all the functionality, of course, has been preserved, and in the top ten you can still provide shared access to folders and printers, open shared access to a specific folder, gain network access to other computers, etc. It’s even simpler and better, unnecessary settings have been removed. HomeGroup was used to simplify setting up a local network and sharing files and printers. But in fact, it only complicated the process of setting up a local network with its confusing settings. It's easier to manually share and share a folder over the network than to mess around with setting up a homegroup.
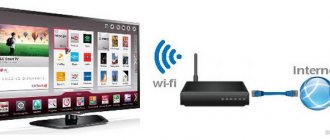
Typically, a local network is set up between computers that are connected to each other via a router (via Wi-Fi, network cable) or a switch. If necessary, you can connect two computers directly using a network cable, but hardly anyone else uses this method now. You can share folders in Windows 10 not only with other computers, but also with mobile devices. For example, folders on a computer shared over the network can be accessed from mobile devices, TV set-top boxes and other devices that run Android. But most often, a local network is configured specifically for exchanging files between several computers. If there are computers on the network running Windows 7 and Windows 8, then the sharing settings on them are configured in almost the same way as in Windows 10. A folder that is shared on a computer with Windows 10 will be displayed without problems in the network environment on the computer with Windows 7 and vice versa. The main thing is that network discovery is enabled on both computers.
Setting up LAN in Windows 10
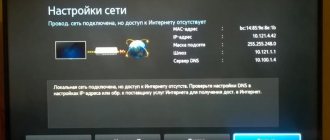
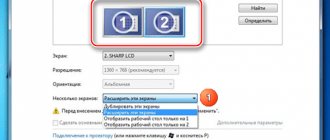
You connect to the router with a cable or over the air - make sure that the network card (adapter) has received TCP/IP and DNS server addresses from the router:
- Open “Network Connections” and find there the network card through which the computer is connected to the router.
- Expand the properties of the adapter, and in them - the TPC / IP protocol.
- Make sure that all values are obtained automatically.
All adapter parameters must correspond to those shown in the picture
Next, you need to make sure that all Windows devices connected to the network have the same workgroup selected:
- Open the “System” window using the Win+Pause key combination on all clients on the network and check whether the name of the working network matches.
All computers on the network must have the same workgroup name
- If the workgroup names of the machines are different, we change the parameters so that the group name is the same for all clients.
If the names of the working network between devices do not match, they need to be changed and brought to a single option
- Also make sure that the names of the computers in the DS are unique (different). If this is not done, a conflict of network resources is inevitable and the operation of the LAN will be impossible.
How to create and configure a wireless network via Wi-Fi connection
A wireless connection is more convenient for most users, although the connection may be less stable than we would like. To create it in Windows 10 you will have to use the command line. But to simplify the process, which must be repeated every time you turn on the computer, we will immediately consider creating an executable file that will reproduce this command. To do this, create a text file and enter the following block of commands there:
netsh wlan set hostednetwork mode=allow ssid=”network-name” key=”connection-password”
netsh wlan start hostednetwork
In this case, the name of the network and its password must be entered without quotes.
Next, when saving the file, we change the .txt format to .bat simply by changing the file format signature after the dot in its name. The executable file is ready. It is worth running every time you start your device.
Tell the connecting device your network password
After the network has been launched with this series of commands, another device can connect to it using the connection password and network name you set.
How to disable network discovery
Network discovery is a mechanism that allows computers on a network to see other machines, their network drives and printers. If you don't want your machine to be visible on your home network, it's best to turn off network discovery.
- Check your account. The sections of the control panel we need are available only to the administrator.
- In the Control Panel, open the Network and Sharing Center, and from it open the dialog box we need.
Network Sharing Center in Windows 10 gives you access to disable network discovery
- For each network profile (private, guest, or all networks), enable or disable network discovery.
Disable network discovery for the selected profile
- Save the changes using the button of the same name at the bottom of the screen. There is no need to reboot the OS; network discovery will be disabled immediately.
Granting access to files and folders
As a rule, a local network is created so that computers have access to shared resources - files, packages, printers, applications. To do this, the necessary permissions are specified on the local node.
Perform general settings for the network profile. On the local computer, in the “Change network access settings” item include:
- access to shared resources (files and printers);
- read/write permissions on shared folders;
- password protection (if you need users to log in to shared resources using a password).
After these settings, all computers on the local network are allowed access to specific resources on each of them.
To do this:
- in Explorer, select a resource (disk, folder, file);
- open the “Access” drop-down menu;
- set the desired access level: no one, read, write, for specific users.
After this, the local PC resources marked as shared become visible to other network nodes. Users can access them according to the set level.
For resources that are initially considered by the OS as general packs (for example, “Shared Music”, “Shared Documents”) there is no need to configure them. For files and folders containing critical data (for example, folders with operating system files), simply setting access is not enough - they are protected by the OS from user actions.
Home network does not work: causes and diagnostics
The network is both a technically and programmatically complex organism, equipment that ensures round-the-clock uninterrupted operation and costs a lot of money. In the home segment, the class of equipment is lower and it is prone to failures and malfunctions. All this leads to loss of network functionality. Let's take a quick look at the main mesh problems and how to fix them.
Router malfunction
Most home routers are made in compact plastic cases. Electronic components operate in a very severe thermal regime, almost “to the limit”. The hot season adds 10–15 degrees to the temperature of the device and the router freezes. Along with it, the entire home network loses its functionality. Symptoms include the inability to log into the router’s web interface and lack of access to the Internet and network resources. To restore the network, you need to turn off the router and let it cool down, but this is a palliative measure. A radical solution to the problem would be to improve the heat transfer of the router by creating additional ventilation holes and installing a fan for airflow.
Installing additional fans will help your router overheat significantly less and work longer
Operating a router in severe thermal conditions not only makes the network unstable and glitchy, but also reduces the lifespan of the router itself by 3–4 times.
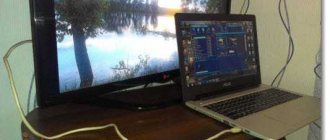
Damage to the network cable
Pets, curious children, or just a wife with a mop can instantly render a network segment inoperable by damaging the wire that connects the computer to the router. If only one client has lost access to the network, the problem is most likely in the cable. Disconnect the connectors, carefully inspect them and the wire itself. If the RJ-45 plugs are damaged, you can cut them off and crimp new ones. If the wire itself is mechanically damaged, you need to replace it entirely. Twisted or soldered connections will lead to network errors and a drop in speed to a snail's pace.
Inexpensive twisted pair UTP is designed for installation in protected cable boxes. If the cable is laid along the baseboard and is poorly secured, it can be easily damaged
Network configuration
After connecting/enabling the network adapters and installing drivers, they proceed directly to the implementation of the LAN. Creating a physical connection and setting up the connection depends on the implementation of communication between local network nodes. In practice today, 3 main options are considered:
- Computer-to-computer connection using an Ethernet cable.
- Connection via router.
- Creating a wireless Wi-Fi network.
Via Ethernet cable
When building such a LAN, computers are connected by a cable (patch cord), plugging it into the adapter ports. Main features of this mini-grid:
- To connect, you may need a network cross-over cable (crossover, cross-patch) or cross adapter;
- there is no node on the LAN that distributes network addresses, so they will have to be assigned to the user himself.
Crossover cable
A crossover cable or adapter is needed because the Ethernet ports of both PCs use the same pairs of transmit/receive wires. To ensure data exchange between devices, it is necessary to connect the contacts that work for transmission on one computer with the receiver input on another. It is this rearrangement of twisted pair conductors that is implemented in cross patches or cross adapters.
Practical note! A crossover cable with connectors or an adapter can be easily purchased at any store that sells computer accessories. If necessary, you can do it yourself - you need to physically swap the second and third pairs of the cable (do not cross the conductors in the pairs!).
You will have to work with a cross-patch if none of the PC network ports supports Auto-MDIX (automatic detection of pairs working for receiving/transmitting). This function is implemented in almost all gigabit (1000BASE-T) and higher-speed ports, and is supported by 100BASE-T (100Mbit) ports of some adapters. You can check the support of the function in the technical documentation on your PC or network card. If on one computer or laptop the Ethernet port works with auto-detection, a cross-over cable is not needed for connection; a regular network patch cord will do.
Configuring adapter and network settings
After physically connecting the mini-LAN nodes, the user proceeds to setting up adapters and the network. For this:
- Opens the system settings window (Start - Settings).
- Proceeds to setting up adapters and network connections, connecting to the Internet (“Network and Internet”).
- Works with the interface to which the network cable is connected (“Ethetnet”).
- First of all, it configures the adapter (“Configuring adapter settings”).
- Changes its properties (the “Properties” item in the context menu, which opens after right-clicking on the network interface icon).
- Sets the network address for the IPv4 protocol - on the “Network” tab, select the “IP version 4” protocol in the list (Do not remove the checkbox!) and click the “Properties” button.
- Moves o to manual address setting and enters any address in the format XXX.XXX.XXX.XXX (X – any numbers).
- Confirms the changes made (the “Ok” button).
- Performs the same set of actions on the second computer on the network.
Important details!
- In addition to configuring the IPv4 protocol, you need to similarly configure IPv6; if these settings are not completed, the adapters may conflict. You can similarly set addresses for network cards or disable support for this protocol (uncheck the box on the “Network” tab). Disabling it will not affect the functionality of the created local network.
- If you do not plan to connect the internal LAN to the Internet, you can set any network addresses. If an external connection is also used, it is better to use an address space specially allocated for local networks (addresses from the pool 10.ХХХ.ХХХ.ХХХ or 192.168.ХХХ.ХХХ).
- The adapter addresses must differ by at least 1 in the last group.
- In the “Subnet Mask” field use the combination 255.255.255.ХХХ. XXX is set based on the number of computers in the local network: 0 means the ability to connect 256 devices, 254 means two nodes.
- The "Default Gateway" field can be left blank if an external connection is not used. If there is a connection to another network, you should indicate the address of the computer connected to it.
If the adapters on both computers are configured correctly, the local network between them is working, you can proceed to setting up access to shared resources.
Via router
When using a router that provides connection to an Internet provider's network, setting up a home or office LAN includes:
- setting up a DHCP server on the router;
- setting connection parameters on each local network node.
To configure automatic distribution of addresses, configure a DHCP server on the router.
To configure it:
- Connect the router to the computer using an Ethernet cable or another one supplied (if the initial configuration is set using a different interface).
- Connect to the web interface or launch the application to configure the router.
- Log in with the login/password specified by the manufacturer or equipment supplier.
- Go to the main menu, select local network (LAN) settings, and the DHCP settings item.
- They set a pool of addresses for distribution to LAN computers and their validity period.
- If necessary, static IPs are reserved for individual or all local hosts (specify the MAC-IP address pair).
- Save the configuration changes and reboot the router.
This sequence of steps is used for routers of all models and manufacturers. Only the names of the menu items differ.
After configuring the router, we move on to building and configuring a home or office local network.
- Connect all LAN nodes to the router with Ethernet cables. They use regular patch cords and connect the ports of the network adapters on the PC with the LAN connectors of the router.
- Perform adapter settings settings similar to settings for a computer-to-computer connection.
Unlike the sequence of actions for an Ethernet connection, the IP addresses of local network nodes are not set manually, but are obtained automatically. To do this, leave a check mark in the IPv4 protocol properties.
Most budget and mid-range routers do not yet support IPv6, so you can disable its support in the adapter properties.
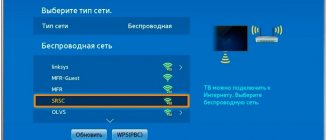
If the local network is not built over copper, but over a radio channel (Wi-Fi), a wireless connection is additionally configured on the router.
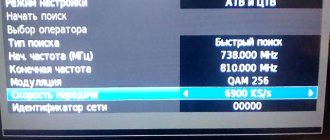
To do this, in the router configuration menu, select the settings for wireless networks (wireless, WLAN) and set:
- network name (SSID);
- protocols used in accordance with the parameters of Wi-Fi adapters installed on local PCs. So, if no network device operates in the 5GHz band, there is no point in turning it on on the router;
- channels of connection;
- security parameters – protocol (recommended WPA2-PSK), encryption method (AES), network key (password for connection).
After setting all the settings, save the router configuration and reboot the device. After completing this procedure, on the LAN nodes, select the new wireless network that has appeared in the list of available connections and connect with the key.
Network discovery
At the last stage, LAN settings ensure that devices included in the local network are visible to other nodes. To do this, you need to enable network discovery on each PC.
A network profile is predefined, which indicates whether the local network is trusted (private) or public. These actions are performed for wired (Ethernet) and wireless (Wi-Fi) connections in the “Network and Internet” window. To change the profile, just select the connection and check the corresponding item in the “Network Profile” list.
To enable network discovery, use the Change Sharing Settings settings window.
In him:
- select a local network profile (“Private”);
- allow network discovery (including automatic discovery for network devices);
- save changes.
After performing these operations on all LAN devices, they will become visible in the “Network” tab in Explorer.
Possible problems
At the stage of creating and configuring a local network, problems with equipment most often occur.
Network cards don't show up in Device Manager
The reasons for the situation are faulty equipment, disabling integrated devices or discrete ports in a PC or laptop at the hardware level. The check is performed in the BIOS (entered when the computer boots). If hardware resources are enabled and Windows does not detect devices, the most likely problem is the adapters.
Incorrect operation of the equipment
In this case, the adapters appear in Device Manager, but their icons display icons warning them of their limited functionality (for example, an exclamation point in a yellow triangle). Probable Causes
- Problems with device drivers. To fix it, update the software. Current drivers are installed from the disks that come with the devices, or downloaded from the websites of manufacturers of adapters, motherboards (for integrated devices) or laptops.
- Conflicts between devices. Possible when integrated network cards are installed on the PC, and the user connects additional discrete ones. A similar situation often arises when trying to connect several adapters. In the device properties in the task manager, check the used address range and interrupts. If necessary, change to avoid overlap (the system shows available ones in the drop-down list). If there is no urgent need for the simultaneous operation of several devices, they can be physically removed (on stationary PCs) or disabled in the BIOS.
- Damage to patch cords. The system will report this in the form of “Network cable not connected” or other warnings. You can easily check by replacing the cable.
- Use a regular network cable to connect adapters that do not support Auto-MDIX.
- Problems with Wi-Fi connection due to congestion of bands, remoteness, weakening of signals by obstacles.
At the operating system level, questions about setting up a local network and problems when setting parameters practically do not arise.
Basic Concepts
To connect a LAN, you need a router, which is also called a router. It is needed in order to combine all devices on the home network into one LAN, which makes it possible to exchange data and files between them.
To adjust the LAN, you need to connect the necessary devices to the router or combine them into a wireless network. Modern routers provide wireless and wired connections, as well as communication between several networks at the same time. Therefore, the router can be with a cable connection or mobile. If you use a cable connection, then the router should be selected with a WAN connector, if a telephone line, then with an ADSL connector. A mobile router is different in that it has antennas.
Important! Windows 10 OS has the necessary tools for successfully regulating and using LANs, but the process of creating a local network is not easy.
There are two ways to create a drug using:
- Wi-Fi;
- network cable.
Internet connection optimization
There are several reasons for a slow connection, some of which you can solve on your own. Here are the main ones: 1. Damaged cable - only replacement will help here and you need to contact a specialist. 2. Outdated drivers for the router - you can update them automatically. 3. Enabled speed limits - this applies more to file hosting services, in the settings of which you can remove the limit on the file transfer speed. 4. Incorrect settings - carefully check all steps for setting up the local network. If at least one is not made according to the instructions, we correct it.
If everything is done correctly, file sharing and joint editing will be available on all computers connected to the network.
Previous
Windows Setting up vpn windows 10 step by step instructions
Step-by-step creation of a local space
A home network is needed not only for periodic access to the Internet, but also for exchanging files between devices. In order not to copy to a flash drive or not to use bluetooth, it is easier and more convenient to use LAN.
Zyxel keenetic lite III router: installation, connection, settings
Working group
First of all, you need to ensure that all PCs that need to be connected to the LAN have the same workgroup name. The user comes up with and sets any name he wishes.
How to create a workgroup in Windows 10:
- You need to click on “Start”, then go to “Utilities”.
- Open “Control Panel”, select “System and Security”.
- Click on the “System” menu.
- Click on “Advanced system settings”.
- A tab will appear on the screen, in it you need to find and click “Computer name” and click on the “Change” button.
- Find the item “The computer is a member of...”, select “Workgroup” and then write the name of the computer.
- Click OK and restart the PC.
Important! It is necessary to make settings for all devices that the user will connect to the network.
Visibility of computers on the network
In order for computers in the same workgroup to be able to “see” each other, special settings are needed. It is worth enabling visibility on all PCs:
- Launch "Control Panel", where select "Network and Internet" and go to the "Network and Sharing Center" menu.
- Click on the “Change advanced settings...” tab.
- Enable "File and Printer Sharing and Network Discovery".
- After completing these steps in all profiles, you need to activate “Sharing” so that network users can read and write files in shared folders.
- Select “Disable password protected access.”
- Save everything.
Sharing folders
After opening shared access to folders, the Windows 10 setup procedure ends. To complete, you must complete the last four steps:
Step 1. By pressing the key combination “Win and E”, open Explorer and find the required folder.
Step 2. Open the folder properties by right-clicking on it.
Step 3. Go to the “Access” menu, and then to “Advanced Settings”, where o and click on “Permissions”.
Step 4. Check the “Change”, “Full Access”, “Read” items in the “Allow” tab. If you need to limit the capabilities of LAN users, some items should be selected.
Step 5. Near the “Access” menu you need to find the “Security” folder, in which click on “Change” and then “Add”. Next, write the word “Everyone” in the empty window. After that, select the “Everyone” group, and then check the boxes for full access.
Step 6. You need to save all changes made and restart the computer.
What is a home local network, what does it consist of?
LAN refers to a system consisting of mobile devices and several PCs. They are combined into a single system using special tools; this type is used for large companies and computer classes.
At home, it allows you to create a smart home - with the connection of smartphones, air conditioners, smart speakers. Files are exchanged through the line, materials are printed via a remote printer, etc. The main feature of the local network is the closedness of the system, which is impossible for an outsider to connect to (he will see it, but will not be able to enter).
When creating a project with minimal configuration you will need:
- mobile and stationary devices - personal computers, phones, tablets and laptops;
- router - is one of the most convenient devices for a home network;
- twisted pair cables;
- switch switch or hub hub - required to combine devices into a single system in the absence of a Wi-Fi router.
Important! The NAS acts as storage. This is a small PC with a sufficient number of hard drives, which is used for storing information and as a server. Refers to optional but convenient things.
Types of network connection
Sharing Internet access
If a local network is built without a router, using a direct wired connection of computers, and one machine has Internet access, but the other does not, then this can be quickly corrected. The described actions are performed on the computer that has a connection to the global network.
- Click the connection icon in the notification area. Open Control Center and proceed to change adapter settings.
- In the list of available connections, find the WAN connection. Open its properties, right-click.
- On the Access , allow other members of your home network to use this Internet connection.
Now from one computer the Internet will be distributed to other participants in the network. This will affect the speed, but when accessed from different devices through the router, the speed is also divided in proportion to the load, so this is a common practice for sharing the Internet.
Sources used:
- https://pc-consultant.ru/rabota-na-komp-yutere/nastrojka-seti-windows-10/
- https://dadaviz.ru/nastroyka-lokalnoy-seti-windows-10/
- https://mixprise.ru/windows-10/nastroika-seti-windows10/
Creating a LAN using a cable
If you have Wi-Fi and the correct connection of all equipment, no additional equipment or actions are needed. Connected gadgets will be online once and communicate with each other constantly. If there is no connection, you need to make a local connection. This requires an internet cable and the correct settings.
First you need to make sure that the “Workgroup” on all devices has the same name:
Note! After checking the name, you need to set up network discovery, which will allow you to operate from a PC on your home network when it’s running and will block it when it’s off.
Enabling and disabling is performed for the security of the local network:
Note! If the personal computer and other devices are connected by a network cable through a router, then the above steps are sufficient.
But if the devices are connected without using a router, then you need to set the parameters:
Note! The last digit of the IP address must be different for each PC on the local network.
After correctly performed actions, all devices in the system will have a common file approach.