Models: KV-14LT1В/Е/K/U, KV14LM1В/E/К/U, KV-21LT1B/E/K/U, KV-21FT2K
- SONY TVs on FE-2 chassis
- Electrical adjustments
- Service mode
- Possible faults
Thanks to proven circuit design, the use of the most modern element base and its proprietary technologies, SONY traditionally occupies a leading position in the television equipment market.
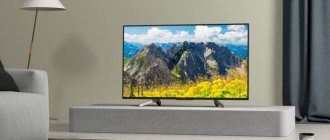
Buyers are not put off by relatively high prices, because everyone understands perfectly well that SONY stands for quality and reliability. Unfortunately, sometimes you have to repair SONY equipment. We hope that the material in this article will be of good help to service center specialists. Rice. 1. Appearance of a SONY TV on the FE-2 chassis
Modern SONY mid-price TVs with picture tube screen diagonals from 14 to 21 inches are made mainly on the FE-2 chassis. Depending on the region where TVs are supplied, they are equipped with various tuners and integrated color decoders for receiving signals of certain standards and color television systems.
Televisions based on this chassis can receive and process broadcast television signals of sound standards B/G, D/K, I, L and PAL (SECAM) NTSC 3.58/4.43 MHz color systems in the ranges: VHF channels E2-E12 , F2-F1O, R01-R12; VHF - channels F21-F69, R21-R69, B21-B69, as well as: cable channels S01-S03, S1-20, BQ; hyperband channels: S21-S41, F02-F10, F21-F69.
In table 1 shows the correspondence of the installation elements to certain models of TVs with a screen diagonal of 14″.
Features of the FE-2 chassis
The chassis structurally consists of two boards - the main one (board A) and the picture tube (board C). Depending on the modification of the base chassis, televisions based on it can receive and process broadcast television signals of all analog standards and systems. The chassis incorporates the new PHILIPS SEMICONDUCTORS TDA939x chip, which is the latest generation of integrated television chips from the Ultimate One Chip Television (UOC) family. The microcircuit is made using combined Bi CMOS and CMOS technologies, which made it possible to combine in one package a complete video processor with a video detector and audio demodulator, a teletext decoder that accepts all international broadcasting standards, and a microprocessor based on an 80C51 crystal with an expanded set of functions.
Direct current operating modes of some elements are given in Table. 8-11.
To receive and process television signals, a TU101 tuner with a digital frequency synthesizer and control via the I2C digital bus is used (the type of tuner, depending on the TV model, is shown in Table 1). Full color video signal with pin. VIDEO tuner TU101 is supplied to one of the inputs of the video signal switch of the multifunctional chip - pin. 36 IC001. The other switch inputs (pins 40 and 42 of IC001) are supplied with video signals from connectors J401 (SCART) and J402 (Jack). From the user-selected video signal, the video processor of the IC001 chip generates signals of primary colors (R, G, B), which are pinned. 58, 57 and 56 (oscillations 1-3) are fed through connector CN504 to the RGB signal video amplifier of the kinescope board, which is traditionally implemented on discrete elements for the circuitry of SONY TVs. Cascades on transistors Q702 Q703, Q705 Q706 and Q708 Q709 perform preliminary amplification of the R, G, B signals, which then go to cascades Q710 Q713, Q716 Q712 and Q717 Q701, made in a push-pull circuit. The output video signals are fed through current-limiting resistors to the cathodes of the kinescope (pins 10, 9 and 8 of J701). In order to stabilize the dark current of the kinescope beams, measuring signals are also taken from sensors Q715, Q716 and Q710 through the contact. 6 CN504 are sent to pin. 52 IC001 chips.
Table 1
| TV type Element | KV-14LM1B | KV-14LM1E | KV-14LM1K | KV-14LM1U | KV-14LT1B | KV-14LT1E | KV-14LT1K | KV-14LT1U |
| S416 | — | — | — | — | 0.01 µF | 0.01 µF | 10 µF | 10 µF |
| D404 | — | — | — | — | MTZJ-T-77-5.6B | |||
| D408 | — | — | — | — | UDZS-TE17-6.8B | |||
| IC001 | TDA9390H/NI/3/0130/T3 | TDA9392H/NI/4/0130/T3 | ||||||
| IC004 | M24C04-WMN6T | M24C08-WMN6T | ||||||
| IC401 | — | — | — | — | LM393DT | |||
| JR406 | — | — | — | — | jumper | jumper | jumper | jumper |
| R420 | — | — | — | — | 10 kOhm | 10 kOhm | 10 kOhm | 10 kOhm |
| R428 | — | — | — | — | 10 kOhm | 10 kOhm | 10 kOhm | 10 kOhm |
| R429 | — | — | — | — | 47 kOhm | 10 kOhm | 10 kOhm | 10 kOhm |
| R430 | — | — | — | — | 10 kOhm | 10 kOhm | 10 kOhm | 10 kOhm |
| R431 | — | — | — | — | 10 kOhm | 10 kOhm | 10 kOhm | 10 kOhm |
| R433 | — | — | — | — | 10 kOhm | 10 kOhm | 10 kOhm | 10 kOhm |
| R434 | — | — | — | — | 10 kOhm | 10 kOhm | 10 kOhm | 10 kOhm |
| TU101 | BTF-EF411 | BTF-EC401 | BTF-EP401 | BTF-EU601 | BTF-EF411 | BTF-EC401 | BTF-EP401 | BTF-EU601 |
A monaural audio signal is removed from the output of the TU101 tuner and fed to the input of the audio signal switch - pin. 28 IC001. The other inputs of the switch (pins 29 and 32 of IC001) receive sound signals from the SCART and Jack connectors. The output audio signal is removed from the pin. 48 IC001 and is fed to the input of the audio frequency power amplifier (UMZCH) - pin. 1 IC1201 type TDA 7494S. The microcircuit has three switched inputs (pin 1, 5, 6), and also supports standby mode (pin 9) and sound blocking mode (pin 10). The amplified audio signal from the outputs of the microcircuit (pins 12 and 14) is supplied to the dynamic heads of the TV through connector CN1201.
The synchroprocessor of the IC001 chip generates vertical scanning signals and horizontal scanning trigger pulses. Personnel antiphase sawtooth pulses are removed from the pin. 18 and 19 (oscillation 7) of the IC001 microcircuit and are supplied to the vertical scanning output stage - the IC501 microcircuit of the TDA9302 type. The frame coils of the deflection system (OS) are connected to the output of IC501 (pin 5) via connector CN501. For operation of various components of the IC001 chip with pin. 3 IC501, reverse pulses (OX) of the vertical scan are removed and sent to the pin. 55 IC001. The IC501 microcircuit is powered by a bipolar voltage of ±15 V, generated by a horizontal scanning circuit.
Pulses for starting horizontal scan with pin. 30 IC001 (oscillation 4) are fed to the driver Q535 (oscillation 5) and the horizontal scanning output stage on elements Q533, D536, D539, as well as TDKS T511. This stage generates deflection current in the OS horizontal coils (connected via connector CN501), as well as the supply voltage of video amplifiers, vertical scan output stage and kinescope. To correct east-west distortion, IC001 generates an EWD correction signal, which is fed to the diode modulator through amplifier IC531 and a buffer stage on field-effect transistor Q532. Reverse pulses for horizontal synchronization are removed from the pin. 11 T511 and through the Q576 buffer are supplied to the pin. 13 IC001. The horizontal scan is powered by a voltage B+ (about +135 V), generated by the power supply (PS) of the TV.
To protect the TV components in the event of a power failure (a significant increase in its output voltages), a sensor on transistors Q602-Q604 connected to the output of channel B+ is used. In an emergency, it generates a high-level signal on the pin. 34 IC001. The signal from the X-ray protection circuit, generated by the divider R516-R518 from horizontal scanning OX pulses, also comes here. If the voltage at the pin. 34 IC001 exceeds the specified level, the microcircuit blocks horizontal scan trigger pulses on the pin. 30 and transfers the IP to standby mode with a signal from the pin. 70.
The microcontroller included in the IC001 chip controls all components of the TV. For the initial reset of nodes IC001 to its pin. 65, during power supply, the IC003 chip generates a RESET signal in the form of a pulse of negative polarity. The microcontroller is synchronized by an internal oscillator, the frequency of which is stabilized by a quartz resonator X001 connected to the pin. 63 and 64 chips. The external components of the TV are controlled using the I2C digital bus, which is connected to the pin. 71, 72 IC001. Setting parameters and operational adjustment values are stored in non-volatile memory IC004, connected to IC001 via the I2C interface. To pin. 2 IC001 control buttons are connected to pin. 6 - LED indicating the operating mode, and to the pin. 67 - output of photodetector IC002.
In order to optimize power consumption, the chassis power supply circuit is divided into two independent sources - standby and working.
The operating mode power supply generates constant stabilized voltages B+ (+135 V), AUDIO (+25 V), LOW V (+12 V) and is made according to a pulse push-pull converter circuit on an IC601 microcircuit of type MCZ3001D. The chip includes all the standard elements of a PWM controller: a master oscillator, a voltage stabilizer, a 5 V reference voltage driver, current limit, overvoltage and thermal protection circuits, an error signal amplifier, a latch trigger, a control logic circuit and a push-pull output stage. Elements R609 and C636 connected to the pin. 4 and 3 of IC601, determine the operating frequency of the inverter. To start the converter, use the circuit R633 R610 R648, connected between the output of the mains rectifier and the pin. 1 IC601. In operating mode, the microcircuit is powered by winding 17-18 T603 and rectifier D608 C618. To stabilize the output voltages, the feedback circuit IC602 PH601 is used, which controls the horizontal scan supply voltage B+ and generates the feedback voltage at the input of the error signal amplifier - pin. 2 IC601. To control the current through the power switches, positive pulses are removed from the R634 current sensor and applied to the pin. 6 IC001. The secondary channels of the IP have no special features, except that the voltages +8 and +5 V are generated using the integrated stabilizer IC604.
The standby mode power supply generates constant stabilized voltages STBY 5 V (+5 V) and STBY 3.3 V (+3.3 V) and is implemented according to the circuit of a pulsed single-cycle converter based on the IC609 microcircuit of the TOP209P type. The circuit operates constantly (in operating and standby modes) and has no special features. The +3.3 V voltage is generated from the +5 V voltage using an integrated stabilizer on the IC608 chip. In standby mode, low potential with pin. 70 of the microcontroller, key Q601 opens, relay contacts RY601 open and the operating mode IP is disconnected from the network. All chassis components, with the exception of the microcontroller IC001, the non-volatile memory chip IC004 and the photodetector IC002, are de-energized.
Let's check if your Sony TV supports digital TV
Before connecting digital TV and starting setup, you need to check whether your TV can even receive it. This can be done on the website of the manufacturer or official distributors of Sony products, but the easiest way is to use this online service. To do this, enter the model number in the “Search” line:
| Model | Diagonal | DVB-T2 support |
| KDL-22EX553 | 22 | + |
| KDL-24W605A | 24 | + |
| KDL-26EX553 | 26 | + |
| KDL-32EX653 | 32 | + |
| KDL-32EX343 | 32 | + |
| KDL-32HX753 | 32 | + |
| KDL-32R423A | 32 | + |
| KDL-32R424A | 32 | + |
| KDL-32W503A | 32 | + |
| KDL-32W603A | 32 | + |
| KDL-32W653 | 32 | + |
| KDL-32W653A | 32 | + |
| KDL-32W654 | 32 | + |
| KDL-32R303B | 32 | + |
| KDL-32R435B | 32 | + |
| KDL-32R433B | 32 | + |
| KDL-32W706B | 32 | + |
| KDL-32W705B | 32 | + |
| KDL-40EX653 | 40 | + |
| KDL-40HX753 | 40 | + |
| KDL-40HX853 | 40 | + |
| KDL-40R353A | 40 | + |
| KDL-40R453A | 40 | + |
| KDL-40R473A | 40 | + |
| KDL-40R474A | 40 | + |
| KDL-40R483B | 40 | + |
| KDL-42EX443 | 42 | + |
| KDL-40W905 | 40 | + |
| KDL-42W653A | 42 | + |
| KDL-42W654 | 42 | + |
| KDL-42W654A | 42 | + |
| KDL-42W807A | 42 | + |
| KDL-42W808A | 42 | + |
| KDL-42W805 | 42 | + |
| KDL-42W828B | 42 | + |
| KDL-42W817B | 42 | + |
| KDL-42W705B | 42 | + |
| KDL-42W706B | 42 | + |
| KDL-46EX653 | 46 | + |
| KDL-46HX753 | 46 | + |
| KDL-46HX853 | 46 | + |
| KDL-46R473A | 46 | + |
| KDL-46W905 | 46 | + |
| KDL-47W805 | 47 | + |
| KDL-47W807A | 47 | + |
| KDL-47W808A | 47 | + |
| KDL-48R483B | 48 | + |
| KDL-49X8505B | 49 | + |
| KDL-49W8505B | 49 | + |
| KDL-50W705В | 50 | + |
| KDL-50W706В | 50 | + |
| KDL-50W685A | 50 | + |
| KDL-50W817B | 50 | + |
| KDL-55HX753 | 55 | + |
| KDL-55HX853 | 55 | + |
| KDL-55W805 | 55 | + |
| KDL-55W807A | 55 | + |
| KDL-55W808A | 55 | + |
| KDL-55W817B | 55 | + |
| KDL-55W828B | 55 | + |
| KDL-55W8505B | 55 | + |
| KDL-55W905 | 55 | + |
| KD-55X9005A | 55 | + |
| KD-55X9005B | 55 | + |
| KD-55X8505A | 55 | + |
| KD-55X8505B | 55 | + |
| KDL-55W955B | 55 | + |
| KDL-65W855A | 65 | + |
| KDL-65S995A | 65 | + |
| KD-65X8505A | 65 | + |
| KD-65X8505B | 65 | + |
| KDL-65HX953 | 65 | + |
| KD-65X9005A | 65 | + |
| KD-65X9005B | 65 | + |
| KD-65X950B | 65 | + |
| KD-65X9505B | 65 | + |
| KDL-65W955B | 65 | + |
| KDL-70X8505B | 70 | + |
| KDL-79X9005B | 79 | + |
| KDL-84X9005 | 84 | + |
| KDL-85X9505 | 85 | + |
Didn't find your model in the list? We recommend reading the instructions for determining DVB-T2 support on TVs.
How to determine your TV model
Over the years of its existence, Sony has produced a huge number of televisions of different models. Not all of them support digital playback, and among those that can do this, not all work with the European DVB-T2 broadcasting standard. And first you need to define the model.
Is Sony a good TV?
Information about this is indicated:
- on the TV packaging box;
- on stickers on the case (but this is not always the case);
- on a receipt from an electronics store where the TV was purchased;
- in the operating instructions.
If your TV does not support digital TV
If it turns out that the existing TV receiver cannot independently receive a digital television signal, the user has two options:
- Buy a new TV. Considering that television technology is constantly evolving, this is the most reasonable, but also expensive option. Some digital TV features (such as HD picture playback) may not be available on older models.
- Install a digital set-top box (aka receiver, decoder, tuner). This option is good if the TV is relatively new and of high quality, but simply does not have a built-in digital tuner.
After the set-top box is connected, it also needs to be configured to receive.
Which Sony TV models support digital broadcasting?
Almost all the latest TV models released by Sony have a built-in digital converter that supports all modern television broadcasting standards. However, some Sony Bravia models manufactured after 2014 can only work with the DVB-T format, which is outdated and almost never used in modern television. In this case, for the TV to work correctly, you will have to additionally purchase a digital set-top box.
You can find out for sure about DVB T2 support from the user manual. If the instructions for the TV are lost for some reason, you can easily find them on the Internet. It is enough to know exactly your TV model. However, this method may take quite some time. To speed up the process, you can go to the website of a large household appliance seller and enter your TV model into the search. Then, from the proposed options, find the card of the desired model. The fastest way is to use Yandex.Market. All the main parameters of any model of equipment are indicated there.
Automatic search for digital channels on Sony
The easiest way to set up channels is to use auto search. The exact procedure varies depending on the model and the specific interface option, but the general algorithm is as follows:
- The TV menu opens (usually using the corresponding button on the remote control, labeled “Menu” or “Home”).
- In the menu, first select the “Settings” tab, and then “Settings”.
- In the settings you need to select the “Digital configuration” item.
- In the menu that opens, you need to activate the “Automatic search for digital stations” item.
- The TV will prompt you to select a signal source. Here you need to indicate exactly where the digital television signal comes from - from an over-the-air antenna or cable.
- The TV itself will begin scanning the range and storing all detected TV channels in its memory.
- Once the scanning is completed, a message indicating the process is complete will appear. After this, you can start viewing the found programs.
Important: some TV models (for example, the Sony Bravia line) have two types of scanning - fast and full. The second searches deeper, looking through the entire available range, but it also takes much more time, up to an hour.
Service mode
The service mode is used to make electrical adjustments that are performed after repairing the TV. To enter the service mode, as well as to make adjustments, the standard remote control (RC) RM-887 (for models 14LT/21LT/21FT) or RM-889 (14LM1) is used.
To enter the service mode, turn on the TV using the power switch and switch it to Stand-by mode using the remote control. Then press the following buttons on the remote control in sequence: i+ - 5 - Volume+ - TV. “TT” will appear in the upper right corner of the screen. After this, press the MENU button on the remote control. The following image will appear on the screen (Fig. 3):
To select the desired menu item, use the UP and DOWN buttons on the remote control, and to enter the corresponding item, use the RIGHT and ENTER buttons. To exit the service menu, press the MENU button on the remote control. The list of parameters for each menu item is shown in the table. 2, 3, 5. In table. 4 shows possible errors that can be detected by the internal diagnostic system.
Test mode TEST MODE 2
In this mode, the parameters available for adjustment are shown in table. 6. To enter TEST MODE 2 from the service mode, press the TEST button on the remote control twice. To select the required parameter, enter its two-digit code using the numeric buttons of the remote control. To exit this mode, enter 00,10, 20, 30...90 or switch the TV to standby mode.
Rice. 3 Service menu for SONY TVs on the FE-2 chassis
table 2
GEOMETRY menu options
| Parameter | Adjustment range | Note |
| LEFT-HBIK | — | Fixed value equal to 13 |
| RIGHT-HBIK | — | Fixed value equal to 9 |
| V-ANGLE | 0-63 | — |
| V-BOW | 0-63 | — |
| PH-CENTER | 0-63 | — |
| H-SIZE | 0-63 | — |
| PIN-AMP | 0-63 | |
| U-CORNER-PIN | 0-63 | — |
| L-CORNER-PIN | 0-63 | — |
| PIN PHASE | 0-63 | — |
| V-LINEARITY | 0-63 | — |
| V-SIZE | 0-63 | — |
| S-CORRECTION | 0-63 | — |
| V-CENTER | 0 63 | — |
| V-ZOOM | — | Fixed value equal to 25 |
Table 3
SERVICE menu options
| Parameter | Adjustment range | Note |
| OFFSET-R | 0-15 | — |
| OFFSET-G | 0-15 | — |
| R-DRIVE | 0-63 | Fixed value equal to 25 |
| G-DRIVE | 0-63 | — |
| B-DRIVE | 0-63 | — |
| PEAK-FREQ | 0-3 | Fixed value equal to 0 |
| LUMA-DELA | 0-15 | Fixed value, equal to 8 |
| SCO | 0-3 | Fixed value equal to 3 |
| WHITE-PEAK | 0-15 | Fixed value equal to 15 |
| SUBCONT | 0-15 | — |
| SUBRIGHT | 0-63 | — |
| SUBCOL | 0-63 | — |
| SUBSHARP | 0-63 | Fixed value equal to 31 |
| BROSD | 0-15 | Fixed value equal to 11 |
| BRTXT | 0-15 | Fixed value equal to 8 |
Table 4
ERROR MENU
| Parameter | Adjustment range | Note |
| E02 | OCP (current limit protection) | (0,255) |
| EOH | OVP N/A (Over Voltage Protection) | (0,255) |
| E04 | VSYNC (vertical scan) | (0,255) |
| E05 | AKV (photodetector) | (0,255) |
| E06 | IIC (I2C bus error) | (0,255) |
| E07 | NVM (Non-Volatile Memory IC004) | (0,255) |
| E08 | JUNGLE (video processor IC201) | (0,255) |
| E09 | TUNER (tuner TU101) | (0,255) |
| E10 | SOUNDP (sound processor) | (0,255) |
| E11 | There is no exchange on the I2C bus between IC001 and IC201 | (0,255) |
| WORKING TIME | Total TV operating time | |
| HOURS | Watch | |
| MINUTES | minutes | |
| Note: Value 0 - no error, 255 - error. | ||
Table 5
IF ADJUST menu options
| Parameter | Adjustment range | Parameter | Adjustment range |
| AGC ADJUST | (0-255) | AUDIO GAIN | (0-255) |
| AUTOMUTE | (0-255) | L GATING | (0-255) |
Table 6
TEST MODE 2 service mode parameters
| Parameter code | Parameter | Description |
| 0 | TT mode off | Exiting TEST MODE 2 |
| 01 | Picture maximum | All image adjustments are set to maximum |
| 02 | Picture minimum | All image adjustments are set to minimum position |
| 03 | Set speaker/headphone Volume to 35% | Setting the volume level to 35% |
| 04 | Set speaker/headphone Volume to 50% | Setting the volume level to 50% |
| 05 | Set speaker/headphone Volume to 65% | Setting the volume level to 65% |
| About | Set speaker/headphone Volume to 80% | Setting the volume level to 80% |
| 07 | Aging mode | Training mode |
| 08 | Shipping Condition | Not used |
| 11 | Sub picture adjustment | Sub-clarity adjustment |
| 12 | Sub color adjustment | Subcolor adjustment |
| 13 | Sub Brightness adjustment | Sub-brightness adjustment |
| 14 | Text H Position adjustment | Shift teletext image horizontally |
| 15 | Picture Rotation Test | Image rotation test |
| 16 | Picture level 50% | All picture adjustments are set to 50% |
| 19 | Toggle Factory Mode | Switching Factory Mode |
| 21 | Destination ADE | Not used |
| 22 | Destination BL | —«— |
| 23 | Destination ADE | —«— |
| 24 | Destination U | —«— |
| 25 | Destination ADE | —«— |
| 26 | Destination BL | —«— |
| 27 | Destination KR | —«— |
| 28 | Destination KR | —«— |
| 31 | Auto Cutoff Disable/Enable | Cut-off mode control |
| 33 | Rotation ON/OFF | Image rotation on/off |
| 35 | No Function | Not used |
| 36 | No Function | Not used |
| 38 | Enter G2 Adjustment | Setting the accelerating voltage |
| 41 | Re-initialize NVM (Prog 59) | Initializing non-volatile memory (operation can be performed on channel 59) |
| 42 | Re-initialize geometry (Prog 59) | Initializing GEOMETRY 5 menu parameters (operation can be performed on channel 59) |
| 48 | Set NVM as non virgin (Prog 59) | Installation of previously unused non-volatile memory (operation can be performed on channel 59) |
| 49 | Set NVM as virgin (Prog 59) | Installing previously used non-volatile memory (operation can be performed on channel 59) |
| 61 | Auto AGC adjustment | Automatic AGC tuning |
| 63 | No Function | Not used |
| 64 | Enable/disable RGB priority | Priority (RGB signals (on/off) |
| 65 | RGB auto-detect enable/disable | Auto-detection of RGB signals |
| 66 | On timer enable/disable | Timer (on/off) |
| 67 | Manual AGC adjustment | Manual AGC tuning |
| 68 | Enable/disable X26 countermeasure (N problem) | — |
| 71 | Force PAL video (Factory Use Only) | Force PAL enable |
| 72 | Un-force PAL (restore normal video condition) | Restoring auto-detection of the color system |
| 87 | Locat keys test | Local keyboard test |
| 88 | No Function | Not used |
| 89 | Enable/disable watchdog | Security Management |
| 99 | Display Error and Working Time menu | Access to the error menu and TV operating time |
Table 7
| Faulty microcircuit, node | Number of indicator flashes |
| No mistakes | — |
| Reserved | 01 |
| OSR (enabled by current limit) | 02 |
| Reserved | — |
| No Vertical Sync (no vertical scan pulses, see pin 5.7 IC501) | 04 |
| Unstable AKB (unstable current of kinescope cathodes) | 05 |
| IIC bus clock and/or data lines low at power on (I2C bus error) | 06 |
| NVM no IIC bus acknowledge at power on (no response on I2C bus from IC004) | 07 |
| Not used | 08 |
| Tuner no acknowledge at power on (no response via I2C bus from tuner TUOO1) | 09 |
| Not used | 10 |
| Jungle controller no acknowledge at Power ON (there is no exchange on the 12C bus from the video processor IC001) | 11 |
Table 8
Operating modes of microcircuits on board A for direct current
| Micro circuit | Pin No. | Voltage, V | Micro circuit | Pin No. | Voltage, V | Micro circuit | Pin No. | Voltage, V |
| IC001 | 1 | 0 | IC001 | 47 | 3,6 | IC501 | 5 | 0,2 |
| 2 | 3,2 | 48 | 2,8 | 6 | 13,9 | |||
| 3 | 2,9 | 49 | 2,3 | 7 | 0,3 | |||
| 5 | 0 | 50 | 0,2 | IC531 | 1 | 1,4 | ||
| 6 | 2 | 51 | 2,5 | 2 | 2,3 | |||
| 8 | 2,3 | 52 | 2,5 | 3 | 1,8 | |||
| 9 | 8 | 53 | 2,5 | 5 | 2,4 | |||
| 10 | 5 | 54 | 2,1 | 6 | 1,6 | |||
| 12 | 0 | 55 | 5,2 | 7 | 6,4 | |||
| 13 | 0 | 56 | 3 | IC601 | 1 | -80,4 | ||
| 14 | 4 | 57 | 3,1 | 2 | -80,5 | |||
| 16 | 1,4 | 58 | 3,1 | 3 | -80,2 | |||
| 17 | 1,5 | 59 | 3,2 | 4 | -80,2 | |||
| 18 | 0 | 62 | 0 | 5 | -81,5 | |||
| 19 | 0 | 63 | 0 | 6 | -81,6 | |||
| 20 | 3,8 | 64 | 0 | 7 | -77,8 | |||
| 21 | 3,8 | 65 | 0 | 9 | -81,8 | |||
| 22 | 5 | 67 | 4,8 | 10 11 | -76 | |||
| 26 | 0 | 68 | 0,4 | -81,9 | ||||
| 28 | 3,5 | 69 | 0 | 12 | -79,4 | |||
| 29 | 3,6 | 70 | 0 | 14 | 16,5 | |||
| 30 31 | 1,9 | 71 | 0 | 15 | 11 | |||
| 0,3 | 72 | 0 | 16 | 14,4 | ||||
| 32 | 3,6 | 73 | 7,1 | 18 | 86,4 | |||
| 34 | 1,9 | 74 | 5 | IC1201 | 1 | 11 | ||
| 35 | 1,4 | 75 | 8,1 | 4,9 | ||||
| 36 | 3,9 | 76 | -3,5 | 5 | 0 | |||
| 38 | 1,8 | 77 | 0 | 6 | 0 | |||
| 40 | 3,3 | 78 | 3,2 | 7 | 1 | |||
| 42 | 3,3 | 79 | 3,2 | 9 | 0,3 | |||
| 43 | 1,4 | 80 | 0 | 10 | 0 | |||
| 45 | 0 | IC501 | 1 | 0,3 | 12 | 0 | ||
| 46 | 0 | 3 | -12,6 | 14 | 11,35 |
Table 9
Operating modes of the transistor on board A for direct current
| Transistor | Emitter | Base | Collector |
| Voltage, V | |||
| QO13 | 0 | 0,7 | 0 |
| Q016 | 0 | 0 | 3,3 |
| Q212 | 0 | 0,7 | 0 |
| Q401 | 4,8 | 4,2 | 1,8 |
| Q411 | 1 | 1,7 | 4,2 |
| Q601 | 5,6 | 4,8 | 5,3 |
| Q602 | 14,2 | 5,1 | 8 |
| Q603 | 8 | 8 | 0 |
| Q604 | 0 | 0 | 2,5 |
| Q608 | 0 | 0 | 5,6 |
| Q609 | 5,6 | 5,6 | 0 |
Table 10
Operating modes of the transistor on board A for direct current
| Transistor | Emitter | Base | Collector | Transistor | Emitter | Base | Collector | Transistor | Emitter | Base | Collector |
| Voltage, V | Voltage, V | Voltage, V | |||||||||
| Q701 | 124,2 | 124,8 | 20 | Q706 | 7,5 | 8,1 | 125 | Q712 | 125,8 | 126,4 | 201,9 |
| Q702 | 2,3 | 3 | 7,5 | Q707 | 124,6 | 125,8 | 5,5 | Q713 | 133 | 132,4 | 201,9 |
| Q703 | 7,5 | 8,1 | 131,6 | Q708 | 3,5 | 2,1 | 7,5 | Q715 | 132,3 | 131,5 | 8,1 |
| Q704 | 131 | 132,4 | 5,2 | Q709 | 7,5 | 8,1 | 123,3 | Q716 | 125,8 | 125 | 8,1 |
| Q705 | 2,5 | 3,1 | 7,5 | Q71 | 123 | 124,3 | 5,5 | Q717 | 124,2 | 123,4 | 8,1 |
Table 11
Operating modes of the IC1801 chip on board C for direct current
| Chip | Pin no. | Voltage, V |
| IC1801 | 1 | 1,3 |
| 2 | 1,3 | |
| 3 | 1,4 | |
| 5 | 4,1 | |
| 6 | 4,1 | |
| 7 | 7,0 | |
| 8 | 8,0 |
Self-diagnosis system
The FE-2 chassis has a built-in diagnostic system that tests all microcircuits and components connected to the I2C digital bus. If a malfunction occurs in the TV, the LED indicator on the front panel flashes a certain number of times (see Table 7).
Manual channel tuning
Switching the TV to manual channel tuning mode is usually required if there are any problems with auto search or if another digital multiplex has started broadcasting in the vicinity, and you don’t want to mess up the existing settings.
- Instructions for setting up SMART TV on Sony TVs
Step-by-step instructions for manual setup are described in a separate article. In general, its algorithm looks like this:
- In the TV menu, select the “Manual tuning” item.
- The frequency from which the search will be conducted is indicated.
- The TVC number is set.
- Detected channels are recorded in the TV memory.
You can find out all the necessary data in 2 minutes from the article about the frequencies of digital channels.
Adding local analogue TV channels
Although in Russia the broadcasting of federal channels is being transferred to digital, analogue television is still preserved: local programs are broadcast on it. If you want to watch them, proceed as follows:
- Go to the menu and go to “Settings”.
- Select analog configuration (ATV).
- Go to the “Search for channels” item.
- After completing the procedure, secure the received analog channels.
Expert opinion Vitaly SadovnikovSpecialist in connecting and setting up digital television Unlike digital channels, the quality of reception of analogue channels is greatly affected by interference, but you can try to get rid of it. To do this, you need to select the “Fine-tuning” item in the menu and, by changing the frequency within small limits, achieve the maximum available reception quality. Fine tuning must be done for each of the found channels.
Deleting and sorting channels
If for some reason you do not want to watch one or more channels found, you can remove them from the list. This is done as follows:
- Open the menu.
- Select Settings, then Digital Configuration.
- Go to “Uninstall programs”.
- Find the unwanted channel in the list.
- Press "OK" on the remote control. The channel is deleted.
Important: Some older Sony TV models do not have the option to delete found channels.
If you need to sort the order of channels, the procedure looks like this:
- Open the menu.
- Select Settings and Digital Configuration.
- In the menu that opens, go to the “Sorting programs” item.
- Enter the channel number you want to change and press the select key. The program will be highlighted.
- Use the Up and Down keys to move the channel to the desired position.
- The procedure is repeated for all channels that need to be sorted.
How to connect a digital set-top box
As mentioned above, some Sony TV models do not support modern television broadcast formats. To fix this problem you will need a special device - a digital tuner. Analogue television broadcasting is almost a thing of the past, and therefore it is worth thinking about a complete transition to digital, so that at some certain point you will not be left without your favorite TV channels.
The digital tuner is also capable of turning an old TV into a modern Smart TV model. To do this, you should choose a console on Android. It has its own software. With this option, the TV will only serve as a screen, and the set-top box will allow you not only to watch TV channels, but also to connect to popular Internet services (YouTube, Skype, social networks, etc.)
To connect a digital tuner, you must perform the following steps.
- Connect the antenna cable to the set-top box.
- Connect the digital tuner to the TV. Here it is better to use an HDMI cable, but if there is no such connector, you can use regular “tulips”.
- Using the “Input” button, select the signal source on the TV - the input to which the digital set-top box is connected.
- After all the operations have been completed, start searching for TV channels using a digital tuner.
Common problems and their solutions
The channels were showing, but then they stopped
Sometimes it happens that digital channels that have only recently been accepted suddenly disappear. What to do in this case?
Expert opinionVitaly SadovnikovSpecialist in connecting and setting up digital televisionFirst of all, you need to check who has the problem - the user or the broadcaster. To do this, you should contact your neighbors or friends who live in the same area and use digital television. If they have the same situation, then the problem is not in the TV, but in the relay tower. Then all that remains is to file a complaint with the operator (for example, through the website https://rtrs.ru/).
- Service codes and combinations for Sony Xperia
But most likely the reason for the disappearance is the TV settings (for example, due to a power surge). In this case, it is recommended to use two methods:
- rescan the range (manually or automatically). It is possible that channels will be detected;
- a complete reset to factory settings (how to do this on a specific digital TV model can be found in the operating instructions). After this, you need to reconfigure the TV receiver, including searching for channels.
No signal
If no channel shows, you need to take the following steps:
- Check the antenna connection. The plug may have fallen out of the socket.
- Verify the integrity of the antenna cable visually and, if possible, by ringing it using a multimeter.
- Check antenna orientation. Digital TV broadcasts in the decimeter range, and UHF antennas, as a rule, are sensitive to the direction of the signal source, so they must be installed with a clear orientation towards it. The exact bearing to the nearest repeater can be found on the interactive map of CETV.
If none of these steps yield results, you need to seek help from the experts. Most likely, this is a malfunction of the TV.
Other possible problems and their solutions:
- manages to catch only 10 channels out of 20;
- the image freezes, slows down or crumbles;
- The channels are not picked up at all.
Standard recommendations
Before connecting the device to the network, you need to check that all cords are connected correctly and that they are securely fastened. After turning on the TV, you need to wait a while so that the installation of the system is completely completed, only after that you can proceed to the basic settings of the Sony TV.
All actions are performed using the control panel. Parameters such as sound, image, Internet connection and speaker system must be configured in the “HOME” menu. This is the main tab; all the necessary settings for the Sony TV are performed in it.
- Sony Alpha 7 Mark II test
Electrical adjustments
Focus adjustment
- Tune the TV to the signal of any television station.
- Set the image adjustment mode to “Normalize”.
- Set the FOCUS regulator (located on the TDKS body) to optimally focus the image over the entire screen area.
Accelerating voltage adjustment
- A dot field signal is supplied to the TV input.
- Set the brightness, contrast, clarity and color adjustments to the minimum position.
- Connect the cathodes of the RGB kinescope to a 175 V DC source.
- Set the SCREEN regulator on the TDKS to the position where the return lines disappear on the screen.
Adjusting White Balance
- A “white field” signal is supplied to the antenna input of the TV.
- Set the contrast control to maximum.
- In the service mode of the TV (see description below), select and open the SERVICE line from the menu.
- In the list that appears, select the R-DRIVE parameter and set its value to 25.
- By adjusting the G-DRIVE B-DRIVE parameters, optimal white balance in “light” is achieved.
- To save new parameter values after each adjustment, press the OK button.
- Set the contrast control to minimum.
- By adjusting the G-OFFSET and B-OFFSET parameters, you achieve white balance in the “dark”.
- Press the OK button to save the new values of the adjustment parameters.
Rice. 2 Same range of cyan, magenta and blue video signals of SONY TVs on the FE-2 chassis
Subcontrast adjustment
- A “white square on a black background” signal is supplied to the TV input from a television signal generator.
- Connect a digital voltmeter to pin. 10 connector J701 (board B).
- In service mode, adjust the SUBCONT parameter (located in the SERVICE menu) and set the voltage at the indicated contact to 95+0.5 V.
Subcolor adjustment
- The color bar signal in the PAL system is supplied to the TV input from a television signal generator.
- Connect the oscilloscope to pin. 3 x CN504 connectors (Board A).
- In service mode, adjust the SUBCOL parameter (located in the SERVICE menu) and achieve the same range of cyan, magenta and blue video signals (see Fig. 2).
Tuner AGC adjustment
- In service mode, set the value of the AGC ADJUST parameter (located in the IF ADJUST menu) to zero.
- The TV input is supplied with a signal level of 64 dBµV/75 Ohm from a television signal generator.
- Connect to pin. 1 tuner TU101 digital voltmeter and make sure that the voltage at this pin is 3.5 + 0.3 V. If it does not correspond to the specified value, then by adjusting the AGC ADJUST parameter, set the required value.
Adjusting image geometric parameters
- A “grid field” signal is supplied to the antenna input of the TV.
- In the service mode, enter the GEOMETRY menu and sequentially adjust its parameters to achieve the optimal image on the TV screen.
Automatic channel search
Setting up a Sony TV begins with searching for TV channels. On new models it is performed automatically. To start the operation, you need to hold down the “MENU” button for a few seconds; standard settings for searching for TV channels will appear on the TV screen.
During the procedure, interference and channels found by the device will be displayed on the TV screen. When the search operation is completed and the channels are in the correct order, the screen will function normally.
Search for digital TV channels
Digital channels are configured according to the following scheme:
- Go to the “Main Menu” tab by pressing the Home button on the control panel.
- Select the “Digital Configuration” section; if there is no such section, then select “Autostart” and immediately go to step No. 5.
- “Digital tuning” tab – “Automatic search for digital stations”.
- Select cable type connection.
- You must enter the parameters required for the search.
- If all actions are performed correctly, the device will find digital programs available for viewing.
- To turn on the internal clock, perform the following steps: “installation” - “digital configuration” - “technical configuration”.
- In the tab that appears, select the GMT time zone.
This is the main way to set up digital channels on a Sony TV.
Features of Sony Bravia TV
Setting up digital channels on the new Sony Bravia TV is different from other devices. Smart TV provides high quality picture and sound. A large number of channels organize leisure time for the whole family.
Setting up the TV takes place in several stages:
- Preparation;
- Calibration;
- Setting brightness parameters;
- Adjusting contrast and sharpness;
- Selecting the saturation of the color palette;
- Set sound and advanced options.
Let's look at each item in as much detail as possible so that you understand how to set up digital channels on your Sony Bravia TV.
Preparatory stage
The initial setup of digital broadcasting begins with choosing the language in which the menu will be displayed. Then, you need to indicate the location (country) and come up with a unique digital combination that will protect children from accidentally viewing unwanted channels. You can write it down or come up with a simple password - year of birth, for example.
After entering the basic parameters, preparations begin for setting up digital channels on the Sony Bravia. And most importantly, check that all devices are connected correctly. And also check the functionality of the remote control and the presence of batteries in it.
Then follow the simple instructions:
- Turn on the TV. Access the menu via the Home button on the remote control.
- Download the calibration data if it has already been entered into the TV memory. If not, pay attention to the TV's OS. For Android, you can download calibration from Blu-Ray or DVD with drivers.
- Find “factory reset” in the “Recovery and reset” menu section. There will be an automatic return and removal of all programs to the basic version.
After this, you can begin re- or initial setup of digital broadcasting on Sony TV.
Calibration setup
You can watch TV channels in perfect quality and with good sound by properly setting up digital television on your Sony Bravia. Calibration is one of the adjustment elements. In its absence, sharpness decreases.
To load parameters downloaded to a flash drive, PC or DVD, you need to go to the settings, in the “installation” subsection. Select the "Screen Control" link. There will be an option for “automatic display area” and “maximum resolution”.
Adjust brightness, sound, contrast and sharpness
After connecting the equipment, setting the time and language, and calibrating, you can proceed to the following parameters:
- Brightness. A pre-downloaded diagram is used for setup. The most commonly used option is with 4 gray stripes. The area on the right should be almost black. This indicates that the brightness is adjusted correctly.
- Contrast. Save the brightness settings and move on to contrast. Adjustment is also carried out by stripes. Select the lightest one in the chart and adjust until it turns white.
- Sharpness is responsible for the naturalness of the image. The correct setting is also determined by the diagram. There should be no light outline left around it.
- Saturation of the color palette. It is necessary to bring all shades to maximum saturation.
- The sound is adjusted through external acoustics or internal speakers. No additional adjustment is required.
It is advisable to immediately adjust additional parameters. Go to the “Settings” tab - “System settings” - subsection “Eco”. There you can turn off the light sensor and make other adjustments.
The setup of digital television on Sony TVs is completed by automatically searching for channels. To do this, just go to the appropriate section of the menu. Select the signal source (antenna, cable) and click search. When finished, save the found channels.
Sony Trinitron
In order to install channels on Trinitron models, you must adhere to the following rules:
- Press two keys on the remote control at the same time (up arrow and right arrow).
- Using the PROG button, select the channel number that should be infused.
- Press the button (up arrow) and the keys next to it.
- In order for sound to appear, hold down the key (up arrow), as well as the key with an asterisk.
- Remember the desired channel and press two keys on the remote control (up and right arrow).
- The operation is completed.
- If you cannot find the TV in this way, this means that the device has problems with the memory unit, repairs are required, it is recommended to contact a technical center.
The best option for setting up channels on a Sony Trinitron TV. Detailed information can be found in the instructions supplied with the device by the manufacturer . If there is no paper copy, it is recommended to find its virtual version on the company’s website. The user needs to thoroughly study the instructions for his model to avoid problems when connecting the equipment.
Also read how to set up Smart TV on Samsung and LG TVs yourself.
“How to set up digital and satellite channels on LG TVs. Select and connect the hard drive to the TV” 2 —> Interesting: Comments: (2) Write a comment
Any brand of TV device must be adjusted correctly the first time it is turned on. We'll talk about what a Sony Trinitron TV is and how to set it up in the article.
Looking for channels on Sony Triritron
Many people have a question about how to set up TV channels on a Sony Trinitron TV. If the model was purchased new and included a remote control, then the search for TV channels is carried out as follows.
- Press 2 buttons at once, located under the key with the red arrow pointing up and the button with the right arrow.
- When a new window appears on the display, you must hold down the up arrow button with the volume key. Pressing “+” or “-” starts automatic tuning on your Sony TV.
If you inherited a TV without a remote control, or purchased a used version, you can download instructions on the official website and install using the buttons on the equipment panel, as well as purchase and configure a universal Sony remote control.
Continuing the topic: Subscribe, and your VK feed will contain all the most interesting things about technology: Calculation of consumption
electricity equipmentCalculatex11/26/2019The best children's synthesizers for different agesOther digital11/26/2019How to choose a synthesizer for a childOther digital11/19/2019Video surveillance cameras in a smart home systemVideo cameraCCTV cameras in a smart home systemChoice of household appliancesYour opinion Loading...Equipment reviews Electricity
calculation calculatorCalculate
Any brand of TV device must be adjusted correctly the first time it is turned on. We'll talk about what a Sony Trinitron TV is and how to set it up in the article.
Useful information about the Trinitron brand
Sony used to produce reliable Trinitron TVs. This is a fairly large piece of equipment when you compare the device with modern flat-panel TVs.
But many users are in no hurry to get rid of it, since the device has a number of advantages:
- Reliability. Judging by the reviews, Trinitron has been working for many users for more than 15 years and has never failed.
- Despite its age, you can connect various set-top boxes to the TV to expand its functionality.
- Does not fail, even during power surges.
According to reviews, equipment users rate the device’s characteristics as follows:
- color rendering – 4 out of 5 points;
- brightness – 5 out of 5;
- sound – 4 out of 5;
- image quality – 4 out of 5;
- design – 5 out of 5.
Disadvantages include the size and poor sound quality.
Quality models:
- Sony Trinitron KV-21T1R.
- Wega Trinitron 100 Hz.
What to do if your TV doesn't have a remote control
There are situations when a TV is inherited, but there is no remote control for the Sony Trinitron TV. In this case, you can control the equipment from the toolbar or purchase a universal Trinitron TV remote control. To activate such a sample of remote technology, you will need to make certain settings.
There is also the option to download a special application to your mobile phone and control Trinitron TV via a cellular device.
To install the equipment, you will also need to make settings, which consists of pressing certain keys that will appear on the phone monitor. As soon as the TV begins to respond to the equipment, you can use the mobile phone as a full-fledged remote control.
If the Trinitron TV cannot be connected to the phone, you must notify the manufacturer by entering in the appropriate window the name of the model of the TV equipment that is not synchronized. After a certain time, the manufacturer will try to add this TV model to the list of available TVs for communication with the mobile device.
- SONY Music centers user manual and operating instructions
If you definitely need a remote control, and not a mobile phone, then in the nearest TV and radio store you should look for a remote control called Sony RM-887 non-original.
This remote control is suitable for most Trinitron TVs. Judging by the reviews on the forums, many Triniton TV users were satisfied with the remote control of this model. In terms of capabilities, it is in no way inferior to the original.
To operate the Sony Trinitron TV remote control, you need to install two AA batteries. It is preferable to choose not ordinary batteries, but batteries that can be charged. If the TV Trinitron does not turn on from the remote control, then you will need to insert the batteries into a special slot, connect it to the outlet and restore functionality. This will save you a lot of money. The price for the remote control unit should not exceed 414 rubles. If the cost is higher, it is advisable to look for another point of sale and not spend extra money.
The instructions on how to set up a Sony TV are universal and suitable for almost all models. The menu interface is similar, so there are no significant differences.
Experts note that the menu of Sony brand plasmas is more complicated than that of TVs of other brands. It is sometimes difficult for the user to understand the incomprehensible symbols and additional functions with which the panel is equipped.
Setting up a Sony Trinitron TV without a remote control
Methods for setting up a Trinitron TV:
- The easiest way to set up TV is to activate the automatic channel search mode. To start the function, you need to press the menu key on the toolbar (located at the bottom or side of the monitor) and go to the Trinitron TV settings. There you will need to select a sub-item with automatic channel search. To start the function, you just need to click on channel search and wait until the search ends. It is important to note that on some models, when using Auto mode, you will need to lock the installed channel in order to move on to the next search. To do this, press the “+” key to adjust the volume.
- If a set-top box or TV tuner is additionally connected to the TV, then before starting the automatic channel search, you must select the type of broadcast used - digital or analog. We choose the digital option, since analogue television will soon be unavailable to Russian users. Adjustment of the selected frequency will begin immediately after entering the data. Once all the channels begin to appear on the monitor, it is worth clicking through them all to make sure that the signal is in high quality HD.
- You can also use the standard manual mode to tune in TV channels. To start, you will need to go to the Trinitron TV menu again, but this time select manual mode. You need to activate it and control the settings by switching the volume buttons - “minus” or “plus”. As soon as the frequency of one tuned channel has been adjusted, you can move on to tuning the next one by clicking on “+”.
If a satellite dish is connected to the Trinitron TV, then first you need to configure the receiver correctly. When using satellite equipment, it is better not to change the settings of the set-top box yourself, but to immediately start the auto mode.
Standard setting
The connection diagram for TVs from well-known manufacturers is very similar to each other. If you have previously configured digital channels, for example, on Samsung or LV TVs, then there will be no problems, even if the equipment is of a newer generation. in the TV , and most users make the installation by testing out possible options.
If you have no experience in this area, it is better to use the instructions from the manufacturer.
It is very convenient to use a remote control for these purposes, but in some models you can do without it. So, let's look at the steps on how to set up channels on a Sony TV.
- The simplest step is to enable the built-in automatic channel search mode. To launch this function, you must enter their settings menu. After holding this button, the automatic channel search menu will appear. When the installation process is completed, the TV will return to viewing mode automatically. It should be noted that in some models, during automatic search, it is necessary to fix the installed channel in order to be able to move on to the search for the next one.
- If a T2 TV tuner is connected to the TV (or it is already built-in), then after selecting automatic search, the device will ask you to select the type of channels: analog or digital. Television frequencies will be adjusted based on the entered data.
- You can use manual mode. The instructions for a specific model will indicate which button or key combination is responsible for using this function. You can work with the settings menu elements using the volume buttons “+” and “-”. Having adjusted the frequency of one TV channel received by the antenna, you can proceed to setting up the next one.
- When using a satellite dish, you must perform the initial setup on the receiver. When connecting satellite equipment, it is better not to change the manufacturer’s settings, but to run an automatic search.