If you connect your laptop to your TV, you can display any information from your computer device on the big screen. Depending on the TV, the version of the laptop operating system, the presence or absence of the Internet, you can make a different connection. The end result will differ not only in the connection method (wired or wireless), but also in the task for which the equipment is synchronized with each other.
For example, you can connect in such a way that the laptop screen will be duplicated on the TV screen. All actions will be duplicated in real time. We went to the folder on the laptop - a similar picture will be displayed on the TV. Or just make a server so that you can access your laptop files from your TV at any time. In this case, duplication does not occur, but you can watch videos, films, photos from your laptop on a large TV.
Connecting a laptop to a TV via HDMI is the best way
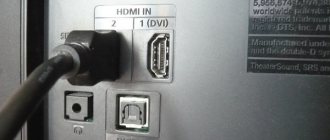
TV inputs
The solutions we offer fall into three categories: direct connection cables, such as those that carry a signal between outputs and inputs of the same type; Signal adapters that convert between different types, sometimes with some loss of quality along the way; And finally, converters through processing, which usually take the form of signal encoders.
In some cases, the connection between formats is not simple and requires several steps, that is, first convert the signal to the format and use another adapter to convert it to the third. You should be aware that these conversions often lose quality, so you should avoid them unless absolutely necessary.
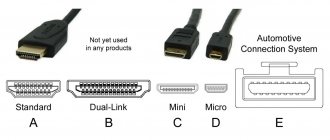
Almost all modern laptops have an HDMI or miniHDMI output (in this case you will need an appropriate cable), and all new (and not so new) TVs have an HDMI input. In some cases, you may need adapters from HDMI to VGA or others, if one of the types of ports is missing on your laptop or TV. Moreover, ordinary wires with two different connectors at the ends usually do not work (see below in the description of problems connecting a laptop to a TV).
When using Miracast
There are many ways to enjoy your favorite movies and series with a broadband Internet connection on your computer that you can get for a small amount of money or even for free.
Likewise, you may need to adjust your computer's resolution so that the image fits the size of your TV. Therefore, you must connect your computer and set up a new screen, select Control Panel from the Start menu. Double-click the Show icon and go to the Settings tab. Why using HDMI is the best solution for connecting a laptop to a TV. Everything is simple here:
- HDMI is a digital interface that supports high resolutions, including FullHD 1080p
- When connected via HDMI, not only images are transmitted, but also sound, that is, you will hear the sound through the TV speakers (of course, if this is not necessary, you can turn it off). May be useful: .
Get the latest drivers for your computer
Adjust the resolution in the Settings tab and then click the Advanced button to set the refresh rate.
Most maps offer a "clone" or "mirror" mode, where both screens show the same content. Alternatively, extended desktop mode will allow each monitor to operate independently. If your computer only has a separate video output that you use for something else, you may need to purchase a new video card. The price of the converter is actually almost the same as that of the video card. And we will tell you one of the simplest ones.
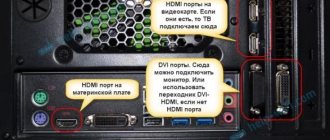
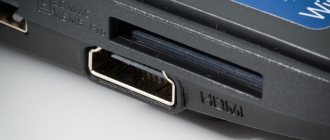
HDMI port on laptop
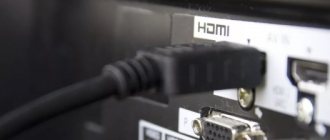
The connection itself is not particularly difficult: you connect a cable from the HDMI port on your laptop to the HDMI input of your TV. In the TV settings, select the appropriate signal source (how to do this depends on the specific model).
We downloaded the appropriate version and installed it. One is the server and the other is the console or user interface. Take the command and go to the connections and output section. Because you have to share the contents of your computer earlier. We provide a program icon. We need to search for "Library", go to the "Shared Folders" section and give it the "Add" function. Do you see what has been revealed to you? Check the type of content to share, be it audio, video or images.
Ninth method. Connection via SCART
Now you need to select content. To do this, we give "Overview" and an icon opens on a new screen. A list of system folders will appear. Now we need to look for the one we need, for example, in general or just to transfer a specific multimedia file.
On the laptop itself (Windows 7 and 8. In Windows 10 it’s a little different -), right-click on an empty space on the desktop and select “Screen Resolution”. In the list of displays you will see the newly connected monitor, here you can configure the following parameters:
- TV resolution (usually the optimal one is automatically determined)
- Options for displaying images on the TV - “Extend screens” (different images on two screens, one is a continuation of the other), “Duplicate screens” or display the image on only one of them (the second is disabled).
In addition, when connecting your laptop to your TV via HDMI, you may also need to adjust the sound. To do this, right-click on the speaker icon in the Windows notification area and select “Playback Devices”.
Give it a few minutes depending on the amount. Enabling options that will never be closed and remain in the low consumption profile will be more than enough. Here you also have a list of audio, video, image, playlist and subtitle extensions that the program is compatible with.
Or play your favorite game on the big screen. Select the appropriate link below depending on your case. Typically you have one of these four. Identify them using the image above if you need them.
- Also included are the most "flat" and some older TVs.
- It offers acceptable image quality.
- This gives digital image quality and is very good.
- The connectors are different, but the usage is the same.
- Its image quality can be good and digital.
- They have some pretty old ones.
- Also old and modern TVs.
- Its image quality is quite poor.
It's easy to do, but you have to follow a certain order and take some precautions.
In the list you will see Intel Display Audio, NVIDIA HDMI Output, or another option corresponding to HDMI audio output. Set this device as the default one by right-clicking on it and selecting the appropriate option.
Many laptops also have special function keys in the top row to enable output to an external screen, in our case, a TV (if such keys do not work for you, then not all official drivers and utilities of the manufacturer are installed).
Use the table below to find out which system to use. There are times when a simple video cable is enough. They must have male-to-male connectors. You can buy them from any physical or online store. Video connection table.
Problems with cables and adapters when connecting
The easiest way to do this is to use a simple cable that can be purchased at any computer store.
- Or you have two connectors on both ends.
- The pins must be male and usually 3.5mm.
- Using a Simple Audio Cable There is one audio connector on each end.
- Male type and generally 5 mm.
To prevent failures, connect in this way.
These can be the Fn+F8 keys on Asus laptops, Fn+F4 on HP, Fn+F4 or F6 on Acer, I have also seen Fn+F7. The keys are easy to identify; they are labeled accordingly, as in the image above. In Windows 8 and Windows 10, you can also enable output to an external TV screen using the Win+P keys (works in Windows 10 and 8).
What to do if you can't see anything, it looks bad or there's no sound
- Then connect the cables or video converter between them.
- Or sometimes you need to do it through the TV's options menu.
Try these solutions. Then repeat the same steps to establish the connection. This is also useful for positioning the image to your liking. Or if it's clipped, warped, or things look too big or too small. Try different resolutions until you find one that works. In general, you should set resolutions to low when connecting to older and older TVs if you are connecting to high definition. Check the table below to find out which system to use depending on the sockets your TV has.
Typical problems when connecting a laptop to a TV via HDMI and VGA
When you connect your laptop to your TV using wires, using HDMI or VGA ports (or a combination of both, when using adapters/converters) you may find that it doesn't work as expected. Below are typical problems that may arise and ways to solve them.
No signal or just image from laptop on TV
If this problem occurs, if you have Windows 10 or 8 (8.1) installed, try pressing the Windows keys (with logo) + P (Latin) and select “Extend”. Perhaps the image will appear.
If you have Windows 7, then right-click on the desktop, go to the screen settings and try to identify the second monitor and also set “Extend” and apply the settings. Also, for all OS versions, try setting the second monitor (provided it is visible) to a resolution that it definitely supports.
When connecting a laptop to a TV via HDMI there is no sound, but there is a picture
If everything seems to work, but there is no sound, and no adapters are used, and it’s just an HDMI cable, then try checking which playback device is installed by default.
Note: if you use any adapter option, keep in mind that audio cannot be transmitted via VGA, regardless of whether this port is located on the TV or laptop side. The sound output will have to be configured in some other way, for example, to the speaker system via the headphone output (do not forget to set the appropriate playback device in Windows, described in the next paragraph).
Right-click on the speaker icon in the Windows notification area and select “Playback Devices.” Right-click in an empty space in the list of devices and enable the display of disabled and disconnected devices. Note if there is an HDMI device listed (there may be more than one). Right-click on the one you need (if you know which one) and set “Use as default”.
If all devices are disabled or there are no HDMI devices in the list (and they are also missing in the sound adapters section in the device manager), then it is quite possible that you do not have all the necessary drivers installed for your laptop’s motherboard or video card; they should be taken from the official website of the laptop manufacturer (for a discrete video card - from the website of its manufacturer).
Problems with cables and adapters when connecting
It is also worth considering that very often problems with connecting to a TV (especially if the output and input are different) are caused by low-quality cables or adapters. And the problem is not only in quality, but in a lack of understanding that a Chinese cable with different “ends” is usually an inoperative thing. Those. You just need an adapter, for example this one: .
For example, a common scenario is that a person buys a VGA-HDMI cable, but it doesn’t work. In most cases and for most laptops, such a cable will never work; you need a converter from analog to digital signal (or vice versa, depending on what is connected to what). It is only suitable for cases when the laptop specifically supports digital output via VGA, and this almost never happens.
Rating of consoles
To conclude the topic, I present a list of the best smart consoles based on customer reviews.
Rombica Smart Cast v02
Compact media player with HDMI connection and external Wi-Fi antenna. Supports setup via DLNA or Miracast. There is a separate USB connector and HD video playback. Price – from 2,500 rubles. (multi-store).
MiraScreen 2.4GHz WiFi Display Dongle
Model with built-in antenna, supports video playback in FHD, Miracast, DLNA. Runs Andro >
Rombica Smart Cast v03
Compact media player with the ability to connect a cable to a smartphone or flash drive. Operating system – Andro >
Palmexx WiFi Display Dongle DLNA Miracast AirPlay
A model with a large number of built-in codecs, support for DLNA, Miracast. The device allows you to play music from your iPhone, as well as watch videos in FHD. Connect to TV via HDMI. Cost – from 1,800 rubles. (2 stores - Russia, Belarus, UA, Kazakhstan).
MXQ Pro 4K
Model with remote control support (supplied). A large number of connectors and built-in codecs. 4K video support. An HDMI cable is included. It is possible to synchronize with a PC via DLNA or Miracast. Equipped with a download manager. Built-in memory – 8 GB, RAM – 1 GB. Cost – from 2,300 rubles.
Thank you for your attention! See you again on the blog! Sincerely, Rostislav Kuzmin.
Connecting Apple Macbook Pro and Air laptops to your TV
Mini DisplayPort Adapters at the Apple Store
Apple laptops are equipped with a Mini DisplayPort output. To connect to a TV, you will need to purchase the appropriate adapter, depending on what inputs are available on your TV. The following options are available on the Apple Store (and other places):
- Mini DisplayPort - VGA
- Mini DisplayPort - HDMI
- Mini DisplayPort - DVI
The connection itself is intuitive. All that is required is to connect the wires and select the desired image source on the TV.
More wired connection options
In addition to the HDMI-HDMI interface, you can use other wired connection options to display images from a laptop to a TV. Depending on the configuration, these may be the following options:
- VGA - VGA. With this type of connection, you will have to separately worry about outputting sound to the TV.
- HDMI to VGA - If your TV only has a VGA input, you will have to purchase the appropriate adapter for this connection.
You can imagine other wired connection options, but I have listed all the most common ones that you are most likely to encounter.
Conclusion
From all of the above, we can conclude that connecting a computer to a TV is not so difficult. The main thing is to follow the instructions and everything will work out. These instructions are also relevant for connecting projectors and other devices for displaying images from a computer screen.
Good afternoon, dear subscribers and just readers! Quite often, buyers are interested in whether it is possible to use a TV as a monitor for a computer. There is such a possibility. To do this, you can use a wired connection or duplicate your computer screen to your TV via Wi-Fi.
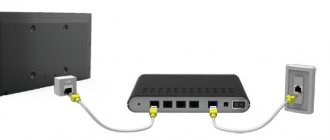
Most often, buyers use TV to watch movies from a computer. Many people want to perform this action without wires, because it is not always convenient to stretch them around the apartment, in addition, as the wire lengthens, the image quality begins to decrease, and no one wants this. Thus, it is quite logical to set up broadcasting via a wireless Internet network. An important condition is that the TV must have a built-in wireless communication module, namely a Wi-Fi adapter. With its help you can broadcast via a router.
A fairly common way to watch video on TV via a PC is to connect both devices to a network. In this case, there will not be a live broadcast, but access from the TV to network folders that contain data.
So, the connection algorithm consists of the following points:
- The TV and computer must be connected to the same router.
- On a PC, a shared server is configured in the “Control Panel” section. Using Windows 10 as an example, you need to go to the address – “control panel” – “network and Internet” – “home group”. Here the user must select what data can be accessed by devices on the network. You can only select video or photo.
- Now, through the TV menu, you need to enter the folder on your computer to receive the files and start viewing them. All TVs connect to the folder differently. Using Sony TV as an example, you need to press the home button on the remote control, and then select the content type.
Another option to start playing videos on your TV is to enable broadcasting from your PC. To do this, a DNLA connection must be configured according to the algorithm described above. After this, the user selects the required video on the computer and, without launching it, opens the context menu. What’s interesting here is the “play on” item, which will indicate the devices available for display. In this case, the user needs to select a TV.
When creating a network connection between a TV and a PC, it is convenient to use the Windows Media Center Extender program, which displays content available for output to devices connected to the network. All that remains is to launch the file and select display on the TV.
Wirelessly connecting a laptop to a TV
Update 2021: I wrote more detailed and up-to-date instructions (than what follows) on connecting a laptop to a TV via Wi-Fi, i.e. wirelessly: .
Modern laptops with Intel Core i3, i5 and i7 processors can connect wirelessly to TVs and other screens using Intel Wireless Display technology. As a rule, if you have not reinstalled Windows on your laptop, all the necessary drivers for this will already be there. Not only high-resolution images are transmitted wirelessly, but also sound.
To connect, you will need either a special set-top box for your TV, or support for this technology by the TV receiver itself. The latter include:
- LG Smart TV (not all models)
- Samsung F-series Smart TV
- Toshiba Smart TV
- Many Sony Bravia TVs
Unfortunately, I do not have the opportunity to test and demonstrate how it all works, but detailed instructions for using Intel WiDi to wirelessly connect a laptop and ultrabook to a TV are on the official Intel website:
I hope the methods described above will be enough for you to connect your devices as needed.
Transfer video to TV via Wi-Fi
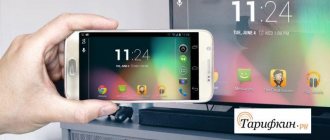
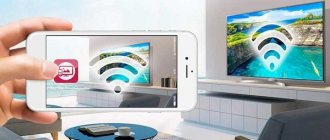
Screen mirroring is easily achievable; if your mobile device and TV are made by the same manufacturer, they will likely have a "screen mirroring" feature (or something similar) on both devices. This will allow you to immediately see on TV everything that is on your smartphone without hassle. If the devices are produced by different manufacturers, then you need to enable the DLNA (Wi-Fi Direct) function on the TV and download the DLNA application to your smartphone via GooglePlay.
You can use a good app called AllCast (free for iOS and Android). For those who have an AppleTV, iPhone or iPad, you can connect via the AirPlay app to share with your TV. Older brands of TV and mobile equipment do not have such built-in functions, so you will have to use special Chromecast, Miracast and EZcast adapters.

