Setting up a receiver is a rather difficult task, requiring the subscriber to be careful and attentive. But, despite the apparent complexity of the process, anyone, even the most inexperienced user, can cope with this task. The main thing is to be patient, and then setting up the Tricolor receiver will go smoothly and will not require the help of a TV technician who charges money for his services.
Connecting television yourself is an important process that allows you to save money and learn how to independently manage connected services. The latter is especially important, since regular calls from a specialist and constant calls to the support service will definitely not cheer up any of the clients of the satellite company.
Antenna installation
The most important part of properly setting up the equipment is installing a satellite dish. This process can be divided into several important main parts:
- antenna assembly;
- attaching the plate to the bracket;
- connection of the receiver, antenna and TV;
- turning the plate in the desired direction.
To turn the signal receiver in the right direction, you should clarify the elevation and azimuth in advance. This information can be found on the provider’s official website or checked with support operators. In the most severe cases, you should focus on neighbors who have already connected to satellite television.
The final fastening of the dish must be done after completing the initial settings of the receiver, when it is aimed at receiving a signal from the desired satellite.
Check if the connection is correct
One of the reasons why the TV does not see the Tricolor set-top box is an equipment connection error. Users are often in a hurry and choose the wrong scheme, which is why the TV cannot recognize the tuner. First, check if the video channel is selected correctly. For example, if you connected using RCA, you need to go to the AV section, and when connecting using HDMI, select the appropriate connector. If you are not sure what the correct port name is, check the different options.
Pay attention to the TV, which does not see the Tricolor prefix. If it was released 10-15 years ago, most likely the connection is possible using “tulips” (RCA). They are three wires - red, yellow and white. In this case, the first and last are audio, and yellow is video. Older TVs can connect using SCART. This is a special connector with sockets in two rows.
If there are many ports on the tuner and TV, the user may choose the wrong connector. As a result, the TV does not see the Tricolor console through tulips or another connector. Read the instructions again and make sure that the equipment is connected correctly.
To avoid mistakes, remember the following:
- On the tuner, connect the cable to INPUT.
- On your TV, connect to the OUTPUT inputs.
Please note that connection cables are often not sold as a set, so they must be purchased separately.
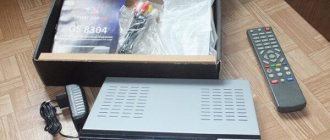
How to set up Tricolor TV channels yourself on the gs 8300n receiver
To figure out how to set up a Tricolor TV receiver yourself, you don’t need to have any special knowledge or skills. This process requires the accuracy and attentiveness of the user, who will only have to follow the available prompts. In general, subscribers will:
- open the menu by pressing the corresponding button on the remote control;
- select the desired interface language;
- leave the connection mode selection automatic;
- indicate the exact time and current date;
- refine your search area by stopping at Tricolor TV;
- specify the broadcast area (West or Siberia);
- adjust the angle of rotation of the antenna, focusing on the setting scales suggested to users;
- start searching for TV channels;
- save the changes made.
It should be noted that different receivers have their own configuration features. But in general terms, this process follows the points mentioned above.
If all else fails
The situation is more complicated when you have taken the steps discussed above, but the TV still does not see the set-top box. The cause may be a technical malfunction in the equipment circuit. You won’t be able to fix this problem yourself, so it’s better to contact a service center. Experts quickly determine the cause and fix the problem. If the device cannot be repaired, the company will offer to replace the Tricolor console with a new one. There is only one plus in this situation - new equipment is usually more powerful.
In a situation where the TV does not see the Tricolor console, do not rush to panic. Start by checking the tuner itself (whether it's on or not). After this, check that the connection is correct and that the mode is selected correctly on the TV itself. If this does not work, do a collection or update the software. In the most difficult cases, you cannot do without contacting a service center.
Setting up the gs u510 Tricolor TV receiver yourself
Connecting and searching for channels using the remote access module will be a little more complicated than usual setting up the receiver. To connect your TV yourself, you will need to do the following:
- you should start with the correct, accurate installation of the antenna;
- the second step will be opening the menu;
- Next, you need to open the satellite selection section and check the correct option;
- in the transponder parameters you will have to specify levels equal to 10750 and 12226 MHz;
- the next step is setting up the transponder (usually after filling out the first line, the rest are filled in automatically);
- The finishing touch will be to search for TV channels and save the selected parameters.
If everything is done correctly, almost immediately after completing the activation of the Smart card and decoding the channels, subscribers will be able to watch their favorite shows and movies.
Main characteristics
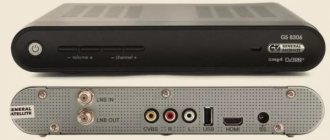
➥ Availability of two DVB-S/S2 tuners ➥ Playback of media content from external media ➥ Connectors: HDMI, RCA-3, USB, Ethernet, optical audio output S/PDIF; connector for connecting an external IR receiver ➥ Reception of high definition TV channels (up to 1080p) and standard definition in MPEG-4 AVC/H.264 and MPEG-2 formats ➥ Convenient and user-adaptable graphical interface ➥ Full range of necessary digital TV services (subtitles , teletext, E.
: 0px; padding: 0px; font-family: » />
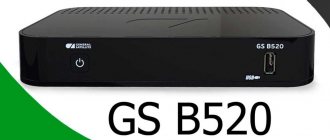
Setting up the Box 500 receiver for Tricolor
Setting up the Tricolor TV receiver independently for 2 monitors deserves special attention. To connect an additional device, you will need:
- open menu;
- select sub-item Ethernet 0;
- indicate the desired connection method (wired or wireless);
- Next, you need to activate the “enable server” item;
- and perform a sequential search on both TVs (first catch TV channels on the main monitor, then repeat the procedure on the additional TV).
If problems or difficulties arise, you should check for software updates for the receivers. The check should be carried out through the client receiver. Additional attention should be paid to the reliability of connections if a wired connection method was used.
Incompatible with old TV
One of the reasons why the equipment does not see the Tricolor prefix is the use of an old TV. Very “ancient” TVs lack the necessary firmware, which is why the equipment cannot recognize each other. The only solution is to try flashing the Tricolor tuner with new software.
If the TV does not have RCA, SCART, and especially HDMI, the only way to connect is through the antenna input. For this you need a special adapter. But keep in mind that the audio signal will have to be transmitted separately.
Setting up favorite lists
To quickly turn on your favorite channels, almost every receiver has a function for creating favorite lists. Initially, each set has 4 basic lists, including music, sports, news and radio channels. But each user has the opportunity to edit them, adding additional TV channels to the lists and excluding unnecessary ones from them. To do this you need:
- enter the set-top box menu and enter the access password (by default you need to dial 0000);
- select an item related to ordering or changing lists;
- as a result, two lists of channels will open on the screen, the first of which will contain available channels, and the second will contain programs already included in the list;
- to make changes, you should follow the system prompts;
- Having completed the distribution, you should save the changes and switch on the desired gears much faster.
The described actions allow you to control access to connected TV channels, making it extremely simple and convenient.
Power LNB
Second menu item LNBP
This is to turn on/off the power supply to the satellite converter via the antenna cable. In individual systems it must be turned on; the need to turn off the LNB power rarely arises if power is supplied to the converter through a power injector.
There may be several options: on/off, on/off, 13/18 (or one of them), normal or increased. By increased, the manufacturer meant that when using large cable lengths, part of the supply voltage will drop across it. But this is not necessary, because the voltages of 13/18 Volts are already taken with a reserve.
By the way, voltages of 13/18 Volts are not only supply voltages but also polarization switching signals. 13 V is the signal to turn on the horizontal H (left L) in the range of 11-14 Volts, and 18 V is the signal to turn on the vertical V (right R) in the range of 16-20 Volts.
Parental control
No less useful will be the parental control function, which limits access to certain TV channels. To set restrictions you will need:
- find the “parental controls” section in the television settings;
- open the option parameters by clicking Ok and entering the PIN code (0000);
- select the required age restrictions by setting the desired age (usually 18);
- confirm your choice;
- Next, you should find the section for changing the PIN code in the menu and create a new combination so that the settings you have made cannot be changed.
It is important to take this last point especially carefully so as not to encounter difficulties later. It is better to write down the new PIN code on a separate sheet so that you can freely change settings without losing access to control equipment and television. If new numbers are lost or forgotten, it will not be easy to fix the problem, so you should set simple combinations, for example 2021 (year of connection).
Additional actions
If the TV does not see the Tricolor set-top box, other steps may be required. Here are the main ways:
- Make sure the tuner is turned on. Many are in a hurry and immediately complain to the support service, not paying attention to the color of the indicator or forgetting to press the remote control button. In normal mode, the diode should glow green. If the reason is determined correctly, the Tricolor console logo appears on the TV screen.
- Do not discard the option of a broken device. If the TV does not see the tuner, the cause may be a faulty power supply. If it is remote, there are no difficulties with replacement; it’s a different matter when the power supply is located inside the case. In this case, the only way out is to contact the service center and the experts.
- Update the firmware. One of the reasons why the TV suddenly does not see the tuner may be old software. To solve the problem, update the program. To do this, download the software from the Internet, load it onto a USB drive and plug the USB flash drive into the connector. After that, find the required item in the menu and update. Detailed instructions can be found in the description of the model.
- Make sure there is no interference in the signal path to the antenna. If there is an obstacle, raise the antenna higher or buy a device with a built-in amplifier. If you have a strong signal, you can place a TV antenna right in the room.
Setup steps
Resetting the previous settings will help avoid further interference. Find the installation and configuration of the TV. They get to the parameters and reinstallation. The TV reboots and turns off power for 5 minutes. During this time, you can install the module and plug the cord into the outlet.
- Find the installation and satellite search string. They move on to reinstalling and sorting channels. The antenna is aimed at a satellite broadcasting to the European part of the country.
- Consider indicators of power and signal level. If there are no complaints, you will have to return to the main menu and do not click Install. Select the Ignore option.
- In the installation section, we move on to setting up the satellite and installing channels. Indicates manual installation.
- The LNB section will display the satellite name and polarization. Horizontal in these models means left.
- You will need to record the transmission speed and frequencies of the transponders. The necessary information is present on the portal and is defined for each Tricolor package.
- After specifying the frequency, the results are searched and saved. Subsequently, channels are searched and assigned.
During manual tuning, you can select a configuration and update channels after searching for a satellite. Reception characteristics (polarization, speed, frequency) will appear and the found channels will be included in one list. You will need to spend some time sorting.
Source
Tricolor TV • Help for subscribers. Official website of Tricolor TV - tricolor.tv Home page. Services, channel packages, news, help for subscribers, list of channels, promotions and equipment reviews, discussion. Equipment errors and malfunctions. Tricolor TV Forum.. Official website of Tricolor TV - tricolor.tv
Signal sources
To watch channels on your TV, you need to connect the antenna and receiver. This is done through special holes that are located on the devices. There are several types of connection:
- RF is an old format that was used to connect an outdoor or indoor antenna.
- Composite (AV) is a popular type that can be found on any device. In everyday life they are called tulips. Multi-colored cables will help you connect the receiver to your old TV.
- S-Video - the connector is presented in the form of connecting a keyboard or mouse to the system unit. It complements expensive models of TVs and receivers.
- Scart is a 21-pin connector with a wide cord.
- Y Pb Pr - consists of several cables of different colors. It can transmit images in 1080 i resolution. Each color sends its own signal: green - HDTV, red - HDTV Cr / Pr Chroma, blue HDTV Cb / Pb Chroma. There are additional red and white cables that are intended for audio channels.
- HDMI is a modern cable for signal transmission. Its advantage is that the picture is shown in the form in which it is broadcast by the operator. There is no transformation or change.
Gradually, the Tricolor TV company is switching to the latest signal transmission option. That is, users can enjoy the picture in HD format.
Features of old and new receiver models
All Tricolor prefixes have letter designations:
- Cable connection - abbreviation C on the box.
- Ground receiver - letter T.
- Satellite receiver – S.
Tricolor offers a wide range of satellite devices. The old and new range of models coexist in stores, and the choice is not always in favor of the latter. The fact is that the division into “old” and “new” is only formal; some devices were produced for no more than two months, giving way to subsequent generations. There is a significant difference between the models. For example, a number of interfaces that can be found on the rear panel of the receiver:
- HDMI cable.
- Antenna high frequency output.
- Tulip.
- SCART wire
Receiver connection diagram
The old generation of set-top boxes has an antenna output and SCART. Some modern models only have HDMI. Before purchasing equipment and connecting it to the provider’s network, you should compare the pros and cons, ask a consultant about the speed at which the device turns on, as well as its technical characteristics.
All the provider’s devices are pre-configured and do not require additional manipulations, however, difficulties may arise in hardware terms, for example, the lack of necessary adapters.
The connection procedure cannot be called complex or confusing: no specific knowledge or tools are required. The main thing is to follow the instructions and do not forget about safety precautions. Let's figure out how to connect the receiver in different ways.
Connection diagram for two television receivers
To include a second TV receiver in the circuit, you will need an additional cable. If the first TV was connected using a “tulip” connector, then the second TV should be connected in a different way. It is important to note that the information signal must be supplied to all available receiver outputs.
Since the display is controlled from one receiver, the broadcast of channels will be the same on two TVs. If a subscriber wants to watch different channels, then he needs to purchase another tuner, which operates from the same antenna, but is connected through a different output on the converter.
To minimize signal loss, experts advise using as few wires as possible. The cable length should also not be too long.
To make your own cable, you need to purchase the required length of coaxial cable. Then the F-connector should be attached to one end so that the inner core of the cable protrudes at least 1 cm. The same should be done with the other end.
To connect and configure a second independent TV to display other channels, the user needs to purchase a splitter for the cable through which the broadcast is supplied. If only the HDMI output is used, you must use an HDMI divider that distributes the signal to the required number of TVs.
Receiver connection diagram
The antenna cable connecting the receiver to the TV must be connected to LNB IN - the output of the receiver. The cable type doesn't matter. The RF cable should be connected to the LNB OUT and the TV antenna socket.
After applying voltage to the receiving equipment, the “Boot” command will appear on the receiver’s display, indicating the start of the receiver’s operation. Next, the inscription will change to the channel number. You should search for channels on your TV. If the TV has been correctly connected to the tuner, the line “No signal” will appear.
To turn on other types of cables, using the TV remote control, select the working format of the incoming signal by pressing the “Sourse” (or “TV/AV”) key. Until the “No Signal” command is displayed. After completing the steps, you need to configure the satellite dish.
Connecting to a satellite dish
The procedure will require a cable and a pair of type F connectors. In a good half of cases, the latter are included with the receiver. If the cable will be laid around the house, then the most affordable option is RG-6. But when most of the wire goes outside, it is better to take more reliable, as well as expensive options, like RK-75 or SAT-50.
After laying the cable, its ends must be stripped:
- Using side cutters, we straighten the end of the core, biting it off by 1-2 mm.
- Trim the insulation by 1 cm.
- We lay the braid along the cable.
- We remove the remaining insulation from the central core, stripping 2-3 mm.
- We screw on the connector.
Important! The foil and braid under the insulation should not touch the central core, otherwise the output image will have artifacts: “snow,” ripples and stripes.
We connect one end of the cable to the unit on the Tricolor satellite dish, and the other to the receiver (LBNin interface). The connectors on the equipment must be threaded, so, as a rule, there are no problems with connection.
Connecting via Wi-Fi router
This synchronization format allows you to broadcast the signal to mobile gadgets - tablets, smartphones and laptops. The connection procedure is similar to the previous method, with the only difference that an intermediary appears between the set-top boxes - a Wi-Fi router.
Synchronization also occurs via UTP cable. We select the name of the router as the server, and not the GS C5911 prefix. To view content on mobile devices, you will need to install .
To summarize, it should be noted that connecting the receiver to the TV is not difficult, since the kit always includes detailed step-by-step instructions, and, as noted earlier, today this process is as simplified and automated as possible.