Setting up the Tricolor TV receiver yourself
- You need to connect the cable to the LNB in socket and to the TV (RF out or SCART). If the subscriber connects the receiver for the first time, the “Setting the language” section will appear on the TV screen - click “Next”. After this, the “AV Output Settings” section will appear; if necessary, you need to change the settings; if not, proceed to the next step by clicking “Next”.
- The system will transfer the subscriber to the channel search section, where in the lower right corner there is a satellite tuning scale (signal strength and quality). If the dish is not tuned to the Eutelsat W4 satellite, you will need to adjust it using the scale on the screen.
- To do this, you need to select “Search Type” - “Tricolor TV”, click “Next”, this will start the search for channels, after the search is complete, the message “Save found channels?” appears on the screen. – you need to click “Yes”, otherwise when you turn off the TV the channels will disappear and you will need to tune them again.
- Then the “Time Setting” table appears on the screen. “UTC offset +03.00”, “Update from satellite?” - “yes”, “Year” - set the current one, “Month” - set the current one, “Day” - set the current one, “Local time” - set the current one.
- To save the settings, you need to click “OK”. Tricolor TV channels have been saved.
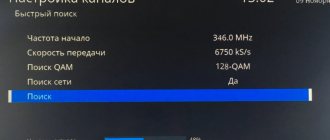
- Next, on the receiver’s remote control you need to press the “Menu” button - on the screen go to “Settings” - you need to enter the PIN code (by default it has the combination 0000, then it is recommended to change the password to another so that no one other than the subscriber can access the receiver ) – you need to click on the “Automatic search” option – a table of settings will appear, where in the “Search type” folder you need to select “Quick”, click “Start search” - “Save found channels?” - "Yes".
- “Menu” – “Settings” – PIN 0000 – “Manual search” – should remain unchanged, except for “Frequency” – you need to enter 12174, “Polarization” – Left, “Flow rate” – 4340, “FEC” – 3/4 “Start search” – “Save channels” – “Yes”.
- In the “Frequency” section you need to change the value to 12207, “Polarization” – Right, “Flow rate” – 27500, “FEC” – 3/4 – “Start search” – “Save channels” – “Yes”.
- After this, again in the “Frequency” section you need to change the value to 12360, “Polarization” – Right, “Flow rate” – 27500, “FEC” – 3/4 – “Start search” – “Save channels” – “Yes”. The last step is to press the “Exit” button on the remote control three times.
Correct connection of the 8306 receiver
After you have studied the contents and made sure that you have the necessary components, make the connection yourself. This is done in several stages:
- Antenna installation. The manufacturer and installation rules suggest installing a bracket under the antenna on the south side. Before the procedure, make sure that the future antenna signal will not be interfered with by trees, hills or other obstacles.
- Next is the cable that will be connected to the receiver. To do this, you will have to make a hole in the wall in the place closest to the device.
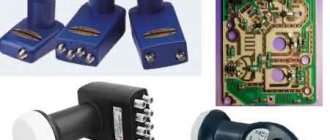
- Step three - connect the cable from the antenna to the receiver, namely to the LNB IN input.
- Now you can connect the receiver to your TV: this is done using an HDMI cable (these inputs are available on all modern TVs).
- For sound and video to work properly, connect the cables using RCA so that the colors on the cables and inputs match.
- Make sure the smart card is installed and connect the power supply.
If your 8306 Tricolor receiver does not turn on, there may be two reasons:
- In the first case, you simply did the installation incorrectly according to the instructions.
- In the second, your device was initially non-working or defective.
If your device worked before, but now won’t turn on, you’ll have to contact a technician.
Updating the module software
Over time, subscribers will need to independently update the software of the receiver module; this is done simply, you just need to follow the instructions:
We update the software:
- You need to reboot the receiver if it works, if not, turn it on.
- Then you need to turn on the Tricolor TV channel on your TV.
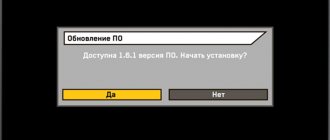
- The provider saves the time and effort of its subscribers, so there is no need to look for the update window; it will appear on its own a few seconds after the receiver turns on.
- In the update menu, you must click on the “Yes” button. In this way, the update will be launched, the process of which can be observed on the TV screen. The average update time will be 5 minutes.
- After automatic installation of the latest update, the receiver will restart itself, you should not be afraid of this, there are no problems, you do not need to turn it on after turning it off, it will turn on again.
- Next, you need to check whether the update was successful. To do this, you need to go to the Tricolor website from your computer and look at the latest version, check it by turning on the TV to the Tricolor channel.
- If the subscriber has completed all the steps correctly, and the information on the update versions matches, then in the near future you can forget about problems in broadcasting channels.
- If, after flashing the module, the subscriber cannot turn on the TV from the remote control, there is no need to panic, this is not a failure or breakdown. You need to turn on the TV from the main button located on the TV itself.
If for some reason the subscriber was unable to update the firmware on his own (forgot, did not have time and missed the previous one), he needs to contact technical support, since he will no longer be able to update the program on his own.
Instructions for setting up the Tricolor receiver
The Tricolor TV company is the largest operator in the Russian Federation, which provides high-quality digital signal broadcasting services, satellite Internet, payment and many other special offers. Capable of broadcasting up to two hundred television channels.
The quality of the picture directly depends on the choice of installation location, namely on the quality of the incoming signal to the receiver. The main requirement for broadcasting a clear signal is direct visibility of the dish and the transmitting satellite. The most convenient place to mount the antenna is the wall of a building or its roof. You cannot install a satellite dish in the premises or balconies of apartments.
Once the location has been determined, you can begin assembling the plate, following the included instructions:
- The antenna structure is securely fixed to the wall surface with specially prepared fasteners.
- The television cable is connected to the receiving unit and attached to the brackets.
- A special connector is put on the end of the cable and the tuner is connected.
- The broadcast channels are configured using the remote control.
Advice! In order for the telecommunications tool to work correctly and without failures, it is recommended to purchase the antenna and its accessories only from reliable representatives with subsequent installation.
In this video we will look at setting up the Tricolor receiver:
How to set up a tricolor TV set-top box gs b531m
- News Technical news
- News Tricolor TV
- Active
- Multi-tuner satellite receivers
- Technical support
Satellite dish assembly
Installation yourself is carried out strictly according to the instructions supplied with the plate, which explain the nuances of assembly; at the end of the procedure it should be secured as much as possible. A television cable is connected to the receiver, which is secured with ties to the bracket, and the F-connector is attached to it - after stripping the wire 1.5 cm from the insulation. The next step is to connect the receiver to the antenna convector and then configure it.
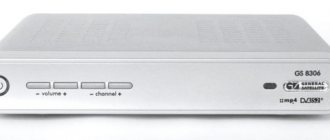
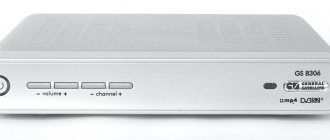
Correct setup of the GS 8306 receiver
- Connect the receiver to the network. You can make sure that it works if the “Setup Wizard” starts to launch.
- First of all, select your language.
- To connect to suitable channels, select your region. Based on it, a search will be made for those channels that operate in your region.
- After selecting a region, an automatic search begins.
- If the search gives you few or no results, repeat the procedure. This can be done by going to the “Search Channels” section in the menu.
Setting up an Internet connection
Cable connection
1) To connect the receiver to the Internet via cable, you need to connect the Internet cable to the Ethernet connector of the receiver. In this case, an automatic connection to the Internet occurs.
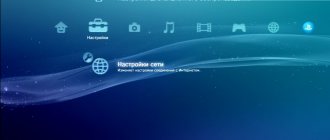
2) If this does not happen, you need to follow the path “Menu - Settings - Network
a) and select Auto in the network settings;
b) If the receiver is connected through a router in which DHCP mode is disabled or special local network settings are used, you need to set the network parameters in the receiver’s network settings. In this case, you need to select the “Manual” option. If the subscriber does not know the network parameters, it is recommended to contact the specialist who configured the router; most often this means contacting the operator that provides the Internet.
3) Having selected the correct connection type, press “OK” on the remote control.
If the connection is successful, the following message will appear to the right of the “Obtain IP address” text: Connected.
When connected to the Internet
When connecting to the Internet for the first time, you must be authorized by ID (for authorization, the client receiver must be connected with the server receiver to the same local network with Internet access). Upon successful authorization, the message “Your device has been successfully connected to the Internet TV service (ID [ID number])” should appear. Example message: “Your device has successfully connected to the Internet TV service (ID 34567834567234).”
Each time you turn it on again, authorization is not required - only the receiver automatically checks to see if authorization has passed previously (if it passed earlier, no message will appear when connecting).
If there is no subscription to the main package of TV channels, an error message will appear and viewing will be unavailable (error messages are discussed in the “Error message. Internet TV” procedure).
In the “Status” menu of such Internet TV receivers: “Connected” is displayed.
Selecting a broadcast source
1. Selecting a broadcast source on a channel
For the current channel, you can select the broadcast source: “Satellite” or “Internet”. To do this, go to the “Broadcast Source” element of the context menu and press the “OK” button on the remote control. Use the buttons to select the broadcast source and confirm the selection by pressing the “OK” button on the remote control.
Please note: Selecting a broadcast source is possible if there is a corresponding source for the channel. While recording a channel, this action will not be available in the context menu.
2. Broadcast settings in the Settings application
There is a Broadcasting tab in the Settings app. In this tab, you can select the “Broadcast Source”: “Satellite” and “Internet”. The default is Satellite.
Note:
A source manually selected for a specific channel in the InfoBanner has a higher priority than this setting.
Changing the broadcast source in the Settings Application will not change the settings of the channels where the source was selected through the extended info banner.
Source
Setting up favorite lists
To quickly turn on your favorite channels, almost every receiver has a function for creating favorite lists. Initially, each set has 4 basic lists, including music, sports, news and radio channels. But each user has the opportunity to edit them, adding additional TV channels to the lists and excluding unnecessary ones from them. To do this you need:
- enter the set-top box menu and enter the access password (by default you need to dial 0000);
- select an item related to ordering or changing lists;
- as a result, two lists of channels will open on the screen, the first of which will contain available channels, and the second will contain programs already included in the list;
- to make changes, you should follow the system prompts;
- Having completed the distribution, you should save the changes and switch on the desired gears much faster.
The described actions allow you to control access to connected TV channels, making it extremely simple and convenient.
Flash receiver Tricolor 8306
The need for receiver firmware can be caused by many reasons, where the most common ones are:
- the appearance of image flickering;
- disappearance of picture and sound;
- frequent loss of signal, etc.
One of the simplest and most popular ways to flash a receiver is the software update procedure.
- First of all, you download and upload the updated firmware to the media.
- Next, connect the media to the receiver, turn off and turn on the receiver again. This action will lead to the fact that in the next 30-40 seconds an image will appear on the TV indicating that the software update from the media has begun.
- Upon completion of the procedure, remove the flash drive and restart the receiver.
Please note that with the new software, your old settings will be reset to factory settings, so you will have to install new ones again.
Finding the antenna installation location
The correct choice of antenna localization point allows you to receive a high-quality television signal from the satellite. The equipment is mounted near an apartment window or on the roof of a residential building, depending on its location. Antennas are not installed on loggias or inside apartments. The main requirement for correct installation is a continuous path of the beam from the outgoing to the incoming point; during its passage there should be no extraneous interference in the form of trees, houses, etc.
Parental control
No less useful will be the parental control function, which limits access to certain TV channels. To set restrictions you will need:
- find the “parental controls” section in the television settings;
- open the option parameters by clicking Ok and entering the PIN code (0000);
- select the required age restrictions by setting the desired age (usually 18);
- confirm your choice;
- Next, you should find the section for changing the PIN code in the menu and create a new combination so that the settings you have made cannot be changed.
It is important to take this last point especially carefully so as not to encounter difficulties later. It is better to write down the new PIN code on a separate sheet so that you can freely change settings without losing access to control equipment and television. If new numbers are lost or forgotten, it will not be easy to fix the problem, so you should set simple combinations, for example 2021 (year of connection).
Source
GS B210 receiver review
GS B210 is a recently released subscriber receiver that is voluntarily and forcibly offered to failed Tricolor TV dongles. Well, let’s not consider the gesture of “Tricolor TV” in relation to old subscribers, but let’s pay attention to the information and price of the device.
The GS B210 satellite receiver is called that way because “B” stands for “black,” that is, black. Representatives of the NLE trading network voiced a rather absurd version that there is no other color range, since users consider silver-colored Tricolor TV tuners to be of lower quality. The size of the model is very similar to such mini-receivers as Globo X-80 or HotCake HD, but the price is higher.
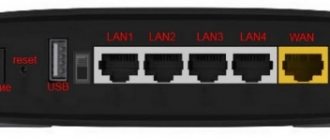
Frequency range GS B210 950 - 2150 MHz. The tuner supports no less than 15 groups of 200 channels. The model is characterized by HD resolution and full graphics. The following connectors are available on the rear panel: HDMI, RCA3, USB, LNB IN, IR, 12 V, 2A. TV standard - PAL, NTSC.
The device supports the following applications: On Air, Tricolor TV-Mail, Gallery, Tricolor TV Cinemas, Music, Tricolor TV Search, Minesweeper, Status, TV Guide, Jeweler, etc. The price of the receiver is approximately $83. User reviews for the GS B210 satellite receiver are most often positive.