Television plays a very important role in the modern information space. Today we can distinguish several varieties of it:
- cable;
- Internet television;
- IPTV;
- ethereal;
- satellite.
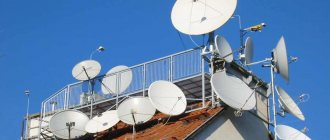
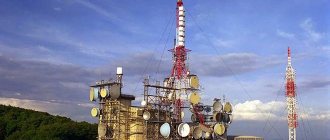
Satellite TV is a progressive method of watching TV channels
Satellite TV is one of the most common and convenient options for watching TV channels, and there are good reasons for this. Due to the fact that the signal is transmitted using artificial satellites, the possibilities for connecting this type of television are much wider, in contrast to cable or terrestrial.
This format supports uniform signal coverage of a large area. Broadcasting can be carried out even in the most remote and remote areas, and the image quality will not deteriorate.
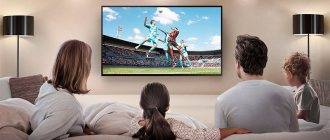
Consumers have access to a huge amount of varied content, from children's to popular science channels. The necessary resources can be viewed by subscription. Which allows you to pay only for what interests you. However, payment must be made every month. If desired or necessary, a subscription to certain resources can be disabled at any time.
How does the transmission of a satellite signal from a translator to a consumer's TV work?
If you decide to give your choice to this particular broadcast option, then you will have to take care of preparing special equipment for satellite television. It can be of two types:
- original
- universal
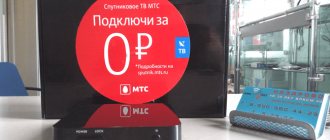
MTS equipment set for connecting and starting broadcasting satellite channels
If you have already decided on the choice of operator, then you can purchase a set of equipment for satellite TV from this distributor. With its help, it is much easier to establish signal reception, but if you want to change the network, you will need to replace the equipment, since the previous version may not support the new signal format.
A more economical option would be universal equipment, but at the same time, setting it up may require more effort. However, such equipment will last you much longer.
When choosing a receiver, you should be guided by personal experience; try to make a decision that will fully satisfy your needs and capabilities. It is worth considering that satellite television is not the most economical of all. The equipment is quite expensive, plus you will have to pay for a certain package of channels, so before choosing, you should weigh your decision several times.
When did satellite television appear? The dawn of satellite TV began in the mid-60s, and the first transmission of a satellite TV signal took place on April 24, 1962 between US cities.
Technical description
Satellite television is a broadcast signal that is transmitted to viewers’ screens using a complex of satellites that orbit the Earth.
Due to the fact that the need for telecommunications is increasing every year, terrestrial broadcasters have ceased to fully cope with their functions.
They are not capable of supporting signal transmission over long distances, and one could completely forget about relaying overseas. An equally important disadvantage of older formats is the instability of image and sound quality. Thus, devices located at a relatively close distance to the source receive the information flow better, as a result of which the level of picture and audio varies greatly. Satellite TV is a great alternative to more outdated broadcast technologies. This way the quality of broadcasting is maintained at a high level.
The main advantage is low energy consumption. So the satellite rotates in orbit following the planet without wasting extra resources, and the power source is solar panels, the power of which is completely sufficient to maintain the operation of space equipment.
The coverage of the territory is quite large; the signal can easily cover up to a quarter of the surface of the entire planet.
Broadcasting can be done in two different ways:
- Direct television broadcasting is the simplest and most accessible. This way the video signal goes directly to the viewer, eliminating intermediaries.
- Retransmission using terrestrial television centers - first the information reaches one specific point, after which it spreads further with the help of antennas until it reaches the consumer.
Coverage of the territory of the Russian Federation with an MTS satellite signal.
The type of broadcasting depends on the operator you initially chose. If you are not satisfied with any of the above options, then you can safely refuse the services of this provider and switch to the type of broadcast that will be convenient for you personally.
What you need to know before connecting
Before starting the installation, it is important to remember some theoretical aspects:
- There are 2 options for relaying a signal received from a satellite: direct and circular.
- With direct transmission, the signal goes directly from the satellite to the receiver and is not refracted in any way, and the electromagnetic wave arrives from above. This mode of operation is vertical polarization. The main disadvantage here will be significant signal dispersion when passing through the densest atmospheric layers. But high-quality reception is guaranteed in any weather.
- At the same time, circular transmission helps to expand the broadcast coverage area. Satellite radiation moves in a circle. This is how the convector operates in horizontal polarization mode. Those who choose satellites with such installations receive a more powerful signal, because it is not so much subject to scattering, since it passes the atmosphere in passing.
This is the reason why those who want to set up a satellite dish on their own must definitely find out exactly the data about the current location of the satellite and the method of radiation. To concentrate the scattered signal on the satellite head, a dish-shaped receiver is required. Each subscriber initially receives just such a signal, i.e. The plate will definitely come in handy. At the time of purchase, take into account the size of its circumference, because regions differ in the receiving surface area.
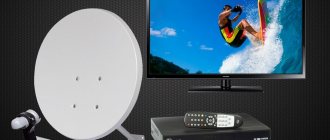
What equipment is needed to install satellite TV and Internet
The consumer can easily purchase the necessary equipment sets for satellite TV from different satellite TV and Internet operators, which come in different levels of configuration. The main difference is the price. You should be careful when choosing, because not every set may meet your requirements. If you can’t decide, then you should ask for help from a person who understands this issue. He will select the necessary model for you, without unnecessary problems.
- Incomplete set : includes a receiver, a module with an access card and all the documentation necessary for the user. This option is the most economical of all possible, but it lacks many of the necessary elements that you will need to install and configure satellite television. It is worth purchasing if you already have the elements you need at your disposal.
- Complete kit : it includes all the necessary components, such as; receiver, antenna, converter, module, cables and all documentation. This set is completely self-contained and does not require extra costs for additional parts. If you have never used satellite television before, then this will be quite enough for you.
- Expanded set : completely corresponds to the contents of the previous one, but as an addition there is a second receiver. You can use it to connect a second TV. This set is ideal for a large family, so that all its members can enjoy watching their favorite programs in good quality, without the risk of missing any important moment or having to wait their turn.
A set of equipment for connecting satellite TV - a receiver, a set of cables, brackets and fittings for installing a dish antenna, a signal converter, the antenna itself, Dysik, heads
Antenna operating principle
A satellite dish is a dish-shaped type of parabolic antenna (multifield, Opticum AX 1000+, Maximum, Opticum X80 Premium, Orton X80, BIG BISAT), designed to receive microwaves from communication sources that transmit signals to television, radio, and sometimes Internet satellites (Intelsat 15, Intel, Eutelsat 36A/36B (36°E), TT-budget S-1401 SkyStar 3, Sky tv digital).
Photo - Satellite dish
The parabolic shape of the offset dish reflects the signal to the antenna at the focal point. A device called a horn feed (Satfinder) is attached to the dish coordinator; its adjustment is fully automatic. This part is essentially an amplifier, the front converter heads (LNB) collect the signals from the focal point and “drive” them to the down-converter block. The horn converts electromagnetic or radio wave signals into electrical waves and tunes their spectrum.
Now another amplification technology is actively used - winding a metal mesh or additional turns of wire on a plate (see photo). This setting helps increase the antenna's absorption capacity and sensitivity even to weak signals.
Photo - Amplifier on the antenna
Modern dishes intended for use in home television typically range in size from 43 cm to 80 cm in diameter and are configured in one position to receive Ku-band from one orbital position. Before the existence of live broadcast satellite services, home users typically used a motorized C-band dish up to 3 meters in diameter to receive channels from different satellites. Overly small plates can cause network problems, but they have a longer shelf life, are easier to set up, and are durable.
Video: choosing a satellite dish installation location
Installation and connection of satellite TV
The first step is to purchase all the necessary components and enter into an agreement with the provider. Without this, it makes no sense to even think about how to move to the next stage.
MTS installation equipment kit
Decide on the installation location. Will it be an apartment, a private house or a cottage? Location plays a very important role.
The antenna installation address will help you decide where to point the dish depending on the subscriber’s place of residence
Once you have chosen a location, try to sort out all the components. Each item in the set is there for a reason; there will be no unnecessary parts that would not be useful to you. Find out what they are for. Don’t be afraid to go online for answers or ask your friends.
Then you should install the antenna. It can be installed both on the roof of the house and on the wall. The main rule that should be followed is that there should be no obstacles to the signal. Therefore, installing it under a tall tree or canopy will be a very bad idea, since the broadcast will be of poor quality or the signal will be constantly lost.
Before installation, determine where the signal will come from. If there are obstacles on the way that can be calmly removed, then do it like this. This way you won’t have any unnecessary problems with broadcasting.
Afterwards, check the angle of the antenna, and if everything is fine, then you can return home to carry out all the necessary manipulations inside.
Connect the convector to the receiver, and connect the receiver to the TV. Check the functionality of this design. Make sure the receiver is transmitting the signal to the screen correctly. After this, you can start viewing the content.
Connecting and installing satellite television using the example of MTS TV - video instructions:
Possible problems
Connecting a satellite dish yourself can be quite difficult. Especially for those who have never encountered such a problem before. When connecting, the most common errors made are:
- Incorrect plate diameter selected. If the antenna size is incorrectly selected, it may cause deterioration in sound or picture quality during adverse weather conditions. This problem can only be eliminated by replacing the plate;
- The traverse is installed incorrectly. It should be noted that it must be secured below the bracket, and not above it. If done incorrectly, there may be signal problems;
- Pass-through sockets are used. If you use this type of socket, the signal may disappear completely. It is best to use the finished sockets that come with the television sockets;
- Using splitters or splitters. This element is suitable exclusively for analog TV. The fact is that satellite channels are transmitted in a form that a conventional splitter is not able to pass through;
- Using a large number of connections. This leads to the loss of a useful signal, which means the reception quality deteriorates.
What problems can arise directly with the Tricolor TV module? The most common problem is no signal. What is meant by this problem? If there is no image on the screen, but there is noise or just blackness, this does not mean at all that there is no signal. This screen indicates that the receiver is not connected to the TV. It should be noted that the physical connection and the cord inserted into both connectors do not guarantee that the TV can be seen by the receiver. In this case there is a connection, but the receiver may still not work.
If the TV receiver shows the message “No signal,” the problem can be corrected. To do this, press the “Menu” button on the receiver’s remote control. If the main menu appears on the screen, it means that the set-top box is connected to the television device. If the menu does not appear and the “No Signal” message continues to appear on the screen, the problem may be that the TV does not see the receiver. In the latter case, you won’t be able to watch Tricolor TV.
How to watch encrypted channels on TV? To do this you need to get special access. A TV smart card allows you to get more features. Using the card, the equipment can decode encrypted channels. This means that the number of channels with the card on the TV will become much larger.
Now you know how to watch satellite channels on TV. It turns out that installing an antenna yourself is not at all difficult. An attentive person can easily cope with this task.
Setting up satellite TV
First, install the antenna on the brackets:
Installing the plate on the brackets
Installing heads when tuning a satellite dish for three popular satellites Amos, Sirius and Hotbird:
Satellite TV heads tuned to three popular satellites - the so-called dragon
One of the most difficult, but at the same time important stages, which can mainly affect the quality of signal transmission. When setting up antennas, you should be extremely careful so as not to accidentally fall. Follow safety precautions. If the weather outside is bad, rain, strong wind or snow, then it is advisable to postpone the installation and configuration to another day.
Primary adjustment is carried out by turning the heads
After you have connected the equipment, make sure that there is a signal at all. To do this, look at the screen. If you see at least some image there, it means that you are on the right track. When you manage to catch a signal, and this may not happen right away, you can start setting up the video. If you can’t achieve results, then most likely you have made a mistake with the installation location.
The signal quality is checked on the TV device
To start setting up video, try to slowly start rotating the antenna around its axis. It is advisable that you be able to look at the TV at this moment, or that someone could tell you. Over time, you will notice that the picture and sound become clearer.
Turn until the quality begins to satisfy you. Then the transponders are configured:
Transponders and frequencies
After that, you can consider that you have completed the setup. Now you can not worry and enjoy watching.
Setting up satellites on satellite television using the example of a “dragon” - installation, frequencies, transponders, current channels for 2021:
Satellite DVB-S2 tuner built into the TV
What is in DVB-S2 TV?
The presence of a DVB-S2 digital tuner makes it possible to directly connect a satellite dish to the TV and view CT channels without a receiver. Those. The DVB-S2 device is a satellite tuner built into the TV. Many TV models have such devices inside them. Manufacturers always indicate their availability in the technical description.
But the DVB-S2 built into the TV also has its drawbacks. If using a regular satellite tuner you can watch 70-80 free Russian television channels on your TV, then when you simply connect a dish to the TV, you can only watch completely open, unencrypted channels. The firmware of domestic receivers has already included keys that open encrypted channels. There are no such keys inside the TV.
All TVs that have such a built-in tuner support CAM modules. This is a device into which a paid CT card is inserted, and which, in turn, is inserted into the TV into a special PCMCIA connector. Those. You connect a satellite dish and purchase a starter package from any CT operator. The package must include a CAM module. The card with the module must be inserted into the PCMCIA slot.
After this, you need to start searching for channels on the TV (on those satellites indicated by your operator). Paid channels should open at the same time.
This method has several important advantages. Firstly, a separate receiver is not required to view CT. Secondly, you only need one remote control, i.e. You will control the channels using the TV remote control.
When purchasing a package from any CT provider, be sure to check whether their CAM modules work on TVs with built-in DVB-S2. And be sure to clarify this question in relation to a specific TV model.
How to set up an LG TV to receive satellite TV
- Connect the cable that comes from the antenna to the connector on the back of the TV marked “SATTELITE”.
- Insert the DVB-Cl+CAM module with the TB access card installed in it (so that the card number is directed towards you).
- On the remote control, press the “SETTINGS” button. A menu will open. In it, find the “Channels” item, then click on “OK”.
- A window will open in which you need to select the “Program mode” item. After that, click on “Ok”. A list will appear in which you need to put a dot opposite the inscription “Satellite” and click “Ok” again.
- The device will offer an automatic search, you must refuse it. In the “Channels” window, select “Satellite Settings”. A window will open in which you need to go to the “EUTELSAT 36 A/B 36.0 E” satellite. After this, return to the window with satellite settings.
The following parameters must be specified:
- LNB frequency – 9750/10600 for dual-band convectors with circular polarization;
- LNB frequency – 10750 for single-band convectors;
- LNB power supply – “On”.
Other parameters depend on the specific connection scheme of the TV to convectors and antennas.
How to set up a Samsung TV to receive satellite TV
- Click on "Menu". A menu will open in which you need to select the “Channels” item. It is depicted as a satellite dish icon.
- Go to the "Country" section.
- If the TV asks for a PIN code, then enter the numbers 1234, or 0000, or 1111. This is the standard set of numbers for a password.
- If you want to set up terrestrial or digital TV, then go to the “Other” item.
- After this, you will need to go back and select “Cable Search Options”.
- Here you need to enter the parameters:
- frequency – 290,000 kHz;
- transmission speed – 6875 KS/s;
- modulation order – 256 QAM.
- Return to “Automatic Settings” and select “Cable” as the signal source.
- Select digital and/or analog TV.
In search mode, go to “Network” and start the setup using the “Login” button.
How to choose satellite TV in the Russian Federation - the best operators for 2021
The list of various providers today is very large. Any viewer can choose the desired option without much difficulty.
Tricolor TV
"Tricolor TV" (official website of the provider https://www.tricolor.tv/) is one of the most popular providers in the Russian Federation. The company has been operating for many years. The price for their services remains very affordable, and the choice of services provided is the widest.
Advantages:
- For 2000 rubles you can get a fairly wide package of services;
- it is possible to connect on two devices simultaneously;
- Availability of installment plans for new equipment upon delivery of old equipment.
Flaws:
- The company releases updates too often, without installation of which the image quality begins to rapidly decline.
- The packages are missing many world-famous channels, the absence of which has a significant impact on consumers.
Satellite signal coverage from Tricolor TV
Satellite TV MTS
MTS-TV (official website https://sputnik.mts.ru) is a relatively new provider, but no less popular. The reason for this popularity is that the service offers not only a subscription to many channels, but also a fairly wide media library. It gained particular popularity in the Trans-Ural region.
Advantages:
- Availability of cashback upon installation.
- Connection to the Internet and television at a single tariff.
Flaws:
- Not the lowest prices for services.
- There are no additional packages to install.
Satellite signal coverage from MTS TV depending on the radius of the dish
NTV-plus
NTV-plus (website https://ntvplus.ru) is currently the oldest satellite TV network in Russia. Compared to other providers, prices for their services may differ significantly.
So the cost of a standard package of services is about 1,500 rubles. For this price you will get 190 channels at your disposal. This is quite enough to have a great time in your free time.
Advantages:
- A wide selection of all kinds of tariffs to suit every taste.
- Dividing channels into different subgroups, making it easier to navigate within the menu.
- Installment plan without paying extra interest when purchasing equipment.
Flaws:
- Uncertainty when paying tariffs.
- High prices for additional services.
Satellite signal coverage from NTV-plus
Satellite "Tricolor" - what is it
The first question that arises for those who buy a dish is which satellite to tune Tricolor TV to? After all, such a thing does not exist. It's simple, it's called Eutelsat. Its position over Europe is 36˚E. Over the Ural, Siberian and Far Eastern districts - 56˚E.
It’s very nice to look at the Eutelsat 36B satellite - this is a high-power transmitter with five redirectable beams and seventy transponders. In addition to Russia, Ukraine and the CIS countries, it broadcasts to Central Africa, Europe, the Middle East and Central Asia, for which 27 transponders are allocated out of 70. Today we’ll talk about setting up the Tricolor TV dish to a satellite yourself.
Summarize
By connecting the Tricolor antenna yourself, you can save money in the family budget for other necessary needs. However, you should not overestimate your strength. And if a home handyman has doubts that he will be able to do everything correctly and accurately, it is better to turn to professionals for help.
If you have doubts about your abilities, it is better to seek help from professionals.
We hope that the information presented in today's article was useful to our dear reader. If you have any questions, our editorial team will be happy to answer them in the discussions below. If you have experience in such work, please share it there - it will be useful for beginning home craftsmen. And for a more complete discussion of the topic, we suggest watching the video “How to set up the Tricolor TV antenna” yourself.
How to update Tricolor: some nuances
There are no difficulties here. The main task is to connect the receiver to the Internet. There is a necessary connector on the back for this.
If an update has been released for your software, you will be prompted to update the software on your TV screen. It must be accepted. After the update is completed, the receiver will automatically reboot, and then another update will be offered. The thing to remember here is that different models require different versions. The table can be found below.
As you can see, setting up and connecting Tricolor TV yourself cannot be called difficult.
How to set up a TV guide on Tricolor TV: several reasons and tips
It happens that the TV guide stops working on some (or even all) channels. This is not only inconvenient for the user, but can also lead to malfunction of the receiver or its complete failure, which means the problem needs to be corrected. There may be several reasons. This happens when the time is incorrectly set on the receiver itself, malfunctions occur in the operation of the equipment itself, or outdated firmware. As usual, you need to start with the simplest thing - set the correct time, date and reboot the receiver. If this does not help, reset the settings to factory defaults and enter the parameters again. If this doesn’t help, try updating the software; perhaps an update has been released. We will now talk about how to implement the third option.
Using the TV guide, you can find out what the film that is currently being shown is about.