Each digital TV has its own operating system. WebOS is LG's open source operating system. Thanks to its openness, it was possible to develop a large number of applications that run on various LG devices - smartphones, tablets, TVs.
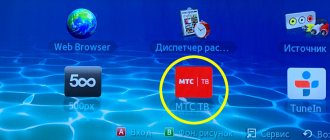
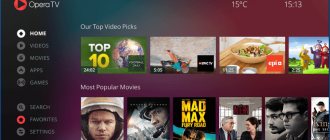
The convenient ForkPlayer widget for LG Smart TV is widely used on TVs with the WebOS operating system. It quickly searches for video content in open sources. In part, it is analogous to a regular browser used on a computer.
Features of the Fork player application for LG Smart TV
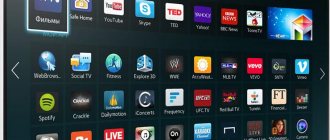
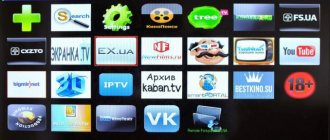
ForkPlayer is an application that combines software for viewing Internet pages, images, and playing various types of audio and video files, or streaming video. The user gets access to a large number of channels, and the ability to play video files from a flash drive.
The main advantage of Fork Player is the ability to play video from various sources in the player itself, without switching between other applications. There are several more advantages:
- simple navigation panel for quickly jumping to the desired section;
- visual display of the loading progress in the form of a bar, indicating the remaining time until the end of the loading;
- a convenient bookmark system in which you can quickly save the necessary information;
- personal settings system allows you to change the appearance of the application;
- Can be installed on TVs from any Samsung, LG, etc. company.
ForkPlayer for LG Smart TV 2021 is a good solution for movie fans. Its main page can be easily customized - add your favorite links to Favorites, sort and group. The “Top Search Queries” tab is very interesting – it contains popular search queries of other users. Using the “KinoPoisk” link, you can select top films, and the choice can be made according to different criteria: by year of release, by rating, or, for example, by box office receipts.
Setting up Vtuner (Virtual DVB adapters)
“Vtuner” is a client-server architecture that allows direct access to DVB “server” devices—“clients”—over the network. That is, programs running on the “client” (VDR, Tvheadend, Enigma) can use a virtual DVB adapter, the physical embodiment of which is located on the “server”, just as if the adapter were directly connected to the “client”.
"Vtuner" supports working with adapters:
You must decide for yourself how to apply (or not apply) this technology in practice. I will describe my point of view.
In the end, it all comes down to the fact that you don’t need to run cables (antennas and networks) throughout the apartment, unless of course you have more than one TV. Vtuner also works great over a Wi-Fi connection.
In principle, client-server architecture is provided by all programs (VDR, Tvheadend, Enigma) that work with DVB adapters. The same effect as with “Vtuner” can be achieved using VDR plugins, including for example:
- streamdev-server (on the server) and streamdev-client (on the client)
or
- streamdev-server (on the server) and iptv (on the client)
But, in this case, the issue of “sharing” may arise. In this case, the “client” receives an already decoded stream.
If you have only two adapters on the “server” and your sharing provider supports “PiP” (allows you to watch two different channels at the same time) - everything is in order, you don’t have to worry and use VDR (or Tvheadend) plugins for broadcasting to the network.
But if these conditions are not met, Vtuner will help us. With it (Vtuner) you can set up a separate account for “sharing” on each client.
Test stand.
The “server” will be a media center (x86) where the following is installed:
Network connection – wired 100 Mbit.
As a "client":
- Raspberry Pi-2
- OC "AlexELEC-RPi2-1.13"
Network connection – Wi-Fi 54 Mbit (USB adapter).
Both systems (PC-6.4 and RPi2-1.13) are still in testing and will be available soon.
Setup.
I would like to note that “Vtuner” (client and server) is compiled for DVB kernel drivers – “CORE”. Therefore, work with other DVB drivers (TBS, S2, MEDIA...) is not guaranteed.
Let's start with the "server".
The “server” (the system where the DVB adapters are physically connected) will itself use one tuner for VDR and export two tuners for “clients”.
Turn on the “Vtuner server”.
As soon as you click “Enable”, Vtuner will be launched for all DVB adapters in the system. That is, all three tuners that are connected to the “server” will be exported. But we need to leave something for ourselves so that we can watch TV on the server. Therefore, we exclude tuners from export that we want to use locally.
Here, just as an example, an exception to the export of two tuners is shown (two tuners are used locally and one is exported). In fact, I excluded only one tuner “1-0 (Montage M88DS3103)” from export; this is the first tuner of the “DVBSky S952” adapter. The second tuner from "DVBSky" and "SkyStar USB HD" were exported.
*Up to three tuners can be excluded from export.
To verify this, run the command in the console:
systemctl status vtunerd
As we can see, two instances of “vtunerd” are launched for the tuners “SkyStar (0:0)” and “DVBSky (2:0)”.
Regarding the "Port Number". In the settings you specify the starting port number. Further, the system will automatically assign each next tuner a port, one higher.
- "SkyStar (0:0)" - port 39305
- "DVBSky (2:0)" - port 39306
When setting up the “client”, you can specify which tuner to connect to by its port number.
Now we can configure the VDR-frontend to use the “DVBSky (1:0)” tuner.
If you prefer to watch TV in Kodi, specify VDR-backend or Tvheadned which tuner to use. Don't forget that these tuners should be excluded from Vtuner exports.
This completes the “server” setup.
Setting up the "client".
Turn on the “Vtuner client” and select the type of adapter you exported (DVB-S2 by default).
If you exported only one tuner, then the line “Connect to the Vtuner server” can be left empty. Otherwise, you must specify which tuner you want to connect to. Here you need to enter the IP address of the “server” and the tuner port (for example: 192.168.1.53: 39305).
“Buffer size” for the virtual adapter – set the value to “256”. The higher this value, the longer it will take to switch channels. You need to enlarge only if the picture on the client “freezes”. In general, the speed of channel switching when using “Vtuner” is not much different from a physically connected adapter, even when using a Wi-Fi connection.
At this point, the “client” setup can be considered complete.
Now let's turn on VDR and check it in practice.
Everything seems to be working
Source: https://www.alexelec.in.ua/nastroyka-vtuner-virtual-dvb-adapters/
How to install ForkPlayer for LG Smart TV
When installing Fork Player, you need to pay attention to the year of manufacture of the TV and the type of OS installed. The installation process may vary slightly. There are two main ways to install Fork Player for LG Smart TV - changing the DNS, or launching from a flash drive. The first method is more popular and easier to implement.
Installation by changing DNS
To install Fork Player this way, you need to go to the TV settings and click “Network”. Then select your Internet connection from the list - wired or via Wi-Fi, and click the appropriate line.
In the list of available connections, you should find your home network, then go to the “Advanced settings” sub-item.
In the window that opens, you should delete the DNS address that is specified in the settings and manually enter another DNS server address, for example 85.17.30.89 or 195.88.208.101. The numbers for entering a new address can be viewed on the official ForkPlayer website - https://forkplayer.tv. To confirm your entry, click the “Change” button.
If changing the DNS does not work, you need to delete the entered numbers and enter a new address option. After a successful replacement, you need to go to the “Premium” section in the LG Content Store, and find one of the available applications - Deezer, vTuner, or First Automobile, and click on its icon.
Fork Player is ready to go. If the address 46.36.218.194 is entered, the unofficial ForkStore application store is launched.
Installing ForkPlayer from a flash drive
First you need to download the archive with the required version of Fork Player, which is located at https://forkplayer.tv/apps/lg_forkplayer2.57.zip. Then you need to unzip it with any specialized program onto a flash drive. In addition, to complete the installation, the user must first register on the Smart TV LG Store website. This procedure is absolutely free. If you are already registered, log into your account by entering your username and password.
After unpacking the files, you need to connect the flash drive to the TV’s USB connector located on the rear panel. The application should appear in the bars at the bottom of the main screen (if your TV is running WebOS 4), or in the “My Applications” section (Netcast).
Please note that in this case the display of content will be limited. For full access, you need to install the Remote ForkPlayer program on your tablet or smartphone and run it. The RemoteFork option must also be enabled in the ForkPlayer 2.5 settings.
If your LG device was released in 2010-2013, and the Netcast operating system is installed on it, then after logging into your account on the Smart TV LG Store and installing a flash drive in the slot, you need to go to the “My Applications” section. There you should select “My applications on USB” and launch the widget from the flash drive.
OS
When choosing a set-top box, you need to pay attention to its operating system: processor, number of cores and operating frequency. Built-in memory must be at least 4 GB
For connection, ports and other sockets are installed on the device. They are joined by various manipulators. The device is equipped with Bluetooth and Wi-Fi modules. These add-ons allow you to access the Internet and exchange various information with gadgets or a laptop.
The newer operating system works better than older models. A good design supports the functioning of a remote control, with which you can enter the “Menu” section from a distance.
The dimensions of the device also matter. It is performed in the style of a TV Stick or Smart Box. Choosing offers in favor of the first means stopping at a flash drive with which you can access the Internet. Smart box is a device with large dimensions, depending on the brand. The case has many pins for connecting devices. The device is multifunctional.
You should not overpay for the selected device. The cost of a high-quality device is within 5,000 rubles. Each manufacturer tries to introduce new firmware into the product that distinguishes it from its competitors.
Naked Android Sony, TCL, Sharp
TVs of this type are equipped with the Google operating system. It resembles the functions of modern tablets and phones, but without the presence of a desktop. Instead, widgets appear on the screen in the form of tiles. They allow you to download programs and broadcast them on your TV screen.
The disadvantages include:
- interface is too simple;
- the new image appears on top of the old one;
- Not all Play Store pictures are suitable for showing on TV.
Instead of a TV remote control, you can use your smartphone to control it.
Tizen Samsung
Samsung smart TVs are equipped with the proprietary Tizen operating system. Its manufacturer is South Korea. The device is small in size, typical for the company's products. The system interface is intuitive and has many settings. Special instructions for use have been created for beginners.
The TV remote control can be used as a pointer. There is a button to enable voice control. You can connect other devices to the device and exchange information with them. Control over the operation of the Smart Home system is organized through the remote control.
There are few disadvantages:
- small amount of software;
- high cost of Smart TV.
LG Web OS System
This device is a competitor to Tizen. The proprietary platform is based on the Linux kernel. The device is controlled by voice and gestures, the remote control is a pointer. The system interface has animated prompts and a smart ribbon located vertically. Lots of features and a rich app store expand the possibilities. The picture on the screen can be zoomed in without compromising its quality.
The downside is uncertainty. The latest version dates back to 2017. There is no information about further developments.
VIDAA Hisense
This is a new platform from Chinese manufacturers for Smart TV. It supports Google and Android, but does not have the Google Play Store. You can install TV Store on the system, available in Opera.
The advantages include:
- performance;
- rich interface settings;
- accessible navigation;
- protection against viruses and malware.
My Home Screen Panasonic
The latest TVs produced by Panasonic are equipped with the My Home Screen system. It is based on Firefox.
The platform features a user-friendly interface and proprietary functions:
- TV show;
- news;
- weather;
- recommendations;
- other.
Any content contained in memory can be easily found using a special tool. The menu has intuitive navigation. It is divided into 3 parts: program panel, TV, devices. The TV receiver easily synchronizes with a smartphone and iPhone with the Mozilla browser.
What is better to buy: a TV with a built-in Smart or a set-top box - a question that can be easily resolved. Smart TV is a ready-made solution, but expensive. The Android set-top box is much cheaper, but it will turn any old TV set into a computer with accessible Google home, videos, communication via Skype and other working applications.
Additional DNS addresses for LG Smart TV
When entering the server address, you need to take into account that not all DNS may be suitable for your Smart TV. For proper operation of the player, you can use the following list of additional DNS:
- 46.36.222.114;
- 46.36.220.208;
- 5.101.118.43;
- 101.118.43;
- 36.220.208.
First, you should delete the broken DNS, then enter a new one, and confirm the action by clicking the “Change” button.
Additional DNS server addresses can be found on the official Fork Player website. There is also a user forum there. In the comments to one of the threads, they share solutions to problems connecting and installing Fork Player, and also publish working, fresh DNS.
Errors and problems when using ForkPlayer
Errors or problems may occur when launching or operating Fork Player. They can manifest themselves in different ways: for some people the video does not play, the player simply shows a black screen; Some people lose bookmarks with their favorite films, or there is no way to add them. Possible freezes or interruptions in playback, or cyclic repetition of a fragment. Let's look at some problems and possible ways to fix them.
- If ForkPlayer does not start after installation, you need to go to the LG Content Store (after logging in first). On the “My Page” tab, select “Purchased Applications”, then press the “Smart” button on the remote control and select the Fork Player shortcut.
- If the TV with Smart TV does not see the flash drive, you need to format it and re-unpack the installation file. If this does not help, you should take another flash drive.
- If the list of applications does not contain those mentioned in the article (Deezer, vTuner, First Automobile, as well as IVI or Tvigle), you need to check that in the Smart TV settings the country of use is Russia or Ukraine.
- If ForkPlayer does not start when launching applications, you should check whether this DNS is blocked by your router or provider.
If the described problems cannot be resolved, it is recommended to update the Smart TV or reset the TV settings to factory settings , followed by reconfiguration.
Watching TV using vTuner is right
| The vTuner program is designed for viewing television programs on a computer with an installed ATI All In Wonder Pro AGP video card or a Pinnacle PCTV Pro (the author has not tested it with other cards) under the Windows 2000 or Windows XP operating system. When using the program in a Windows XP environment, you may need to enable support for compatibility with Windows 98 / Windows Me (enabled from the [Properties]-[Compatibility] context menu). |
The current version of the program is 1.451
Supported Hardware
The program works with:
- Pinnacle PCTV Pro (Win2000);
- ATI All In Wonder AGP Pro (WinXP/2000) (for Win2000 drivers from ATI must be installed);
- ATI TV WONDER VE, Philips PAL BG (WinXP/98SE) (AutoScan works [by PLL offset])
- reported by Andrew Krei; - All in Wonder 128 PCI (Win98SE) (AutoScan works [by PLL offset], the sound is not adjusted)
- said Alexander Ageev; - send a message if you tested on a different tuner/version of Windows;
The program allows you to:
- configure the interface language
(if anyone finds spelling errors, please inform the author about this. I will also be very grateful to those users who translate and send the vTuner_LANGUAGE.lng file into their language (LANGUAGE)); - vTuner_ukr.
lng was translated into Ukrainian by Stepan (Ivano-Frankivsk); - remain visible on top of all windows ( [F11]
in the main window); - display or not display the frame of the main program window [F5]
; - go to the next channel (
on the additional keyboard); - go to the previous channel (
on an additional keyboard); - call the program settings menu ( [F9]
) (the settings are automatically saved in the ini file), in which the following settings are available:
- Select the sound source (how the TV tuner card is connected).
- Perform automatic scanning (several types) in the selected range with the selected step (turned on using the AutoScan
). Scanning is carried out according to the principle: if you find a new channel, add it to the end of the list (additive scanning), i.e. if there is a channel with the found frequency, it is not added to the list, and previously found channels that are not currently broadcasting are not removed from the list. - Stop automatic scanning ( [Esc]
or click the stop icon). - Select PAL/SECAM broadcast format...
- Add and remove channels (icons and ).
- Move channels up and down in the list (icons and ).
- Edit the frequency, name and channel number (you must enable the [Edit channels]
), as well as the broadcast format. - For each channel, the parameters brightness, contrast, color gamma and sound level are set.
- Using the search icons ( and ) you can search for the previous/next channel (unlike auto scanning, the search process cannot be interrupted, i.e. it continues until the channel on which the broadcast is being found is found or the entire search range is viewed).
- Turn sound on/off (mute) (
on an additional keyboard); - Enable/disable preview (automatically switch channels after a short period of time) ( [Gray /]
on the additional keyboard); - call the program general settings menu ( [F8]
) (the settings are automatically saved in the ini file), in which the following settings are available: - Set the cyclic viewing pause (in ms).
- If the sound does not turn off when exiting the program, you can force the sound to turn off.
- Set the signal strength (in %). Used for automatic scanning by PLL Offset and Signal Strength.
- Set auto scan type.
- Set the minimum difference between the found channels (that is, if the next found channel differs in frequency from the previous one by less than delta, then it is skipped).