For those who don't already know, ForkPlayer is an application that can be installed on smart TVs of any brand, as well as other devices. With this program you have the opportunity to search and watch movies online through open sources. Thanks to this, you receive a huge amount of content on various topics completely free of charge, both from the Internet and from a flash drive.
Today, Fork Player for Samsung Smart TV is especially popular among users. More recently, it was difficult to imagine that there would be any widget for Samsung Smart TV that could compete with NstreamLmod. Few people took ForkPlayer seriously. But over the past few years it has been actively developing and today it can be called the most popular widget.
Advantages of ForkPlayer over a standard browser
There are several main advantages of ForkPlayer:
- Fast operation compared to browsers built into the TV operating system.
- No advertising before and during video viewing.
- The presence of a much larger number of services than the official store can allow you to install on Smart TV (for LG this is the LG Content Store).
- To expand the functionality of your TV, you often need to install many additional applications. For example, an application for watching channels through IPTV playlists. With ForkPlayer, in many cases additional TV programs are not needed. A lot of popular services and functions are already built into Fork Player. Everything is in one place and works much more efficiently than official applications.
- Navigation through ForkPlayer is performed without a mouse and complex cursor control from a conventional push-button remote control. Management is reminiscent of moving through folders, launching the desired content. There is no cursor on the screen, and all actions can be performed using arrows and the “OK” button on the remote control.
In addition, you can conveniently customize the start screen of the multimedia player. So, immediately after launching the application, you can open the desired service in a matter of seconds and start viewing content. This cannot be done in a built-in Internet browser. Yes, there is a tile with the most visited sites on the main screen of your web browser, but the data may change regularly.
The pre-installed browser is demanding on the TV's resources, so it can work slowly, begin to slow down a lot over time, and freeze. If there is insufficient memory, the browser may spontaneously close.
ForkPlayer for LG Smart TV allows you to get rid of the problems described above. Viewing becomes much easier and more comfortable.
Why is this widget needed?
Not everyone knows that this application can be installed on any TV and other device that supports Smart TV, regardless of its brand. This program allows you to search for films conveniently online in open sources. Thus, each user will be able to access content on a wide variety of topics; such a service is completely free, and it does not matter how the connection is made. This can be done using an ordinary flash drive or via the Internet.
Modern smart television offers all users a huge number of opportunities to receive content and information, for this reason the presence of special applications is a must. The fork player has become especially famous because through this media player you can easily get free access to an extensive list of TV channels on any topic. It is also designed for watching movies, videos, listening to music online and from any media connected to the TV.
General features of the utility
The smart TV plays many TV channels and movies from the Internet. The Forkplayer app for LG expands these capabilities. The main additions include:
- Easily set a parental viewing mode to control the TV programs your children watch.
- Independently search for content similar to your queries and interests on the Internet.
- Expanded capabilities for creating a Playlist with music and clips.
- Show hidden pages on VK or other social networks.
- Detailed instructions for working with the application - you don’t have to open any extra sites to understand how the utility works.
In fact, with the help of Fork Player, any Smart TV becomes almost a full-fledged computer. And most importantly, this application is completely free for any owner of LG equipment.
Application installation methods
Now there are two easiest ways to install Fork Player for an LG TV:
- by changing the DNS server in the “Smart TV” settings of the device;
- launching ForkPlayer through the additional Media Station X application;
Both methods work and allow you to install the player in a few minutes without complicated steps.
Additionally, if desired and necessary, you can use the following methods:
- work with a connected flash drive on which the archive of player files is preloaded;
- embedding a multimedia browser into the Smart TV system through the development environment.
We disable domains so that third-party widgets do not crash (only for Samsung Tizen J series 2015)
We block these domains on the router
samsung.com
test.samsungotn.net
cdn.samsungcloudsolution.com
osb.samsungqbe.com
samsungcloudsolution.com
rsch.samsungcloudsolution.com
ims.samsungcloudsolution.com
gpm.samsungqbe.com
empdownprd.samsungcloudsolution.com
notice.samsungcloudsolution.com
samsungotn.net
log-config.samsungacr.com
lcprd1.samsungcloudsolution.net
oempprd.samsungcloudsolution.com
osb-krsvc.samsungqbe.com
noticecdn.samsungcloudsolution.com
api-global.netflix.com
appboot.netflix.com
cloudfront.net
nrdp.nccp.netflix.com
secure.netflix.com
How to install ForkPlayer on LG by changing DNS
The installation principle is to redirect (replace) one application with another. In our case, it will be redirected to ForkPlayer. That is, first in the equipment settings we change the network parameters - we install a new “DNS”. The server must work with a specific application. In the example below, this is the Tvigle multimedia service. After changing the settings, in the first seconds after launching the application, a redirection will occur and ForkPlayer will open on LG TV. And Tvigle will stop working until the original DNS value in the TV receiver settings is returned.
There are many DNS servers for running multimedia Fork Player. Everyone works with different applications. Which one to use depends on personal preference and the status of the server. It is possible that a previously working DNS will become irrelevant in a month or even a few days.
Below are instructions for opening ForkPlayer on smart TVs from LG (using webOS as an example). Relevant for many webOS releases, including the latest versions 4-5.
- On the remote control, press the “SETTINGS” button.
- Open network settings (section “Network” or “Connection”).
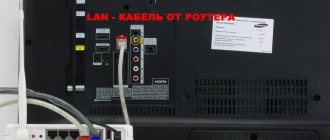
- If the Internet works via cable, then select “Wired Connection”. If you access the Internet wirelessly through a router, select “Connect to a Wi-Fi network.”
- At the bottom, go to "Advanced Settings".
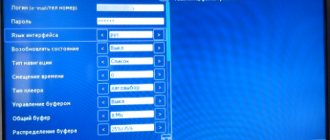
- Under Network Settings, click Change.
- Disable the automatic detection option. Clear the "DNS Server" line and enter the new value "85.17.30.89". Click on the “Connection” button. In the same menu, the status after changing the data should remain “Connected to the Internet”.
- Open the official LG store from the main menu (LG Smart World, LG Store or LG Content Store).
- On the store's home page, find the Tvigle online cinema. If you can’t find the application, use the search (icon in the upper right corner of the TV screen).
Go to the application card and click “Install”. Wait for Tvigle to download and install. - To apply the changes made to the network settings, restart the TV (turn it off and on using the remote control).
- At the end of the application quick access panel, find the previously installed Tvigle and launch it.
- First, the Tvigle startup screen will appear for 1-2 seconds.
Afterwards, the ForkPlayer loading screen should appear.
Important: if the application change does not occur, disable IPv6 in the network configuration.
Then check the player again. After launching, it is recommended to perform basic settings of the application and add services to the ForkPlayer menu.
The described method is suitable for everyone who often uses the player. Unlike other methods, the setup is done once. To make the application you are replacing faster to launch, you can move the icon to the top of the list. Move the selection over Tvigle, hold down on the remote control. You need to press until a cross appears above the icon. Then use the left arrow to move the application to the top of the menu and click OK.
For previous versions of the webOS operating system on LG's Smart TV, you can activate the function of rearranging and deleting applications by double-clicking the up arrow.
DNS table for ForkPlayer on Smart TV from LG
The table below shows the DNS and applications through which the replacement is made, and the corresponding opening program. "DNS" can work with several applications and open different services. Sometimes it’s not ForkPlayer that launches, but a store where you can already use the browser or other services. The data is current at the time of writing, 2021.
| DNS | What is being replaced | What will launch |
| 46.36.222.114 | Megogo, Tvigle | Forkplayer |
| 46.36.220.208 | iVi | ForkStore (store from which you can open Fork Player, OTTPlayer and SS IPTV) |
| 85.17.30.89 | Twigle, Accu Weather | ForkPlayer |
| 195.88.208.101 | Tvigle and iVi | ForkPlayer and ForkStore respectively |
More examples of DNS and launch options through third-party or system applications can be found on the Internet.
Operating principle
This is a simple player designed to work with smart TV, necessary for more convenient use and expanded functionality.
In fact, it adapts the website you open to your specific device (TV), which makes operation more convenient.
The principle of operation is that the player receives content directly from the site, and then further processes and optimizes it before displaying it on the screen.
Why do we need such a player at all?
- Smart TVs usually have an Internet browser of their own design, but its functionality is greatly reduced;
- Most often, the browser is not optimized and is inconvenient to use;
- Many models do not have a flash player, which does not allow playing most of the videos from the RuNet (other formats are actively spreading on the international Internet, but the trend has not yet reached Russia);
- The browser may experience “low memory” when loading sites with heavy visual content.
ForkPlayer via Media Station X
This is the most recommended use case for ForkPlayer. There is no need to change Internet settings or stop other utilities.
- Open the built-in official LG Content Store.
- Use the search and start writing the name of the application “Media Station X”.
- Select the desired option from those offered by the system.
- Go to the application page and click "Install".
- Wait for Media Station X to download and install.
- Launch "Media Station" and go to "Start Parameter".
- Click "Setup".
- Using the on-screen keyboard, enter “msx.lnka.ru”, click on the checkmark below.
- Click on the “Yes” button.
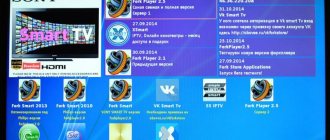
- ForkPlayer and OTTPlayer will appear in the service window.
- After clicking on ForkPlayer you will have to confirm the launch again, click “Continue”.
The player may not launch in full screen.
The video itself will be played in full screen mode.
Launching the ForkPlayer widget from a flash drive
The method is only suitable for TVs running the first versions of webOS and NetCast. New TVs running webOS 4 and later will not be able to add ForkPlayer from a flash drive.
Access to the player will only be with a flash drive inserted into the TV.
- Download the player archive (). Unzip the contents to the root of the flash drive. The flash drive must be empty and formatted in the FAT32 file system.
- Turn off the TV, connect the USB flash drive to one of the USB ports on the connector panel.
- Turn on the TV, if you are asked to open the flash drive, we do not agree.
- Press the “Home” button (house icon) on the remote control and look at the end of the panel to see if ForkPlayer has appeared.
If the TV is running NetCast OS or older webOS, the ForkPlayer icon should appear in the My Apps menu (or under the More bar at the bottom of the screen).
Installation via developer IDE
This method allows you to flash ForkPlayer into the TV’s memory, which will result in a separate application icon appearing. The player itself will work faster due to the fact that all interface elements and files will be stored in the memory of the TV receiver.
To implement, you need to set up the TV and some actions on the computer.
Both devices must be connected to the same Wi-Fi network.
Creating an LG Account
You can register with LG through your TV or the official website on your computer or phone. It is easier to create an LG account through a computer, since you need to enter your email and password. The registration process is intuitive; you need to agree to all the terms and conditions and confirm your account by email.
For clarity, let’s look at the registration algorithm through the TV menu if you don’t have a smartphone or a computer at hand.
- Open the settings of your TV device through the “SETTINGS” button on the remote control.
- Go to General, then Account Management.
- On the top right, click on the button to create an “account”.
- Click “Select all” to immediately agree to the terms of use and privacy policy. Click on “Agree” at the top.
- On the next page, enter the email you have access to. An email will be sent to your email address with a link to confirm your registration. Designate a password that must consist of at least one capital letter, a number, and a symbol (such as a percentage or dollar sign). Enter your date of birth and click OK.
- A page will appear notifying you that an email has been sent to the specified email. You need to open the letter and click on the link to complete registration. Use any gadget to confirm. You can also access your email via your TV browser.
- On the same page with a notification asking you to confirm, click “Login.”
- Fill out the login form with the data you provided earlier during registration.
- If the data is entered correctly, you will be on a page called “Account Management”.
Actions on TV
- Install Developer Mode through the store.
- Launch the program, enter your ID and password. The data fully corresponds to the registration data at the previous stage.
- Immediately enable developer mode. Switch the toggle switch to the “ON” state opposite the “Dev Mode Status” line. You will have to restart the TV immediately.
- Wait for the reboot and run the Developer Mode utility again.
- Enable the "Key Server" option.
Now the TV is ready to synchronize with your computer.
Settings on your computer
- Install Java (download the interactive version at https://java.com/ru/download/manual.jsp).
- Download the complete webOS TV IDE program package from the official website.
- Do the installation after downloading. You agree to the terms at the first stage.
Select a folder for installation. You don’t have to change it, then the folder with the program will be located at the path “C:\webOS_TV_SDK”. To start the installation, click “INSTALL”.
Next, you can watch how each component is installed.
If you are asked to install additional components during the installation process, agree to all suggestions. The installation window will indicate a successful installation with the message “Installation Successful”, click “DONE”.
You will be prompted to restart your PC for the program to work properly. - After restarting your desktop computer or laptop, run the program. A program shortcut will appear on the desktop to launch it.
- After the standard program splash screen, you will be asked to select a working folder, which will be used to store temporary files during the current session. If there is enough space on the system disk, you can continue the installation without changing the directory.
- To make it more convenient to work with the program, expand the window to full screen. In the right corner, click on the “New connection” tab.
- In the “Device Type” line, select “LG Smart TV”.
- Return to the TV and look at the network address value on the screen.
- Enter the value in the “IP Address” line, click “Finish”.
- The added device will appear at the bottom on the “Target Configuration” tab. Right-click on “webOS_TV” and select “Generate Key”.
- In the window that opens, you need to enter a 6-digit number from the Smart TV screen (the “Passphrase” line).
- Once again, open the device’s context menu and make a connection through the “Connect” item.
- If all actions were performed correctly, two additional sub-items will appear under the device: “Installed” and “Running”.
- Download the ForkPlayer file with the extension “.ipk”().
- In the main menu of the program, open the “webOS Menu” section, select “Install IPK”.
- Click the “Browse” button to select the saved player file.
- After clicking the “Install” button, ForkPlayer will be instantly installed on the “Smart TV” from LG. The “Success” message will indicate this on the “Console” tab.
- Now open the Smart menu with the “Home” button on the remote control and at the end there should be ForkPlayer.
In this way, we were able to install ForkPlayer into the memory of the Smart TV receiver.
An important point is the time during which the session is open. The standard session duration is 50 hours. Afterwards, if nothing is done, the session will close and ForkPlayer will stop working. Therefore, in the developer application, you need to periodically press “EXTEND”.
The time will return to the maximum of 50 hours.
Also, there is no need to close the application in the “Recent” item. Otherwise, the “Fork Player” icon from the menu will disappear.
Possible problems
- When you launch the program on your computer, a notification appears with the inscription “VT-x is disabled.”
This means that processor virtualization is disabled. You need to launch the BIOS, find the setting with the word “Virtualization” and enable it.
Then exit the BIOS and save the changes. - Git error occurs. Follow the link to the official Git client resource, download for your OS version and complete the installation.
- While installing software on your computer, errors periodically occur. The installation completes normally, but there is no shortcut to launch it, even after a reboot. The JAVA component may not have been installed. In this case, you need to completely remove webOS TV IDE from your computer. Open the folder with the program on drive “C”, and inside the “Uninstall” folder, run the uninstallation file.
Install JAVA and perform a new installation of webOS IDE.
Possible problems and their solutions
Every device has operational problems. Since IPTV is considered a new technology, glitches occur during operation. Most often they are related to the number of working TV channels and setting parameters. Let's look at each individual case below.
Black screen when playing all IPTV
When starting IPTV, the user sees a black screen. In addition, the volume disappears. The failure occurs due to:
- The user has opened a hidden playlist or inactive IPTV. More than 1000 pages are blocked per day. Before launching, check the Canada status in Settings.
- The wrong player format is selected. In the “installations” folder, change the player type. Refresh the services page.
Why are there so many non-working IPTVs?
Anyone can make a new broadcast. Buy special equipment for filming and rent an office. In addition, you must obtain permission to record. To avoid spending money, channel owners record broadcasts illegally. Most ISPs remove illegal IPTV. It's quite easy to calculate them. The more users subscribe to a channel, the easier it is to be discovered. Thus, every day Internet companies remove such resources. We recommend using the “General Rating” tab. The table contains working channels.
Black screen and video doesn't work
Another error appears when viewing media content. Often a black display appears instead of a picture. Reasons for failure:
- the required web page contains codecs that are not accepted by the TV model;
- false player format and is configured in “Options” (click on Media and HTML).
Reboot the device and the problem will disappear.