Watching TV
on the computer
To watch television from the Green Dot on a computer screen or laptop, you need to install a special IPTV Player program.
The program is installed for free and allows you to access both the basic Smart TV package and other TV channels in accordance with your tariff plan.
Setting up routers and other equipment
Dear subscribers! From September 1, 2019, changes will be made to the contract for the provision of services, details can be found here
Dear subscribers! We continue to update the subscriber accounting software, and therefore we are updating the line of archived tariff plans for Home Internet. On 06/01/2019, the Pink tariff plan will be closed. All subscribers on this tariff will be transferred to the modern Sotka tariff. If you want to choose a different tariff, please contact the subscription department.
Dear subscribers! Starting April 25, we are switching to new subscriber accounting software, and therefore we are updating the line of archived tariff plans for Home Internet. On 05/01/2019 the following archived tariff plans will be closed: Love, Create, Like 20, Like 40, Gold, Yeti, Newton, Ninja and Samurai. All subscribers on these tariffs will be transferred to the modern Sotka tariff. If you want to choose a different tariff, please contact the subscription department.
Green Dot announces the launch of Interactive TV in Nalchik. Now subscribers have access to TV broadcast control functions: pause, rewind, archive of TV programs. Content is provided by Home-AP.TV LLC
We are pleased to announce the launch of a new tariff “Sotka”. 100 megabits for only 555 rubles. The tariff will be available for connection to new subscribers of the company only until the end of September 2021
We announce the start of the “All for 390” campaign. Starting from March 1, new subscribers have a single price for any of the available tariffs. Read more in the terms and conditions of tariff plans
Now Green Dot clients have access to express Internet and Digital TV connections. We will come to you in just one hour after submitting your application. Green dot - fast Internet and high level of service
Dear subscribers, due to numerous requests, we have changed the line of tariff plans. Now in tariffs with the Internet service there is a TV package available for viewing on Smart TV
To configure network access, use the auto-configurator.
Download it and run it on your computer.
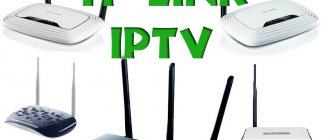
Setting up a TP-Link router for the Green Dot
In this article I will tell you how to configure a TP-LINK router to work with the Green Dot provider, but since the admin panels of all routers from this company are very similar, you can configure routers using these instructions: TL-WN841ND, TL-WR741ND.
1. Before setting up the router, for stable operation of this device, you need to update its firmware. The latest firmware version can be downloaded from the developer’s website at https://www.tp-linkru.com/support/download.
Instructions for flashing router firmware using the example of a TP-Link series router can be read here.
2. After the router has the latest version of the firmware, we connect the router to the computer, insert the cable provided by the provider into the WAN port, plug the cable included into the LAN port on the router and connect it to the LAN connector on the computer.
3. On the computer, in the network card settings, set: Obtain an IP address automatically, and Obtain a DNS server automatically. See the picture below:
4. Enter the address 192.168.0.1 in the address bar of your Internet browser (Opera, Internet Explorer, etc.) and press the “Enter” key.
Next, a window will appear asking for your username and password. Default: Username: admin. Password: admin.
5.The main router settings menu will open. Select the Network – WAN tab
– in the first line we indicate the connection type, in this case we select L2TP/Russia L2TP.
– in the username and password fields we indicate the data in accordance with the contract issued by the provider.
– we note that our IP addresses will be dynamic.
– in the Server IP Address/Name: server address field we indicate l2tp.ooonet.ru
– MTU Size (in bytes) is left at 1420, Max Idle Time for a permanent connection is set to 0.
– WAN Connection Mode, select automatic connection, and click the save button.
6. Next, let's configure the WiFi connection. Go to the Wireless tab - Wireless Settings.
In the SSID1 field, set the name of the wireless network, then click Save at the bottom of the window.
Next, go to the Wireless – Wireless Security tab.
Select the encryption type WPA-PSK/WPA2-PSK, and in the PSK Password field set the wireless network password, then click Save at the bottom of the window.
You have probably already noticed that when you click on the Save button, the following message appears at the bottom:
This inscription says that to make changes you need to reboot the router. Click on the words click here and in the window that appears, click the reboot button. And remember, if you don’t do this, then anyone will be able to join your network and visit all computers as if they were on a local network.
The router will reboot with the new settings. The router is fully configured and ready to go.
Now you can connect devices that support Wi-Fi, such as a TV, netbook, tablet, smartphone, to your Tp-Link Wi-Fi router. To do this, you need to select a Tp-Link access point in your device and enter a password.
7. Restoring the TP-Link router to factory settings.
If you have forgotten the password to enter the settings of your Tp-Link router, or simply want to restore the factory settings.
To do this, press the Reset button on the back of the router for 8-10 seconds.
After this, you can go to the router settings at 192.168.1.1 with the standard username admin and password admin and configure the access point.
Source
Watching TV
on the computer
To watch television from the Green Dot on a computer screen or laptop, you need to install a special IPTV Player program.
The program is installed for free and allows you to access both the basic Smart TV package and other TV channels in accordance with your tariff plan.
Setting up routers and other equipment
Dear subscribers! From September 1, 2019, changes will be made to the contract for the provision of services, details can be found here
Dear subscribers! We continue to update the subscriber accounting software, and therefore we are updating the line of archived tariff plans for Home Internet. On 06/01/2019, the Pink tariff plan will be closed. All subscribers on this tariff will be transferred to the modern Sotka tariff. If you want to choose a different tariff, please contact the subscription department.
Dear subscribers! Starting April 25, we are switching to new subscriber accounting software, and therefore we are updating the line of archived tariff plans for Home Internet. On 05/01/2019 the following archived tariff plans will be closed: Love, Create, Like 20, Like 40, Gold, Yeti, Newton, Ninja and Samurai. All subscribers on these tariffs will be transferred to the modern Sotka tariff. If you want to choose a different tariff, please contact the subscription department.
Green Dot announces the launch of Interactive TV in Nalchik. Now subscribers have access to TV broadcast control functions: pause, rewind, archive of TV programs. Content is provided by Home-AP.TV LLC
We are pleased to announce the launch of a new tariff “Sotka”. 100 megabits for only 555 rubles. The tariff will be available for connection to new subscribers of the company only until the end of September 2021
We announce the start of the “All for 390” campaign. Starting from March 1, new subscribers have a single price for any of the available tariffs. Read more in the terms and conditions of tariff plans
Now Green Dot clients have access to express Internet and Digital TV connections. We will come to you in just one hour after submitting your application. Green dot - fast Internet and high level of service
Dear subscribers, due to numerous requests, we have changed the line of tariff plans. Now in tariffs with the Internet service there is a TV package available for viewing on Smart TV
General connection information
Today, interactive TV is a serious alternative to cable or satellite television. The broadcast quality fully complies with modern TV characteristics, and additional functionality significantly expands the possibilities of using TV content. Moreover, the new generation of interactive television has some advantages over broadcast or cable broadcasting - better sound, better picture quality. At the same time, the cost of content is more than affordable. Considering the capabilities of modern high-definition TVs, setting up IPTV on your TV makes sense. In addition, IPTV owners can use other services related to television content: recording of programs, broadcast archive, the ability to pause the broadcast, etc.
You can connect digital TV in any convenient way, each of which has its own nuances:
- via a connected iptv set-top box;
- via a router via a wireless connection;
- using special applications;
- via an Internet browser.
In most cases, connecting to a TV is done using the first two methods. The latter are suitable for various gadgets or computers.
Tariffs and prices
Due to the fact that the services are actually provided by different companies, the current tariffs and lists of services vary greatly from city to city (see table below).
| City | Internet | Cable TV | Digital TV | Free Wi-Fi |
| Moscow | Yes (up to a private house using GPON technology) | — | — | — |
| Vladivostok | Yes | — | Yes | Yes |
| Ufa | Yes | — | Yes (only with the Internet) | Yes |
| Belgorod | Yes | — | Yes (only with the Internet) | Yes |
| Stavropol | Yes | Eat | Yes (only with the Internet) | Yes |
| Neftekamsk | Yes | — | Yes (only with the Internet) | — |
| Mud | Yes | — | Yes (only with the Internet) | Yes |
| Efremov | Yes | — | Can be done separately | Yes |
| Beloretsk | Yes | — | Yes (only with the Internet) | Yes |
| Kochubeevskoe | Yes | — | Yes (only with the Internet) | Yes |
| Tomsk | Yes | — | Yes (only with the Internet) | Yes |
| Lipetsk | Yes | — | Yes (only with the Internet) | Yes |
| Mikhailovsk | Yes | Yes | Yes (only with the Internet) | Yes |
| Elista | Yes | — | Yes (only with the Internet) | Yes |
| Tambov | Yes | — | Can be done separately | Yes |
| Nalchik | Yes | — | Yes (only with the Internet) | — |
| Dace | Yes | Yes | Can be done separately | Yes |
| Nevinnomyssk | Yes | — | Yes (only with the Internet) | Yes |
Cable TV
The service is available only to residents of the Stavropol Territory (Stavropol and Mikhailovsk), as well as Yelets (Lipetsk Region).
Tariffs for Stavropol/Mikhailovsk are as follows:
- “Simply TV” - 230 rub./month + 500 rub. for connecting each TV.
Access to 100 channels is provided; no additional equipment other than the TV itself is required.
- “Simply TV” - 250 rubles/month (connection is free, but on the condition that the subscriber will do the wiring in the apartment independently).
Subscribers receive 116 channels (24 of them in HD quality).
Home Internet
Prices for the service depend on the region. The table below shows tariffs for the city of Stavropol.
| Rate | Maximum speed (Mbit) | Subscription fee (r./month) |
| Superfast | 200 | 790 |
| Fast Internet | 100 | 690 |
| Just the Internet | 50 | 590 |
| Social | 20 | 490 |
All packages include 20 TV channels (they are available for free, viewing is possible via a PC or Smart TV, for regular TV you will need a set-top box).
Connection is free if technically possible,
The router can be purchased (RUB 1,390 one-time) or rented (RUB 99/month).
A static IP address will cost 200 rubles. for each month of use.
Internet + TV
Profitable promotions from the provider
In almost all cities where it operates, the operator offers a special line of tariffs with interactive TV called “Mixer”.
The following prices apply for Stavropol (see table).
| Tariff name | Number of included channels | Maximum Internet speed (Mbit) | Subscription fee (RUB/month) |
| "Mixer HD Premium box" | 258 (as well as all premium packages) | 100 | 1550 |
| "Mixer HD Maximum" | 258 | 100 | 890 |
| "Mixer HD Popular" | 143 | 100 | 790 |
| "Mixer HD Light" | 143 | 50 | 690 |
Prices and tariff parameters may vary in other regions.
All tariffs include broadcast control service and an archive of TV shows for the last 72 hours.
Additional channels can be connected to the main package (list of packages below).
| Package name | Cost (RUB/month) | What channels are included |
| Movie mood! | 380 | Movie date, |
Film premiere (in HD quality),
Hustler (in HD quality and with 3D support),
Viasat Sport (HD),
The set-top box is given to the subscriber for free use. If you refuse the services of the provider, it must be returned in proper form and configuration.
A list of all channels that you can connect to via the Green Dot is below.
List of all channels
Features of connecting the set-top box
Connecting a digital set-top box is not much different from installing various TV tuners. The connection to the router is made via a standard Ethernet connector, and wireless setup via Wi-Fi is also available. If you wish or have some difficulties, you can use a wire and connect it to the LAN connector.
Any IPTV set-top box also has other outputs:
- AV for connecting to older TVs;
- HDMI for more modern panels;
- USB connector (usually located on the front).
To receive digital television, the TV has either an HDMI output or an AV output. The connection to the set-top box is made by connecting the corresponding wire - this completes the physical connection of the set-top box.
Story
She opened her first office in Tambov in 2007. Here, as in many other regional centers, there was a problem with the existing high-speed Internet access networks. Therefore, the provider built its infrastructure.
The very next year (2008) the company began expanding into the regions. The infrastructure was implemented in the cities of Yelets and Stavropol.
And in 2009, Green Dot decided to raise the bar and entered the Moscow operator market.
From 2009 to 2014, the provider began operating in cities such as Nalchik, Efremov, Nevinnomyssk, Mikhailov and Elista.
In 2015 there was a significant leap in development. The operator's networks began operating in seven major cities at once. This became possible thanks to the purchase in 2014 of part of the assets of VimpelCom (a company known to everyone under the Beeline brand, which at that time was also actively introducing wired Internet using FTTB technology in Moscow and the regions). This step allowed us to ensure a large-scale presence and save on building our own networks.
In the same 2015, the headquarters in Moscow opened its doors.
In 2021, the company increased sales by 35%, revenue by 25%, and active subscriber base by 18%.
In 2021, a new interactive TV platform launched.
Wireless connection
If the user does not want to lay extra wires, then you need to familiarize yourself with how to connect digital TV via the Internet. Let's look at the algorithm using popular brands of TVs as an example.
Owners of LG equipment have access to a wireless IPTV connection and broadcast digital channels on their TV through a specially developed SS IPTV program. You will need an Internet connection to access it. You can install the application from a USB drive or after downloading.
To download and run the program, you need to go to the Smart menu, open the Smart World tab. In the address bar, enter the name of SS IPTV and set the search command. When the utility is displayed in the list, you need to install it and then open it. Connecting interactive television to televisions of other brands, such as Philips or Samsung, is carried out using a similar algorithm of actions.
Philips
In Philips television panels, you need to establish a connection to the Internet by connecting to an access point (router). Then press the Home button on the remote control to open the configuration menu. In the network settings, select “Operation mode” and enter the DNS value. To connect to digital television, just download any of the available widgets.
Samsung
To watch IPTV on a Samsung TV, as done in the previous methods, you need to set up a connection to the Internet and install a special utility.
- On the remote control, open the Smart Hub menu, press the “A” button. Here you need to create an account, enter the Develop login and password.
- Then go to settings and open the “Development” item. In the IP address field, enter 188.168.31.14, or use the alternative set 31.128.159.40.
- After selecting the “Application Synchronization” tab, when the process is finished, press Enter.
Now in the list of applications the user will have access to a special utility nStreamPlayer for watching IPTV television.
Source
Advantages
- A provider initially aimed at working in the regions. It relies not only on the list of services, but also on the quality of service.
- In many cities of presence, a very fast connection is offered in just 100 minutes from the moment the application is received.
- Even when choosing only the Internet, subscribers are provided with a package of free TV channels.
- Our own fiber-based network provides high connection speeds of up to 100-200 Mbit/s.
- Affordable prices comparable to income levels in the regions.
- The provider often runs promotions in which new and existing subscribers can receive the same services, but on more favorable terms.
- All digital TV plans include free access to the archive of TV shows and broadcast control.
- The client’s personal account can be managed from a smartphone through a special application.
- There is a bonus program and rewards for inviting new clients.
How to set up a green dot router
City network users with internal (local) IP addresses need to configure a local area network connection and create a high-speed connection to access the Internet.
Setting up a local network connection (Windows 
1. In the lower right corner, right-click on the network and select “Network and Sharing Center
2. Next, in the left panel, select and click on “Change adapter settings”
3. Right-click on the “Local Area Connection” connection and select “Properties”. If the connection is enabled, turn it off first.
4. Select “Internet Protocol Version 4 (TCP/IPv4)” with the left mouse button and click “Properties”
6. In the window that appears, select the items “Obtain an IP address automatically” and “Obtain a DNS server address automatically.” Then click “OK” and close the Local Area Connection Properties window.
7. Now right-click on “Local Area Connection” again and select “Connect”. The local network is set up!
Setting up a high-speed Internet connection (Windows
First you need to download the registry file (l2tp-disable-ipsec.zip) and enter the data into the registry by running the file. After this, you need to restart your computer.
1. Select “Create and configure a new connection or network”
3. The connection wizard will appear, select “Connect to a workstation” and click the “Next” button
6. Select “Use my Internet connection (VPN)”
7. Select “Delay Internet connection setup”
8. In this window, enter the following data Internet address: l2tp.lipetsk.zelenaya.net Destination name: Green dot Before clicking the “Next” button, be sure to check the correctness of the data entered
9. Now select “Change adapter settings” on the left
10. Right-click on the created “Green Dot” connection and select “Properties”
11. Go to the “Security” tab and select “L2TP Protocol”, click “OK”
12. Now click on the created “Green Dot” connection and enter the connection data, click “OK”
13. The Internet must already be connected and working!
Setting up Windows 7
Setting up Windows 7
City network users with internal (local) IP addresses need to configure a local area network connection and create a high-speed connection to access the Internet.
Setting up a local network connection (Windows 7)
1. Click the “Start” button, select the “Network” menu item
2. In the window that opens, select “Network and Sharing Center” in the top taskbar
3. Next, in the left panel, select and click on “Change adapter settings”
4 Right-click on the Local Area Connection connection and select Properties. If the connection is enabled, turn it off first.
5 In the “Network” tab, uncheck all the components used except “Internet Protocol Version 4 (TCP/IPv4)”. Now select this item with the left mouse button and click “Properties”
6 In the window that appears, select the items “Obtain an IP address automatically” and “Obtain a DNS server address automatically.” Then click “OK” and close the Local Area Connection Properties window.
7 Now right-click on “Local Area Connection” again and select “Connect”. The local network is set up!
Setting up a high-speed Internet connection (Windows Seven)
First you need to download the registry file (l2tp-disable-ipsec.zip) and enter the data into the registry by running the file. After this, you need to restart your computer.
How to set up an L2TP connection in Windows Seven:
1 Click the “Start” button, select the “Network” menu item
2 In the window that opens, select “Network and Sharing Center” in the top taskbar
3 Next, click “Set up a new connection or network”
4 The connection wizard will appear, select “Connect to a workstation” and click the “Next” button
5 If connections have already been created, the system will prompt you to use existing connections. Check “No, create a new connection” and click “Next”
6 In the next window, click “Use my Internet connection (VPN)”
7 In this window, enter the following data Internet address: l2tp.lipetsk.zelenaya.net Destination name: Internet Before clicking the “Next” button, be sure to check that the data is entered correctly
8 Enter your login and password (as specified in the contract) to connect to the Internet. If you wish, you can check the box “Remember this password”
9 Next, click “Close”
10 Now select “Change adapter settings” on the left
11 Right-click on the created “Internet” connection and select “Properties”
12 Go to the “Settings” tab and disable the Windows login domain
13 Now in the “Security” tab you need to select “Optional (connect even without encryption)”
14 In the next “Network” tab, uncheck all the components used except “Internet Protocol Version 4 (TCP/IPv4)”. Click “OK”
15 The connection has been created, right-click on “Internet” and select “Connect”. If the connection is not established, carefully check all settings again
Setting up Windows XP
Setting up Windows XP
City network users with internal (local) IP addresses to access the Internet need to configure a local area network connection and create a VPN connection to the Internet.
Setting up a local network connection (Windows-2000/XP)
1. Click the “Start” button, right-click the “Network Neighborhood” menu item from the “Properties” context menu
2. In the list of existing network connections that opens, you need to find a connection to the local network that uses an Ethernet adapter. Right-click to open the context menu and select “Properties” in it.
3. In the list of protocols and network services, select “Internet Protocol (TCP/IP)” and click the “Properties” button
4. Check the “Obtain an IP address automatically” and “Obtain DNS server address automatically” checkboxes.
5. Click OK and close the network connection properties. This completes the local network setup.
The computer receives an IP address via DHCP from the server and is ready to work in the Green Dot local network. In this case, you have access to the WEB server https://www.zelenaya.net.
Setting up an Internet connection (Windows-2000/XP)
First you need to download the registry file (l2tp-disable-ipsec.zip) and enter the data into the registry by running the file. After this, you need to restart your computer.
1 In the properties of the network connection, in the “Network tasks” section (in the left panel of the browser), select “Create a new connection” and click “Next”
2. Select “Connect to a network at your workplace”
3. Select “Virtual Private Network Connection”
4. Enter the name of the connection to be created (for example, “Internet” or “Green Dot”) and click “Next”
5. Specify l2tp.lipetsk.zelenaya.net and click “Next”
6. Complete the wizard, click “Finish”
7. Enter the username and password that you were given in the “Subscriber Memo” to access the Internet.
Click the “Properties” button before connecting to the server to set the correct security settings.
8. On the “Security” tab, uncheck the “Data encryption required (otherwise disabled)” checkbox. Click “OK”
9. On the “Network” tab, select the VPN type L2TP IPSec VPN.
10. Now you can connect to the Internet.
Setting up Windows Vista
Modules
Update server information
Supported starting from firmware 1.0.28
Used if the operator uses a local update mirror or simply wants to use an update server address other than tvipup.net
The name attribute specifies the name of the update server.
TR-069 Server Information (ACS)
Supported starting from firmware 3.8.6
Allows you to set the URL, login and password for connecting to ACS via the CWMP protocol.
Syslog server information
Supported starting from firmware 3.9.13
Allows you to specify the IP address of the syslog server to which the set-top box will duplicate the log /var/log/syslog. The transmission uses the UDP protocol and port 514.
Information about the statistics server
Supported starting from firmware 4.0.13
Allows you to specify the URL of the server to which the set-top box will send statistics
Itics tag attributes:
Attributes of the network tag (resetting network interface statistics):
Tag attributes (player statistics reset):
Information about the provisioning server
Supported starting from firmware 3.1.0
Allows you to redirect the request for operator settings to another provisioning server. The request to the new server will be completed immediately.
The name attribute specifies the name of the new provisioning server.
Starting from firmware 3.4.x, the server address is saved even when the set-top box is reset to factory settings.
In firmware 4.xx it is recommended to use the full URL (with http/https).
To reset the server address, you must explicitly specify an empty name attribute:
Rebooting the set-top box when updating provisioning
Supported starting from firmware 3.4.0
Possible values:
shell - reinitialize the application.
reboot - reboot the console.
Information about update types
Supported starting from firmware 3.1.0
Specifies a list of update types for which flashing by the user is allowed. For example, users can have access to Beta and Release versions of firmware. The “release” version is always present in the menu as the “Default” item.
The id attribute in the device tag specifies the type of media center to which the setting applies (for example, s410, s500, s500a).
Type tag attributes:
If the os attribute is not specified, then the currently installed OS is assumed by default. If the type attribute is not specified, the “release” type is assumed by default. By default, it means that this parameter was not changed manually through the menu, or was not force set via provisioning.
It is possible to force an update type by setting attributes:
In this example, S400 set-top boxes (on Android OS) have access to firmware of the “android/release” type (by default) and Beta firmware on Android OS (“android/beta”). They also have the ability to change the OS to Linux-QT (“linux-qt/release”).
S300 set-top boxes only have access to “release” versions of current Linux firmware. Also, the update type is always set to “release” automatically.
Managing update installations
Supported starting from firmware 3.4.0
up_background — In the “update available” dialog, the update timer will be forced to start (regardless of local settings).
up_force — There will be no “cancel” button in the “update available” dialog.
up_period — Frequency of checking for updates in seconds (any value in the range from 3600 to 86400 seconds is possible). A verification period of less than an hour can only be set locally through the set-top box interface.
To force enable the desired mode, you must specify the force attribute with the value “true” for the desired parameter.
Operator information
Specifies basic information about the operator providing the settings. Operator name setting is currently supported.
The name attribute specifies the name of the operator.
The following attributes are available starting from version 3.8.11.
tv_app_name - sets the name of the TV application instead of the standard “Television”.
tv_app_icon - sets the identifier of the alternative icon for the TV application.
Operator logo
To force a logo update, you must change the image URL.
If a banner is used, the logo is disabled (valid for version 4.0.11 and higher)
Banner
Supported starting from firmware 4.0.11
Limitations: PNG format, size 1920x180 pixels, please read the banner design guidelines
To force a logo update, you must change the image URL.
The url attribute contains the URL of the banner on the operator's server; uri contains the system URI to perform an action when you click on the banner (from firmware 4.1.9).
Loading screen
Background picture
Supported starting from firmware 4.2.33
Ability to assign a colored background image to the Home screen
Main__background tag attributes:
Setting the time and time zone
Allows you to configure the time zone, as well as specify an NTP server for time synchronization.
The tz attribute specifies the time zone in the format zone. The ntp attribute specifies the NTP server address. The _format attribute (from firmware 4.2.3) sets the time display format to “12” (12-hour AM/PM) or “24” (24-hour).
In this example, the time zone is set to Moscow, and the NTP server is set to ru.pool.ntp.org.
Allowed Applications
Allows you to restrict access to media center applications such as DVR, CCTV, VOD, media player.
Types of applications: player - media player, dvr - video recorder, cctv - video surveillance, vod - video on demand (in development). In firmware from 3.3.x the following are also available: tv - television, settings - settings, apps - applications (Android). Also available in firmware from 3.9.x: igator - browser. In firmware from 4.1.x the following is also available: - search.
By default, all applications are available, except those in development.
The tag name is the application type, the enabled attribute is available (true) or not available (false).
In this example, the available applications are IPTV, Media Player, Video Recorder (DVR). Not available: CCTV, Video on Demand (VOD).
Attributes of the shift enabled tag: (Supported starting from firmware 4.2.33)
Adding and hiding Web applications
The module is available only in Linux-Qt firmware starting from version 3.3.1.
Allows you to add your own Web applications and hide the default ones.
This code hides all Web applications by default and adds YouTube and the provider’s personal account.
If the override attribute is true, then all applications will be hidden by default; if false, then new applications will be added to those already existing in the firmware.
Required attributes: name, title, uiwidth, uiheight, url, api. If an icon is not specified, the name field is used. If no icon is found, the “vod” icon is used.
Reserved application names name: "tvplayer" (TV), "dvr" (Video Recorder), "player" (Media Player), "vod" (Movie), "cctv" (Video Surveillance), "preferences" (Settings), "allapps" (Android Applications). Default web application names: “account” (Personal Account), “youtube” (Youtube), “vidimax” (Vidimax), “ivi” (Ivi.ru), “megogo” (MEGOGO.NET), “tvzavr "(TVZavr).
The names for the icon attribute correspond to the reserved names name. For your own Web application, you can use any of the available icons.
Applications have the following configuration by default:
The default configuration in the firmware is located in the file: /home/tvip/profiles/
/tvip_webapps.xml
Please note that for YouTube applications to work on firmware 4.2.x and higher, you must use the HTTPS protocol and api="youtube".
To return to the main menu, the application must go to the ":back" page when exiting.
To disable all Web applications, use the code:
In current firmware, a reboot of the set-top box is required to correctly apply the Web application settings!
Setting the transport stream type
Allows you to set the type of transport stream: multicast or UDP proxy.
The type attribute sets the type of the stream. In this example: multicast. Possible values: multicast,udpxy
The tsbuffer attribute sets the size of the MPEG-TS buffer in msec. (default 0ms, Supported since firmware 3.3.1)
The tsboost attribute, when set to false, prevents “cutting off” unnecessary audio when MPEGTS starts (Supported starting from firmware 4.2.33)
The hls_version attribute allows you to set the HLS version (Supported starting from firmware 4.2.33)
In this example, the stream type is UDP proxy. The udpxy server address in the format server_address:port or user: [email protected] _address:port is specified by the server attribute.
The speedtest_url attribute specifies the URL to the configuration for speed testing (supported from firmware 4.2.20/4.3.4).