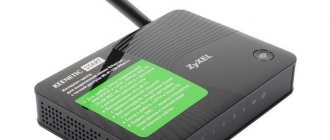
Good day everyone, dear friends! Today we will perform a simple setup of the Zyxel Keenetic router. As always, there is no normal article on this topic on the Internet. Or again they write outright nonsense or use ancient instructions for old firmware. At the moment there are two current firmware. I will write detailed instructions for both.
In general, nothing will be difficult, but if something goes wrong or difficulties arise, please write in the comments immediately. The instructions are suitable for all Zyxel Keenetic models: Start, Lite, Viva, Giga, Ultra, Extra, Dua, Air, DSL, City, Omni, Omni II and others.
What do you need to know before setting up?
Like any other brand of modem, the Zixel router under Rostelecom is configured through a special web interface.
To access it, you will need a browser. You can use anything, from standard Internet Explorer to the more familiar Chrome or Opera. To gain access to the settings area, type the system address of the equipment – 192.168.1.1 – into the line at the top of the browser window. It will be true for any router model. After entering these numbers, an authentication window will appear on the screen above the browser. The login information is also standard for the entire Zixel line: as a login – admin, as a password – 1234 or also admin.
To set up a configuration that allows your router to communicate with the Internet, you will need a login and password for this service. As a rule, they are specified in the agreement with Rostelecom. Prepare this document in advance and keep it handy until you complete setup. If the symbols in the contract are poorly printed and difficult to read, you can check them with the provider by calling technical support at 8-800-1000-800. But be prepared for the fact that a call on this matter will take about 15 minutes, and the operator will ask you for your passport information to verify the password.
Attention: the expression “check password” means that you will dictate to the company specialist the symbols that you see in the contract, and he will correct you in case of an error. The Rostelecom operator does not have the right to read your entire password to you. If you have lost your Internet login details, a remote specialist will not be able to help you - contact the RTK office with your passport and contract.
Preliminary preparation for work
In order for the router to work for the first time, you need to take a few simple steps:
- Connect the device to the network using the power supply and pressing the power button;
- Connect the router to the external network (provider cable) via the WAN port (highlighted in color on the rear panel);
- Connect the PC via the included cable (inserted into one of five connectors);
- Check the correct execution using the indicators on the front panel: the power light, network connection light and the port indicator with the PC cable inserted should be on;
Afterwards we can open the computer, check the network connection (if there is an “Access Restricted” error) and set an important setting:
- From the tray (the place on the Start panel next to the time and date) open “Network Center...” by right-clicking on the network icon;
- In the window that opens, find the adapter settings tab and open it;
- On a working connection, right-click and select properties;
- In a new window, look for the fourth version of the Internet protocol, using the button under the list, open properties;
- For both selectors we set automatic retrieval (IP and DNS);
This is where the connection to the Wi-Fi network begins for the Rostelecom provider and any other service provider.
Primary preparation stage
The first steps to take are to prepare it for work. The procedure is simple and is as follows:
- Selecting a location for installing the router. At the same time, try to keep the device away from sources of interference such as, for example, Bluetooth gadgets or radio peripherals, as well as metal barriers, which can significantly degrade the signal.
- Connecting the provider cable to the router and connecting the device to the computer using a patch cord. On the back of the case there is a block with connectors - the Internet provider cable should be connected to the WAN connector, and both ends of the patch cord should be inserted into the LAN connectors of the router and computer. All connectors are labeled and color coded, so there should be no problems with connection.
- The final stage of pre-configuration is preparing the computer. Open the properties of the TCP/IPv4 protocol and make sure that the network card receives all addresses automatically.
Connect the router to the power supply and start configuring.
Features and Specifications
The RT5350 SoC, which is the computing center here, is familiar to many specialists from a galaxy of other routers (mainly from China) equipped with the same or similar characteristics. In theory, thanks to this, Keenetic Start should have support for OpenWRT firmware, but in practice the chip has been modified and free software cannot be installed instead of the native one from Zyxel. Fortunately, the firmware here, as always, is good and functional.
RAM is traditionally in excess - 32 megabytes, permanent memory - 4, without doubling, which means it is impossible to quickly backup and roll back to the latest stable software version.
Kinetic Start has only one antenna, the signal power is only 2 dBi, but, as users note, this is quite enough for a small room or apartment with thin brick walls. There are 5 ports, all 100 Mbit/s, there is one WAN and 4 LAN connectors.
Wi-Fi operates in the 2.4 GHz band, the maximum wireless local network speed is 150 Mbit/s. Speeds over the IPoE/PPPoE and L2TP/PPTP protocols are lower - 90 and 60 Mbit/s, respectively
Indicators and connectors
On the back wall there is a completely standard set of connectors and buttons. From left to right here are:
- factory reset button.
- 5 already mentioned network ports.
- power connector.
- on/off button.
On the front are indicators of various device states. The first, Power, shows the power status. Those marked with numbers from 0 to 5 indicate the occupancy of the LAN and WAN ports. The Wi-Fi symbol indicator indicates the presence of a wireless connection. The last globe icon is responsible for demonstrating the Internet connection.
Troubleshooting
Most problems with Rostelecom television can be solved by rebooting the router and set-top box. If rebooting does not help, you should make sure that the amount in your personal account is sufficient to be debited for Internet and television services. Also, the cause of malfunctions is often poor cable contact or damage.
After loading a cartoon appears
The set-top box cannot connect to the Rostelecom server, from which the firmware is uploaded when turned on for the first time. When the Internet is working, the cause of this error lies in incorrect router settings. The problem can be solved by reconfiguring the router and rebooting the set-top box.
IP Address Error Message
As in the first case, the router does not allow the set-top box to contact the Rostelecom server. You should make sure that data is sent through the router to the set-top box, then reconfigure the router.
Server communication error message: "Loading error"
This type of error usually occurs when the MAC address of a given set-top box does not fall into the Rostelecom server pool. This problem is easily solvable, so within a few minutes after calling technical support, interactive television will work.
Invalid Login and Password – download error message
Television credentials do not contain letters and consist of a 10-digit login in the format 0122****** and a 6-digit digital password. The reasons why the Rostelecom server does not accept correct data may be on the side of both the subscriber and the provider. In the first case, you need to configure the router correctly: the set-top box receives data and an IP address through it, but Rostelecom television does not work due to the IGMP option being disabled. The second case indicates that the service is not yet linked to a personal account and you need to contact technical support to update the data.
Wired interface not available
The message indicates physical damage to the data link. If the cable is visually in order, you need to create a request with Rostelecom: specialists will dial the line remotely and, if necessary, send a technician to fix the problem.
Found a typo? Select the text and press Ctrl + Enter
Setting up the router
To start setting up Zyxel Keenetic Start, you need to go to the main interface. And to do this, we need to open the browser and enter the number 192.168.1.1 into the address bar - the standard address of the Kinetic family. Immediately after loading the page, we will see an authorization form, into which we will enter the standard data: login - admin and password - 1234. Behind it, a Setup Wizard, unified for the entire line of routers, awaits us.
To enter settings, open your browser and enter the address:
On the newly opened page we will find only two buttons to choose from: “Quick setup” and going to the “web configurator”. In this case, we are interested in the first option. After clicking on it, we will see three selectors that allow us to specify the relationship of our provider to MAC addresses. Most of the modern service providers do not record address data and for them you should select the first option (selector). But if your company is not Rostelecom, but, say, Dom.ru, you need to look at the contract or call technical support to get your MAC address. Then we indicate the resulting alphanumeric combination in the field next to the “Other” selector and click on the “Next” button.
On the page that opens, set the automatic IP configuration option or indicate your own address, as well as NDS, if the provider gave you this information. Let's move on. We indicate the login and password if they are included in the contract for the supply of Internet services, or check the box for “I don’t have a password...”. It is important not to confuse this data with the key and name for the Wi-Fi network, which are indicated on the bottom of the router. These are completely different data, because... Rostelecom is a service provider, and Zyxel is an equipment provider.
When we go further, we get to the status page, where connection data is indicated and information about whether we were able to connect to the Internet (wired connection only, not Wi-Fi) or not. In most cases, the setup will be successful and you will have access to the network.
We launch the web platform with the router settings: address and login information
Where are the network gadget settings located? Usually on a local page that opens through any browser on a PC. The main thing is to know her address. There may be one of the options: 192.168.1.1 or 192.168.0.1. If the first one didn't open anything, try the second one.
Paste 192.168.1.1 or 192.168.0.1 into the address bar
Most likely, you will need to enter data in order to be allowed on this platform. What should I write to log in? The standard word admin for login and 1234 for password. Complete the login procedure by clicking on the OK button.
If you have never visited this platform before, a window will open in front of you in which you will be offered two options: start quick setup or visit the sections themselves for fine-tuning (“Web Configurator”). We will select sections to show everything more clearly.
On the start page, click on “Web Configurator”
Is it possible to set a different login and password for the configurator?
It is possible and, by the way, necessary. If the password is standard, anyone can visit the platform with the settings and change them as they please. To prevent this from happening, set complex code. Immediately after going to the sections with parameters, an additional window will appear asking you to write a new password. We write it twice, remember it and save it.
Immediately set a new password for the admin panel
Connecting Zyxel Keenetic Lite for setup
Whenever it comes to setting up any Wi-Fi router to work with the Rostelecom provider, I always touch upon the issue of correctly connecting the router. The fact is that very often, if a company employee installs a router, they connect it incorrectly - this simplifies their work, but makes it impossible to fully use the router.
So, on the back of the router there is one WAN connector - you need to connect the Rostelecom cable to it. To him and nothing else. Connect one of the LAN connectors immediately available to the corresponding port of the network card of the computer or laptop from which the setup will be performed.
I also recommend making sure that the local network connection settings on the computer that will be used for setup are set to automatically obtain an IP address and DNS server addresses for the TCP/IPv4 protocol.
Plug the router into a power outlet.
And, very important: do not connect the Rostelecom connection on your computer if you usually do this to access the Internet. Our task is to transfer the settings of this connection to the router and never run it on the computer again. If you do not heed this advice, then most likely you will not be able to configure the router. Those. The Internet on the computer should be turned off during and after setting up the router, even if it is not entirely clear to you why.
Setting up the Zyxel Keenetic Lite 3 router under Rostelecom in automatic mode
The algorithm for quickly setting up Zixel routers is the same for all models. Let's look at it using the example of Zyxel Keenetic Lite 3. Most likely, you will see an offer to use the automatic settings configuration wizard as soon as you enter the web interface. What it looks like is shown in the screenshot below. If such a page does not appear, then you are in the Zyxel “System Monitor”. Find the globe icon at the bottom of the screen and click on it. In the new window, click the “NetFriend” button (this is the name of the installation wizard), and you will go into automatic mode.
Here you just have to click on the “Quick setup” button. The configurator will offer you several drop-down lists in which you will need to select your city, country and provider name. If you received a router at a Rostelecom office, this company will definitely be listed in the NetFriend database in first place. After each step, click the “Next” button at the bottom of the page.
In the fourth window, the system will ask you to enter your username and password to access the Internet. Retype them from the contract with the provider, strictly observing the case of characters. After you click “Next”, the installation wizard will check the connection and if the result is positive, it will offer you to update the router firmware. Do this, and setting up the Zyxel Keenetic router for Rostelecom will essentially be completed.
Attention: the firmware update offer will only appear if NetFriend detects a newer version on the server than the one installed on your equipment. If it doesn't appear, it doesn't mean you did something wrong. It’s just that the software on your device is up to date and does not need to be updated.
Next, the installation wizard will prompt you to perform two more steps. The first is the choice of port for the TV set-top box. You can indicate the required connector by clicking on the square under the picture with its number. If you do not have the Interactive TV service from Rostelecom connected, simply proceed to the next step. The second suggestion is to install a Yandex DNS filter. You can completely refuse it; this add-on will not affect the operation of the Internet in any way.
After this, you will see a connection establishment message and connection specifications. The setup is complete, you can close the installation wizard and start surfing websites or chatting on Skype. If you need to set up a wireless network, click the “Web Configurator” button at the bottom of the screen and set the necessary parameters. We will describe a detailed algorithm for this process below.
Setting up Zyxel Keenetic Lite manually
The Keenetic Lite model from Zyxel is inexpensive, but very functional. And, most importantly, like all the company’s equipment, it is equipped with a beautifully designed and reasonably systematized configuration utility. Even a novice user will understand how to work with it. Setting up the Zyxel Keenetic Lite router under Rostelecom begins by selecting the “Internet” menu item on the left side of this interface, the “Authorization” sub-item.
In the window that appears, you will need to select the PPPoE access protocol type in the drop-down list and fill in the lines with the user name and password. Retype this information from the contract. Make sure that the checkbox next to the line about automatically obtaining an IP address is checked. Do not touch the remaining fields, just save your changes using the button at the bottom of the page. If everything is done correctly, you will be connected to the network in 30-60 seconds.
If you need to set up a wireless network in addition to the Internet, go to the left menu item “Wi-Fi Network”. Select the “Connection” sub-item and enter the name of your wireless network in it. You can come up with it yourself, there are only two restrictions - Latin letters and the number of characters is at least eight. After saving the settings, go to the “Security” subsection. Here you need to set the values of all fields as indicated in the screenshot.
In the line called “Network key” enter your password for the Wi-Fi network. Invent it yourself too. The standard password is indicated on the router, on a label on the back, but it can be changed at this point in the settings. If you are afraid of getting confused, use the password issued by Rostelecom for the Internet as a key for the wireless network.
Click the button at the bottom right of the Apply window, and you can use the wireless network and a standard wired connection.
Setting up a connection to the web interface
To configure the router, you should use specialized network interfaces, which can be connected using browsers on your personal computer. The user needs to enter the device address. The address is written on a sticker glued to the back panel of the router and looks like a four-digit number:
- select the network icon in the tray;
- then “Control Center”;
- in the “View networks” column, select the current local connection;
- select "Information";
- right-click to copy the values of the “Gateway” parameter;
- now you have the ability to connect to a web interface that allows you to manage Zyxel Keenetic;
- open your browser;
- Paste the copied value into the address field. You will be asked to enter your username and password. They are indicated on the rear panel label. If it is missing, enter “admin” + “admin” and “admin” + “1234”;
- select "LOGIN" to login.
Setting up PPPoE connection Rostelecom
The main task when setting up any Wi-Fi router, including Zyxel Keenetic Lite, is to configure the connection parameters used by the Internet provider. Rostelecom uses a PPPoE connection, we will configure it.
- Launch any Internet browser (not in Turbo mode)
- Go to the address 192.168.1.1 - this is the internal address of the router; you do not need an Internet connection to go to it.
- When prompted for a login and password, you should enter the standard values for Zyxel Keenetic - admin and 1234, respectively.
- You will be taken to the Zyxel Keenetic Lite router settings page, open the “Internet” menu item in the menu on the left, then select “Authorization” and fill out all the fields as required.
Connection parameters for Rostelecom:
- Internet access protocol - PPPoE
- Username and password - your data for Rostelecom
- The “Obtain an IP address automatically” checkbox should be checked
- In most cases, the remaining parameters should not be changed.
After this, save your settings. After 30-60 seconds, the router will connect to the Internet and you will see that the Skype icon has turned green, and Internet pages are already opening (provided that, as I asked, you disconnected the Rostelecom connection on the computer itself). The next step is to set up a wireless network and set a Wi-Fi password to protect it.
Setting up a connection using Dynamic IP technology
This means that the cable from the provider is connected to the router, we went into the settings and select the “Quick setup” . If there is no “quick setup” item, then you need to reset the settings. I wrote above how to do this.
Since the router automatically connects to the Internet using Dynamic IP technology, it will immediately prompt you to update the firmware if there is a new one. Click on the “Update” .
We wait for the router to download the firmware itself, install it and reboot. When you see a message that the component update is complete, click Next . In the next window, the router will prompt you to enable the Yandex.DNS Internet filter . If you enable this function, the router will block access to sites that Yandex considers malicious. You can disable or enable this feature in the settings at any time. Click Next .
We see a message that the router is configured and the connection to the Internet is established. You can click on the Web Configurator and go to the Wi-Fi network settings, etc. I will write about this in this article below.
The Internet should already be working. You can connect your devices to the router. If you do not want to change the Wi-Fi network name and password, you can use the standard connection information, which is indicated at the bottom of the router.
Let’s move on to the computer: after connecting the router, we’ll configure the PC’s network card
The computer itself should recognize that you connected it to the router via a cord. In rare cases, this does not happen if the laptop’s network card is not configured as needed. To enable automatic recognition, follow these short instructions:
- Expand “Start”, find the “System” folder, and in it “Control Panel”. If you have Windows 7, look for the panel immediately in the right list of sections.
- On the panel, go to the “Network Center” block.
- Click on “Change adapter settings”.
- Call the context menu of the Ethernet adapter or “Local connection”. Click on "Properties".
- Select IPv4 protocol.
Go to its properties. Set automatic retrieval of DNS and IP. Save your changes. Set the value to “Receive data automatically”
Setting up via mobile application
The Play Market for Android and the App Store for iOS have the My.Keenetic branded application. It is supported by all router models, but for more modern devices there is also more modern software for smartphones. Setting up the Zyxel Keenetic Start router is possible through such an application and is no different from previous types. First you need to install My.Keenetic on your smartphone by finding it in the appropriate store. Zyxel Keenetic Start does not have a QR code for downloading it, as in modern models.
Setting up a router begins with connecting to its access point. Then in the application you can click the “OK, Wi-Fi connected” button on the start screen.
After this, another window will appear, in which a “Run NetFrient Setup Wizard” button with an image of an animal will be displayed.
By clicking on it, a slightly simplified visual wizard will launch, completely repeating the functions of its desktop counterpart. All the steps described for manual and automatic configuration above in the article are applicable here.
Port forwarding
This procedure on Zyxel Keenetic Start will look like this:
- Select the “Security” section (shield icon).
- On the “Network Address Translation (NAT)” tab, click on the “Add Rule” button. An additional window for setting up the rule will open: pay attention to the “Interface” parameter. The default is Broadband Connection. If your provider uses the connection type “Dynamic IP” or “Static IP”, then leave this value.
- If your provider uses the PPPoE protocol (for example, Rostelecom, TTK or Dom.ru), or a VPN tunnel (L2TP in the case of Beeline), then you need to select this external connection from the list.
Specify your connection type in the “Protocol” menu - For example, let's create a rule for the game Counter Strike. To do this, select the TCP value, and in the “TCP/UDP Ports” list select the “Single port” value. If you need to open several ports on Keenetic, you need to select the “Range” value.
- Below we indicate the port number - in our case it is 27015. In the “Redirect to address” field we enter the IP address of the computer for which we are doing Port Forwarding. Click on the “Save” button. The rule has been successfully created and will now appear in the NAT table. Now you can check access to the service from the external network.
Setting up secure access
Go to the “Security” tab of the “Wi-Fi Network” section and set the following parameters:
Network key (ASCII): indicate from the Rostelecom agreement, if available. If not, come up with your own, using Latin characters and observing the complexity requirements.
After a few minutes (2-5) at the bottom of the screen, not far from the system clock, you will see a Wi-Fi network status icon.
Click on the icon that appears with the left mouse button and select yours from the available networks, with the name assigned in the SSID Network name item. Click the “Connect” button, having previously checked the “Connect automatically” checkbox.
A request for a network security key will appear, in which enter the Network key (ASCII) issued by Rostelecom or the one you created yourself and click OK.
If your key is entered correctly, you will see the following window indicating the connection process
After completing all the above 3 steps of the instructions, you will connect to the Internet using wireless access.
These instructions for setting up a Zyxel Kineetic Wi-Fi router can be applied as a universal one to the Zyxel Keenetic Lite, 4G, GIGA, Start models with minor variations in the graphical interface. It should also be taken into account that the equipment manufacturer can arbitrarily change the location of parameters, sections and tabs when improving the device.
Operating modes
So, the Internet center has four operating modes: A – main, B – adapter, C – amplifier, D – access point. Many people cannot understand the difference between them. In fact, everything is very simple.
The router can be the main device that gains access to the Internet (or IP television) via cable. It doesn’t matter whether it will be access from the provider directly via a dedicated Ethernet line or via a DSL or PON modem (that is, via a telephone or fiber-optic line). Next, other devices are connected from the router - via cable or over the air.
If the router gains access to the Internet in the Leningrad region through another data center (the main one), then these will already be three additional modes.
Access point - the router is connected to the main one via cable or radio. At the same time, it distributes Wi-Fi, is connected by a cable to the receiving device, or this happens simultaneously (usually a wire at the input, Wi-Fi at the output). Network parameters are set by Kinetic.
With the same initial data, when the network parameters are identical to the “mother” device, this is the “Amplifier” mode. Typically, a wireless connection is used here at both the input and output.
In the last of the remaining modes, the router accesses the Internet via Wi-Fi, and is connected to the receiving device via a cable - this is the “Adapter” mode.
Now about the difference between wireless connection to our Keenetic Air for “Access Point” and “Amplifier”. In the first case, the Wi-Fi parameters are set by the KN-1610, in the second - they are identical to the “mother” device.
In the “Basic” mode, the router serves as a “distributor” of the Internet to all devices. It creates a Wi-Fi network as an access point, and as an amplifier it expands the coverage area of the existing network (from the entrance to the room on the third floor of the far wing of the house). The adapter is used to access the network, say, from a neighbor to your computer or IPTV set-top box.
Setting up IPTV on the device
Zyxel Keenetic Giga generation III router: new features of a home Internet center
When using the “NetFriend Wizard” in the Zyxel Keenetic automatic mode, several points were missed. They concerned the issue of use. If such a service is connected, we will configure IPTV using the “Wizard” prompts. There is a picture on the page showing the LAN ports of the router. One of them is applicable for connecting an STB set-top box provided by Rostelecom for rent.
You cannot use a port that is open on a PC for configuration. Check the box next to the selected LAN connector. With this action we connect it to the WAN port programmatically, through which the Internet is supplied from Rostelecom. A “transparent bridge” is installed between them. This connector is not subsequently used for other purposes. Click “Next” and continue the process of automatic operation of the “Wizard”.
Without specifying VLAN ID
This option is used by most Internet providers. Television packages are transmitted untagged. To configure IPTV on Zyxel Keenetic, go to its interface at 192.168.1.1. It is written to the address bar of the browser open on the computer. Enter the login and password of the Keenetic wireless router into the fields of the form that opens. The default values are admin/1234. If we connect the digital interactive television service on an already configured router, enter the already changed administrator password.
Make sure that the latest firmware version is installed on the Keenetic router. Keenetic Internet centers with operating system version NDMS v2.06 and higher use the TV Port function. It allows you to programmatically allocate a LAN port for the STB set-top box. Version information is available in the Keenetic “System Monitor” interface in the bottom row of tabs. In it, go to the “System” section and select the “System Information” item.
In the next step, look for the globe icon (Internet) in the bottom row of tabs. On the page that opens, click the “Connections” section. Find a line in the list called Broadband Connection and click on it.
A page with connection parameters opens. Select the LAN port to which we connect the IPTV set-top box and mark it with a checkmark. WAN connector with a bird for Internet access. We additionally mark the “Enable” item.
Depending on the provider, select the desired entry from the “Configure IP parameters” list. For Beeline - “Automatic”, for the rest we leave it - “Without IP address”. We apply the entered settings for IPTV television on Zyxel Keenetic routers. The Zyxel Keenetic developers recommend enabling the IGMP Proxy service. To do this, go to the “Settings” section with the gear symbol and in the “Components” sector o.
Execute the “Apply” command. Now the STB set-top box is directly connected by software to the provider’s network.
Indicating VLAN ID
If traffic is provided in tagged form, to save the Internet, you need to create another IPoE connection. In the main menu, select the Internet icon in the form of a globe. In the row of top tabs, click IPoE Ethernet connection. Click the “Add Interface” button.
After that, in the new window that appears, enter the digital VLAN ID. You must first find out its meaning from the technical support service of the service provider.
On the connection settings page, check the boxes for those connectors that we want to connect with a “transparent bridge”. Check the “Transmit VLAN ID tags” box in the WAN field and re-enter the identifier value. We check the absence of Fr. Don’t forget to confirm the “Enable” command and click the “Apply” button.
How to make an access point and put a new password on it
The Wi-Fi network (access point) is created automatically in the settings. Its name is standard - with the name of the manufacturer. Not everyone likes it. In addition, there is not always a password on the network, and even if there is, it is a weak one. How to set new, unique data for your network:
- We open the central section at the bottom for Wi-Fi. In the first menu, we first activate the network (check the box).
- We set a suitable name in English (you can write Russian words, but also only in English letters, insert numbers and dashes with underlining).
- The most important thing is to install WPA2 PSK protection. Below in the key field we enter the most complex password. Write it down separately in your notebook.
- What else can be changed is to indicate the country and the combined bgn network standard.
Save everything at the end. In the access point, enter the network name and password