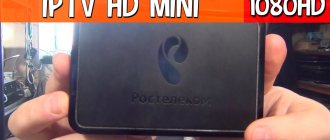
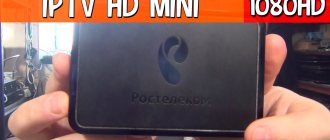
Access to Rostelecom interactive television is impossible without special receivers. The company offers many models, and it can be difficult for the user to decide which one to buy. Below is an overview of the IPTV HD Mini set-top box - one of the most common and modern from Rostelecom. The set-top box was developed by the Ufa plant Promsvyaz and largely copies its Chinese counterparts.
Specifications
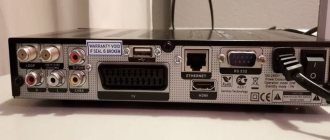
In terms of appearance and connectors, the IPTV HD Mini set-top box from Rostelecom is no different from most similar devices. It is made in a compact case made of matte plastic. All connectors are located on the back side:
- RJ-45 (LAN) for Internet via fiber optic cable;
- USB 2.0;
- 3.5 for sound output;
- HDMI;
- optical output S/PDIF;
- power connector.
The filling can also hardly be called unique:
- chipset STi105;
- RAM – 256 MB;
- ROM – 128 MB;
- OS - Linux 2.6.35;
- support for drives formatted FAT16/32, NFS, Ext2/3;
- video support - 1080i/p, 720p, 576p, 480p, NTSC, PAL.
Equipment
The IPTV HD Mini TV set-top box includes:
- 12V power adapter;
- batteries for the remote control, type “AA” – 2 pcs.;
- Ethernet cable – 5 m;
- HDMI cable – 1.5 m;
- remote control;
- wire mini jack – RCA – 2 m;
- RCA – SCART adapter;
- warranty card;
- user guide.
Functions
The main task of the Rostelecom set-top box is to receive, decode and display the signal on the screen. In addition, you can use it:
- subscribe to paid services;
- write data to external media;
- view the TV program, including archived programs;
- install informational and entertainment widgets.
The functionality of a digital set-top box for interactive television does not end there. It offers a large set of settings, which are divided into system and user. It is not recommended to change anything in the first category, as this may lead to failures.
It is worth noting that this model is used not only by the provider Rostelecom. It is universal, and to work for a specific operator, proprietary firmware is installed on it. And this is a huge minus. If the user refuses the services of the provider, then he will have to flash the Rostelecom IPTV HD Mini set-top box in some unofficial way in order to use it with other telecom operators. Otherwise, it will simply turn out to be a useless gadget.
What is needed for flashing
To flash a TV set-top box from Rostelecom, you need to go through four steps:
- Preparation.
- Reset settings.
- Official firmware.
- Alternative firmware.
It is important to understand that not all models can be reflashed. The instructions described below are suitable for the MAG-200, MAG-250 and IPTV RT-STB-HD Standart brands.
There are two ways to flash a Rostelecom set-top box:
- By Multicast.
- C USB flash drives.
Connection
Connecting the set-top box to the TV is not difficult. If you study the instructions, this will not cause any big problems, besides, all the necessary wires are included in the kit. The setting is performed according to the following algorithm.
- The set-top box is connected to the Internet via a LAN cable.
- After plugging in the device, the blue ready-to-use indicator will light up on its display.
- The TV and receiver are connected via an HDMI cable. If the TV is an old model, then you can use an RCA or SCART cable through an adapter.
- On the TV, you should indicate the signal source (HDMI, SCART, RCA, depending on the selected connection method).
- A window will appear for entering your login and password. The necessary data is indicated on the back of the device.
- In some cases you will need to enter a PIN; by default it consists of four ones or zeros.
- If all the steps are performed correctly, a start window will open with the question “what to watch.”
Official firmware from USB flash drive
- Download the Informir software version.
- Upload the bootstrap and imageupdate files to the “Mag250” folder on the prepared removable media.
- Insert the flash drive into a special slot on the device body.
- Go to the console menu.
- Follow the path: “System settings” - “Setup” - “Update software” - “Update via USB” - “Start update”.
- Check the serviceability and correctness of the files copied to the flash drive.
- Click "OK".
If an error occurs during the installation process, do the following:
- delete data from the memory card and write it again;
- check the folder name for errors and correct them;
- start the process in another way.
The second way to launch firmware from a flash drive:
- Insert a USB flash drive with downloaded files into the receiver.
- Press and hold the “Menu” button on the remote control.
- In the Bios settings, select the Upgrade Tools section.
- And enable USB Bootstrap.
After installing the new firmware, the set-top box will reboot.
Official firmware via Multicast
To reflash the receiver via Multicast you need to:
- Copy the Bootstrap, imageupdate, mcast, dualserver files into one folder on your computer.
- Connect the set-top box.
- Go to the BIOS settings (by holding down the “Menu” button).
- Select the Upgrade Tools section.
- Connect the receiver to the computer via a LAN cable.
- Go to network connection properties.
- Select the sub-item “Internet Protocol Version 4 (TCP/IPv4)”.
- Enter the data: IP address - 192.168.1.1, subnet mask - 255.255.255.0.
- Run the “dualserver” file from the folder via the command line (the command line is called by the WIN+X button combination).
- Run file
- Select the changed connection type.
- Press the “SELECT” button.
- Enter the data in the window that appears:
- IP – address of the first stream – 224.50.0.70:9000;
- IP address of the second stream is 224.50.0.51:9001.
- Click "Start" for both streams.
- Wait for the process to complete.
- Open the BIOS settings of the set-top box again.
- Select the path “Upgrade Tools - MC Upgrade”.
- Receive a message about the start and end of the firmware.
- Reboot the receiver.
This completes the official flashing process. To get more advanced set-top box capabilities, you must install an alternative option.
Possible faults
Like any equipment, the Rostelecom set-top box may begin to behave incorrectly. User reviews point to several common glitches.
Doesn't respond to remote control
Very often IPTV HD Mini does not respond to settings using the remote control or freezes. In this case, the set-top box can function properly, play video, but you will not be able to call up the menu, scroll through the video or perform any other actions using the remote control. The LED on the front panel responds by flashing red, but nothing happens.
As a rule, after some time the situation will repeat. The problem is widespread and is resolved remotely by the provider. Users can only wait for this to happen and put up with temporary inconveniences. To make the process go faster, reviews recommend bombarding technical support with failure messages.
Red-green indicator lights up
If immediately after turning on the image does not appear on the TV, and the Power indicator on the receiver’s display lights up red-green (or yellow), then the problem may be in the power supply. You will need to buy a new one or replace it at a service center if the set-top box is under warranty.
Self-shutdown
The last problem is the set-top box turning off some time after starting work (usually after 20-30 minutes). Investigation of the failure showed that the failure was caused by overheating of the capacitor on the board. At the same time, if you cover the console, it will turn off faster; if you cool it, it will work a little longer. Repair will require desoldering the capacitor and replacing it with a new one. However, it is not recommended to carry out such work on your own; it is better to contact a service center.
Alternative firmware
Before you start, you must also prepare a bootable USB flash drive:
- Select a flash card no larger than 8GB.
- Format it in FAT system
- Create a folder “mag250” on the media.
- Transfer the Bootstrap and imageupdate files to it.
Alternative firmware via the console menu
- Open the “Settings” section in the device menu.
- Press the “SETUP” button.
- Select the “Software Update” section.
- Find “Update via USB”.
- Click "Start".
- Check the integrity of the data on the media.
- Click "Start".
After the update is completed, the bailiff will reboot on its own.
Alternative firmware via BIOS parameters
The flashing process from BIOS is similar to the method described above with the standard version.
- Open the BIOS (while turning on the device, press and hold the Menu button).
- Open "Upgrade Tools" and "USB Bootstrap".
- Insert the removable drive into the special USB connector on the receiver body.
- Click "OK".
- Wait until the firmware is installed and the system reboots.
If at any stage an error message appears, you need to delete the files from the memory card and rewrite them again. Or use another firmware method.
In the modern world, not a single person can do without watching television programs, reality shows, films and series. But not everyone has the opportunity to connect expensive tariff plans and additional packages to their equipment. An alternative (modified) firmware for the Rostelecom set-top box will retain all the main functions of interactive TV - recording, rewinding, pausing, but will also add many others to the main channels.
Technical characteristics of the IPTV HD mini set-top box
- Processor: STi7105
- RAM: 256 MB
- Flash memory: 128 MB
- Operating system: linux 2.6.35
- File systems: FAT16/32, NFS, Ext2, Ext3
- Video modes: 1080i, 1080p, 720p, 576p, 480p, PAL, NTSC
- Supported Middleware: SmartLabs; CTI TVE; IPTV Portal; Cubiware CubiTV
- Supported VoD: Espial-Kasenna, Bitband, ARRIS (C-COR), Live555
The IPTV HD mini set-top box is very compact, its size is only 127mm x 85mm. Early versions of set-top boxes of this model were equipped with 12V 1.5A power supplies, and newer ones were equipped with 5V 1.5A. Set-top boxes are actively purchased by Rostelecom subscribers along with the digital interactive television service. Unfortunately, this model does not have proper reliability. Many subscribers were found to have very serious technical defects during the warranty period. It is these defects and how to eliminate them that I would like to share with you.
Technical characteristics of the IPTV HD Mini set-top box
The Rostelecom IPTV HD Mini set-top box has certain similarities with IPTV 103 HD. The updated compact body is overly similar to the MAG-250. Did the developers really take the path of least resistance and present not a new console, but a collective image of previously released devices? To finally understand this, you need to carefully analyze the technical characteristics.
In fact, there are still certain differences. For example, specialists from the Ufa plant have worked hard on the practicality of the device. Preference was given to a matte black body, which does not show fingerprints. Agree that this is a real godsend for users, since previous models were produced in a glossy case, which was quite easily soiled.
The location of the USB connectors is another significant difference. The IPTV HD Mini set-top box from Promsvyaz does not have an input on the front side, since it was moved to the side of the case. This is a very good decision. For example, on the MAG-250, many users connect various devices via the front USB connector, which increases the risk of mechanical damage to the connected devices. The user may simply not notice the cable and catch it with his foot.
Otherwise, the consoles are really very similar. On the rear panel there is a traditional set of interfaces:
- LAN connector for connecting an Ethernet cable (Internet connection speed - up to 100 Mbit/s);
- USB 2.0 port;
- composite mini jack input for connecting headphones, speakers, audio systems;
- HDMI interface;
- optical S/PDIF connector;
- socket for connecting a 12 V power supply.
The STi7105 central processor is responsible for the performance of the set-top box. As for RAM and built-in memory, according to these indicators the device is identical to the MAG-25- and IPTV 103 HD set-top boxes. Technical characteristics of IPTV HD Mini:
| CPU | STi7105 |
| RAM | 256 MB |
| Flash memory | 128 MB |
| operating system | Linux 2.6.35 |
| File systems | FAT16/32, NFS, Ext2, Ext3 |
| Video modes | 1080i, 1080p, 720p, 576p, 480p, PAL, NTSC |
| Supported Middleware | SmartLabs; CTI TVE; IPTV Portal; Cubiware CubiTV |
| Supported VoD | Espial-Kasenna, Bitband, ARRIS (C-COR), Live555 |
The specifications fully meet the requirements of modern users.
Contents and optional HDMI cable
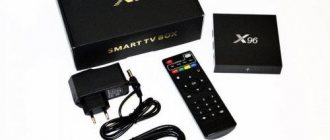
This device has standard equipment. In the IPTV HD Mini package you will find the following:
- 12V power adapter;
- remote control;
- two AA batteries for the remote control;
- five-meter Ethernet cable;
- one and a half meter HDMI cable;
- two-meter mini jack-RCA wire;
- adapter from RCA to SCART;
- user instructions;
- warranty service card.
A serious advantage of this set-top box is the presence of all the necessary wires. Therefore, the user will be able to connect the device to any TV model, as well as connect additional devices: audio system, headphones, etc.
Turning on the set-top box
First you need to connect the set-top box to the TV. Considering that all wires are included in the basic package, this should not be a problem. The connection setup process is described in detail in the user instructions. Connect the power supply to an outlet. As a result, the blue indicator located on the front panel will light up.
Turn on the TV. Using the remote control, select the signal source. To do this, click on the “Input” button, and then select “AV Video Input” or “HDMI” - depending on the type of connection of the set-top box. Modern TV models are equipped with several HDMI interfaces, so the user needs to select the exact number of the connector into which the cable is actually inserted.
If you did everything correctly, a window for entering your login and password will appear on the TV screen. You will find this information on the back cover of the console. Rewrite them in the appropriate lines, and then click “Confirm”. In some situations, immediately after entering your login and password, the set-top box asks for a PIN. Why is this happening? The need to enter a secret code is due to the activation of the parental control option. The default PIN is “0000” or “1111”.
What to do if the codes don't match? Call customer service. To contact the operator, dial the toll-free number 8-800. It is possible that there is a different short code in your region. This information can be found in the instructions or on the official Rostelecom website. When the PIN is entered correctly, the start screen will open with the message “What to watch?”.
Preparation
Before you begin the software installation process, have all the necessary tools ready. Having everything you need at hand, you can quickly and easily carry out the firmware, as well as correct the situation if any failure occurs during the manipulations.
Necessary
Depending on the chosen method of installing the software and the desired result, the operations may require the following:
- A laptop or PC running Windows of any current version;
- A high-quality patch cord through which the TV Box is connected to the PC network card;
- USB storage device with a capacity not exceeding 4 GB. If such a flash drive is not available, you can take any one - in the description of methods for installing the system in MAG250, which will require this tool, it is described how to prepare it before use.
Types of firmware, download
The popularity of the MAG250 is due to the large number of available firmware for the device. In general, the functionality of different solutions is very similar and therefore the user can choose any version of the system, but shells modified by third-party developers have much more options. The methods for installing official and modified operating systems in MAG250 are completely the same. When downloading packages, you should take into account the fact that in order to fully flash the device firmware, in all cases you will need two files - the “Bootstrap***” loader and the “imageupdate” system image.
Official software from the manufacturer
The examples below use the official version of the shell from Infomir. You can download the latest version of the official firmware from the manufacturer's FTP server.
Download official firmware for MAG 250
Modified software shell
As an alternative solution, the firmware from the Dnkbox team is used, as a modification characterized by the presence of many additional options, as well as the shell that has received the largest number of positive user reviews.
Unlike the official version of the system installed in the set-top box by the manufacturer, the solution from DNA is equipped with the following capabilities:
- TV program from yandex.ru and tv.mail.ru.
- Integrated Torrent and Samba clients.
- Support for user-created menus.
- Automatic start of IP-TV.
- Sleep function.
- Recording the media stream received by the set-top box to a network drive.
- Access to the software part of the device via the SSH protocol.
There are several versions of the shell from DNK, designed for installation in different hardware revisions of the device. You can download one of the solutions from the link below:
- Archive "2142". Designed for devices that have the STI7105-DUD processor installed.
- The files from the “2162” package are used for installation in set-top boxes with an STI7105-BUD processor and AC3 support.
Determining the hardware version of MAG250 is very simple. It is enough to check the presence of an optical connector for audio output on the back panel of the device.
- If the connector is present, it is a set-top box with a BUD processor.
- If missing, the DUD hardware platform.
Determine the revision and download the appropriate package:
Download DNK firmware for MAG 250
To install alternative firmware in the MAG 250, you must first install the official version of the system “cleanly”. Otherwise, errors may occur during operation!
Functional
IPTV HD Mini set-top box is a device designed to provide reception, decryption and display of a signal. This is the main purpose of the receiver. Let us briefly list the main functionality of the set-top box of this model:
The functionality of the device is not limited to this. The console has quite a lot of useful parameters. All settings are divided into two groups: “System” and “My”. Experts strongly do not recommend changing system parameters, since incorrect values can lead to malfunctions in the operation of the set-top box.
Special attention should be paid to the parental control option. It can be accessed through the “Access Level” section. The user will be able to configure age restrictions in this section. The “Social Networks” and “Weather Forecast” widgets will also be useful. All these features can be customized.
We've sorted out the functionality. It's time to briefly list the main advantages of the console in question:
There are indeed many advantages, but there are also disadvantages. The main flaw is the lack of an internal portal. This means that the set-top box will not function without firmware from the provider. Therefore, users will not be able to use the device as a media player. If in the future you refuse the services of the operator, the set-top box will lie idle.
Another drawback is compatibility problems when connecting Wi-Fi adapters. For example, currently the firmware from Rostelecom does not support devices manufactured by Smartlabs. Of course, this may create additional inconvenience. Today, the set-top box in question is also actively used by the operator Bashtel.
Proxy
For devices and players that do not support multicast broadcasts via the UDP protocol, it is advisable to use a UDP proxy (IPTV proxy). Additionally, this solution will reduce the load on the network due to IPTV broadcasting via HTTP. It will be relevant for mobile devices and TVs with Smart TV.
are best adapted for using UDP proxy IPTV.
Setting up a proxy for Android devices:
- Let's launch IPTV.
- Call up the application settings.
- Select the item “UDP proxy settings”.
- ABOUT.
- Enter the IP and “Port” of the router specified when setting it up.
Setting up a device for IPTV is a simple matter that any user can handle, knowing the features of the process for their case. It is impossible to cover all models of routers, TVs and adjustments for providers in one article.
Therefore, if you have any questions, please write in the comments, we will definitely try to figure it out and help you solve the problem with setting up IPTV. Please rate if you liked the article and found it useful! Thank you, come again)
HomeNetwork devicesWi-FiSetting up IPTV via a router | IPTV over Wi-Fi and wired connection
Blog about modems, routers and gpon ont terminals.
Not long ago, the ranks of branded TV set-top boxes at Rostelecom were replenished with a new copy - IPTV HD mini from the Ufa plant Promsvyaz. I must admit, I missed her appearance because I considered her another reincarnation of the immortal MAG-250 TV set-top box. And this is not surprising - outwardly they practically copy each other. Even the dimensions of the case are the same:
Everything turned out to be much more interesting. This is also our old friend - IP-TV 103 HD in a new, compact case, suspiciously similar to the Infomir MAG. Only the latter’s plastic is glossy and easily soiled, but the Ufa brainchild’s is matte and fingerprints are no longer so noticeable. The second difference that immediately catches your eye is the location of the USB ports: on Promsvyaz IPTV HD Mini, the connector from the front panel was removed to the side. This is also the right decision, in my opinion. On my MAG-250, a rather long WiFi module is included in the front connector and I’m always afraid of breaking it. And if you connect a flash drive with bright backlight, watching TV is also not very comfortable for the eyes. This problem was fixed here.
The rear panel has the same set of connectors:
— Ethernet network port 100 Mbit/s. — second USB 2.0 port — composite mini jack connector — S/PDIF — optical (Toslink) — HDMI 1.3a — 12V power supply connector
The TV set-top box is built on the STi7105 chip and has 256 MB of RAM and 512 MB of Flash memory on board. In this, it again completely copies MAG-250 and IPTV 103 HD - the insides are the same. Therefore, the possibilities are identical:
Supported video modes: 1080i, 1080p, 720p, 576p, 480p, PAL, NTSC Supported video codecs: MPEG1/2 [email protected] , H.264 [email protected] 4.1, MPEG4 part 2 (ASP), XviD Audio codecs: MPEG-1 layer I/II, MPEG-2 layer II, MPEG-2 layer III (mp3), MPEG-2 AAC, MPEG-4 AAC, MPEG-4 AAC+SBR Playable video formats: MKV, MPEG- TS, MPEG-PS, M2TS, VOB, AVI, MOV, MP4, ASF, QT Audio formats: MP3, MPA, M4A, Ogg, WAV, AC3, AAC Supported file systems: FAT16/32, NFS, Ext2, Ext3
The device is supplied with: STB set-top box IPTV HD 103 mini, power supply 12V 1.5A, remote control with AA batteries - 2 pcs., Ethernet network cable 5 m, HDMI-HDMI cable 1.5 m, mini jack-RCA cable long 2m (3 tulips), RCA-SCART adapter, user manual and warranty card.
Now about the sad stuff. The main disadvantage of Promsvyaz IPTV HD Mini is the lack of an internal portal. In other words, without firmware for a specific operator, STB will not work, and you will not be able to use it as a media player. This means that after disconnecting from the telecom operator, the set-top box will remain with you as a “dead” weight. Another disadvantage is that you can work with USB WiFi adapters only if they are supported by the firmware used. For example, now Rostelecom firmware from Smartlabs does not support them.
At the time of writing, this model is used not only in Rostelecom. As far as I know, they are actively used by OJSC Bashinformsvyaz (Bashtel).
Did it help? Recommend to your friends!
Preparation
If the image on your TV has deteriorated or doubts creep in that digital TV is not working as it should, you should think about updating the software.
It is necessary to prepare for this process. To do this, you will need to download the necessary files and have a computer or laptop.
Firmware for a TV set-top box from Rostelecom is done using a computer with a free Ethernet input.
The set-top box will be connected to it. In addition, you will need a network cable that will connect the set-top box and the computer.
The software you will need is mcast.exe and dualserver (or its equivalent). You need to download the latest firmware files from the company's website. They will be called " bootstrap " and " imageupdate ".
It is not recommended to flash the device using third-party tools if at least one official update has not been installed.
Cadena devices will require a USB flash drive with a capacity of up to 8GB formatted in FAT32. The firmware downloaded from the site will be recorded on it.
Promsvyaz IPTV HD Mini set-top box for Rostelecom: 100 comments
Good afternoon I bought such a set-top box, I would like to transmit the signal to it not over twisted pair, but through a Wi-Fi whistle. I can't find a list of Wi-Fi adapters. Perhaps the same ones as for MAG are suitable? (article WiFi adapter for MAG 250 - selecting and setting up a connection)
Nothing suits her at all. Only buy a WiFi bridge then. Although I would recommend PLC adapters.
However, comrades from w3bsit3-dns.com managed to flash this box
