| Developer: Intel | License: Free |
| Version: 1.0 | Update: 24.06.2021 |
| Windows: 32|64-bit XP, Vista, 7, 8, 8.1, 10 | Size: 86.8 MB |
| Language: Russian, Ukrainian, English, etc. | Category: System |
Go to download Go to discussion
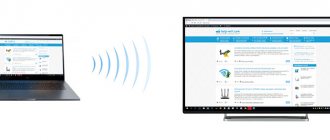
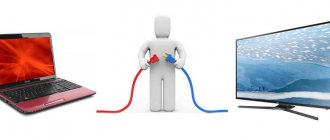
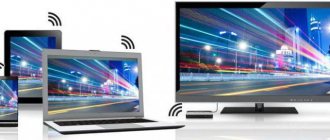
WiDi is a modern technology that allows you to transmit a video signal from a laptop to a TV or projector, and both devices must support it, so if you want to use this protocol, you need to download a special application. Data transfer is carried out via Wi-Fi, therefore, you do not need wires, which is more than convenient, because in order to transfer the image to a TV device, you can be in another room. If your TV does not support wireless data transfer, then purchase a special adapter and connect it to the TV using an HDMI cable.
Fixes
If for some reason there are no wi-fi adapter drivers on your computer, or if after updating the operating system to ten they are no longer relevant, then reinstalling them will not be difficult. For this:
- Go to "Hardware" and then to "Device Manager".
- Select Network Devices.
- Right-click on the Wi-Fi adapter and click on “Update Driver”.
The system will search and install via the Internet, after which mirascreen configuration can be performed.
If the laptop or computer was manufactured before 2014, most likely the fact is that at that time the operating systems did not yet support the Miracast function. In order for the adapter to start supporting, the drivers should be updated to the latest ones. You can find them on the website of the wi-fi adapter manufacturer or the resource that Windows works with.
TVs with the Miracast function began to be produced quite recently, although they were equipped with wi-fi adapters for a long time. In order for the TV to support the function, the firmware on it must be updated. Without this, the connection will take a long time, and eventually a message will appear stating that the connection is impossible. This problem can be seen on all-in-one PCs and laptops based on Intel processors.
Originally posted 2018-04-17 09:52:26.
Analogue Miracast
There are other technologies. For example - WiDi. Many modern TVs support it. The big difference compared to Miracast is that in this case it is necessary to install additional software - Intel Wireless Display.
It is worth noting that this program has certain requirements, due to which it does not work on every computer or laptop.
In this regard, Miracast wins, since Windows 8.1 and older are sufficient for its operation. There is no need to install any additional programs.
The advantages of WiDi include the ability to connect to a receiver, which, in turn, is connected to the TV if it does not have a built-in Wi-Fi adapter.
Setup on a laptop or PC
In order to connect to a TV (Samsung, LG, etc.) using Miracast, you must have Wi-Fi adapters for both gadgets.
Please note that:
- Your PC must have Windows 8.1 or higher operating system installed;
- your TV must be modern and support Miracast or Screen Share (the name of the technology depends on the model).
To duplicate the display, you need to follow these steps.
- Turn on your TV and make sure it is connected to Wi-Fi. This happens differently on different models. Here is an example for LG.
- Press the “Smart” button on the remote control.
- Immediately after this, a menu will open.
- You need to navigate (using the right arrow on the remote control) to the “Screen Share” application. After that, click on the “OK” button.
- Immediately after this, the necessary utility will launch.
- Now press the key combination Win + P on your laptop or computer. A menu will appear on the right side of the screen, in which you need to click on the “Connect to a wireless display” link.
- After this, you will need to wait until Windows finds your TV.
- The name that was specified earlier should appear in the list.
- Click on this device to start connecting.
Immediately after this, a picture from your PC or laptop should appear on your TV display.
Connection problems
When connecting, the following error may appear.
You can correct the situation as follows.
- Click on the Start menu and click on Settings.
- Go to the "Devices" section.
- After this, you need to click on the “Add Bluetooth or other device” button.
- A new window will appear. In it you need to select the “Wireless display or docking station” item.
- Immediately after this, the search will begin. You need to wait a little.
- As soon as your TV appears in the list, you will need to click on it.
- After this action, the connection will begin (it may take a long time).
- If successful, the wireless display will be added to the list of devices.
Now press the Win + P key combination again and try to connect. Everything should work. If so, the message “Connected” will appear.
Firewall problem
If you still cannot connect, then the problem may be with your antivirus, or more precisely, with your firewall. This traffic protection system works differently on different programs. Let's consider a way to solve this problem of communication between a TV and a laptop using the example of the Eset Smart Security program.
First, try disabling this feature completely. To do this, right-click on the antivirus icon in the tray and select the desired item.
After this, repeat all the steps described above to connect to the TV. If everything works out this time, then the problem is in the firewall. But keeping it turned off all the time is not an option.
Typically, it runs in automatic mode by default. You need to switch to interactive mode. You can do this using the following steps.
- Open an antivirus window.
- To launch the settings, press the F5 button on your keyboard. In the window that opens, go to the “Personal Firewall” section and expand the “Advanced” category.
- Switch "Filtering Mode" to "Interactive".
- Save the settings by clicking on the “OK” button.
Try connecting to the device again. This time you should see the windows shown below. Allow network traffic to and from your computer to your TV.
Be sure to check the box next to “Create a rule and remember forever”
This time everything should end in success.
How to set up on laptop and PC
The function is present in most modern laptops and computers. The main thing is to figure out how to configure it and connect the PC to another screen.
Settings
There are many ways to customize Miracraft. The user can choose the most convenient option for him. Regardless of the method used, the result will be the same.
Keyboard shortcut
Enabling and configuring Miracast using a keyboard shortcut takes literally a few minutes. How to enable Miracast on a laptop with Windows 10 is shown in the instructions:
- Activate the wireless network on your PC. You should also enable this feature on your TV or connected device.
- Press keyboard shortcut Win+P on the keyboard of a laptop or computer (works also on the on-screen keyboard).
- This will bring up the Projection . At the very bottom of the panel that pops up, you need to click on “Connect to a wireless screen” .
- After which the display will show that a search is in progress for devices available for connection. When it ends, select the required display from the displayed list.
- As soon as the connection is made, the computer desktop image will be displayed on the second screen.
Advice! It is recommended to find out in advance how exactly the name of the TV is displayed when searching for devices available for connection.
System parameters
To set up a wireless connection between two displays, you need to do the following:
- Go to the Start and go to Settings . This can also be done using the key combination VIN+I .
- Go to panel "Devices".
- Through the side menu, go to the “Connected devices” . Here it is possible to connect a PC to a new one by clicking on “Add device” .
- After this, the system will search for available gadgets. You must select the one you need from the list that appears.
Via WiDi
There are other technologies similar to Miracast. One of them is WIDI. It is also supported by modern TVs and screens. But unlike Miracast, it requires installing additional “Intel Wireless Display” software to work.
Widi is good because it can be used to connect to a laptop even a TV that does not have a Wi-Fi adapter. The connection in this case goes to the receiver, which in turn has a direct connection to the screen.
How to transfer an image from the Android screen via Wi-Fi (broadcast)
1) First you need to open the Windows 10 settings (this can be done through START (as in the screenshot below), or you can simply press Win+U).
Options
2) Next, open the “System/Project to this computer” section and:
- allow projection (for example, indicate “Available everywhere”);
- set it to “On every connection” mode (so that if someone wants to broadcast to your screen, you will be asked about it);
- I would recommend disabling the PIN code (when you enable it, in some cases the connection impossibility error appears).
Windows 10 Setup: System - Project to This PC
3) Open the notification window on your phone (by pulling the topmost line with notifications towards you), and click on the “Share screen image” function
Please note that there may be alternative names: “Broadcast”, “Smart View” (this is on Samsung phones) and other derivatives
I note that Android must be at least version 5* (4.4).
Send screen image
Smart View (on Samsung phones)
4) In the corner of the screen (under the time), click on the icon with three dots and turn on the display of all devices (see screenshot below). Then click on your device, in my case it is “alex-pc” (if, of course, it is found...).
Choosing a Wireless Monitor
5) After which a notification should pop up in the corner of your screen on your laptop/computer with the question: “Should I allow projection here for such and such a device...” (example below). Click "Yes" of course...
Allow PC projection
6) Next, a warning will appear (on the entire screen) that the connection will be established soon (usually this takes no more than 10-15 seconds).
Projection will start soon
7) In general, that’s all, ready! Afterwards, you can start viewing some photos, and they will be displayed on the computer screen (if you start the game, you can also watch it, although there will be slight freezes and lag*). A couple of examples in the photo below.
Broadcast from phone screen to laptop
* Peculiarities:
- The broadcast occurs with a slight delay (about 0.5-1 sec.!). I tried several different phones/laptops/PCs - the delay was always about the same (the same 0.5 seconds);
- Due to latency, broadcast mode can only be used to view photos, videos, and present presentations. For everything else, where speed and reaction are important (for example, games), it cannot be used due to the delay;
- To be able to broadcast, you must have an Android version of at least 5* (although this function is available on one of my smartphones with Android 4.4 - but it does not connect to either a PC or laptop), and Windows 10 is installed on the PC/laptop (not lower than version 1809).
PS
If you were unable to configure your phone and computer to broadcast images from one screen to another, then you can simply copy photos and videos from Android memory to your computer’s hard drive. The link below will help!
Additions, as always, are welcome...
Good luck!
RSS (how to read Rss)
Monitor without wires - new boundaries of leisure
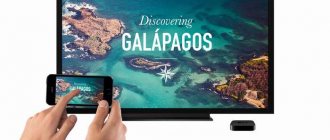
People have long dreamed of getting rid of network connections and wires. Intel began to make dreams come true by creating a wireless monitor. Wi-Fi Display is an opportunity to see photos, videos, in general, everything that is displayed on the screen of a computer, smartphone, etc., on a large TV monitor using a wireless connection. Now you can play your favorite games, watch movies, enjoying high-quality and large images.
There is one minus. Everything that is displayed on the phone display will be visible on the TV screen. For example, you decide to watch a movie with friends by launching a wireless monitor from your smartphone . While watching, you receive a message on Skype. The alert text displayed on the phone will be visible on the screen.
It is worth taking this into account: do not touch the smartphone display or say goodbye to privacy.
Miracast Basics
It is already clear to you that the Miracast standard allows you to establish a wireless connection between two gadgets. After such a connection, any information is easily transferred from one electronic source to another. The operating principle of the technology is based on a Wi-Fi Direct network connection. This ensures the transmission of video material with maximum resolution and at the same time with impressive surround sound.
Many users welcome this connection as it guarantees high-quality transmission and broadcasting of any video and audio material
In this case, it doesn’t matter what formats, sizes they have, or what codecs they need. It is also surprising that with the help of this technology it is possible to transfer even files that were write-protected by the manufacturer
How the technology is used
Despite the fact that the “age” of such innovative and promising technology is still quite young, it can still be used on a large number of electronic devices. One of the advantages of Miracast is that it is successfully used on various operating systems, including not only computer equipment, but also modern smartphones. It was this feature that predetermined the technology’s leadership over similar “products” from Google and Apple.
Consumers are also delighted by such a feature of Miracast as maintaining the absolute quality of transmitted materials. It is for this reason that it was easy to part with HDMI, the strength of the connection to which, the commitment to it was formed over the course of a decade. By the way, if you own a TV that does not support Miracast, you don’t have to worry about being left behind by modern technical progress. All you have to do is purchase an adapter and connect it to the HDMI port.
What is Miracast
Miracast (MiraScreen) is a technology with which you can easily display the actions taking place on one device on a third-party monitor. For example, display a picture from a phone to a computer or from a computer to a TV. These are not the only combinations; mutual projection is possible between all devices that support Miracast.
With Miracast you can see what's happening on your phone on your laptop screen
The technology was patented in 2012; its predecessor was Wi-Fi Direct technology. Since then, it has been actively implemented in laptops, TVs, mobile Android and IOS devices.
Benefits of Miracast
The main advantage is the possibility of wireless synchronization: you don’t need to route an HDMI cable, look for adapters for it and tinker with the settings; you just need to allow pairing between devices and start enjoying the process.
Moreover, to establish a connection, you do not need a Wi-Fi network; the paired devices are combined and exchange data using another method, creating a personal network channel. This eliminates the problem that would be present with a connection via DLNA technology, which performs all the same functions but uses the home network for synchronization. With this method, any load on the router caused by another user's connection could interrupt or weaken your signal. When sending videos via Miracast, you will not encounter such a problem, because the third wheel will not be able to interfere with your session.
Through Miracast you can copy what is happening on your tablet to your TV
No less important merits of Miracast:
- high image transmission speed, support for IEEE 802.11n standard. When playing games, you will not experience any lag or FPS drops;
- powerful compression that allows you to share a large amount of data in the shortest possible time. For example, broadcasting FullHD video will not cause glitches or resynchronization;
- support for 3D video broadcasting;
- the most simple and understandable control design, the use of technology is within the capabilities of any user;
- a large number of devices that support Miracast.
Flaws
There is only one drawback - the maximum transmission quality is 1920x1200, that is, you will not be able to transmit video in UltraHD. But it’s worth considering that almost no one has devices that support higher resolutions, and they are very expensive. So you will most likely never encounter this limitation.
Disadvantages of technology
Despite the public's enthusiasm, the system has a number of disadvantages. After testing and using the wireless monitor, users noted the following problems:
- Braking at work.
- Poor picture quality on the screen.
- Difficulty connecting to some devices.
If you want to play games or watch movies, it is better to do so using an HDMI cable. Wires ensure uninterrupted data transfer, and the wireless monitor system has not yet been improved, so slowdowns may occur. Agree that watching a movie or playing your favorite game is not very pleasant if the video freezes.
In some cases, users note a deterioration in image quality. A fuzzy picture is also not delightful, so if problems arise, use wires.
A wireless monitor is an excellent opportunity to view information from a tablet, smartphone, or laptop on a TV monitor. This function is not always appropriate, but it can bring new experiences to leisure and work.
Dear readers of our portal! Have you tried the wireless monitor feature? How are your impressions? What problems did you encounter? We will be glad if you share your personal experience!
If the DNS server does not respond, change it!
Each more or less large provider has its own DNS servers. And all network settings are made in such a way that when a subscriber connects, he automatically receives everything he needs to work. Including the addresses of the necessary servers. But not everyone can boast of a stable job. Some telecom operators generally leave their DNS at the “as is” level, without paying due attention to it. But in the end, it works very poorly, problems constantly arise with it and it crashes, causing users to receive errors like “The DNS server is not responding.” The use of public servers from the largest IT companies in the world will help solve the problem. I prefer to use Google public servers:
8.8.8.8 8.8.4.4
Or from Yandex:
77.88.8.8 77.88.8.1
How to register them in Windows 10?! Very simple! Click the Start button and open Operating System Settings. We need the “Network and Internet” section:
In the menu on the left, you need to select the type of connection through which you access the Internet, and on the right, click on the link “Configure adapter settings.” The Windows Network Connections window should open:
Right-click on the connection icon and select “Properties” from the menu that appears. The following window will open:
Here you need to find and double-click on the line “IP version 4 (TCP/IPv4)” to open the Internet Protocol properties window:
Here you need to check the “Use the following DNS server addresses” checkbox at the bottom of the window. After this, two fields below will become available, in which you need to enter DNS IP addresses. Above you see an example with Google servers, and below - from Yandex:
After that, click on the OK button to apply the changes. Now we launch the browser again. The “err name not resolved” error should be resolved.
Possible problems when using Windows 10 as a wireless monitor
Everything doesn't work as perfectly as we would like. This may be because the Project to This PC feature is in development mode. For example, it is not always possible to connect devices the first time. Sometimes I had to restart my computer. Because when connecting to another computer, the error “Could not connect” simply appeared.
Or the receiving computer (in the Connect app in Windows 10) was displaying a "There's a problem with projection" error.
If you were unable to set up projection to a wireless monitor in Windows 10 the first time, try again. If the settings display a warning that your device may have problems displaying content due to its hardware (I wrote about this at the beginning of the article, there are also screenshots there), then be prepared for the fact that the “Project to this” function the computer" will not work at all. Or it will not work with all devices.
Solving the most common problems:
- In Windows 10 settings, “Project to this PC” does not work, the settings are grayed out. Error: “We are still trying to determine the capabilities of the component” or “This device does not support Miracast reception and cannot project wirelessly.” Make sure your computer has Wi-Fi enabled and is working. Check the status of the wireless module in Device Manager. The module installed on your computer may not support Miracast, so this function is not available. You may find the article updating (installing) the Wi-Fi driver in Windows 10 useful. You can also try updating the driver if there is an error in the wireless monitor settings: “This device may have problems displaying content because its hardware has not been specifically designed for wireless projection."
- If other devices cannot see the wireless monitor, make sure that they are not too far from each other. Check if the projection function is enabled on the receiving computer (you need to set it to “Available everywhere”). You can also try disabling this feature and enabling it again. Or restart your computer. Manually launch the Connect application (via search in Windows 10).
- There is no "Connect to a wireless display" button on the computer. You may encounter this when you want to connect your computer to another computer to cast the screen. Most likely this computer has limitations on the part of the Wi-Fi module or video card. There is more information on this topic in this article.
In case of any problems, start by updating the Wi-Fi adapter driver, since this is most likely the cause. Download drivers only from the official website of the wireless adapter or laptop manufacturer. You can install the latest Windows 10 updates. If experiments with drivers do not help, wireless projection does not work, then there really are hardware limitations. Perhaps replacing the Wi-Fi module or connecting a USB adapter will solve the problem. If you have a laptop, then after connecting the USB adapter, do not forget to disable the built-in Wi-Fi module in the device manager.
Leave comments, ask questions and don’t forget to share useful information on this topic. Best wishes!
38
Sergey
Miscellaneous tips for Windows
What to do if Miracast on Windows 10 does not work
Many users are faced with potential problems that may arise when using the technology.
The sound is played on the computer, not on the TV
It may happen that the sound is played on the computer. To solve the problem, you need to change the sound and playback settings - right-click on the speaker in the system tray and select “Playback devices”. There you need to select the required receiver.
No connection
It turns out that Miracast does not always work in the Windows 10 Firewall network - the Wireless Display network is blocked. Because of this, unfortunately, the transmitter cannot always connect to the receiver, because all traffic is limited here. If you use the Miracast service, for example, in your office, then the only solution to the problem when there is no firewall on the corporate network is to simply remove the computer from the corporate network.
Noise or black screen
Unfortunately, because the image sent through the technology is encoded, it may happen that when you use a device like Netgear and connect a projector, the image will appear as noise. This doesn't mean your PC doesn't support Miracast. The problem is related to the HDCP function in HDMI. Its purpose is to protect content from unauthorized use. Unfortunately, if you connect such a device to an HDMI cable that later goes through some kind of splitter (a common situation in conferences and meeting rooms), then HDMI detects an attempt to send a signal to other devices and begins to encode the image. The problem can only be solved if additional devices are removed from the communication queue.
Poor quality image
If the image is transferred, but it is of poor quality, you should change the resolution on your computer to a lower one. Another common problem is that the device simply does not support Miracast technology. In this case, contact your equipment supplier for advice on what equipment needs to be replaced. Miracast, and wireless communications in general, have a guaranteed future. The main advantage of this technology is the absence of “cables” and, therefore, the ease of use of devices and the implementation of all their capabilities. The big plus is the unification of the technology, so whether we have devices A and B, or A and Z, Miracast will work.
There are already many devices on the market that allow you to use the technology. Among them are tablets and televisions, the number of which is constantly growing. If you don't have a TV that supports the technology, you just need to buy a suitable adapter that connects via USB or HDMI.
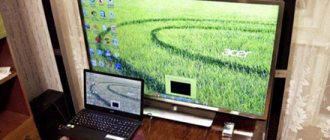
How to connect a computer to a TV via Wi-Fi
The function works well on more modern TVs. New modules provide better picture quality, sound quality and synchronization. Most devices, starting from the fifth generation, are equipped with this technology. The direct wireless connection option does not require long setup, selection of dozens of parameters, etc. This is its advantage - simplicity.
For your information! Using the Wi-Fi Direct module is a connection where you do not need to use an intermediate point - a router. The TV acts as a second wireless monitor for the laptop.
The basic requirements are the Windows 7, 8 or 10 operating system installed on the laptop. If you don’t have a regular Wi-Fi network at home, then it’s okay. Connection and recognition are carried out through a request on a particular device, that is, the user needs to confirm the connection. This is done for security so that strangers cannot take control of other people's TVs.
In addition to the advantages of high resolution and a large diagonal on a TV compared to a smartphone, there is one drawback. The picture quality is different. Some TVs have a much smaller color range. This means that the picture may not appear as rich. There is also sometimes a slight delay. This happens when something interferes with the network:
- walls and other obstacles;
- other Direct connections;
- nearby connections operating on the same frequency.
However, these shortcomings are minor; it’s worth trying to watch your favorite series on the big screen. How to do it? To work you need to do the following:
- Enable both gadgets. After that, activate Wi-Fi Direct.
- On your laptop, go to settings. This can be done through the Start menu or by pressing the key combination “Win + I”.
- In the settings, you need to go to the “System” tab, then to “Display”.
- On the right side of the window at the bottom there is a “Multiple Displays” section. You need to click on the “Connect to a wireless display” option. A side window will open. The detected device will appear in the list. You need to click on it, connect and confirm the request.
Important! To disconnect, you need to go to the same menu and click “Disconnect”
Connecting to TV via Wi-Fi Direct
How to connect?
Watch the video instructions for connecting your smartphone to your TV using Miracast:
Connecting a wireless display is very easy. In the TV settings, go to the “Network” menu. Find "Miracast/Intel's WiDi".
Next, we connect the function on the TV using the “On/Off” button.
That's it, the TV is set, leave it on.
Intel WiDi, starting from version 3.5, is fully compatible with Miracast.
Connecting to a smartphone
Let's move on to a smartphone or tablet running Android OS. To set up your mobile device, go to Settings options. Connect Wi-Fi data transfer. In the “Screen” tab of your mobile device, select “Wireless Screen” from the provided list. After activating the “Enable” button, a list of possible connections pops up. From the list that appears, we find our TV. Feel free to click the “Connect” button. That's it - your TV functions as a wireless display. Everything you see on your tablet or Android smartphone is now displayed on your TV monitor.
If you want to disable this feature, go to the screen settings on your smartphone. Next, click on the name of your TV, as a result of which a window pops up asking if you really want to stop transferring data. By clicking “Ok”, you stop broadcasting images to the TV monitor.
Connecting to a computer
The following video talks about WiDi technology:
To activate WiDi, we launch Intel Wireless Display - a special driver that is responsible for the operation of the technology. A window will appear on the TV screen where you need to enter a security code.
On the computer we find the Charms panel, which appears on the right side of the monitor when the PC is used as the main screen when multiple monitors are connected. Now select “Devices”, go to “Projector” and click “Select wireless display”.
Miracast does not work and there is no “Connect to a wireless display” option
In older versions of Windows 10, when the system “understood” that Miracast was not supported, it displayed the message “The PC or mobile device does not support Miracast, so wireless projection from it is not possible.”
In new versions, there is simply no “Connect to a wireless display” item in the “Project” menu, which is opened by the Win + P key combination.
Most likely, there is no Miracast support at the Wi-Fi adapter level. For example, I have no way to connect to a wireless display through the Wi-Fi module built into my laptop. The laptop, however, is not new. Somewhere around 2012-13. And after connecting the TP-Link TL-WN725N V2 Wi-Fi adapter, everything works.
For this function to work, you need support on the side of the Wi-Fi adapter and the graphics adapter (video card). Both at the hardware and driver level. This is easy to check.
Launch a command prompt and run the netsh wlan show driver command.
The results will contain the line “Wireless display supported:” With the factory (old) Wi-Fi module on the laptop, I have the following result:
As you can see, there is no support. The graphics driver supports it, but Wi-Fi does not.
And here is the result of testing with another Wi-Fi adapter:
And with this configuration everything works great.
What can be done:
- Update the Wi-Fi adapter driver. It's unlikely, but it might work. Here are the instructions: updating (installing) the Wi-Fi driver in Windows 10.
- If, according to the test results, the problem is only in Wi-Fi, then you can replace the Wi-Fi adapter itself. But I noticed that the specifications simply do not indicate whether there is support for a wireless display or not. On the TP-Link TL-WN725N second hardware version (V2) everything works. But I'm sure there are a large number of other adapters that support Miracast. Need to find.
- You may find it easier to connect your TV via an HDMI cable.
Let's consider another problem.
Failed to connect to wireless display
The computer finds the TV, we select it, it takes a long time to connect and the error “Failed to connect” appears. Or the computer does not see the TV and it does not appear in the list of available devices.
I also got this error several times. It's difficult to say what this is connected with. Be sure to try connecting again.
- Restart your computer and turn off the TV's power for a couple of minutes.
- This may be due to a bad signal. If possible, reduce the distance between the computer and the TV. Check if Miracast (or something like that) is active on your TV.
- Update the Wi-Fi adapter driver. I provided a link to the instructions above.
- If possible, try connecting to another TV that can also work as a wireless display.
Disabling the discrete video card in Device Manager helped. I don’t know to what extent this is the right decision, because we are essentially disabling the high-performance video adapter. But it seems to be working. You can try it. We go to the device manager and disable the discrete video card, leaving the integrated one to work.
Don't forget to turn it back on later. When you stop using the wireless display, or it turns out that this solution did not help in your case.
Update: disable antivirus and firewall
There have already been several comments that Miracast in Windows 10 started working after disabling the antivirus or firewall.
388
Sergey
Miscellaneous tips for Windows
Connecting to a TV or wireless monitor via Miracast
In order to enable Miracast and transfer images to the TV via Wi-Fi, in Windows 10, just press the Win+P keys (where Win is the key with the Windows logo, and P is the Latin key).
At the bottom of the list of display projection options, select “Connect to a wireless display” (see below for information on what to do if there is no such option).
The search for wireless displays (monitors, TVs, etc.) will begin. Once the screen you want is found (note that most TVs require you to turn them on first), select it from the list.
Once selected, the Miracast connection will begin (may take a while), and then, if everything went smoothly, you will see the monitor image on your TV or other wireless display.
Important Notes
- The TV must support the Miracast standard. If it does not provide this, you will have to use an HDMI adapter and download additional software.
- On TV, this technology may have a different name. For example, Samsung called this feature Screen Mirroring.
This article could end here, if not for one “but”. As noted above, the transmitter and receiver must be matched. TVs from well-known brands that support Smart TV since 2013 are manufactured with built-in Miracast receivers (Intel WiDi technology is compatible with Miracast technology).
Possible problems
- The device does not support the Miracast standard. This can happen either due to an old Wi-Fi adapter (released before 2013) or due to a problematic driver. In the first case, it is better to use an external adapter. In the second case, the problem can be solved by installing the latest driver, which can be downloaded from the website of the transmitting device manufacturer. This must also be done if Windows 10 itself downloaded and installed the chipset driver. If the manufacturer cannot offer the required driver for Windows 10, use the driver for Windows 8. Very often this helps.
- The device does not connect to the TV. After a long attempt to connect to the TV, the message shown in Fig. 9 appears on the screen of the Windows 10 device.
Figure 9
As in the first case, the problem can be solved by installing the latest driver obtained from the manufacturer of the transmitting device. It can be downloaded for free from the corresponding website. If the Wi-Fi adapter is not the latest, then due to incomplete compatibility of technologies, reinstalling the driver may not solve the problem. In this case, to watch movies, it is better to configure DLNA (a technology for connecting various devices into a digital network) in Windows 10.
Intel Wireless Display: getting rid of wires
Introduction
Over the past 10 years, wireless technologies have gained enormous popularity.
Almost every self-respecting establishment has proudly adorned itself with a “Free Wi-Fi” sign. Technology is successfully penetrating all areas of our lives. You can find it everywhere – now even in refrigerators. There are fewer wires, and our life becomes simpler. To many, this idea of a household device may seem expensive and unjustified. But everyone definitely dreamed of getting rid of unnecessary wires in monitors, speakers, keyboards and even televisions and home theaters. The more complex the equipment, the more difficult it is to solve the problem of connection and convenient operation. To solve such difficulties, Intel specialists have developed Wireless Display (WiDi) technology - a method of wirelessly transmitting video and audio from a laptop to a TV or monitor screen. People started talking about wireless video transmission quite a long time ago. In 2006, the Wireless HD consortium was created, which currently includes more than 40 companies, such as Broadcom, Intel, LG, Panasonic, Samsung, Philips, Toshiba and others. At the beginning of 2008, the WirelessHD 1.0 specification was approved, and in 2010, Wireless HD Next Gen was adopted.
Intel went its own way, and at the Consumer Electronics Show 2010 demonstrated its own Wireless Display technology in action. The second version of Wireless Display was released simultaneously with Sandy Bridge processors in January 2011, and the third is expected along with Ivy Bridge mobile processors, which should be released this spring. Currently, the technology supports Full HD video (1080p), Dolby 5.1 Surround sound and the HDCP standard (High-Bandwidth Digital Content Protection, media content protection technology). According to PC Magazine, Intel WiDi was named the “most disruptive technology” of 2010, and Popular Science declared Intel Wireless Display one of the best technological innovations of the year.
Based on the results of CES 2012, household appliance manufacturers announced the following solutions, one way or another related to WiDi:
- Samsung will include Intel WiDi in some of its smartTVs and monitors; Estimated release time: early 2012.
- LG will include WiDi in its CINEMA 3D Smart TVs, projectors and monitors; Estimated release time: early 2012.
- Netgear plans to include Intel WiDi support in its future NeoTV media players.
- AT&T will make Intel WiDi available to AT&T U-verse users.
- Software vendors such as Rovi, ArcSoft, CyberLink, EdgeRunner, Corel and Greetech are planning to include support for Intel Wireless Display in their applications.
Also, Intel WiDi will be supported by many devices that work with the DLNA (Digital Living Network Alliance) standard. Of course, WiDi over DLNA will not provide the full range of functionality, but it will be able to perform its main function - viewing content on your TV screen.
Let's look under the hood: how does WiDi work?
Wireless Display technology is based on the Wi-Fi 802.11n standard. The graphics chip creates a virtual monitor, the signal from which is transmitted via Wi-Fi by Intel My Wi-Fi technology. Thus, to use Intel Wireless Display, you must have an appropriate wireless chipset from the Intel Centrino line that supports Intel My Wi-Fi. A receiver is installed on the side of the TV or monitor, which receives the signal, processes it accordingly and transmits it to the TV, home theater or projector. Receivers can be either a separate device or built-in, for example, directly into a TV.
Surely, many of you remembered DLNA (Digital Living Network Alliance) technology, which also allows devices compatible with it to transmit and receive various media content over the home network. The difference between DLNA and Intel WiDi is that DLNA technology only allows you to transfer media content (images, videos or music); and Intel WiDi acts as a second monitor for a computer - you can also use it to expand your desktop or duplicate the main screen.
What is needed to use WiDi?
As you've probably already guessed, you'll need a laptop with a second-generation Intel Core processor. Also, Intel Wireless Display has strict requirements for the wireless chipset and slightly lighter requirements for graphics. If the graphics chip must belong to the Intel HD Graphics series, then with wireless cards everything is not so simple. Your laptop must have one of the following Wi-Fi adapters:
- Intel Centrino Wireless-N 1000
- Intel Centrino Advanced-N 6200, 6205, 6230 or 1030
- Intel Centrino Advanced-N + WiMAX 6250 or 6150
- Intel Centrino Ultimate-N 6300
This limitation is due to the fact that only these Wi-Fi adapters support Intel My Wi-Fi technology, which is necessary for the full functionality and correct operation of Intel WiDi. However, there is also a small note regarding the video subsystem. Owners of laptops with hybrid graphics (a discrete video card combined with an integrated one in the processor core) will have to switch to the integrated one; and if the manufacturer of your laptop has disabled the built-in video core from Intel, then such a laptop will not be able to work with WiDi.
At the moment, WiDi only works under Windows 7, starting from the “Home Basic” edition, also known as “Home Basic”. As for the other, non-computer side of the issue, the following TV receivers that support Intel WiDi are currently on the market :
- D-Link DHD-131 TV Adapter
- NETGEAR Push2TV HD Adapter
- Belkin ScreenCast TV Adapter
There is a laptop, there is a TV, there is a WiDi adapter. What's next?
Setting up the connection between the computer and the adapter is very simple and takes just a few steps.
Step one:
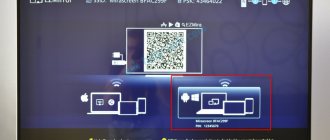
turn on the TV, adapter - and select the signal source on the TV. If the signal source is selected correctly, then you should see something like this picture on the TV screen. This indicates that the adapter is loading.
But this picture indicates that the adapter is ready for use and is waiting for an incoming connection from the laptop.
Step two:
run the Intel Wireless Display program on the laptop. If one of the above-mentioned Wi-Fi adapters is installed in the laptop and all the necessary drivers are installed, then you will see your adapter in the list of available ones for connection.
Accordingly, after clicking “Connect” the laptop will be connected to the WiDi adapter.
Step three:
Use it. With a screen connected via WiDi, you can do everything the same as with a regular one - expand the desktop onto it, change the resolution, and so on.
Conclusion
The technology turned out to be workable, and I would like to note that it can greatly facilitate the use of home TV as a universal media center. The fact of easy setup plays an important role in this. Intel has worked hard to make Wireless Display a consumer-friendly technology. After the initial connection between the laptop and the TV, Intel's software takes care of all subsequent interactions.
The main disadvantage can be considered that to use WiDi there are strict hardware requirements - and this hardware, unfortunately, is sometimes difficult to find. Laptop manufacturers rarely specify a specific model of Wi-Fi adapter, but this is one of the critical factors for using Wireless Display. But this is only a disadvantage if you do not yet have a laptop with the necessary hardware. And if you have a laptop, all you have to do is purchase an adapter and download the corresponding software from the Intel website. Of course, a regular HDMI cable costs a little less than a WiDi adapter - but, as they say, you have to pay for convenience.
And finally, a demo video that clearly shows the use of WiDi (in English, but even those who don’t know the language can understand the essence):
Can't access 192.168.203.1. What to do?
A very common problem is when you can’t enter the MiraScreen or AnyCast adapter settings. The page at 192.168.203.1 simply does not open and the settings are unavailable. Usually the error “Cannot access the site” appears. Timed out waiting for response from site 192.168.203.1."
Most often, problems with entering settings occur for two reasons:
1
Make sure your device (laptop, phone, tablet) is connected to the MiraScreen Wi-Fi network. I showed in detail how to make this connection in this article. Turn off mobile internet on your phone.
2MiraScreen/AnyCast adapter does not distribute Wi-Fi network
You can change the operating mode with a button on the adapter itself (above in the article I showed how to do this). Or in the settings. But since it doesn’t go into the settings at 192.168.203.1, this option is not suitable for us.
Other solutions:
- Try logging in through the address 192.168.49.1. Some Miracast adapters use this exact address. Mainly in Rombica Smart Cast devices.
- Be sure to try connecting to the adapter from another device and go to settings via 192.168.203.1. Or through another browser.
- If VPN is enabled on your device or browser, disable it.
- When you type the address 192.168.203.1 and instead of the MiraScreen settings, a search engine with search results opens, then most likely you simply entered the address in the wrong line. The address must be entered into the address bar of the browser. You can type the full address: https://192.168.203.1/
- Turn off the power of the set-top box and turn it on again. Perhaps after a reboot the settings will open.
- Reset the adapter settings. Typically, you can reset the settings by long-pressing (about 5-10 seconds) the button that is used to switch operating modes.
157
Sergey
Various tips for setting up TVs
Instructions for launching and connecting via Miracast
If all devices meet the requirements, then you can try to establish communication between them via Miracast/Intel WIDI. There are several methods.
Via "Connect to a wireless display"
The classic method is to use the standard Windows interface. Let's look at connecting Miracast using the example of a modern TV. The instructions include the following steps:
- On the TV, activate detection and turn on Miracast, if this function is displayed in a separate menu. The picture below shows an example for LG.
- Next you need to do one more action. Press WIN+P on the source keyboard, and then click on “Connect to a wireless display.”
- In the list, click on the desired TV. Wait for the synchronization to complete.
The image from your computer should appear on the TV if the "Repeating" option is selected. Clicking Second Screen Only will turn off your laptop or PC display so you can control the system using your TV.
Through the "Options" section
There is an alternative method that allows you to set up projection. If you suddenly don’t have a keyboard or some keys don’t work, use the following setup method, which only requires a mouse:
- Activate Miracast on the receiver device in the same way as the previous instructions.
- Connect to the network provided by your TV through the corresponding icon at the bottom right of the screen on your laptop/PC.
- Go to system settings and click “Devices”. In the “Connected devices” subsection, click on “Add...”. Then you need to select your TV from the list.
- Wait for synchronization and make sure that the picture appears on the receiver device.
To change the display principle (repetition, expansion, etc.), you need to open the projection menu via WIN+P. An alternative option is through the notification icon on the right side of the screen (in case the keyboard is not available).
Nuances when connecting via WiDi module
If you use Intel WiDi technology, then you need to consider a number of requirements, in particular:
- Requires a 2nd generation Intel i3, i5 or i7 processor or higher. The third and second generations are not supported by Windows 10.
- Network card with WiDi support.
- Windows 7 and later.
- Special software. Not required for Windows 10.
On the company's official website there is a list of adapters and graphics solutions that are necessary for full operation of Intel WiDi. Pairing of devices occurs through a special program of the same name, which will need to be installed. Like Miracast, Intel's solution allows you to choose between repeating and expanding the picture.
Please note that if the software immediately displays a message that your computer or laptop does not support this technology, then you should not try to start image transfer using workarounds. Intel specialists clarify that full WiDi functionality and stable operation are guaranteed only on devices running Windows 10 that meet the system requirements
How to set up Intel Widi on a computer?
Let's summarize - to set up WiDi we need 2 devices - a source and a receiver. They may be:
- TV with built-in WiDi chip or external adapter
- Windows computer or laptop with Intel processor and Wireless Display support
- Smartphone with RockChip and Android 4.2+
If all this is available, then let's set it up. We will use the large screen of a regular TV as a receiver. We turn it on, connect an external WiDi adapter to it via HDMi and select it as the source for the picture. An image like this will appear (using the Netgear adapter in this example), indicating that the device is ready to connect to a signal source:
What is your opinion: is WiFi harmful?
Yes
22.94%
No
77.06%
Voted: 33200
To broadcast video from a computer, you need to use your operating system and run it.
After launching it, a window will open with a list of devices with a working adapter located in the reception area. Choose our TV.
Next, the TV, seeing that they want to connect to it, will display on the screen the password required for the connection.
We enter it on the PC when connecting and after a few seconds we get a duplicate of the computer desktop screen on the TV monitor.
How to enable Miracast on Windows 10?
If you have a Miracast-enabled TV and a Windows 10 computer, how do you enable the two devices so that they can communicate? Let's try to analyze this issue in detail.
Let's look at the Miracast function itself on Windows 10: a small number of potential users know what it is. Not all people have brand new equipment at home that supports these capabilities.
Miracast is a product of the Wi-Fi Alliance, the largest manufacturers of wi-fi equipment. This function is used only on new operating systems: in particular, we are talking about Windows number 8 and 10. A person connects his TV to a new computer without the use of additional cables - the connection is made thanks to the Miracast wireless function.