Modern technologies have reached the point where data transmission over wires no longer surprises anyone. Moreover, now everyone is trying to use a wireless connection. Be it Wi-Fi or Bluetooth. Of course, working with wireless devices is much more pleasant than getting tangled up in a bunch of unnecessary wires. Many even manage to broadcast images using wireless technologies. A wireless display is a harsh fact of life, not a fantasy. A regular TV can also serve as this device. The main thing is to know how to connect it to a computer, smartphone or tablet. This is what we will now try to figure out.
Why is this necessary?
That's a good question. Most average users do not need such features. But sometimes you want to quickly connect your tablet, laptop or smartphone to your TV to view photos or do something else. Connecting the wire, setting parameters and connecting takes too long. It's easier to do without wires. Some people manage to watch movies this way. And even play. The Wireless Display feature is quite interesting in this regard.
To connect this option, the TV must have a Wi-Fi adapter. It is also highly desirable to have a Smart TV option. But this is no longer necessary. Using a wireless connection, you can even connect a camera to a TV or other display device to view photos. This is more convenient than watching on the small screen of the device. Wireless Display allows you to connect an unlimited number of devices to your TV and simply move between them as needed. Now let's look at some of the nuances of such a connection.
Laptop - set-top box - TV
Happy owners of Smart TVs can connect their laptops to them in many ways. If one doesn't fit, there is always an alternative. And owners of ordinary, especially old television receivers, sometimes have to suffer: either the required adapter is not on sale, or the connection does not work.
In this case, the best solution would be to buy a set-top box with SMART functions, like Apple TV or Android Box. It’s not very expensive, and it also eliminates the hassle of connecting other equipment to the TV forever.
In a recent article we talked about ways to connect a mobile phone to TV. But the telephone is not the only device capable of broadcasting an image to the TV screen. There are others - for example, laptops. And they have no less opportunities in this regard. So, today we’ll talk about how to connect a laptop to a TV via Wi-Fi and wired interfaces.
Risks
Of course, there is a small chance that something will go wrong. But it's tiny. However, all users should be warned that the image quality transmitted via a wireless connection is not comparable to the full HDMI digital format. If you want to watch movies or play games this way, then know that it won’t work. The fact is that Wi-Fi cannot yet provide an ultra-wide channel for transmitting all data in uncompressed form. Before being transmitted over the air, the data is compressed and in this form ends up on a wireless display. And this is fraught with slowdowns and low picture quality. You can still view photos, but high-definition video will not be available in this mode.
Possibilities
So, if everything is not rosy, then what can you do when connecting a wireless display? A lot of things. You can, for example, surf the Internet using a PC. The image will simply be transmitted to the TV. You can view photos and some not particularly dynamic videos. You can work with documents. You can communicate via Skype. Just keep in mind that the image will all be in pixels. And they will be gigantic in size. It is likely that in the near future, wireless data transmission technologies will make it possible to transmit HD content. But we need to wait a little longer. For now we will be content with what we have. Now let’s answer the question of how to connect a wireless display.
Connecting a PC running Windows 7
There are several options to connect your PC or laptop to your TV wirelessly. However, you need a Wi-Fi adapter that supports Intel WiDi or Miracast. Without this nothing will work. Well, and, naturally, you need a TV that supports both of these standards. But there is no problem with this. All modern “boxes” are equipped with appropriate adapters. And if not, then buying an external adapter is not difficult. So, let's set up Wireless Display in Windows 7.
The first thing you need to do is turn on the TV and activate Intel WiDi in its settings. Then open the utility of the same name on the PC. You may need a special code to connect, which will appear on the TV screen. You just need to enter the code into the appropriate window on your PC and click “OK”. The connection will be picked up and configured on its own. If not, then you need to update the drivers of the Wi-Fi adapter and video card. If you use Miracast, you just need to open the Charms panel, click “Devices”, then “Projector” and add a display.
Wireless connection methods
Wi-Fi Miracast, WiDi and AMD Wireless Display
You probably remember what Wi-Fi Miracast and WiDi (Intel Wireless Display) are from the previous article. We hasten to please you: these technologies are supported not only by smartphones, but also by mobile computers. However, not all, but only those equipped with Intel Core i3/i5/i7 processors of the second and subsequent generations.
WiDi and Miracast support is implemented differently in different versions of Windows. Namely:
- 2nd generation Intel Core i3/i5/i7 processors can use WiDi version 4 features only on Windows 7 and 8.1. Windows 10 does not support WiDi and Miracast.
- Third-generation processors support WiDi 4 only in Windows 7, “eight” and “ten” support Miracast.
- Fourth generation processors switched to support WiDi version 6 (modern). In Windows 7 and 8.1 - no restrictions. In Windows 10 - only if you have a Wi-Fi adapter released after 2013. Computers with older wireless adapters and Windows 10 can only use Miracast.
- Processors of the fifth and sixth generations support WiDi 6 without restrictions.
Laptops based on AMD processors are also capable of transmitting images to the TV via Wi-Fi. The technology they use is called AMD Wireless Display. This, so to speak, is an analogue of WiDi, developed by AMD for wireless connection of its devices and Miracast-compatible TVs.
AMD Wireless Display is officially supported by Windows 8, 8.1 and 10 systems. To check whether the processor is compatible with this technology, the manufacturer recommends the proprietary AMD Catalyst Auto Detect utility.
Connecting to a TV
To transfer an image from a laptop to a TV screen using any of the above standards, an access point is not needed. It is only necessary that both the laptop and the TV receiver support Miracast (as you already know, if such an option is not available on the TV, an external adapter can make up for it).
So, before establishing a connection, let’s make sure that Wi-Fi is turned on on both devices. Next we activate the Miracast function on the TV. Which menu it is in should be indicated in the instructions. Next we move on to the laptop.
If you have Windows 10, press Win+P on your keyboard to open the Project menu. If you want the desktop to be displayed on both the computer and TV, select “Repeating”; To display the picture on TV, select “Second screen only.”
If you have Windows 8.1, open the Charms bar, go to “Devices” - “Projector” and select the “Wireless Display” option. After this, the TV will work as a monitor.
To connect via WiDi, Intel previously offered users its own tool - the Intel Wireless Display utility, but it is no longer available.
AMD Wireless Display has always used only the Windows interface described above.
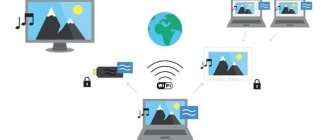
DLNA is another technology that allows home network devices to share multimedia content without complex settings and wires. However, not only without wires - one or both paired devices can be connected to the network via a cable. Unlike Miracast, DLNA does not provide the ability to link them directly.
A TV connected to a laptop via DLNA will not replace the monitor - it will play only those multimedia files that the user selects, and the desktop, shortcuts and everything else will remain on the laptop display.
To connect a mobile computer to a TV via DLNA, three conditions must be met:
- Both devices are part of the same local network. No Internet connection required.
- TV technology support.
- A modern operating system (Windows 7-10) installed on a laptop, or separate software for creating a DLNA server. For Windows XP and Vista users, for example, Windows Media Player versions 11-12 are suitable.
How to transfer multimedia to TV using Windows
After making sure that the computer and TV are connected to the same network, open the folder where the multimedia file is stored, right-click on it and select the “Transfer to device” option. In the list of devices, select your TV.
Most often this is enough to start playback. In case of problems, do the following:
- Change the network connection type to private.
- Open Advanced Sharing Options for your private network and enable network discovery, automatic setup on network devices, and file sharing.
- Make sure that access to the laptop drives is not blocked by a firewall.
Creating a DLNA server
If you want all the media content stored in the Music, Pictures, Videos, etc. libraries to play on your TV, spend a few minutes creating and configuring a DLNA server.
- In Advanced Sharing Options, open the All Networks section and click Select Media Streaming Options.
- Next, click “Enable Streaming.”
- In the settings section, specify the name of the library in which the multimedia is stored (by default, the user’s root folder is registered here), and in front of the playback device (TV), check the “Allowed” box.
- If you want, you can specify the type of content that will be played on TV. To do this, click the “Customize” button next to it and change the desired parameters.
This completes the creation and configuration of the DLNA server. Now laptop folders containing multimedia files will be displayed on TV.
By the way, proprietary technologies for connecting mobile devices and computers to a TV, which we wrote about in the previous article, are also primarily based on DLNA standards. For LG it is “Smart Share”, for Sony, in particular Sony Bravia, it is “VAIO Media Server”, for Samsung it is “AllShare”, for Apple TV set-top boxes it is “AirPlay”. Their advantages over regular DLNA are a wider range of capabilities.
To connect a laptop, for example, to an LG TV, you just need to install the free proprietary LG Smart Share application. If you have a TV of a different brand, you can easily find similar software on the manufacturer’s official website. Installation and configuration of such programs is very simple, the system requirements are low.
Connecting a display in the “ten”
Now let’s look at the question of how to connect a wireless display in Windows 10. In the case of Miracast, everything here is ridiculously simple. Just press the Win + P key combination. After this, a dialog box will appear in which all displays will be displayed. If there is nothing there (if you are using this option for the first time), then you need to click on the link at the end of the “Connect to a wireless display” window. The computer will begin searching for and identifying available devices. All you have to do is select your TV and connect to it. At first, there may be slowdowns and image glitches. But over time everything should stabilize.
If after pressing the specified key combination there is not even a hint of Miracast activation, then this problem has several explanations. The first is out-of-date wireless adapter drivers. This can often happen if standard drivers from Microsoft are used. Solution: go to the official website of the device developer and download the latest drivers for the network adapter. The second explanation is unlikely to please users. In Windows, a wireless display may not work because the PC or laptop is too old and simply does not support this option. There is only one way out: try setting up a DLNA server. But that's a completely different story.
Advantages and disadvantages of technology
Miracast has many different benefits, including:
- well-established technology that allows you to stably transfer “heavy” media files using the IEEE 802.11n standard;
- a router is not required to establish communication between devices;
- WPA2 technology is used to protect data;
- minimal signal delays and resynchronization;
- ease of detection of other devices;
- support for 3D content.
There are practically no significant drawbacks, except perhaps the limitation of the maximum resolution at the FullHD level, at a time when 2K and 4K monitors are actively starting to appear. A small drawback is the lack of a recognizable logo. This is largely the reason why not everyone knows about Miracast. Among the closest analogues, we can highlight Apple AirPlay technology.
Despite its obscurity, Miracast technology offers truly broad opportunities. With its help, without unnecessary manipulations on Windows 10, you can start broadcasting from a computer or laptop to other devices. A large list of audio and video formats is supported. It is possible to project an image from a smartphone to a TV or computer over the air, eliminating the need to create a wired HDMI connection. It is likely that developers will soon add the ability to broadcast video in resolutions greater than FullHD.
Setting up DLNA on Windows 10
So, what should you do if Wireless Display does not work in Windows due to outdated hardware? If broadcasting movies to your TV is enough for you, you can set up a DLNA server and use it. You need to find “Media streaming options”, click “Enable media streaming”, give the DLNA server a name (any) and designate the folders that can be viewed on TV. After all these manipulations, it will be enough to right-click on the desired multimedia file and select “Send to device”. Also, “shared” folders will be available in the built-in browser of the TV. Subject to availability of Smart TV.
Of course, this is not the only way to configure a DLNA server. There are many third-party programs that work right out of the box and do not require any settings. However, it is worth noting that you won’t be able to watch HD movies this way. The wireless communication channel is not wide enough. With such a connection, you will have to disconnect all torrents, smartphones and tablets from Wi-Fi and not even breathe towards the router. Then it will be possible to achieve a more or less sane picture. You can also use an advanced and expensive router, but it is not a fact that such a solution will help.
Wireless connection methods
Wi-Fi Miracast, WiDi and AMD Wireless Display
You probably remember what Wi-Fi Miracast and WiDi (Intel Wireless Display) are from the previous article. We hasten to please you: these technologies are supported not only by smartphones, but also by mobile computers. However, not all, but only those equipped with Intel Core i3/i5/i7 processors of the second and subsequent generations.
WiDi and Miracast support is implemented differently in different versions of Windows. Namely:
- 2nd generation Intel Core i3/i5/i7 processors can use WiDi version 4 features only on Windows 7 and 8.1. Windows 10 does not support WiDi and Miracast.
- Third-generation processors support WiDi 4 only in Windows 7, “eight” and “ten” support Miracast.
- Fourth generation processors switched to support WiDi version 6 (modern). In Windows 7 and 8.1 - no restrictions. In Windows 10 - only if you have a Wi-Fi adapter released after 2013. Computers with older wireless adapters and Windows 10 can only use Miracast.
- Processors of the fifth and sixth generations support WiDi 6 without restrictions.
Laptops based on AMD processors are also capable of transmitting images to the TV via Wi-Fi. The technology they use is called AMD Wireless Display. This, so to speak, is an analogue of WiDi, developed by AMD for wireless connection of its devices and Miracast-compatible TVs.
AMD Wireless Display is officially supported by Windows 8, 8.1 and 10 systems. To check whether the processor is compatible with this technology, the manufacturer recommends the proprietary AMD Catalyst Auto Detect utility.
Connecting to a TV
To transfer an image from a laptop to a TV screen using any of the above standards, an access point is not needed. It is only necessary that both the laptop and the TV receiver support Miracast (as you already know, if such an option is not available on the TV, an external adapter can make up for it).
So, before establishing a connection, let’s make sure that Wi-Fi is turned on on both devices. Next we activate the Miracast function on the TV. Which menu it is in should be indicated in the instructions. Next we move on to the laptop.
If you have Windows 10, press Win+P on your keyboard to open the Project menu. If you want the desktop to be displayed on both the computer and TV, select “Repeating”; To display the picture on TV, select “Second screen only.”
If you have Windows 8.1, open the Charms bar, go to “Devices” - “Projector” and select the “Wireless Display” option. After this, the TV will work as a monitor.
To connect via WiDi, Intel previously offered users its own tool - the Intel Wireless Display utility, but it is no longer available.
AMD Wireless Display has always used only the Windows interface described above.
DLNA is another technology that allows home network devices to share multimedia content without complex settings and wires. However, not only without wires - one or both paired devices can be connected to the network via a cable. Unlike Miracast, DLNA does not provide the ability to link them directly.
A TV connected to a laptop via DLNA will not replace the monitor - it will play only those multimedia files that the user selects, and the desktop, shortcuts and everything else will remain on the laptop display.
To connect a mobile computer to a TV via DLNA, three conditions must be met:
- Both devices are part of the same local network. No Internet connection required.
- TV technology support.
- A modern operating system (Windows 7-10) installed on a laptop, or separate software for creating a DLNA server. For Windows XP and Vista users, for example, Windows Media Player versions 11-12 are suitable.
How to transfer multimedia to TV using Windows
After making sure that the computer and TV are connected to the same network, open the folder where the multimedia file is stored, right-click on it and select the “Transfer to device” option. In the list of devices, select your TV.
Most often this is enough to start playback. In case of problems, do the following:
- Change the network connection type to private.
- Open Advanced Sharing Options for your private network and enable network discovery, automatic setup on network devices, and file sharing.
- Make sure that access to the laptop drives is not blocked by a firewall.
Creating a DLNA server
If you want all the media content stored in the Music, Pictures, Videos, etc. libraries to play on your TV, spend a few minutes creating and configuring a DLNA server.
- In Advanced Sharing Options, open the All Networks section and click Select Media Streaming Options.
- Next, click “Enable Streaming.”
- In the settings section, specify the name of the library in which the multimedia is stored (by default, the user’s root folder is registered here), and in front of the playback device (TV), check the “Allowed” box.
- If you want, you can specify the type of content that will be played on TV. To do this, click the “Customize” button next to it and change the desired parameters.
This completes the creation and configuration of the DLNA server. Now laptop folders containing multimedia files will be displayed on TV.
By the way, proprietary technologies for connecting mobile devices and computers to a TV, which we wrote about in the previous article, are also primarily based on DLNA standards. For LG it is “Smart Share”, for Sony, in particular Sony Bravia, it is “VAIO Media Server”, for Samsung it is “AllShare”, for Apple TV set-top boxes it is “AirPlay”. Their advantages over regular DLNA are a wider range of capabilities.
To connect a laptop, for example, to an LG TV, you just need to install the free proprietary LG Smart Share application. If you have a TV of a different brand, you can easily find similar software on the manufacturer’s official website. Installation and configuration of such programs is very simple, the system requirements are low.
Connecting smartphones and tablets
In the case of mobile devices, the connection to the wireless display will have to be made exclusively using DLNA. There is simply no other option. Although the iPhone has a proprietary AirPort option, it requires Apple's proprietary display. As usual with Yabloko. So, we will not consider this possibility. Connecting your Android or iOS smartphone to your TV using DLNA is very simple. Just launch the appropriate application on the device and select a connection using DLNA in the TV settings. Then everything will happen by itself.
It is worth noting that the possibility of such a connection is available on almost all devices. Unless you have some ancient Android 2.3. “Wireless display” with “Android” works quite adequately. However, surfing the Internet is inconvenient due to the presence of a touch screen. But you can view photos and videos as much as you like. Playing with this connection won't work either. But you can communicate via Skype or some other VOIP application. There are no restrictions on this.
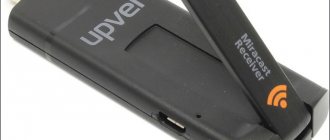
Connecting Xiaomi equipment
There are some subtleties here, since these devices are almost the only ones that support Miracast. “Wireless display” in Xiaomi is connected in the settings menu. You need to go to “Settings”, select the “Screen” menu. There will be a “Wireless Screen” item. You need to press it. First you need to turn on the Wi-Fi transmitter on the smartphone itself. You also need to enable the WiDI-Miracast option on the TV itself. If everything is done correctly, a dialog box with the name of the connected device will appear on the TV screen. You just need to click on the “Connect” button. On your smartphone, the connection will be established automatically. Xiaomi probably has the easiest setup for connecting to a wireless screen using Miracast. No special knowledge is required from the user. You just need to strictly follow the instructions.
Monitor without wires - new boundaries of leisure
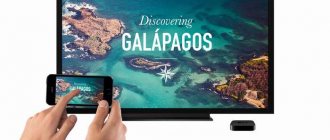
People have long dreamed of getting rid of network connections and wires. Intel began to make dreams come true by creating a wireless monitor. Wi-Fi Display is an opportunity to see photos, videos, in general, everything that is displayed on the screen of a computer, smartphone, etc., on a large TV monitor using a wireless connection. Now you can play your favorite games, watch movies, enjoying high-quality and large images.
There is one minus. Everything that is displayed on the phone display will be visible on the TV screen. For example, you decide to watch a movie with friends by launching a wireless monitor from your smartphone . While watching, you receive a message on Skype. The alert text displayed on the phone will be visible on the screen.
It is worth taking this into account - do not touch the smartphone display or say goodbye to privacy.
What to do if your smartphone does not see TV?
This is a very common problem. And the point here is not at all about the smartphone. To successfully use DLNA or Miracast on a mobile device, you need to have an appropriate TV. It is known for certain that there are no problems with TVs that are equipped with a Smart TV system and built-in Wi-Fi adapters. Other devices may not work correctly. It is very difficult to somehow fix the problem in this case. All that remains is to purchase the appropriate TV.
Some smartphones with Intel WiDi support (there are few of them, but they exist) completely refuse to connect to the wireless screen due to the lack of Intel graphics in the device itself. This is a software glitch. And it is treated by replacing the firmware. It is known that the advanced Lenovo K300 once suffered from such a “disease”. But with modern devices everything is fine.
Reviews from users using this option
Most of those who use this option are owners of PCs and laptops. They use wireless connectivity to the fullest and are therefore wildly happy. With a wireless mouse and keyboard, users say, surfing the Internet, working with documents or photographs is a pleasure. And indeed it is. But there are big problems with video. Especially with HD and Full HD. A lot of problems are caused by the fact that popular MKV files are displayed crookedly and incomprehensibly. But that's how it should be. Wi-Fi is nowhere near HDMI. And we have to take this into account.
Those who use mobile devices (tablets and smartphones) with the “Wireless Display” option are completely dissatisfied, because there are frequent crashes, glitches and slowdowns. Ease of operation deserves special mention. He's gone. Still, using such technology in tandem with touch devices is a big mistake. You have to constantly pay attention to the small screen of the device and “poke” it. However, tablets with keyboard and mouse support do not have such problems. Things are best on devices that use Windows as the operating system.