Select the menu item “Delete multiple contacts”. The following source selection menu will appear:
The easiest and fastest way
To easily clear the SIM card memory on your smartphone, just take it out and insert it into some old simple phone. It’s not without reason that they say, “simplicity is the best beauty.” On such devices, all this is done very simply and quickly. Just go to contacts and in the settings select the option “Delete all” or “Delete several” and check the “All” box.
The device will ask where it will delete from. Select the “From SIM card” option. After this, the SIM card memory will be cleared.
Cleaning SIM on Android
The Android operating system has very extensive functionality and allows you to do a lot. But simply deleting all the numbers on a SIM card won’t work that easily. To do this you will have to delve into the settings. For example, consider a phone running Android 6. On older versions, everything is done in approximately the same way. At least the algorithm is the same.
So, go to Contacts and open the options menu:
Select the menu item “Delete multiple contacts”. The following source selection menu will appear:
Select the SIM card that we want to clean. After this, a list of numbers and contacts that are present on it will be displayed:
Since we want to do a complete cleanup, check the “Select all” checkbox. Profit!
Note: If you were unable to find such an opportunity in your Android, use third-party applications. For example, HTC SIM Manager . This will allow you to keep control of the SIM card memory while creating or deleting contacts.
Removing numbers from SIM on iPhone
This is the official method from Apple. Unfortunately, it is not very convenient and here's why. This option allows you to completely delete all numbers from the iPhone’s memory, including those on its SIM card. That is, if you want your contacts to remain on the device itself, you will have to save them by synchronizing them with the iCloud service.
After this, you need to connect your phone to your computer and launch iTunes. In the program window, open your smartphone and go to the “Information” section. Here you need to check the “Sync Contacts” checkbox:
Below we check the “All contacts” checkbox. Scroll down the window to the “Advanced” subsection:
Here you need to check the “Contacts” box. Click on the “Apply” button. A confirmation window should appear, in which you need to click on the “Replace information” button. Ready. After this, the device’s memory and SIM card will be cleared. To return your contacts to the device itself, synchronize it with iCloud and they will be on the phone again.
- Open the Contacts on your Android smartphone.
- Next, click on the Settings in the upper right corner, and then select “ Contacts to display ”.
Quick instructions on how to permanently delete a contact and number from your phone
If you are the owner of a modern smartphone, then even editing your contact list can be difficult. It's all about synchronization, which prevents you from changing phone numbers in memory at will. In addition, the device collects numbers from popular instant messengers into one list, and this causes additional difficulties. Let's figure out how to delete a contact or phone number from a smartphone.
Standard way to delete a contact
On phones with the Android operating system, there is an easy way to edit your contact list. To do this, you need to find an application that stores a list of them. Usually it is called “Contacts”, but it can be different. Its pictogram is a notebook with a schematic image of a person on it.
Next, the instructions will tell you how to delete a phone number on Android:
- Here is a list of contacts; find the one that is no longer relevant.
- Click on the contact you want to delete. Hold your finger until an additional menu appears.
- From the list, select “Delete” and confirm your decision.
When you click on the desired line, the operating system may behave differently. Sometimes the menu does not appear, and a line is activated at the top of the screen, which schematically displays the available actions. In this case, you need to select an icon that resembles a trash can or trash can.
Also, sometimes the interface of this application involves calling up the menu not by holding your finger for a long time, but by a special button.
In this case you need:
- select the contact to be deleted from the list;
- click on it;
- select the symbol in the form of three dots at the top or bottom in the control line;
- Select “Delete” from the menu that appears.
If none of the menu methods work, press the leftmost button at the bottom of the screen. It is used for an alternative menu call. There you can also delete a contact or change it.
Removing contacts from a SIM card
Many people save contacts on a SIM card so that they can be accessed when changing devices. In this case, you may face the problem of how to delete old phone numbers if they are stored in the SIM memory. If you prefer to store the numbers of friends and acquaintances not in the phone’s memory, then the sequence of actions will be different:
- Click on the menu button at the bottom of the screen (far left).
- The settings for the Contacts application will appear on the screen. In the list you need to find the line “Display”.
- At this point there are several options for displaying contacts. You need to choose the one that provides for displaying information from the SIM card in a general list. Turn this display on.
- Now go back to your contact list and edit them as you wish.
Almost every modern SIM card has service numbers, which are marked with a “Lock” icon. They can be very annoying, but they cannot be removed. These numbers are needed to call emergency services, check your balance and contact the operator's hotline.
If the SIM card only has service numbers that you do not use, then you need to disable its display in the list, then they will not interfere with you. To prevent SIM contacts from appearing in the main list, you need to disable their inclusion in the general list through the settings. This is done through the "Display" tab in the menu.
Batch deleting contacts from your phone
How to delete a contact from your phone in batch mode
If you want to carry out a global wipe of contacts, you can do a mass deletion. Depending on the operating system configuration, this is done in two ways.
The simplest option for batch deleting numbers and contacts:
- Go to the Contacts or People app.
- Select any of the entries, tap on it and hold your finger.
- Cells will appear to the left of your contact list.
- Place markers in them (with short presses) opposite the contacts you want to delete.
- On the top line, select the word “Delete” or the icon that resembles a trash can.
- Confirm your actions.
More modern versions of Android have a Batch Uninstall option.
To do this, you need to go to the Contacts application and call up the settings menu using the touch key under the screen (far left).
Then follow these instructions to delete contacts:
- find the “Advanced” line and select it;
- From the options in the menu that opens, select “Batch deletion”;
- activate it;
- return to “Contacts”;
- check the boxes next to the entries you want to get rid of;
- Click the delete button at the top.
These are the main ways to delete several contacts at once, but using them is not always convenient. If you want to completely reset your notebook, you need to do it differently.
Disabling an account
If you want to completely reset your contacts list, you will need to disable the account they are synced with. This option will be useful if you are preparing a phone for sale or, on the contrary, you bought a smartphone secondhand and want to get rid of other people’s numbers. Account deactivation is carried out according to the instructions:
- Find the Settings or Google Settings app on your phone.
- Find the “Personal Data” item and go to the “Accounts” section.
- Select the Accounts tab. It will list several accounts. Information from your notebook is most often synchronized with Google.
- You need to remove the Contacts tab from your account and disable its syncing. If your Google account is not divided into separate entries, then completely deactivate its synchronization.
- Now you need to go to the menu. It is usually represented in the line at the top by a button with three vertical dots.
- Click the "Synchronize" button and the phone will update the data in its memory. Your contact information or Google account information will disappear completely from your phone.
This way, you can leave only contact lists from instant messengers in memory, and delete previously saved numbers. If, on the contrary, you want to delete contacts that appeared in memory due to the use of instant messengers, then you need to disable accounts in them from synchronization.
This way, you will get rid of displaying in your phone book the numbers of social network users who are among your friends, and you will also not have to look for the necessary numbers among the data of unfamiliar people with whom you communicated via messaging in any of the popular instant messengers.
Editing Google Synced Data
If you duplicate the list of contacts in your Google account, you can not only delete it entirely, but also edit it and then synchronize the device with the account. This is convenient if you have a lot of numbers in your address book and you don’t know how to remove a phone number from your account without deactivating it. Follow the instructions:
- To edit numbers synced with Google, you will need to open the browser on your phone and go to Contacts. On some versions of the OS there is an application with this name, on others you need to log in through Gmail. If you work through a browser on your phone or PC, you will need to go to google.com/contacts. It will be more convenient to work from your home computer.
- Log in to the service using your Google account information.
- You will see the photos and names of contacts saved in your account.
- You need to click on the images to select them.
- Selected entries are deleted using the Trash button located at the top of the screen. All entries you selected will be deleted.
- Now all that remains is to close the browser and go to “Settings”.
- There you need to enable your Google account if it has been deactivated.
- Then go to the menu (it is called up by the button with three vertical dots). Click the "Synchronize" line. After this, your contact list will be updated.
Basic tools
The easiest way to delete a contact from an Android phone is to use basic functions. To do this, you need to go to the phone book and press your finger on the contact to be deleted. After a second it will be marked with a tick. At the same time, we will be asked to mark other entries. If necessary, select other contacts (put a check mark next to them), then go to the very top and click on the icon with the image of a trash can - the necessary contacts will be immediately deleted.
Sometimes the trash icon is missing, and the desired item is called up through the context menu - this depends on the basic program installed on the smartphone for working with contacts and calls.
All dialer programs have this functionality, so there shouldn’t be any difficulties here. Basic capabilities allow you to delete contacts stored in any sources
, starting from the SIM card and ending with your Goole account. To switch between sources, go to the application settings and find the contact list display settings item there (may be called “Show contacts”). By tapping on this item, you will see a list of sources:
- All contacts (the entire list is displayed at once);
- Device (referring to the internal memory of the phone);
- SIM1 and SIM2 (for devices with two SIM cards);
- Google account (visible as address@gmail.com).
There may also be other items here that appear after installing various applications (Messengers WhatsApp and Viber, applications for social networks VKontakte and Odnoklassniki).
If you want to access all contacts at once, select “All contacts” - records from all sources will appear in the list at once
. The process of deleting records will be the same as we described above - press one contact, mark other contacts, select the delete option.
To avoid confusion in phone numbers in the future, copy your phone contacts into one source. The best option is to copy everything to your Google account so that the records are synchronized with the servers of the Android operating system developer.
How to delete a contact from an Android phone
» Android » How to delete a contact from an Android phone
You can delete contacts from your Android phonebook one by one or in groups. It is even possible to remove all contacts at once, but to do this you will have to disable the accounts of different applications that use other people’s numbers.
Removing from SIM card
Removing a SIM card is the simplest procedure. It is performed using standard means:
- Turn off synchronization of contacts with your Google account.
- Open Android phonebook.
- Call the context menu and select "Filter".
- Select display from SIM card. If your smartphone has 2 or 3 SIM cards, you will have to mark them one by one.
- Find the phone number you want to erase. Open its details.
- Call the context menu (using the key below the screen or the button in the form of three dots).
- Click "Delete" and confirm your decision.
If synchronization was enabled previously, the recording will remain on the Google server. To remove it from there:
- Launch a browser on your computer and go to google.ru.
- Log in using the account details with which synchronization is enabled on Android.
- Open the list of applications, tap More and select Contacts.
Mass deletion
If you need to erase several phones at once or clear the entire list, the order will be as follows:
- Open the list on Android.
- Call the context menu and click “Delete group”.
- Select multiple entries or click Select All.
- Tap “Done” to start deleting the phones.
In cloud storage, the operation is carried out in a similar way. After selecting one entry, a “Selected” button with a check mark appears at the top, and when you click on it, a menu with the “Select all” item pops up.
Removal from other sources
If there are no problems with clearing the SIM card of unnecessary entries, then the question of how to delete individual contacts on Android synchronized from other applications often leads to a dead end. A deleted contact constantly returns back to the phone book, so many users simply stop contacting it. The problem is solved by disabling synchronization.
- Open your phone book.
- Call the context menu and select “Accounts”.
- Uncheck "Synchronize".
After turning off synchronization, you can safely delete entries from your book and applications without worrying that they will come back.
Removing duplicate numbers
Numbers can be repeated - for example, stored in the SIM card memory and on the phone. To correct this shortcoming, use the already described application from Google.
- Go to Google on your computer and go to the list.
- In the menu on the left, click "Find Similar."
After a short scan, the service will display a list of records that have a repeating number. You will be asked to combine these contacts so as not to fill the memory with the same data.
poandroidam.ru
How to delete a contact on Android?
The Android operating system, like any other, is not perfect. Therefore, users may experience various problems, including with saved numbers. In this guide, we will tell you how to delete contacts on Android, how to get rid of double contacts and fix other address book problems.
How to delete a phone number on Android
Removing a contact from your phone book is easy. To do this, follow these steps:
Step 1: Launch the Contacts app (may also be called People depending on your OS version)
Step 2: Touch and hold on the contact you want to delete until the context menu appears.
Step 3: Click the "Delete" button and then confirm your selection.
How to delete contacts from a SIM card
To delete contacts from a SIM card, you must first configure their display. The sequence of actions is as follows:
Step 1: Launch the Contacts app.
Step 2: Press the Menu button on your smartphone.
Step 3: The application settings will open, click the "Display" button.
Step 4. Set the “SIM Card Contacts” checkbox to the “Enabled” position.
Step 5. Return to the Contacts application, find the SIM card contacts that have appeared in the list of numbers (they will be displayed with the appropriate mark), select and delete them at your discretion.
Batch deleting contacts
Selecting and deleting each contact from the Android phone book individually is a rather labor-intensive and boring task if there are several hundred numbers on the phone. Therefore, you can use the batch uninstall function:
There is nothing to demagnetize there!
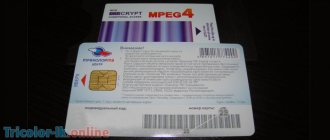
In fact, a SIM card is one of the types of processor-based “smart cards” that differ depending on the supported mobile communication system. Next we will talk specifically about SIM cards working in our GSM networks.
Today, there are four standard sizes of SIM cards:
- Full-size (1FF), the size of a bank card;
- Mini-SIM (2FF), the usual large SIM card;
- Micro-SIM (3FF), those that were in the iPhone 4;
- Nano-SIM (4FF), thin SIM cards that are now in most smartphones.
When you buy a card now, you get a chip on a universal piece of plastic that meets all these standards. And whatever the form of SIM cards, they have one thing in common: this is a real computer in miniature . A small chip with six contacts (previously there were eight) contains almost the same components as in a regular system unit. The SIM card contains:
- Processor (CPU);
- Random access memory (RAM);
- Read-only memory (ROM);
- I/O controller;
- File system.
Of course, there is no battery or any kind of human interface, they are simply not needed. But the small SIM card has its own operating system, which allows you to store vital data for the phone, user files (contacts, SMS) and even Java applications.
Due to the desire to reduce the cost of components, operators issue cards with a minimum of memory, but technically, gigabytes of information can be stored on SIM cards. Of course, no one needs this, there are no terminals operating in this mode, and it’s easier to operate a large amount of data via USB.
Do you understand now? This is a board with contacts. There are no magnetized elements here. The principle of data recording has nothing to do with magnetism. Accordingly, there is nothing to be demagnetized.
How to clear a SIM card of contacts
In addition to deleting SMS messages, many people do not know how to delete contacts from a SIM card, and the following questions have also been received. The tips are too short for a separate article, so I’ll paste them into this one.
How to clear SIM card numbers:
That's all the wisdom, I hope after these tips, your SIM card will no longer be full. There was also a question related to the memory card, but that will be a completely different story. ?
Despite the shortcomings, this option for storing contacts is convenient for many users. However, sometimes it may be necessary to delete some entries.
How to delete a contact from your phone yourself
: 10.08.2018
You can delete a contact from your phone using the Contacts function. The user also has the option to unsync an account to erase all numbers associated with it. If your contacts are stored in a Google Account, we recommend using the Contacts website to maintain control over them.
An easy way to delete numbers
To delete a contact from Android, you need to enter the Contacts application. This program may be called differently, and this will depend on the mobile device that is used. You must click on the entry you want to erase.
As a result, contact information should be displayed. If you want to erase several items, you can click on 1 of them and hold your finger for a while, which will activate the selection mode, and then specify additional names that need to be cleared.
This process may differ markedly on some device models.
Now you can click “Delete”. The location and design of this button will vary between devices, but it can generally be found in the top half of the screen. Sometimes it looks like a “Delete” message, and other times it looks like a trash can icon.
In some cases, the user will first need to click the button that looks like 3 vertical dots and then select the “Delete” option. You must click “Yes” to confirm that you want to erase the selected items.
The user will be asked if they understand that contacts will be permanently deleted from the mobile device. The operation needs to be confirmed.
Delete Google contacts
To delete Google numbers, you need to open a web browser. If you store numbers in your account, you can use Contacts to manage them more efficiently. For this purpose, you are allowed to use a special website. This method is only for items that are stored in an account. Numbers located in the phone memory or on another account must be removed separately.
You need to log into Contacts using your browser. To do this, use the same account as on the Android device. Next, click on your contacts' profile photos to select them. The search bar at the top of the page will help you quickly find the numbers you need.
You must click on the button with the image of a basket at the top of the screen. This will remove all selected numbers from your account. If the cart button is inactive, it means that 1 or more items you selected were added using .
To remove them, you need to erase the numbers from Circles.
Next, you need to open the Settings menu on your Android device. After deleting numbers from the Google Contacts website, you will need to re-sync your account on your Android phone. You must select the “Accounts” option, which can be found in the “Personal Information” section. Now you need to select “Google”. If you have several accounts, you should select the one that needs changes and click the button in the form of 3 vertical dots. It is usually located in the upper right corner.
You must click "Sync" for your Google account to share data with your contacts. Any items you delete on the Contacts site will be erased on your Android device. To delete contacts from a SIM card, you need to enter the corresponding section of the application with numbers. The location of this section may differ on each phone model.
review: deleting contacts
Source: https://appsgames.ru/raznoe/udalit-kontakt-s-telefona/
Step-by-step instruction
If you need to delete one phone number, then the user must do the following:
- Go to the “Phone” application on your smartphone.
- A menu with a call log will open. Select the “Contacts” section.
- A list of people's names will appear. Select the one to be deleted.
- A menu with information will open. Click on the pencil icon.
- Then to three dots, which are located in the upper corner.
- A menu will appear. Select the “Delete” function.
- Confirm action.
Important! If a user deletes numbers that were linked to a Google account with synchronization turned off, then after synchronization is turned on, the deleted contacts will appear on the phone again.
Therefore, you need to delete a number with synchronization enabled to avoid the problem.
If you need to erase several contacts at the same time, then:
- First of all, open the Contacts program.
- A list of people's names will appear. You need to press on a certain one and hold for three seconds. The name will be highlighted and a checkmark will appear next to it.
- Then simply click on the other names you want to erase.
- Click on the three dots and select “Delete”.
Some numbers are read-only, so it will not be possible to delete them using these methods. This is due to the fact that the number was saved via messenger. Therefore, you first need to unlink it from the messenger and only then erase it from your smartphone.
The need arises when it is important to completely reset the list. Then the user must disable the account. This function is useful if the phone is being prepared for sale. Instructions:
- Go to “Settings” - “Google Settings”.
- Go to “Personal Data” - “Accounts”.
- There will be a list of all accounts. Information about the notebook is synchronized in Google.
- You need to remove the Contacts tab from your account. And also disable its synchronization. If your Google account has not been divided into separate entries, then it is important to completely deactivate its synchronization.
- Then go to “Menu” - “Synchronize”. The phone will update the data. The number information will disappear.
How to delete a contact from an Android phone: from the SIM card and device
Has your smartphone's phone book gone from a carefully thought-out repository of useful information to a jumble of unknown numbers with strange names and irrelevant data? Is it becoming more difficult to find the right recipient? Numbers that came from unknown where are repeated three times in an endless list and do not disappear even after deletion? It's time to once and for all understand the tricks of interacting with the phone book - deleting contacts from an Android phone - briefly but clearly. No duplicates, unnecessary data or search problems - it's time to get things in order!
Deleting contacts one at a time
Before you start mass clearing your phone book, you should start with the basics - deleting selective contacts in one sitting:
- Open the “Contacts” menu (the appearance of the shortcut and the location of the section differ greatly between different versions of the Android operating system - somewhere the numbers are hidden in the “Phone” or “Address Book”);
- Take a look at the list that opens, find the desired contact and go to the profile settings. Call the context menu (either using the button on your smartphone, or using the “vertical ellipsis” located in the upper or lower corner of the interface), click on the “Delete” item that appears;
- An alternative option (without going to the profile) is to hold your finger on the contact until a small window with current actions appears, click on the same available item;
- The final step is to agree to the deletion and wait for the procedure to complete.
By the way, if it is important to clean the phone book contacts stored on the SIM card, you will have to work with the section settings and change the way the numbers are displayed. It is important to check the box next to “Display SIM card contacts” and then save the changes. As a result, when working with the phone book, numbers marked with a special SIM icon will appear.
By default, every owner of a smartphone with the Android operating system is registered with Google (at least for the sake of using the Play Market), and therefore the “Contacts” service will not become news (before using the site, you should go to the operating system settings and check the box next to “Synchronize” numbers with Google).
Accordingly, you just need to follow the link, log in, and then, armed with the menu located on the left side of the screen, click on the “Find similar contacts” item.
If suitable options are found, the service will immediately tell you how to deal with everything that is unnecessary (check the boxes, click “Delete”) or how to return the changes made.
Applications for cleaning contacts
And although Android’s built-in contact management tool can hardly be called inconvenient or overly confusing, there are always higher-class competitors. The options, of course, cannot be listed, but several need to be specifically mentioned:
- ExDialer - Dialer & Contacts. - an unusually beautiful tool for working with numbers: each profile is presented like a real business card, where you can write down everything - even your birthday, even your blood type. Interesting features include support for plugins and notifications, automatic and continuous search for duplicates, assistance in filling out versatile text fields, transferring some information to the calendar;
- “Contacts +” is a true founder of the genre, which has survived a thousand patches and turned into a public favorite. Blocking spam and unwanted numbers (users can add some subscribers to the blacklist and even synchronize exceptions between different devices), enhanced protection of confidential data, the ability to answer calls via SMS, quick search and all kinds of reminders. Supports the ability to transfer contact data to smart watches;
- PixelPhone Pro is a legend in the phone book genre. An incredibly beautiful tool with instant access to data, a system of blocked and hidden numbers from prying eyes, several themes, the ability to install and configure antispam, a built-in recycle bin, and even a tool that allows you to delete what others could not. True, you have to pay for luxury, but there will never be advertising!
iPhone
In order to delete contacts using iTunes, you will need:
- Connect your smartphone to your computer using a USB cable;
- Launch iTunes;
- Click on the device icon in the upper right corner;
- Find the “Information” section;
- Check the box “Synchronize contacts”;
- Select “All contacts”;
- Go to the “Advanced” section, which is located at the very bottom;
- Check the box next to the “Contacts” line;
- Click on the “Apply” button;
- Select “Replace information”;
- The contacts will be deleted from the SIM card.
Why block a number?
Once again, we will explain in more detail why a user of mobile communication services needs to block the number to which the SIM card was linked.
So, there are two objective reasons for this. The first is that users are looking for an answer to the question of how to block a Megafon SIM card for the reason of preventing other people from using their number. This is obvious: firstly, we are talking about private data that can become known to outsiders. Secondly, scammers can use your lost SIM card. In such a situation, there are plenty of options for how it can harm you: extortion calls can be made from it, for example. Since the number is registered to your passport, jokes with this are bad and may end in an unpleasant story for you.
The second reason that people want to know how to block a Megafon SIM card is the possibility of further transferring the number to another card. This reason is also very clear: in order to use the same number on a new card that you will receive in the future, it must be blocked on the old SIM card (after all, the operator is physically unable to service one number on two cards). Thus, the need for blocking arises, which we will describe in this article. Apparently, to answer the question: “Is it possible to block a SIM card?” It’s not worth it - the answer is obvious: yes, you can. And now we will tell you more about this.
Warning
When choosing how to block a Megafon SIM card - via the Internet, in person at a communication store, and also with the help of an operator - you need to remember a few things. We are going to talk about them in this chapter.
Firstly, there is the cost of blocking. In order to suspend service from a SIM card operator, the subscriber must pay. Megafon's prices are as follows: a week of blocking is free, and a month will cost 30 rubles. You should not expect that the card will be terminated free of charge.
In this case, it should be noted that your number will be saved for you.
Secondly, you have the right to completely refuse the number that was assigned to you, i.e. simply stop the card. This service is free, but irrevocable, so it would be pointless to ask the question: “how to restore a blocked SIM card?” Thus, you will lose your Megafon number forever. This procedure is carried out through breaking the subscription service agreement.
Android
You can clear the SIM card memory in phones based on the Android operating system using standard device tools. To do this you will need:
- Go to the “Contacts” section;
- Call the function menu;
- Select the “Settings” tab;
- Tap the “Display Options” line;
- Select “SIM card”;
- In the functional menu, use the “Delete” function;
- Check the required contacts or check the box next to the “Mark all” line;
- Click the “Delete” button;
- Confirm deletion.
If you wish, you can clear the SIM card memory manually by deleting each contact one at a time.
Share this article
with friends on social media networks:
Number recovery
As part of an article devoted to blocking a phone number, it would also be advisable to mention the procedure that, as a rule, follows blocking. True, there is one nuance here. It lies in what goal the user is pursuing when unlocking.
If a person has found his SIM card and just wants to resume its operation, he can go to a communication salon, go to the Megafon portal in his personal account, or call the operator (the numbers are the same). Another option is when the subscriber wants to start working with his number using a new card. Then he needs to come to the communication salon (in any case) and write a statement. The service for transferring a number to a new SIM card is called that.
Client Internet Panel
Another option for blocking a card, as you already understood, is to use the subscriber’s Internet account. In it you will find all the information you need about how blocking is carried out; In addition, on the operator’s website (in your account) you will have the opportunity to block the card personally.
To do this, you will need to go to your account. This task, in turn, is solved in two ways: visiting your personal page using your password (which was previously set); as well as logging in using a PUK code. The last option is appropriate in the case where the subscriber had not worked with the account before before the SIM card was lost.
It won’t be difficult for you to understand the resource interface itself. The site is extremely simple, it has an option that allows you to manage your number - this is exactly what you need.
Call to operator
The first, most comfortable and easiest option is to call your operator. In fact, you should simply dial the number of the call center that serves subscribers. After providing certain information confirming that you are the owner of the lost card, you will receive an application for blocking. This operator has two numbers for connecting subscribers with operators. The first is 8-800-333-05-00, and the second is short: 0500. It is clear that to connect you will need either a different SIM card or a completely different phone.
Mass deletion
Tired of looking at every contact's profile? Is your finger tired of calling the context menu a thousand times, but the list of numbers is not going to end? The simplest way out of this situation is to use “batch cleaning”. The procedure is no more complicated than what is above:
- Open the “Contacts” menu;
- Without going to any profiles, open the menu (either using the button on your smartphone, or using a vertical ellipsis), and in the list of possible actions that appears, click on the “Delete” item;
- Check the boxes next to subscribers who have not been needed for a long time. Of course, it’s worth double-checking three times to see if any important number has fallen under the hot hand;
- The final step is to confirm your determination by answering “Yes” to the dialog notification that appears. Wait for the cleaning procedure to complete.