Sony Smart TV panels not only traditionally broadcast TV channels - they open up the opportunity for the user to watch a variety of video content online, including IPTV, communicate with friends via social networks or Skype, play games on the big screen, and surf World Wide Web sites and carrying out other entertainment activities related to accessing the Internet. However, to take advantage of all this, you need to connect the TV receiver to the Network, and then set up SMART TV on your Sony TV.
LCD Digital Color TV KDL…
Lcd digital color tv
- Image
- Text
- Content
4-269-995-
47
(1)
LCD Digital Color TV
KDL-55EX72x / 46HX72x / 46EX72x / 46EX52x / 46CX52x / 40HX72x / 40EX72x / 40EX52x KDL-40CX52x / 37EX72x / 37EX52x / 32EX72x / 32EX52x / 32EX42x / 32CX 52x / 26EX32x KDL-24EX32x / 22EX32x
Operating instructions RU
Operating instructions
U.A.
- Getting started Checking the accessories
- Installing batteries in the remote control
- 1: Assembling the table stand
- 2: Adjusting the TV viewing angle
- 3: Connecting an antenna/set-top box/video recorder (such as a DVD recorder)
- 4: Connecting audio/video devices
- 5: Stable installation of the TV
- 6: AC Power Cable Management/Cable Grouping
- 7: Initial setup
- Watching TV
- Preparing a wired network
- Troubleshooting
- Cob robots Checking the laddy
- Pereklyad TV station
- Preparing a dart line
- Troubleshooting
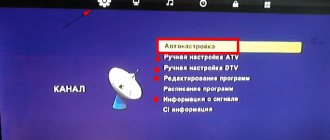
How to connect a TV to WiFi via PBC
If the access point has a PBC button, the procedure is as follows:
- Connect the TV receiver to the Wi-Fi adapter.
- Turn it on, press MENU on the remote control, and then go to the “Settings” section.
- Select the “Network” menu item.
- Enter the type “Wireless”.
- Open the “Network Settings” menu item.
- Press the red button on the remote control.
- Hold the PBC button on the access point for 2 minutes. The TV receiver will automatically receive the required settings and the network connection will take place.
- To exit, press the RETURN button.
Introduction, Digital TV Notice, Trademark Information
Page 2
- Image
- Text
2
RU
Introduction
Thank you for choosing this Sony TV. Before turning on the TV for the first time, please read these operating instructions carefully and keep them for future reference.
Note about Digital TV
•
All functions related to Digital TV (
), will
Only valid in countries or regions that provide over-the-air digital broadcasting of a DVB-T signal (MPEG-2 or H.264/MPEG-4 AVC) or access to compatible cable digital broadcasting DVB-C (MPEG-2 or H .264/MPEG-4 AVC). Please check with your dealer to see if DVB-T can be received where you live, or check with your cable provider to see if their DVB-C cable service is available for your TV.
•
Your cable TV provider may charge an additional fee for this service and require you to agree to its terms and conditions.
•
Although this TV satisfies DVB-T and DVB-C specifications, we cannot guarantee its compatibility with future DVB-T digital terrestrial broadcasts and DVB-C digital cable broadcasts.
•
Some Digital TV features may not be available in some countries/regions, and proper DVB-C signal reception may not be available on all cable providers.
~ •
The “x” in the model name corresponds to a single number related to design, color variation or television system.
•
For instructions on “How to install the wall mount bracket,” refer to this TV instruction manual.
•
The illustrations used in this manual may differ depending on the TV model.
•
The remote control illustrations shown in this manual are for model RM-ED044 unless otherwise noted.
•
Before turning on the TV, read the “Safety Information” section (page 37). Please save this manual for future reference.
Brand Information
is registered
trademark of DVB Project.
HDMI, the HDMI logo and High-Definition Multimedia Interface are trademarks or registered trademarks of HDMI Licensing LLC in the United States and other countries.
DLNA®, the DLNA logo and DLNA CERTIFIED® are trademarks, service marks or certification marks of the Digital Living Network Alliance.
DivX® is a video compression technology developed by DivX, Inc.
DivX®, DivX Certified®, and all related logos are trademarks of DivX, Inc. and are used under license.
ABOUT DIVX VIDEO FILES. DivX® is a digital video format developed by DivX, Inc. This device is an official DivX Certified device that plays DivX video files. For more information and software tools to convert files to the DivX video format, visit www.divx.com.
ABOUT DIVX VIDEO ON DEMAND. To play DivX video on demand content, you must register this DivX Certified® device. To generate a registration code, find the DivX VOD section in your device's setup menu. Go to vod.divx.com and enter this code to complete the registration process and get more information about DivX VOD technology.
Manufactured under license from Dolby Laboratories. “Dolby” and the double-D logo are trademarks of Dolby Laboratories.
"BRAVIA" and
are
trademarks of Sony Corporation.
TrackID is a trademark or registered trademark of Sony Ericsson Mobile Communications AB.
Music and video recognition technology and related data are provided by Gracenote®. Gracenote is the industry standard in music recognition technology and related content delivery. For more information, visit www.gracenote.com. CD, DVD, Blu-ray Disc, and related music and video data from Gracenote, Inc., Copyright © 2000-present Gracenote. Gracenote Software, Copyright © 2000-present Gracenote. This product and service is covered by one or more Gracenote patents. For information on Gracenote's current list of applicable patents, please refer to the Gracenote website. Gracenote, CDDB, MusicID, MediaVOCS, the Gracenote logo and logo, and the “Powered by Gracenote” logo are either registered trademarks or trademarks of Gracenote in the United States and/or other countries.
Opera® Browser from Opera Software ASA. Copyright 1995-2010 Opera Software ASA. All rights reserved.
Wi-Fi Protected Setup and WPA are marks of the Wi-Fi Alliance.
Automatic network setup
Wi-Fi networks have an additional security system that requires connected devices to transmit an access code. This is the password (a word or a series of letters and numbers) entered during connection security setup. Using auto-tuning involves entering a password through a browser.
To automatically install Wi-Fi Internet, you must:
- Press the button to open the “Internet Protocol Settings” item, and then press ENTER. Go to “Auto” and confirm the entry.
- Go to “Select Network” and press ENTER. Searches for available Wi-Fi networks. Once completed, a list of them will be displayed.
- In the list, using the navigation buttons, select the desired network and press ENTER. If the router is hidden (invisible), then you need to open the “Add network” menu item and write down the name and password.
- Select "Security" or "PIN". For most home networks, the first option is suitable. The security screen appears.
- Enter your password. It must match the code you entered when setting up your router or modem.
Wireless Notes, Location of Identification Label, Continued)
Page 3
- Image
- Text
3
RU
For KDL-55/46/40/32EX721, KDL-46/40/32EX724, KDL-26EX321, KDL-26/24/22EX320:
Wireless Notes
1. Sony Corporation hereby declares that this device complies with the essential requirements and relevant provisions of Directive 1999/5/EC.
For more information, visit the website at the following URL:
https://www.compliance.sony.de/
2. Note for buyers. The following information only applies to equipment sold in countries where EU directives apply.
The wireless TV system can be used in the following countries.
Austria, Belgium, Bulgaria, UK, Hungary, Germany, Greece, Denmark, Ireland, Iceland, Spain, Italy, Cyprus, Latvia, Lithuania, Liechtenstein, Luxembourg, Malta, Netherlands, Norway, Poland, Portugal, Romania, Slovak Republic, Slovenia , Turkey, Czech Republic, Switzerland, Sweden, Finland, France and Estonia.
This equipment can be used in other non-European countries.
Wireless TV System - Legal Notices
For buyers in Italy
The use of the RLAN network is regulated by law: -
s according to the Legislative Act
on private use No. 259 of 1.8.2003 (“Electronic Communications Law”). In particular, Article 104 specifies the conditions under which permission is required in advance, and Article 105 specifies cases of free use;
s regarding the provision
general RLAN access for telecommunication networks and services, in accordance with the Administrative Law of 28.5.2003 and its amendments, as well as Article 25 (general permissions for electronic communication networks and services) of the Electronic Communications Law.
For buyers in Norway
This radio equipment must not be used within a radius of 20 km from the center of New Ålesund, Spitsbergen archipelago.
For buyers in Cyprus
The user needs to register RLAN devices (as well as WAS or Wi-Fi) with the Ministry of Electronic Communications (PI 365/2008 and 267/2007).
PI 365/2008 is the Radio Communications Order (categories of stations subject to general authorization and registration) of 2008.
PI 267/2007 is a general authorization for the use of radio frequencies by local radio networks and wireless access systems, including wireless networks (WAS/RLAN).
For buyers in France
The WLAN (WiFi) function of this digital LCD color TV can only be used indoors. Any use of the WLAN (WiFi) function of this digital LCD color TV outdoors is prohibited in France. Before using this Digital LCD Color TV outdoors, make sure the WLAN (WiFi) function is turned off. (ART Decision 2002-1009, as amended by ART Decision 03-908, regarding restrictions on the use of radio frequencies.)
Identification Label Location
Labels indicating the model number, production date (month/year), and power supply specifications (in accordance with applicable safety regulations) are located on the back of the TV or on the packaging.
Sony Corporation, 1-7-1 Konan, Minato-ku, Tokyo Japan
Made in Spain, Slovakia, Czech
Sony Corporation 1-7-1, Konan, Minato-ku, Tokyo, Japan
Made in Spain, Slovakia, Czech Republic
Importer in the Russian Federation: Sony Electronics CJSC, 123103, Moscow, Karamyshevsky proezd, 6, Russia
(Continuation)
Connecting your Sony BRAVIA TV to the Internet via Wi-Fi
Many people wonder how to set up Smart TV on a Sony Bravia TV via wifi. To take full advantage of your Sony Smart TV, you need to connect and configure it correctly.
As a rule, connecting Sony Bravia, Sony Trinitron or Samsung TVs is carried out in 2 main ways:
- via router;
- via Wi-Fi.
To connect directly, special conditions are needed, since the TV will only work if the “Internet provider” provides a dynamic IP. Setting up Smart TV on a Sony Bravia TV via wifi is carried out according to the following scheme: network cable - router - Wi-Fi distribution. The distributed signal can be used from any of the necessary devices.
Note! If your TV does not have Wi-Fi, you will need to buy a Wi-Fi adapter. However, its acquisition will be advisable only if the equipment supports this technology.
Precautionary measures
Page 4
- Image
- Text
4
RU
Precautionary measures
Watching TV
•
When watching 3D video images or playing games in stereoscopic 3D, some people may experience discomfort (such as eye strain, fatigue, or nausea). Sony recommends that all viewers take regular breaks when watching 3D video images or playing games in stereoscopic 3D. The duration and frequency of breaks depends on individual needs. You need to choose the most suitable option. If you experience any discomfort, you should stop watching 3D videos or playing stereoscopic 3D games until the discomfort goes away; If necessary, consult a doctor. You should also refer to (i) the instruction manual of any other device or media used with the TV, and (ii) visit our website (https://www.sony-europe.com/myproduct) for the latest information. The vision of young children (especially those under six years of age) is not yet fully formed. Before allowing children to watch 3D videos or play games in stereoscopic 3D, consult a doctor (such as a pediatrician or ophthalmologist). Children should be supervised by an adult to follow the above recommendations.
•
Do not use, store or leave the 3D glasses or battery near open flames or in hot areas, such as direct sunlight or in cars parked in the sun.
•
When using the 3D Simulation function, please remember that the displayed image is simulated by this TV by transforming the original image.
•
Watch TV in sufficient lighting; viewing in poor lighting or for excessively long periods of time strains the eyes.
•
When using headphones, do not set the volume too high to avoid damaging your hearing.
LCD screen
•
Although the LCD screen is manufactured with high-precision technology and the effective dots reach 99.99% or higher, black dots or bright colored dots (red, blue or green) may appear on the screen continuously. This is a structural property of the LCD screen and does not indicate a malfunction.
•
Do not press or scratch the protective filter, or place any objects on the TV. This may result in uneven images or damage to the LCD screen.
•
If the TV is operated in a cold place, the picture may appear blurry or too dark. This is not a malfunction. These phenomena will disappear with increasing temperature.
•
If you display a still image for a long time, afterimages may appear. They may disappear after a few seconds.
•
While the TV is operating, the screen and body become hot. This is not a malfunction.
•
The LCD screen contains a small amount of liquid crystals. Some fluorescent lamps used in this TV also contain mercury (except for the LCD TV's LED backlight). When disposing of the product, follow the relevant local regulations and instructions.
Caring for the surface of the screen and the TV body and cleaning them
Before cleaning the TV or the power plug, unplug the cord.
To ensure the safety of the construction materials and the coating of the TV screen, observe the following precautions.
•
To remove dust from the surface of the TV screen/body, wipe it gently with a soft cloth. If dust is not completely removed, wipe the screen with a soft cloth lightly dampened with a mild solution of mild detergent.
•
Never spray water or detergent directly onto the TV. Liquid may accumulate at the bottom of the screen or on external surfaces and get inside the TV, which may cause it to malfunction.
•
Never use any abrasives, alkaline/acidic cleaners, scouring powders, or volatile solvents such as alcohol, benzene, thinner, or insecticides. The use of these substances or prolonged contact with rubber/vinyl products may damage the casing or screen surface.
•
To ensure proper ventilation, it is recommended to periodically clean the ventilation openings with a vacuum cleaner.
•
When adjusting the angle of the TV, adjust the position slowly and carefully to prevent the TV from sliding off the stand.
Additional devices
•
Keep additional components or equipment that emit electromagnetic waves away from the TV. Otherwise, the picture and/or sound may be distorted.
•
This equipment has been tested and found to comply with the limits set out in the EMC Directive when using a connecting signal cable less than 3 meters in length.
(Warning about using the remote control) Notes
•
When inserting batteries, observe the correct polarity.
•
Do not use different types of batteries or old and new batteries at the same time.
•
Always respect the environment when disposing of batteries. Some regions may have regulations regarding battery disposal. Please contact your local authorities regarding this matter.
•
Handle the remote control with care. Do not throw it, stand on it, or pour any liquid on it.
•
Do not leave the remote control near heat sources or in a place exposed to direct sunlight or in a humid place.
Wireless function of the device
•
Do not use the device near medical equipment (electronic pacemakers, etc.) as this may cause the latter to malfunction.
•
Although this device transmits/receives encrypted signals, beware of unauthorized signal interception. We are not responsible for any problem of this kind.
Setup using automatic configuration
You can set up a network using automatic configuration by performing the following steps:
- Place an access point (AP) and a TV nearby, and then turn them on. Since download times may vary, you may need to wait about two minutes. Before connecting your TV to a Wi-Fi router, you need to make sure that the network cable is connected to the router port. Otherwise, auto-configuration will only confirm the connection with the access point, but there will be no confirmation of connection to Wi-Fi.
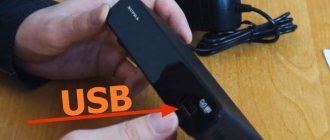
- After a few minutes, connect the adapter to the TV. After this, a pop-up window will appear.
- After connecting, you should place the router parallel to the network adapter no further than 25 cm from it.
- You need to wait until the automatic connection occurs. Otherwise, a window indicating a malfunction will appear on the screen. To try again, you need to reboot the router, disconnect the adapter and start again from step 1. You can also choose another connection method: auto, manual or PBC.
- Place the AP in the desired location. If its parameters have changed, or a new access point is being configured, the steps must be repeated from the beginning.
RU Disposal of TV Disposal of used electrical...
Page 5
- Image
- Text
5
RU
TV disposal
Disposal of waste electrical and electronic equipment (directive
used in the European Union and other European countries where separate waste collection systems operate)
This symbol on the device or its packaging indicates that this device must not be disposed of with your other household waste. It must be taken to an appropriate collection point for the recycling of electrical and electronic equipment. If this product is not disposed of correctly, it may result in potential negative consequences for the environment and human health and is therefore subject to special disposal requirements to help prevent such consequences. Recycling these materials will help conserve natural resources. For more information about recycling this product, contact your local city office, your household waste collection service, or the store where you purchased the product.
Disposal of used batteries (applicable in countries
the European Union and other European countries where separate waste collection systems operate)
This symbol on the battery or packaging means that the battery supplied with the device must not be disposed of with other household waste. On some batteries, this symbol may be combined with the symbol of the chemical element. Symbols for mercury (Hg) or lead (Pb) are indicated if the content of these metals is less than 0.0005% (for mercury) and 0.004% (for lead), respectively. By ensuring that used batteries are disposed of correctly, you will help prevent negative impacts on the environment and human health that could result from inappropriate waste disposal. Recycling materials used in the manufacture of batteries helps conserve natural resources. When operating devices that require constant power from a built-in battery for safety purposes, performing any actions, or storing data stored in the device’s memory, such a battery should only be replaced at specialized service centers. To properly dispose of used batteries after their service life has expired, take them to an appropriate collection point for electronic and electrical equipment. For the use of other batteries, please see the section that provides instructions on how to remove batteries from the device while observing safety precautions. Please return used batteries to the appropriate collection and recycling facilities for used batteries. For more information about recycling this product or used battery, please contact your local city office, household waste collection service, or the store where you purchased the product.
Direct connection
It is possible to communicate with an iPhone or Android mobile device without the mediation of a router. This feature becomes available when SWL is disabled.
Direct connection of a new device is carried out in the following way:
- A list of devices and networks opens through the “Select network” menu item.
- The blue button on the remote control is pressed.
- The message “Direct Wi-Fi connection to a mobile phone or computer” appears. The network may have limited functionality."
- Enter the SSID and security key on the connected access point.
If a security key is required, you should write it down. If the network is not working properly, you should check your login and PIN code. An incorrect key may cause the device to not function properly.
EN Getting started Checking the accessories...
Page 6
- Image
- Text
6
RU
Beginning of work
Checking accessories…………………………………………………………………………………. 8
Installing batteries in the remote control ………………………………………………………………………………. 8
1: Assembling the table stand ……………………………………………………………………………….. 9
2: Adjusting the TV viewing angle……………………………………………………………. 10
3: Connecting an antenna/set-top box/video recorder
(for example, DVD recorder)………………………………………………………………………………… 11
4: Connecting audio/video devices……………………………………………………………… 12
5: Stable installation of the TV……………………………………………………………….. 12
6: AC power cable management/Cable grouping………………….. 13
7: Initial setup ……………………………………………………………………………….. 13
Using your BRAVIA TV
Watching TV ……………………………………………………………………………………………. 16
Selecting various functions and settings in the Home menu…………………………………….. 18
Displaying the operating instructions (i-Manual) ……………………………………………………….. 20
Network configuration
Preparing a wired network………………………………………………………………………………….. 22
Preparing a wireless LAN……………………………………………………………….. 22
Setting up an Internet connection………………………………………………………………………. 23
If you can't connect to the Internet………………………………………………………….. 25
Changing server display settings………………………………………………………. 25
additional information
Troubleshooting……………………………………………………………………… 26
Technical specifications………………………………………………………………………………… 27
Installing Accessories (Wall Mount Bracket) ……………………… 32
Safety information…………………………………………………………………………………. 37
Content
How to connect a TV to Wi-Fi using auto-configuration
Connecting an iPhone via Wi-fi Direct to another phone or TV
How can you access the Internet on a Sony TV using auto-configuration? The function allows you to connect the TV receiver with wireless access points from third-party companies. If they do not support this function, then the connection must be made using PBC (WPS), automatic or manual configuration.
Note! Before connecting your TV to Wi-Fi, you need to turn off SWL.
You can check whether a specific device supports the automatic configuration function on the company’s official portal
Contents of the i-manual
Page 7
- Image
- Text
7
RU
RU
The TV has a built-in manual (i-Manual). To access the i-Manual, press the i-MANUAL
on the remote control and select an item. For more information, see page 20 of this manual. The contents of the i-Manual may differ depending on the model/region/area.
Contents of the i-Manual
*
Some models do not have this feature.
After setting up your BRAVIA TV and learning the basic operations using this manual, refer to the built-in manual (i-Manual) for more information about the TV's features.
Using i-Manual
“BRAVIA” TV functions
3D function* Presence sensor* Internet video “BRAVIA” Internet widgets Wireless LAN /
Wireless network support
“BRAVIA” Sync with f. “Control by
HDMI"
Support Skype TrackID™/Music Search/Video Search USB HDD Recording*
Watching TV
3D Function* Digital Electronic TV Guide Favorites Screen Format Picture Mode Teletext Photos/Music/Video Two Pictures (PIP) Two Pictures (P&P) NVOD/MF
Settings/Home Menu
About the Home menu Settings Display Sound System settings i-Manual
Digital configuration Settings analogue channels External inputs Network Product support
Using other equipment/Internet
VCR/DVD
record player
Audio system Device USB (eg digital camera) Mode Photo Frame Equipment HDMI Internet/Wireless LAN network Home network Media Remote PC
Description of parts
Elem remote control. management and indicator. TV Connectors
Troubleshooting
Pointer
Bookmarks
Possible problems and their solutions
When setting up SMART functionality on Sony SmartTV, users sometimes have difficulties. Let's look at the most common problems and how to fix them in more detail.
- Most often, problems with the operation of Sony SMART TVs are associated with an outdated firmware version. To correct the situation, just update the OS, after which the service will work better.
- In some cases, users complain about unstable operation of programs or widgets. Downloading a new and better version of the application will help solve the problem.
- If there is no Internet with a cable connection, first of all you need to check the condition of the wire. In most cases, problems are related to its integrity - it can be crushed or damaged by pets. The cable will need to be replaced.
- If there is no wireless connection, you need to check the ability to access the Internet from other devices, for example, from a phone, by connecting to the same WiFi network. If you have access, you need to make sure the WiFi receiver on your TV is working. To do this, you can try connecting the device to another wireless network, for example, using your smartphone as an access point. If everything is in order, it is recommended to reset the network settings on the SMART TV receiver to factory settings and reconnect the equipment to the Internet.
Summarize. Sony SmartTV TVs are a technology for those users who want not just to watch television channels, but to have a real entertainment center. Access to the Internet allows you to watch movies and TV series online, visit various sites through the built-in browser, connect a gamepad and launch games, communicate on Skype with friends and family through a separate webcam, and so on. All that is required from the user is to properly organize the Internet connection and configure the SMART TV section .
Network settings
If other methods do not work, you must enter the network settings manually. You must first obtain connection information. To do this, on a Sony Bravia computer running Windows OS, perform the following steps:
- Right-click on the network icon at the bottom right of the screen.
- Select “Status” from the pop-up menu.
- Go to the “Support” tab.
- After clicking the Details button, the network settings will be displayed.
Manual network setup
To enter network connection values manually, you must perform the following operations:
- Select “Internet Protocol Settings” and “Manually”.
- Enter the IP address using the number buttons on the remote control.
- To move to the next field, press the arrow buttons to navigate down, up and back.
- Enter the subnet and gateway mask.
- Go to the DNS input field. Enter numbers.
- When finished, use the button to select a network.
- After this press ENTER.