Many people love to sing, so karaoke is a great entertainment for the home, especially if you need to keep a noisy group busy at a party. It’s not easy to choose among the variety of devices, because they all do an excellent job of playing music. Therefore, the main task for users is to connect the device and configure it correctly. There are many options: from DVD players to LG and Samsung TVs with Smart-TV technology. Microphones also vary in how they are connected and come in two types: wired and wireless.
Karaoke set
The complete kit includes a player, vocal system and microphones. All elements are connected via plugs, the sound and its quality are adjusted through the set-top box. Advanced models have advanced options including backing vocals, digital echo effects, key control, etc.
Budget sets are standard DVD players with a microphone jack. They are connected via old SCART and RCA interfaces. Owners of new TVs will have to buy adapters separately. New players have an additional HDMI connector. In order not to make a mistake when purchasing a kit, it is important to start from the connectors of the existing equipment.
Karaoke set.
What you need for karaoke on TV at home
To be able to sing karaoke on your TV, you need to connect a simple set:
- prefix;
- player;
- boombox.
The set-top box must support karaoke in order to run the program. With its help, the sound quality is adjusted. For ease of use, the user can create separate folders and fill them with favorite tracks. Give folders names depending on the occasion or mood, and quickly find them when necessary.
The developers recommend installing updates periodically so as not to deprive yourself of the opportunity to use interesting additional features. If desired, you can start backing vocals, as well as control karaoke from your tablet and phone.
Before buying a set-top box, check which file formats the device supports. This will ensure that further operation will not require unnecessary effort.
How to connect karaoke
To make karaoke at home, you can use one of 4 connection methods:
- via a standard DVD player;
- using a personal computer;
- through an application on a smartphone;
- to TV with Smart-TV.
When choosing, you should take into account the capabilities of the technology. For owners of Samsung and LG Smart TVs, there are proprietary applications through which karaoke is automatically connected.
Via DVD
Organizing karaoke at home through a DVD player is the easiest and most cost-effective way. To do this, you need to buy an appropriate video player and a music disc. Many DVD players have been preserved and are not used, as more modern technology has come out. The devices are equipped with microphone inputs and support various formats, including the most common - MPEG4, XviD, HDCD, SVCD and WMA. To set up karaoke this way, you need to:
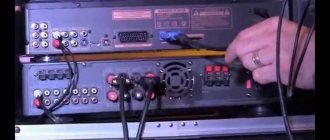
- connect the DVD player using a tulip cable or SCART;
- connect the microphone to the player;
- through the TV settings, select DVD as the main signal for output;
- turn on the player and insert a disc with music, checking the system’s functionality.
A DVD player can also be replaced with a Blu-Ray player if you have a disc with music in the appropriate format.
DVD player with karaoke.
Via PC
At home, you can use a personal computer or laptop. The microphone is connected to the PC connectors and is used as the default output device. But this method still requires a TV - it is a monitor for displaying the lyrics of the song. First you need to download or buy the application and install it on your computer. The following programs are considered the most popular:
- Karaoke Galaxy Player;
- VanBasco's Karaoke Player;
- KaraFun;
- GoSing Karaoke Player.
In order for the image to be displayed correctly on the TV, you must select TV as the main source in the screen settings on your computer. The connection is made via an HDMI connector or analogue conductors. With an HDMI connection, the sound will be output through the TV speakers, otherwise through the PC.
Via smartphone
Connecting from a phone is similar to the previous option - you need to download the application for Android (Google Play) or iOS (App Store). The top 3 applications include Mobile Karaoke Quail, Sing! Karaoke" and "Vocalix". After installation you must:
- connect your smartphone to the TV via a USB cable or HDMI adapter;
- select “connect via USB” on the phone screen;
- in the TV settings, select USB as the main display source;
- connect a wired or wireless microphone to a smartphone;
After launching the application and checking the microphone through a test recording in the voice recorder, you can enjoy karaoke.
Mobile Karaoke "Quail".
To Smart TV
Samsung and LG Smart TVs have their own karaoke apps, such as masterkaraoke.com. Almost all of them are free, but limited to only a few songs. To access the full music library, you will need to purchase a subscription or the full version of the application. The only difficulty that arises when connecting karaoke to Smart TV is choosing a microphone.
Pay attention to the connection connector - they come in two types: 3.5 and 6.3 mm. The port is located on the back or side of the TV. If there is no connector, use devices with a USB connection.
Personal Computer
As a tool for broadcasting karaoke on TV, you can use almost any personal computer - desktop or laptop . The main thing is that the video card has an HDMI connector and supports working with third-party peripherals. In this case, the TV will act as a second monitor.
First of all, you need to install the karaoke program on your PC. Fortunately, there is plenty of such software on the Internet. Among others, the following interesting utilities can be noted:
- Karaoke 5;
- PyKaraoke;
- JichiMultimedia;
- KaraWin;
- UltraStar Deluxe.
To enable karaoke on your TV, you need to connect it to your PC video card with an HDMI cable and configure your desktop.
TV as a second monitor:
- Right-click on your PC desktop.
- In the context menu, select “Display Settings”.
- In the “Multiple Displays” section, click “Detect”.
- Select the TV model and agree to the broadcast.
Here you can decide on the method of displaying the picture: use TV as the main screen, additional, repeating, and also expand or reduce the scan. All that remains is to connect the microphone to the motherboard or sound card.
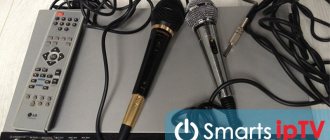
How to connect a microphone
There are two types of microphones: condenser and dynamic. The former are highly sensitive and detect a wide range of sounds, including noise. Used in professional sound studios where there is sound insulation. At home, it is better to use the second option - they are cheaper and only pick up voice.
An equally important criterion is the connection method. Wired devices are connected via a 3.5 or 6.5 mm jack. There are also devices with a USB port. For wireless connection, a radio module with a receiver or Bluetooth is used. The options differ only in convenience.
Wired
To connect a wired microphone, the TV must have an appropriate connector: USB, 3.5 or 6.3 mm. The most common is the pink 3.5 mm input labeled Audio-IN. Once connected, you can check the functionality of the device only while playing music. Smart TVs automatically install drivers to display the device correctly, so an Internet connection is required.
Wireless
Wireless models are in many ways more convenient than microphones with a cable, but they are also more expensive. Wires do not get in the way underfoot, and the range of the device also increases. There are two options for connecting a wireless microphone: via Bluetooth or an external radio module located in the USB port. In the case of Bluetooth, the TV must support wireless transmission technology, so it is recommended to use models that support Smart TV. To connect you need:
- activate the microphone;
- turn on Bluetooth in the TV settings;
- find the microphone in the list and connect it.
After the first connection, re-authorization will occur automatically.
Is it possible to sing without additional programs?
Using karaoke without auxiliary software is an easy way to sing. To do this, music compositions without words – backing tracks – are first downloaded to disk. There are online services that convert any song into a karaoke version.
It is possible to customize the melody in accordance with the sound of the performer's voice. The lack of text prompts is considered a disadvantage. Therefore, you will have to learn the words in advance or save them in a separate file.
At home, you can use another method - Internet services. There are many sites where you can sing karaoke online. Here you can participate in competitions, earn points, and receive comments.
Helpful tips for setting up
Connecting a karaoke system and microphone does not require professional skills, especially if you follow these useful tips:
- Before buying a karaoke, pay attention to the sound quality, recordings, number of inputs and outputs, and the availability of free songs in the music library. The most affordable option is a DVD player, recommended for beginner karaoke fans.
- To get high-quality sound, it is best to purchase a TV with Smart TV from Samsung or LG. Connecting karaoke is simple and understandable to everyone.
- If the audio stream is too quiet, connect additional speakers to the TV.
Karaoke has been and remains a popular entertainment for families or large groups of friends. You can connect karaoke to your TV in different ways, from a standard DVD player to Smart-TV technology. After setup, you need to check the functionality of a wired or wireless microphone connected through the TV connectors.
Smart TV features
Here you will need a special karaoke application for Smart TV. Similar software is already included in the firmware of some models. If not, you can find one at your local online store. There are more than enough programs for every taste. Among others, we can note a very successful application - KaraokeSuperstar.
Built-in programs for LG and Samsung Smart TV come with a paid subscription. For the same Masterkaraoke from Samsung you will have to pay about 150 rubles a month. As for the connection, everything is simple: connect the microphone, launch the application and sing. If your TV does not have access to the Internet, you can download the application to your PC and then load it onto your TV from a flash drive.
Standard connection
Hopefully you already have a microphone for vocals. Typically, relatively simple models are sold in specialized music stores and computer stores. Moreover: in computer systems it is easier to find a simple model, since professional musicians and presenters often need expensive specialized devices.
Often a microphone (or two) is included with a music center or DVD player. If you bought an advanced model, then you may not have to buy anything additional.
If you are buying a model specifically for home vocal parties, then pay attention to several factors:
- Microphone type. Between dynamic and condenser, you need dynamic: they are more affordable and do a better job in noise. Condensers are better suited for the studio.
- Directionality. Since you need to capture one person's vocals, it's best to go with a unidirectional model.
- Price. You shouldn’t overpay for professional models: regular karaoke options for 1000-1500 rubles are quite suitable. Although the expensive ones will deliver better voice quality, remember that you are limited by the capabilities of the sound card and speaker system.