Simply purchasing equipment and concluding a service agreement with Rostelecom may not be enough even for simple access to the Internet. Users should know how to set up Rostelecom Internet on a Windows 7 computer or another version of this operating system. This will avoid many difficulties and help you restore the network yourself if problems arise or the system is reinstalled. And in some cases, such a skill will become a source of saving money and keeping your nerves in order.
How to set up a network connection?
Before setting up and connecting to the Internet, you should find out what the chosen procedure depends on. Subscribers should pay attention to 2 parameters:
- installed operating system;
- connection type.
The second is especially important, since the configuration features for different versions of Windows are not as noticeable as the connection nuances for different types of communication. There are 3 of them in total:
- modern optical fiber;
- telephone cable;
- wireless Wi-Fi connection.
Each of the listed options requires a separate approach and skills. Although none of them are complex or require anything unusual from users.
Preparatory work
Regardless of the brand of the router, its installation follows the same rules - it is important to avoid the presence of electrical appliances working nearby, and also take into account that walls and partitions between rooms can cause an insufficiently high-quality signal from a wireless point.
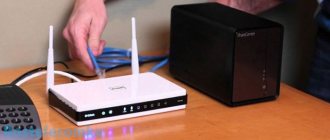
Look at the back of the device. All available connectors are displayed on it, with the exception of USB 3.0, which is located on the side. The connection to the operator’s network occurs via the WAN port, and local equipment is connected via Ethernet 1-4. The reset and power buttons are also located here.
Check the IP and DNS protocols in your operating system before configuring your network equipment. The markers should be opposite the “Receive automatically” items. Read about how to check and change these parameters in our other material at the link below.
Read more: Windows Network Settings
Internet connection equipment
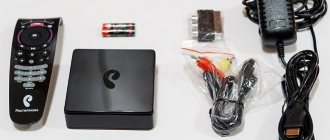
There is no special equipment for setting up the connection. But users will definitely need technology that provides access to the World Wide Web. This includes a variety of routers.
They should be configured before going online. To do this, you will need to open your browser and enter the device control menu through the address bar, using the information necessary for this. It is usually indicated on the device body or in the instructions supplied with it.
In some cases, when connecting via a telephone line, you will have to purchase a splitter. It is a special filter, thanks to which the cable branches into several parts (one to the phone, the second to the computer).
In addition, it is possible to use routers (for example DSL 2500U).
How to connect to a wireless network
To install a Wi-Fi connection at home, you will need to have:
- Rostelecom cable installed in the apartment with a connected Home Internet tariff.
- A router for data transfer with a wire for connecting to a computer (sometimes a wire is not required, but it is better to have one).
- Wireless network name and password (indicated on the router sticker on the back).
The connection diagram looks like this: Rostelecom installs an Internet cable into the apartment. It needs to be connected either to a port on the computer (but then there will be no Wi-Fi) or to a router. Devices in the house that have a wireless module will be able to see the new network and connect to it by entering a password.
As a rule, setting up routers is not required for Rostelecom to work, but sometimes there are exceptions. For example, a connection can be established as described above, but there will still be no Internet access. This depends on the settings of the router itself.
Networking
The first step is to figure out how to connect to the World Wide Web using a telephone connection.
The simplest option in such cases is to use a special boot disk. Just run the installation wizard and follow its instructions to quickly and successfully complete the entire process.
If there is no disk, you should use a browser. To do this, enter 192.168.1.1 into the address bar, after which you will have to specify the correct numbers in the menu that opens. They depend on the region, so you should check with your provider by calling their support number.
Setting up a Rostelecom router
Now we move directly to the software part of Sagemcom [email protected] 1744 v4. Let us repeat that in other versions or models this procedure is practically no different; it is only important to understand the features of the web interface. Let's talk about how to enter the settings:
- In any convenient web browser, left-click on the address bar and type 192.168.1.1 there, then go to this address.
- A form will be displayed with two lines where you should enter admin - this is the default login and password.
- You are taken to a web interface window, where it is better to immediately change the language to the optimal one by selecting it from the pop-up menu at the top right.
Quick setup
The developers offer a quick setup function that allows you to set basic WAN and wireless network parameters. To enter data about your Internet connection, you will need an agreement with your provider, which contains all the necessary information. The Wizard is opened through the “Setup Wizard” tab, there select the section with the same name and click on “Setup Wizard”.
Lines will appear in front of you, as well as instructions for filling them out. Follow them, then save the changes and the Internet should work correctly.
In the same tab there is a tool “Connect to the Internet”. Here, the PPPoE1 interface is selected by default, so all you have to do is enter the username and password provided by your service provider, after which you can access the Internet when connected via a LAN cable.
However, such superficial settings are not suitable for all users, since they do not provide the opportunity to independently configure the necessary parameters. In this case, everything must be done manually, which will be discussed further.
Manual setting
Let's start the debugging procedure by adjusting the WAN. The whole process will not take much time, and it looks like this:
- Go to the “Network” tab and select the “WAN” section.
- Immediately go down to the bottom of the menu and search the list of WAN interfaces. All present elements should be marked with a marker and deleted so that further changes do not cause any problems.
- Next, go back up and set the dot next to “Select default route” to “Specified”. Set the interface type and check the “Enable NAPT” and “Enable DNS” checkboxes. Below you will need to enter the username and password for the PPPoE protocol. As already mentioned in the section on quick setup, all information for connection is in the documentation.
- Scroll down a little to find other rules, most of them are also established in accordance with the contract. When finished, click on “Connect” to save the current configuration.
Sagemcom [email protected] 1744 v4 allows you to use a 3G modem, which is edited in a separate section of the “WAN” category. Here the user is only required to set the “3G WAN” state, fill in the lines with account information and connection type, which is reported when purchasing the service.
We will gradually move on to the next section “LAN” in the “Network” tab. Here you can edit each available interface, specify its IP address and network mask. In addition, MAC address cloning can occur if this has been discussed with the provider. The average user very rarely needs to change the IP address of one of the Ethernet devices.
I would like to touch on one more section, namely “DHCP”. In the window that opens, you will immediately be provided with recommendations for activating this mode. Check out the three most common situations when you should enable DHCP, and then set the configuration individually for yourself if necessary.
To set up a wireless network, we will provide separate instructions, since there are quite a large number of parameters here and you need to talk about each of them in as much detail as possible so that you do not have difficulties with adjustments:
- First, take a look at the “Basic Settings”, all the most basic things are set here. Make sure there is no checkmark next to “Disable Wi-Fi interface”, and also select one of the operating modes, for example “AP”, which allows you to create up to four access points at a time, if necessary, which we will talk about a little later. In the “SSID” line, enter any convenient name; the network will be displayed with it in the list when searching for connections. Leave other items as default and click “Apply”.
- In the “Security” section, mark with a dot the type of SSID for which rules are being created, usually this is “Primary”. It is recommended to set the encryption mode to “WPA2 Mixed”, it is the most reliable. Change the public key to a more complex one. Only after entering it when connecting to the point will authentication be successful.
- Now let's get back to additional SSIDs. They are edited in a separate category and a total of four different points are available. Check the box next to the ones you want to activate, and you can also configure their names, protection type, upload and reception speed.
- Go to "Access Control List". Here you create rules for restricting connections to your wireless networks by entering the MAC addresses of devices. First, select the mode - “Deny specified” or “Allow specified”, and then type the required addresses in the line. Below you will see a list of already added clients.
- The WPS function makes connecting to an access point easier. You work with it in a separate menu, where you can enable or disable it, as well as track information about the key. For more detailed information about WPS, see our other article at the link below.
Network settings
Connecting to the Internet when using Wi-Fi is also not difficult. In this case, just click on the connection icon in the lower right corner of the monitor and find the required one among the available networks.
Next, all you have to do is click “connect” and enter your username and password in the fields that appear.
If difficulties arise, you should check the settings of the Wi-FI distribution router and, if necessary, change them. This is done in any browser, and the login parameters are usually indicated on the equipment itself.
If the configuration parameters of the Rostelecom access point are lost
Viruses, system failures, and carelessness of users can cause software problems in the operation of the router. To restore the functionality of the equipment, it is possible to reset to factory settings. Reset methods may differ for each model. On some, you just need to press and hold the “WPS/Reset” button for 10-20 seconds.
On others, the buttons are located in a hard-to-reach place so that the user does not accidentally reset the configuration. To press it you need to use a thin object.
The system will return to factory condition. After the reset, you will have to configure everything again, which the above recommendations will help with.
Setting up Rostelecom Internet on a Windows XP computer
Despite the presence of a large number of later versions, this system continues to be used, therefore it is almost impossible to do without considering it. To connect to the Internet you will need:
- open the control panel via “start”;
- click “network connections” and “tasks” in sequence;
- select creating a connection and wait for the wizard to activate;
- stop at the Internet connection point and select manual setup;
- Among the proposed options, focus on creating a high-speed connection with a login;
- enter a user name, which can be anything, and a login and password (you can find them out from your provider, in the contract, or see them on the router);
- end the process.
Setting up a router: stage of working with a computer
The user is required to create a network (new) connection; for example, the Windows 10 system will be considered:
- You need to start working from the control panel; you can find it through the search.
- The user needs a section responsible for network connections.
- You will need to start creating a new connection through the control center.
- In the window that opens, select “New”, then “High-speed” and log in to the network using the password and login received from the provider.
Instructions for other versions of Windows can be found on the official website:
By the way: if the client wants to use data transfer only on the computer via cable, there is no need for wi-fi or connecting other PCs, then you can connect the cable directly to the computer and start creating a network connection. Once completed, the browser pages will begin to open.
How to set up Rostelecom Internet on a Windows 10 computer?
Setting up Rostelecom Internet on a Windows 7, 8 or 10 computer is almost the same. Subscribers will have to:
- go to control panel
- open the status and tasks subsection in the “network and Internet” section;
- select the connection settings (in some cases, the top inscription of the menu that opens);
- click “connect to the Internet” and, if necessary, confirm the decision;
- select “High-speed PPPoE”
- enter your login and access code;
- finish the operation.
Selecting connection technology
- Rostelecom offers Internet connection using 2 technologies. The first is FTTH (Fiber To The Home), the literal translation is “fiber to the home.” This technology, under some conditions, allows you to transfer information at speeds of up to 1 Gbit per second. The material from which the line is made allows it to interfere with electromagnetic waves, which ensures less information loss when transmitting data packets over the network. Connecting via fiber optic cable allows you to connect not only the Internet and telephone communications, but also connect to Rostelecom television.
- The second technology is DSL. You can use it to connect your computer or phone with one cable. The maximum data transfer rate is 8 Mbit per second. Its advantage is its versatility. You can simultaneously talk on the phone and be on the global network. The cost of the technology is calculated not by time, but by the amount of traffic consumed. Another advantage of this technology is the automatic Internet setup, which is carried out over the network without user intervention.
Errors and their solutions
The most reliable method of dealing with errors is to call the support service. But, if this option is inconvenient, you can use other methods. The first thing you should do is reboot. If there is no effect, you need to check the network device drivers and try updating them. The third option would be to reconnect to the Internet. If the desired effect is not achieved, you can try to roll back the system using a restore point or look for viruses. As a last resort, you can call a specialist who will deal with the problem.
Brief summary of the work
Now you know how to go to the configuration menu of any router and establish a connection through Rostelecom. We've only looked at a few types of specialized wireless connection equipment, but it doesn't matter. Other manufacturers and models of routers are configured in a similar way and there should be no problems with installing new configurations.
It is recommended, after properly configuring the equipment, to evaluate the quality of the connection and look at the data transfer speed through the wireless device. Sometimes, the device is outdated and simply burns up speed, which may not correspond to tariff requests. In this situation, there is no need to torment the operator and throw threats - look on the Internet what year your router model was released.
If your router malfunctions, you can purchase a new device or take your existing one to a technician, who will quickly identify the problem and, if possible, fix it. The instructions provided will help you set up the device yourself, without requiring outside help.
Previous
RostelecomProvider "Rostelecom" - we measure Internet speed
Subscriber service offices
Company employees are always glad to see users at Rostelecom offices; you can find some of the main departments with contact information below. The rest are on the official website.
Balashikha, Lenin Avenue 26.
- Mon - Fri: from 09:00 to 20:00,
- Sat: from 10:00 to 17:00,
- Sun: from 10:00 to 15:00,
- There are no breaks.
For people with disabilities, the office is equipped with call buttons and convenient access roads.
Vidnoye, st. Soviet 19.
- Mon - Fri: from 09:00 to 19:00,
- There are no breaks.
For people with disabilities, the office is equipped with call buttons and convenient access roads.
Yegoryevsk, K. Marx street, 69.
pm - Fri: from 09:00 to 18:00,
No breaks
Zheleznodorozhny, st. Mayakovsky, 17.
- Mon - Fri: from 09:00 to 18:00,
- No breaks
- For people with disabilities, the office is equipped with call buttons and convenient access roads.
Zhukovsky, Gagarin street 69.
- Mon - Fri: from 09:00 to 19:00,
- Sat: 10:00-17:00,
- No breaks
Lyubertsy, st. Moskovskaya 17.
- Mon - Mon: from 09:00 to 18:00,
- No breaks
- For people with disabilities, the office is equipped with call buttons and convenient access roads.
Moscow, st. Arbat 46 1. Smolenskaya
- Mon - Sun: from 09:00 to 21:00,
- No breaks
Moscow, st. Sushchevsky Val, 26.
- Mon - Sat: from 09:00 to 21:00,
- Sun: from 09:00 to 19:00,
- There are no breaks.
For people with disabilities, the office is equipped with call buttons and convenient access roads.
Odintsovo, Govorova street, 10.
- Mon - Fri: from 09:00 to 18:00,
- There are no breaks.
For people with disabilities, the office is equipped with call buttons and convenient access roads.
Orekhovo-Zuevo, Central Blvd., 6.
- Mon - Fri: from 09:00 to 19:00,
- Sat, Sun: from 10:00 to 17:00,
- There are no breaks.
Rostelecom customer support: 8800 707 1212
Single toll-free number 8800 707 1212; 8800 100 0800
Social media:
- Twitter : @Rostelecom_News https://twitter.com/Rostelecom_News
- Facebook : @Rostelecom.Official https://www.facebook.com/Rostelecom.Official/
- Flickr : Rostelecom_PhotoStream https://www.flickr.com/photos/rostelecom_photostream/
- YouTube : Rostelecom https://www.youtube.com/user/rostelec
- Odnoklassniki : Rostelecom https://ok.ru/rostelecom.official
- VKontakte : Rostelecom https://vk.com/rostelecom
- Instagram : rostelecom.official https://www.instagram.com/rostelecom.official/
Online chats and instant messengers
Chat in your personal account https://my.rt.ru/