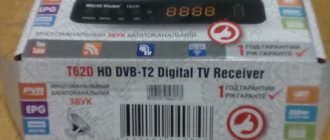
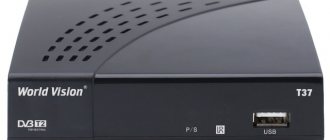
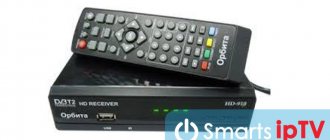
Characteristics of World Vision digital set-top box models
| Model | Price (rubles) | DVB-T2 | CPU | Tuner | Connectors | WiFi | External Power Supply | Remote control |
| 65 | + | Ali3821p | Rafael Micro R836 | HDMI, USB, RSA | — | + | + | |
| 65M | + | Ali3821p | Rafael Micro R836 | HDMI, USB, RSA | — | + | + | |
| T64LAN | 1300 | + | Availink 1506T | Rafael Micro R850 | HDMI, USB, RSA | + | + | + |
| T64D | 990 | + | Availink 1506T | Rafael Micro R850 | HDMI, USB, RSA | + | + | + |
| T64M | 890 | + | Availink 1506T | Rafael Micro R850 | HDMI, USB, RSA | + | + | + |
| T62N | + | GUOXIN GX3235S | MaxLinear MXL608 | HDMI, USB, RSA | + | + | + | |
| T129 | + | Montage M88CT6000 | Rafael Micro R846 | HDMI, USB, RSA | — | + | + | |
| T62A | 1200 | + | GUOXIN GX3235S | MaxLinear MXL608 | HDMI, USB, RSA | + | Interior | Trainable |
| T63 | + | Ali3821p | Rafael Micro R836 | HDMI, USB, RSA | + | + | + | |
| T63M | + | Ali3821p | Rafael Micro R836 | HDMI, USB, RSA | + | + | + | |
| T61M | + | Ali3821p | MaxLinear MXL608 | HDMI, USB, RSA | — | + | + | |
| T70 | + | Ali3821p | MaxLinear MXL608 | HDMI, USB, RSA | — | + | + | |
| T62D | 800 | + | GUOXIN GX3235S | MaxLinear MXL608 | HDMI, USB, RSA | + | + | + |
| T62M | 1300 | + | GUOXIN GX3235S | MaxLinear MXL608 | HDMI, USB, RSA | + | + | + |
| T60M | 900 | + | Ali3821p | MaxLinear MXL608 | HDMI, USB, RSA | — | + | + |
| T59D | + | Montage M88CT6000 | Montage M88TC3800 | HDMI, USB, RSA | + | + | + | |
| T59 | 1000 | + | Montage M88CT6000 | Montage M88TC3800 | HDMI, USB, RSA | + | + | + |
| T59M | 900 | + | Montage M88CT6000 | Montage M88TC3800 | HDMI, USB, RSA | + | + | + |
| T54 | 1000 | + | Ali3821 | MaxLinear MXL608 | HDMI, USB, RSA | — | + | + |
| Premium | 1400 | + | Ali M3821 | Rafael Micro R836 | HDMI, USB, RSA | + | + | + |
| T55Gold | 1400 | + | Ali M3821 | HDMI, USB, RSA | — | + | + | |
| T126 | 1000 | + | Mstar MSD7T01 | Rafael Micro R846 | HDMI, USB, RSA | — | + | + |
| T57M | + | Ali M3821 | HDMI, USB, RSA | — | + | + | ||
| T36 | 800 | + | Mstar MSD7T01 | HDMI, USB, RSA | — | + | + | |
| T57D | + | Ali M3821 | HDMI, USB, RSA | — | + | + | ||
| T57 | + | Ali M3821 | HDMI, USB, RSA | — | + | + | ||
| T56 | 1300 | + | Mstar MSD7T01 | HDMI, USB, RSA | — | + | + | |
| T58 | 1100 | + | Novatek NT78306 | HDMI, USB, RSA | — | + | + | |
| T39 | + | Novatek NT78306 | HDMI, USB, RSA | — | + | + | ||
| T38 | + | Novatek NT78306 | HDMI, USB, RSA | — | + | + | ||
| T37 | 1000 | + | Ali M3821 | HDMI, USB, RSA | — | + | + | |
| T34A | + | Ali M3821 | HDMI, USB, RSA | — | + | + | ||
| T55D | + | Ali M3821 | HDMI, USB, RSA | — | + | + | ||
| T55 | 1400 | + | Ali M3821 | HDMI, USB, RSA | — | + | + | |
| T35 | 800 | + | Ali M3821 | HDMI, USB, RSA | — | + | + | |
| T43 | + | MStar 7802 | HDMI, USB, RSA | — | + | + | ||
| T34i | + | MStar 7802 | HDMI, USB, RSA | — | + | + | ||
| T34 | + | MStar 7802 | HDMI, USB, RSA | — | + | + | ||
| T53 | + | MStar 7802 | HDMI, USB, RSA | — | + | + | ||
| T40 | + | MStar 7802 | HDMI, USB, RSA | — | + | + | ||
| T23CI | + | ALi 3606 | HDMI, USB, RSA | — | + | + | ||
| T411CI | + | ALI M3602 | HDMI, USB, RSA | — | + | + |
*The table contains blank data in the cells with price and DVB-T2 tuner model. In the case of price, the reason is that not all consoles are still on sale and are at the testing stage or have been completely discontinued. In the tuner model data, we were unable to find out the “filling” of some consoles from the manufacturer. Perhaps this is a trade secret or the data has not yet been added.
How to connect the World Vision set-top box to your TV
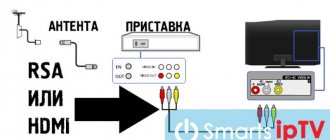
According to our observations, the most popular World Vision set-top boxes at the moment remain devices of the following models: Premium, T62A and T62D. That is why the instructions will be based on these models. However, we dare to assure you that the instructions are equally suitable for any of the device models of this company, the main thing is to do everything in the same way as the review. The general connection diagram is as follows
The antenna is connected directly to the digital set-top box through the corresponding input. In this case, the connection to the TV itself is made by ONE of 3 options:
- Via HDMI cable. Such a wire is usually not included in the kit. However, if your TV has such an input, then it must be used first. The thing is that HDMI provides the best image quality and is generally more durable. It is best to buy a cable from trusted companies: Twisted Veins, Mediabridge ULTRA, Monoprice. A meter of their cable will cost 2-3 times more than cheap analogues, but their quality will be 5 times higher.
- Via RSA (tulips). Particularly relevant for TVs older than 7-10 years of production. These models do not have HDMI, but there are multi-colored inputs for RSA. They are also called “tulips” for their corresponding color. 2-3 meters of this cable are often included with the set-top box. Its quality leaves much to be desired and when using it, be prepared to replace it after 2-3 months of active use. On some TVs you will find options in which you will need to connect not 3, but 2 or 1 RSA output. The principle does not change here, the main thing is not to make a mistake with the colors.
- Using converters and adapters. This is especially true in case of absence or failure of any output on the TV. Adapter from RSA to SCART. A special SCART output can be found on TVs that are more than 10 years old. According to our observations, many subscribers still have such “tenacious” TVs. In stores, the adapter can be seen for 200-300 rubles.
- RSA-HDMI signal converter. It may be useful if, for example, the output for “Tulips” on your TV is broken. Costs vary, from 500-1000 rubles on average.
Adapters should only be used if absolutely necessary. It just doesn’t make sense to resort to their help.
After the device is connected, to turn on the set-top box and check the connection, you must do the following:
- In the TV menu, go to the signal display mode you need. For HDMI, this is the corresponding mode. For RSA, AV (Audio-Video) is usually selected.
- After this, you can turn on the set-top box and press the power button on the remote control.
- If the welcome menu appears, then the connection was made correctly and you can begin directly setting up digital channels.
How to set up channels on the World Vision set-top box
When you connect any of the World Vision set-top boxes for the first time, a special welcome message should appear on the TV, in which you will be prompted to quickly set up the device. In any case, if the antenna selection was made correctly, the tuner will be able to independently configure all available channels. To do this you need:
- Go to the device menu by pressing the corresponding button on the remote control.
- Press the “Menu” button and go to the search section. Specify in the DVB-T2 range item. If the antenna has a signal amplifier, then also switch the power to “on”.
- Select “Auto search” and click “OK”.
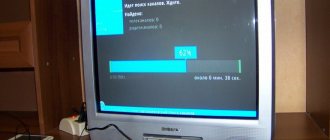
- The set-top box will search across all available frequency ranges. The search will continue for 5-10 minutes. During this time, the device will save the entire available channel list and save the settings when finished.
The auto-search function is very convenient in cases where there is a stable signal and the antenna itself is well-tuned and is capable of receiving a digital signal without problems.
Manual channel search
If there are problems with the signal strength or the device cannot detect the required number of channels for no apparent reason, then you should repeat the search procedure in manual mode. The sequence of actions is as follows:
- Go to the console menu, to the search section.
- Select “Manual search” there and press “OK” on the remote control.
- After that, go to the Internet and open the interactive map of CETV. We indicate your area of residence on it and write down the parameters of the television tower closest to you. We will be interested in the channel number for RTRS 1 and RTRS 2.
- In the set-top box menu, first indicate the number of the first channel from the card. At the same time, we check that the power and quality of the signal changes from 0% to some value. In this case, it is not necessary to have 100%. In some areas of residence, 60%, 70%, etc. is enough for normal broadcasting...
- Click “OK”. The search will find available TV channels and radio.
Settings
To configure T2 you don’t need a lot of intelligence; the first time you start it, all you have to do is press the ok button and it will do everything itself. That's it, all channels are working.
Firmware
First of all, you need to install the latest firmware:
How to flash World Vision T62D:
World Vision T62D - T62 software file from the topic: World Vision T62D, T62M software b) unzip the firmware file with .bin .rar archive c) prepare a USB drive with the FAT 32 and transfer it to the root directory of the drive firmware file with the extension .bin d) insert the USB drive into the USB connector located in the case on the front panel
Next, go through the graphic menu items: Menu - System - Software update - Update via USB - OK remote button
— Update type — Update via USB — Section — All I recommend using Everything (to update all sections of the software), since the other types are: Application (updating built-in Internet applications), User (updating user settings, only for partial software updates. — Path to file - click OK and indicate the path to the file, the name must match the update file that you put on the USB drive, extension .bin - (Update) Start by highlighting this line (once again we made sure that you have all the items selected correctly) - click OK remote control button to confirm the start of the update.
We receive a warning: Execution. Wait, don't turn off the power!
Next, put the remote control aside and wait for the software update process to complete; you can monitor the update progress on the TV screen. During the update, it is prohibited to disconnect the receiver from the power supply and remove the USB drive until the update is completed! The update process will begin, the bar will increase with progress, and when filling is complete, the set-top box will spontaneously reboot.
Information about the installed software version is located along the graphic menu path: Menu - System - Information
Attention! Since the SW version dated 10.26.2017, the function of backing up software to a USB drive has appeared: To create a backup copy, you need to go to Menu - System - in the Software Update , select Update Type < > not Update via USB , but Data Backup .
Firmware for T62D:
Software for World Vision T62D
History of changes: Fixed a problem with the set-top box freezing on some DVB-C frequencies Fixed a problem with the signal at the ANT OUT loop output Fixed the correct operation of the IPTV player when quickly entering using the TV/RADIO button
Software dated December 22, 2017 version RU
Software dated December 22, 2017 version UA
New firmware (software) for 03/22/2018
New, stable software for WV T62D has been released. I tested it for 24 hours, everything works great and without any brakes. Among the changes that I noticed: IPTV began to work better, but here are the changes that the developers write on the forum:
— Fixed the problem of freezing when watching DVB-C
— Memorizing the broadcast standard group and the active channel before switching off and in operating mode.
— Remembering the active group of favorites before shutdown and in operating mode.
— IPTV application, the ability to install several Cloud playlists, enter the URL from both the remote control and download via a USB drive. Entering a link manually supports 45 characters, uploading via the iptv_server.xml file supports up to 60 characters for links to a playlist. The limit on downloading playlists is the total number of possible five. The limit on the total number of channels is only 2000 channels.
— IPTV player, in channel viewing mode by pressing the blue button, a function for changing the screen format has been added: Auto, 16:9 Wide Screen, 16:9 PillarBox, 16:9 Pan Scan, 4:3 Letter Box, 4:3 Pan Scan, 4 :3 Full.
— Graphic indicators Level and Quality have been added to the channel editor.
— Edits to the logical numbering of LCN channels.
— Media player default screen format is Auto.
— Channel editor, the ability to apply editing to a selected group of channels.
— Channel editor, rename favorites, the seven-character limit in Cyrillic has been removed, 15 are now available, 31 are available in Latin.
— Making additional language localization edits.
Attention! Software for Ukraine
Download firmware - https://wvclub.net/forum/index.php?action=downloads;sa=downfile&id=539
Setting up IPTV
Since the popularity of Internet applications increased with the release of the premium model World Vision Premium World Vision T62M and World Vision T62D did not go unnoticed ; alternative television viewing via the Internet channel is no longer a novelty and most people already use this method on a regular basis. The priority is the ability to connect television without running cables and installing additional equipment in the form of various antennas for receiving a TV signal, but this also has its own requirements: The first and most important thing is a stable Internet channel and preferably a speed of at least 8 Mbit/s , the higher the speed your channel, the less likely there are viewing interruptions. The second priority will be the broadcast source, in this case the user has the right to choose what he will watch, there are several options, it could be your Internet provider, the popular Edem IPTV or the cheapest option, a self-updating playlist freely distributed on the Internet, for example, via the link: https:/ /iptv.slynet.tv/FreeSlyNet.m3uor https://getsapp.ru/IPTV/Auto_IPTV.m3u
To connect a wireless Internet network to the World Vision T62M and World Vision T62D you will need a USB Wi-Fi adapter ; the following models are suitable: GI Link (Ralink chip RT3370) , GI Nano (Ralink chip RT5370) , GI 11N (Ralink chip RT3070) , as well as on the Mediatek 7601 The IPTV Player application is located in Menu - Media Center - Internet - IPTV
There are three download options, this is downloading a playlist with the .m3u from a USB drive, the file download option is not tied to any specific name, after pressing the blue button you will see a graphical file manager window, through which you can select a playlist from a USB drive using the buttons joystick and central OK button. If the playlist is sorted into groups, the player supports definition and greatly facilitates management and channel selection.
The next method is to remotely download a playlist from the Internet, to do this, being in the “All” , press the joystick to the left and get into a new section called “Cloud” , there are two ways to enter the playlist URL: 1) The method of manually entering the playlist address by entering through a graphical virtual keyboard, to do this you need to press the red button and enter the address correctly.
2) Option on the USB drive there should be a file iptv_server.xml , into the contents of which the playlist address is entered using the Notepad++ , for example:
Code: [Select]
IPTV list file download server https://iptv.slynet.tv/FreeSlyNet.m3u
After you have edited the file, save it to USB and while in the “Cloud” , press the green button to download the file, after 2 seconds a list of channels will appear, updating this self-updating playlist can be done by pressing the blue button while in the menu, and the update will also occur when every time you log into the application. From what is described above, it becomes clear that the IPTV application on World Vision T62M and World Vision T62D has two working windows, this is a local playlist downloaded from USB and “Cloud” downloaded from the Internet, you can always switch between them and watch the selected one. The tests involved playlists from my local provider, the Edem IPTV , a self-updating playlist FreeSlyNet and a personal playlist stream from a receiver on the Linux model VU+ Duo2 . When watching HD channels on my Internet channel, no problems were noticed. I have attached iptv_server.xml file .rar . Enjoy and enjoy your TV.
UPD. All materials under the spoiler are taken from the forum, where I recommend registering and following the updates.
How to set up WiFi on the World Vision set-top box
In most digital set-top boxes, the connection to the Internet occurs through special Wifi adapters. On World Vision devices this can also be done using an RG-45 connector. This is a standardized connector that is likely to be found in any PC.
Connection to WiFi is made by connecting the set-top box with a special adapter via the USB input. At the same time, you need to buy not the first one you come across in the store, but exactly the one recommended by the official manufacturer World Vision. After connecting the set-top box to the wireless network, the owner will have access to the following functions:
- Updating and firmware of the console.
- Watching videos from the YouTube portal.
To connect to an existing wireless network, you must:
- Go to the device menu and in the “System” section select “WiFi Settings”.
- Then select the device in the menu - Wifi and click OK.
- The set-top box will search for available wireless networks. When finished, the full list will be shown. From it we need to select the one we need and enter the password for it.
After saving the settings, you will be able to freely watch YouTube directly from the console.
How to reflash the World Vision console
A software update is necessary in the following cases:
- When the set-top box starts to work inadequately: reboot, freeze, or refuse to connect to the TV.
- When will a new, stable version of the software be released?
To update you need:
- Download the latest version of the set-top box software from the official website. The firmware format will be .bin.
- Write the file to a flash drive with the Fat32 file system.
- Insert the USB drive into the console and go to the menu.
- In the “System” section, select “Software Update”.
- Then update via USB.
- Specify the path to the file and click update.
If the software file meets the hardware requirements, then the firmware will take 10-20 minutes. At the end of the installation process of the new firmware, the set-top box will reboot.
Firmware for World Vision tuners
A software update is necessary in the following cases:
- When the set-top box starts to work inadequately: reboot, freeze, or refuse to connect to the TV.
- When will a new, stable version of the software be released?
To update you need:
- Download the latest version of the set-top box software from the official website. The firmware format will be .bin.
- Write the file to a flash drive with the Fat32 file system.
- Insert the USB drive into the console and go to the menu.
- In the “System” section, select “Software Update”.
- Then update via USB.
- Specify the path to the file and click update.
If the software file meets the hardware requirements, then the firmware will take 10-20 minutes. When finished, the device will reboot.
Solving problems with World Vision set-top boxes
During the operation of the site, we have accumulated a lot of questions from subscribers regarding World Vision set-top boxes. For some topics we will try to answer and provide possible solutions to problems.
The set-top box does not search for channels / finds less than 20
- Try searching manually.
- Make sure you select the correct antenna. If the distance to the TV tower in your region is more than 10 km, then you will need an outdoor antenna with a signal amplifier.
- Check the antenna cable for integrity.
The device does not connect to the TV
- There may be problems due to old software. It needs to be updated.
- Check the cable connecting to the TV. In 30% of cases the culprit is just a wire.
The console reboots or freezes
- Update your software.
- Reset to factory settings.
How to set up a learning remote
In total, the universal remote control of World Vision set-top boxes has 4 programmable buttons: TV Power, Vol+\-, AV. To program them, you must press the OK and 0 buttons simultaneously, the red light should light up.
After this, place another remote control opposite the student and press the button on the second one that you would like to program.
After that, on the original remote control, press and hold the button that you would like to transfer. It is necessary to hold it until the remote control is not trained, the diode blinks 2 times.
At this point the learning process can be considered complete.
World Vision Errors
During the operation of the site, we have accumulated a lot of questions from subscribers regarding World Vision set-top boxes. For some topics we will try to answer and provide possible solutions to problems.
The set-top box does not search for channels / finds less than 20
- Try searching manually.
- Make sure you select the correct antenna. If the distance to the TV tower in your region is more than 10 km, then you will need an outdoor antenna with a signal amplifier.
- Check the antenna cable for integrity.
The device does not connect to the TV
- There may be problems due to old software. It needs to be updated.
- Check the cable connecting to the TV. In 30% of cases the culprit is just a wire.
The console reboots or freezes
- Update your software.
- Reset to factory settings.
How to set up a learning remote
In total, the universal remote control has 4 programmable buttons: TV Power, Vol+\-, AV. To program them, you must press the OK and 0 buttons simultaneously, the red light should light up. After this, place another remote control opposite the student and press the button on the second one that you would like to program. After that, on the original remote control, press and hold the button that you would like to transfer. It is necessary to hold it until the remote control is not trained, the diode blinks 2 times. At this point the learning process can be considered complete.
