Comparison table of Oriel DVB-T2 set-top boxes models
By and large, if you take the entire model range of released Oriel consoles, you will not find any significant differences in them. New devices may additionally be made of a metal case and may be equipped with Wi-Fi adapters. The rest: menu, format support, connectors, etc., remains the same.
| Options | 120/120D | 105/105D | 101 | 302/302D | 403D | 415D | 421D/421UD | 794 | 963 |
| Material | Metal | Plastic | Plastic | Plastic | Plastic | Plastic | Metal | Metal | Metal |
| Display on the body | + | + | — | — | — | + | + | + | + |
| Outputs for DVB-T2 | HDMI and RSA | HDMI and RSA | HDMI and RSA | HDMI and RSA | HDMI and RSA | HDMI and RSA | HDMI and RSA | HDMI and RSA | HDMI and RSA |
| WiFi | — | — | — | — | + | + | + | — | — |
| Remote control | + | + | + | + | + | + | +/+teachable | + | + |
| Nutrition | Internal 220V | External power supply 5V | External power supply 5V | Internal 220V | External power supply 12V | External power supply 5V | Internal 220V | External power supply 12V | Internal 220V |
| USB | + | + | + | + | + | + | + | + | + |
*) Set-top boxes: 403D, 415D, 421D, 421UD – additionally equipped with the ability to receive digital broadcasts from cable television.
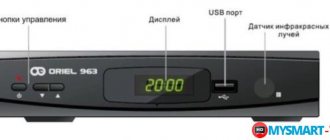
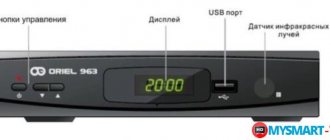
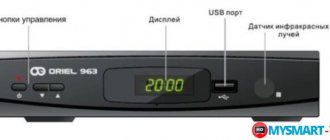
DVB T2 set-top box Oriel 963 with components from Sony
In 2021, Oriel 963 can be considered an obsolete set-top box, there are no new features, the price is too high, it is worth paying attention to the new model with a more sensitive Selenga hd950d tuner.
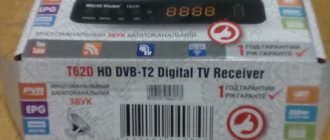
Oriel 963 receiver for receiving dvb t2 TV channels with a powerful processor and a large amount of RAM. Compared to the well-known World Vision T62m model, the receiver differs in weight and cost. Many people probably know that the cost of delivery and customs depends on weight; sometimes it turns out that a tuner bought in China is cheaper, but will cost more in Moscow. This is what happened with Oriel, a manufacturer of dvb t2 receivers, which did not care about the cost of logistics and released a device in a large metal case with a built-in power supply. Although the cooling of dvb t2 receivers made in a large case is better and, accordingly, the service life is longer. The t2 digital receiver is superior in sensitivity to its analogues, since the SONY tuner is considered the best at the moment. The main advantage of the Oriel 963 is the inclusion of additional power through the tuner, which will allow you to connect an active antenna in places with low signal levels. The kit includes the receiver itself, a remote control and batteries; there is no cable connecting to the TV. Ariel 963 can be connected to a TV via a SCART, tulip, HDMI cable, which makes it possible to connect not only to LCD panels, but also to old TVs. It is especially convenient on Oriel 963 that recording and Time Shift can be used simultaneously. You can buy Oriel 963 in Moscow by coming to our office or order delivery.
How to connect the Oriel set-top box to your TV
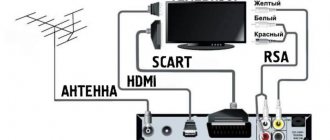
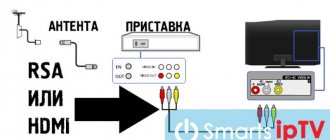
The Oriel set-top boxes come with RSA cables for connecting them to the TV via AV outputs. However, in practice, this option is not suitable for everyone and here it is necessary to further analyze all the options. The general connection diagram will be considered using the example of the most popular Oriel models - 421 and 963. However, the connection principle itself will be identical for all models.
The choice of one or another connection option is arranged in descending order, depending on the capabilities of the cable itself:
- First of all, you need to check if there is an HDMI input on your TV. This transmission standard is more acceptable and should be chosen first. The cable provides the best display (picture) and is also more durable than others. The cost of 1 meter of high-quality cable is from 200-500 rubles.
- If this option is no longer available, then further connections will have to be made via RSA (Tulips). They come in several types, depending on the number of plugs on each side. For Oriel there is not much difference. The main thing is that the TV is adapted to the connection.
- Older TVs, in most cases, will not have HDMI and RSA. These TVs will most likely have a SCART input. On the 961 model, such a connector is present initially and all that is required is to buy the appropriate SCART-SCART cable. It will cost you 200-300 rubles.
If you have an Oriel set-top box model without SCART, then you should buy an adapter with Scart-RSA. It costs from 50 rubles and is sold in all stores
Possible problems and their solutions
Sometimes users encounter unexpected problems while using the Oriel set-top box. Often the reason is hidden in a system failure. Most problems can be fixed on your own, but if they happen constantly, then it is better to go to a service center.
Oriel box does not find channels
If the set-top box refuses to detect TV broadcasts, check for updates. Remember that any system requires regular updates. Go to the official website of the developer and check the latest patches in the appropriate section. Download the file to a flash drive, insert it into the set-top box, go to the menu and select “Update via USB”.
If the error persists, try resetting the settings. The function is located in the “System and TV” category. After the procedure, all information will be deleted and settings will be reset.
Does not respond to the remote control or the button does not work
Initially, make sure that the reason is not due to dead batteries. The second reason is the long distance, that is, you are trying to use the remote control while being too far from the console. Are you doing everything right? It may be time to replace the remote control with a new one or send it in for repair.
No signal
The lack of a signal is often due to technical work by the provider. Call the hotline and clarify the question; maintenance work is probably underway and therefore the broadcasts are unavailable. Also, the reason may be due to unfavorable weather or a damaged cable.
How to set up digital channels on your Oriel set-top box
In order to catch all 20 digital channels, it is not enough just to know the instructions for the set-top box. Please check in advance whether you need a new antenna. The search process itself will be similar for all models of the company's receivers. Therefore, regardless of what model of console you have: 421, 963, 120, etc., the settings will be identical:
Automatic search
- First, select the signal display mode required in your case from the TV menu. It is taken depending on the method in which the console was connected. For example, if this was done using a tulip, then you should switch to AV mode.
- After this, you need to press the power button on the set-top box or its remote control.
- A welcome window will open. It will ask you to indicate your country and select a language. Typically this option is already set. It is better not to touch the remaining settings unless you know the exact ratios for the sides. Click OK.
- An automatic channel search should start. At the same time, the set-top box will pass through all frequency ranges in the visibility zone and find digital channels available for viewing. When finished, the list should save itself.
Manual search
If the set-top box, for some reason, could not find 20 channels or does not see signals at all, then you should reconfigure it in manual search. Its meaning is to set the device the exact frequency at which it will scan the entire flow of information and be able to provide you with the digital channels available on it. It's very easy to do this:
- Find out your frequency for DVB-T and DVB-T2 channels. To do this, go to the interactive map of CETV and look at the parameters of the television tower closest to you.
- Press the OK button on the remote control. The device should go to the menu.
- Select “Manual search” in the channel settings section
- After that, in the search mode, set “By channel” and select the number that was previously taken on the map. If the signal has not changed and the intensity graph shows 0%, then try also turning on the antenna power. It is used if you additionally use a signal amplifier.
Oriel 963 as a T2 over-the-air receiver has the following features:
— Search is carried out both manually and automatically; — Electronic Program Guide (EPG) for 7 days; — Working with teletext; — Can be used as a player to play downloaded movies, music and photos; — The digital set-top box has a display; in standby mode it shows the current time, which is synchronized with the time on the TV channel; — The timeshift function allows you to pause the transmission and continue watching after a while (only works if you have an inserted flash drive in FAT32 format). In our opinion, the TimeShift function in Oriel is very convenient and to find it, just read the operating instructions; — Possibility of timer recording on external media; — Possibility of flashing new software from a flash drive without the participation of a computer. Conclusion: Oriel 963 dvb t2 is a receiver model with characteristics superior to all set-top boxes offered for sale in Moscow and Russia. The receiver comes with the latest software recommended by the manufacturer. The latest stable firmware can be found on our forum.
How to connect the Oriel set-top box to a Wi-Fi network
Some of the set-top box models presented in the table above have a built-in WiFi receiver and can easily connect to the Internet. This is very convenient and allows you to turn your device into a real multifunctional cinema. A wireless network allows you to:
- Watch videos on YouTube and Megogo.
- Find out the weather in your region.
- Connect to news feeds.
- Watch more than 20 channels using IPTV.
- Update the device.
To connect, you will additionally need to purchase an adapter, which is a Wifi antenna and connected via USB.
How to update the firmware or reset the Oriel console
When a new version of the set-top box software is released, it may not start working correctly with those TVs that previously had good contact with it. Therefore, in some cases it may be necessary to change the firmware of the set-top box to a new one, or if something goes wrong, return everything to the factory settings. This can be done through the receiver menu:
- To do this, go to “Tools” and select updating the receiver via USB or via OTA.
- In the first case, the new firmware version should be installed on a flash drive.
- In the second case, wi-fi is required.
- If you want to reset all settings to default, you should select factory settings.
Password for resetting the device and entering the update menu: 1234
Basic Operations
Further configuration will also be carried out using the remote control. You should familiarize yourself with all the button assignments.
Basic operations include setting up the following sections:
- Program Manager.
- Picture parameters.
- Search for broadcasts.
- Setting the time.
- System parameters.
Each item implies several categories. Any user without special knowledge can perform the setup; just follow the instructions.
Program Manager
This section allows you to edit the list of channels. It is located at the very top of the menu. Here you will find a list of broadcasts, radio channels. You can also delete an unnecessary channel or add it to your favorites.
In the broadcast list, editing is carried out as follows:
- To block a specific broadcast, press the red key on the remote control.
- To skip - green.
- To move the channel to another position - yellow.
- Rename the broadcast - blue.
- To move a channel to the list of favorites, use the FAV button.
If you plan to delete all channels at once, you will need to enter the password 1234 (default).
Image Settings
Adjust the image in the third section “System Settings” in the “TV System” tab.
Select the optimal screen resolution. It is recommended to set automatic detection, but sometimes you have to do it manually. In this case, the image resolution depends on the type of connection:
- 480r/i.
- 576i/p.
- 1080p/i.
The aspect ratio must be selected for your TV:
- 4:3 PS.
- 4:3 LB.
- 16:9.
Search channels
The “Channel Search” section is second in the main menu. The following options are available here:
- Automatic channel search. Activate the "Open Only" function to have the system search only for open channels. Leaving this option untouched will detect all broadcasts, including encrypted ones.
- Manual search. Start discovery by channel or frequency. Specify the range in which the search will be carried out - MV or UHF. Next, enter the broadcast number or frequency. Below you will notice visual information about the quality of the incoming signal and intensity.
- In the next tab, indicate the type of broadcasts to be scanned - all, free or encrypted.
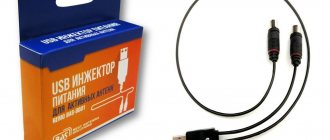
- Activate the antenna power point if you are using an active device with a built-in amplifier.
Why doesn’t IPTV Player show on the computer and TV: reasons, how to fix it?
Setting the time
Time settings are located in system settings. Here it is configured:
- Shit. Select the one where you live.
- Application of GMT. By selecting the “By region” option, the system will automatically set the time. By disabling it, you can independently specify the time and time zone.
- Timer. Allows you to record broadcasts and set reminders to watch a specific broadcast.
Setting options
Edit the main menu:
- Select the demonstration time – 1-10 seconds.
- Set transparency – 0-40%.
System Settings
This section includes the following functions:
- Information about installed software.
- Parental control. When using, the system will ask for a password, enter 1234. The function allows you to lock the main menu, specify age restrictions, and change the password.
- Reset parameters to factory settings. This feature is often used to fix serious system errors.
- Software update via USB. Go to the official website of the set-top box manufacturer and download the latest software patch to a flash drive, then insert the drive into the set-top box and in this section select “Update via USB”. Wait for installation.
Reviews of Oriel TV set-top boxes
Currently, the company occupies its niche in the field of sales of digital receivers. At the same time, users note the high reliability of the devices and adaptation to a large number of connection options. Some of the latest models of set-top boxes can be successfully connected to a TV using 3-4 connection methods.
This in turn makes these receivers universal. When selling them, you can be 99% sure that the device will be able to contact TVs and will not cause any problems during operation. The cost of the company's receivers today varies around 900-1200 rubles. This is affordable for most TV viewers. Moreover, for that kind of money you will also get the opportunity to connect to the Internet.
