How to connect an Oriel digital set-top box to your TV
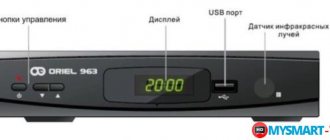
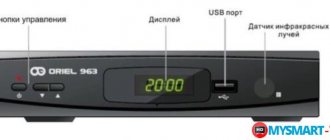
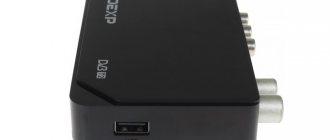
The connection process itself is not complicated, especially if you follow the detailed instructions. An RCA cable is included with the receiver. But, if you have an HDMI cable, it is better to use it, because... it provides better sound and image transmission. You should also initially familiarize yourself with the console itself. The front part contains the main control keys and display:
The rear panel has built-in connectors for:
- Antennas.
- HDMI.
- SCART.
- RCA.
Connecting the device
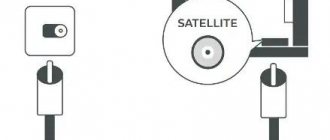
The connection instructions are suitable for all device models, including 4030, 4150, 403d, 415d, 740, 213, 101, 314, 421ud, 963, 4210. First of all, disconnect all devices from the power supply. Then, depending on the cable used, make the connection. The diagram clearly shows the process for different connectors.
Initial settings
The second step is to make sure there are working batteries in the remote control. When you turn on the TV with the set-top box connected, a welcome window will appear on the screen where you will need:
- Specify country.
- Select language.
- Set the optimal resolution and aspect ratio.
How to connect the Selenga set-top box to a TV to receive digital channels
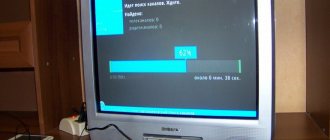
To save and continue the initial settings, click on “Ok”. Next, an auto search for channels will start, the list of which will be displayed on the screen. The search will be carried out according to the DVB-T2 standard.
If you have any questions or complaints, please let us know
Ask a Question
Oriel 302
The criterion for the success of the development of any brand for the production of transmitting and receiving equipment is the constant improvement of the technical “stuffing” and the appearance of the manufactured devices. Oriel 302 receiver, produced by the Chinese branch of Oriel, was no exception . A distinctive feature of the model is:
- Changed body design.
- Pairing the budget Ali M3812 microcircuit with a sensitive Sony CXD2837 tuner with a built-in demodulator.
- Ergonomics of the remote control.
- Lack of support for Dolby Digital surround sound system.
The receiver receives a free terrestrial audio/video signal in DVB-T, T2 formats, with further decoding of the signal into MPEG-1/MPEG-2, MPEG-4 formats. The manufacturer has expanded the practical capabilities of the device due to the tuner’s ability to receive digital radio transmissions in the ranges (UNF): 470-862 MHz, (VHF): 174-230 MHz. Supporting modern software standards, taking into account the release of new versions, is possible by deleting the old version while simultaneously installing new firmware, by copying information from external storage media.
Connecting additional memory to the device via a USB 2.0 connector provides additional features:
- Playback of media file formats specified in the instructions through the built-in player.
- Record live TV programs in real time or using a recording timer. (PVR).
- Application of high-speed search for the desired fragment when playing files, introduction of the “pause” mode with a return to the place where the show began (Time Shift).
The equipment does not feature much choice, which is typical of the Oriel brand. The set includes an Oriel 302 receiver, an external power supply, a remote control with AAA batteries, a warranty, and instructions. The body is made of black plastic, with a combination of matte and glossy surfaces. The design is made in rectangular contours. The usual, unmemorable design of the case reminds us of the device’s budget nature.
The front panel contains the logo of the model brand, an IR sensor for receiving a signal from the remote control, and a two-color operation indicator. All control buttons are located on the remote control.
On the rear of the device there is an input for an over-the-air antenna (RF IN), an HDMI interface, a low-frequency composite audio/video RCA output, and a socket for connecting an external 12 V power supply.
Technical features of Oriel 302
- TV picture format support: Auto, 4:3, 16:9.
- Subtitles, teletext.
- Operating power consumption: 6 W.
The improvement of the rating of the set-top box is facilitated by its compactness, excellent tuner performance, the ability to work from the vehicle’s on-board system, and good picture quality. The lack of an RF OUT antenna output, poor equipment, and the inability to support Dolby Digital reduce the positive assessment of the device.
Basic Operations
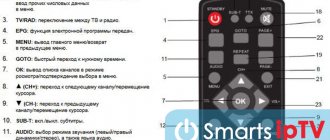
Further configuration will also be carried out using the remote control. You should familiarize yourself with all the button assignments.
Basic operations include setting up the following sections:
- Program Manager.
- Picture parameters.
- Search for broadcasts.
- Setting the time.
- System parameters.
Each item implies several categories. Any user without special knowledge can perform the setup; just follow the instructions.
Program Manager
This section allows you to edit the list of channels. It is located at the very top of the menu. Here you will find a list of broadcasts, radio channels. You can also delete an unnecessary channel or add it to your favorites.
In the broadcast list, editing is carried out as follows:
- To block a specific broadcast, press the red key on the remote control.
- To skip - green.
- To move the channel to another position - yellow.
- Rename the broadcast - blue.
- To move a channel to the list of favorites, use the FAV button.
If you plan to delete all channels at once, you will need to enter the password 1234 (default).
Image Settings
Adjust the image in the third section “System Settings” in the “TV System” tab.
Select the optimal screen resolution. It is recommended to set automatic detection, but sometimes you have to do it manually. In this case, the image resolution depends on the type of connection:
- 480r/i.
- 576i/p.
- 1080p/i.
The aspect ratio must be selected for your TV:
- 4:3 PS.
- 4:3 LB.
- 16:9.
Search channels
The “Channel Search” section is second in the main menu. The following options are available here:
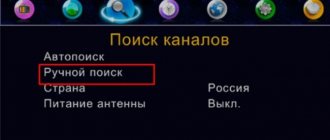
- Automatic channel search. Activate the "Open Only" function to have the system search only for open channels. Leaving this option untouched will detect all broadcasts, including encrypted ones.
- Manual search. Start discovery by channel or frequency. Specify the range in which the search will be carried out - MV or UHF. Next, enter the broadcast number or frequency. Below you will notice visual information about the quality of the incoming signal and intensity.
- In the next tab, indicate the type of broadcasts to be scanned - all, free or encrypted.
- Activate the antenna power point if you are using an active device with a built-in amplifier.
Why doesn’t IPTV Player show on the computer and TV: reasons, how to fix it?
Setting the time
Time settings are located in system settings. Here it is configured:
- Shit. Select the one where you live.
- Application of GMT. By selecting the “By region” option, the system will automatically set the time. By disabling it, you can independently specify the time and time zone.
- Timer. Allows you to record broadcasts and set reminders to watch a specific broadcast.
Setting options
Edit the main menu:
- Select the demonstration time – 1-10 seconds.
- Set transparency – 0-40%.
System Settings
This section includes the following functions:
- Information about installed software.
- Parental control. When using, the system will ask for a password, enter 1234. The function allows you to lock the main menu, specify age restrictions, and change the password.
- Reset parameters to factory settings. This feature is often used to fix serious system errors.
- Software update via USB. Go to the official website of the set-top box manufacturer and download the latest software patch to a flash drive, then insert the drive into the set-top box and in this section select “Update via USB”. Wait for installation.
How to boost the signal
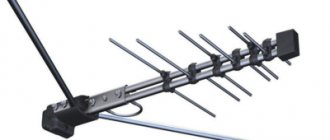
A person who is faced with an unstable digital TV signal needs to think about strengthening it. First, you need to check whether the antenna is installed correctly. We remind you that it must be aimed at the translator, and its path must not be blocked by obstacles.
Secondly, you must use a working cable. The shorter it is, the even better. The signal will be more stable. Thirdly, you can purchase a special amplifier device. As a rule, such devices are available in almost every electronics store. The operating principle of such devices is as follows:
- The amplifier is connected to electricity.
- On one side the antenna cable is connected to it.
- On the other hand, the cable goes to the TV.
You can make such a device at home by assembling a zigzag antenna.
But we do not recommend doing this, since in this situation a person exposes himself to danger. It is better to purchase a high-quality amplifier in a store, and consult with the seller before purchasing.
How to set up the Oriel console without a remote control
The first step is to connect the Oriel set-top box to the TV, as indicated at the beginning of the article. If you cannot use the remote control, you will have to make settings using the control buttons on the set-top box itself. The front panel has all the required keys.
Due to the absence of most control buttons, you will not be able to use many options. For example, adding a channel to favorites and setting up the list will be problematic. Also, functions that require a password will not be available. But, running channel detection and adjusting the image is not difficult.
If one or more channels are missing
Unlike analog television, digital TV has an important feature - the absence of interference. Channels are either broadcast in excellent quality or absent altogether. The causes and solutions to this problem were discussed in the previous paragraphs. But sometimes users notice that one or several programs are missing from the list of available ones.
The influencing factors in this case are the following reasons.
- Changing the broadcast TV package. Typically, digital TV service providers enter into contracts with various channels and consistently broadcast them in high quality. However, over time, this period expires and, if the company does not renew the agreement, access to the programs is suspended. To verify this, you need to visit the provider’s Internet portal, go to the “Channels” section and view the list of programs included in a particular package.
- In some cases, the set-top box cannot find a channel due to a change in its broadcast frequency. This can also be clarified on the Internet resource.
- We should not exclude technical work carried out selectively on channels of a certain category. You can find out more information and get recommendations by making a phone call to the support service.
Possible problems and their solutions
Sometimes users encounter unexpected problems while using the Oriel set-top box. Often the reason is hidden in a system failure. Most problems can be fixed on your own, but if they happen constantly, then it is better to go to a service center.
Oriel box does not find channels
If the set-top box refuses to detect TV broadcasts, check for updates. Remember that any system requires regular updates. Go to the official website of the developer and check the latest patches in the appropriate section. Download the file to a flash drive, insert it into the set-top box, go to the menu and select “Update via USB”.
If the error persists, try resetting the settings. The function is located in the “System and TV” category. After the procedure, all information will be deleted and settings will be reset.
Does not respond to the remote control or the button does not work
Initially, make sure that the reason is not due to dead batteries. The second reason is the long distance, that is, you are trying to use the remote control while being too far from the console. Are you doing everything right? It may be time to replace the remote control with a new one or send it in for repair.
No signal
The lack of a signal is often due to technical work by the provider. Call the hotline and clarify the question; maintenance work is probably underway and therefore the broadcasts are unavailable. Also, the reason may be due to unfavorable weather or a damaged cable.
How to solve the problem yourself
In the process of setting up digital channels, a person may encounter many difficulties. We have collected all the most common problems in one table and provided possible solutions. Read this information to restore access to the channels yourself.
Maksim
Equipment repairman
Ask a Question
Problems and solutions
The set-top box only shows 20 channels
Each resident is given free access to exactly twenty TV programs. If you previously showed more channels, then most likely, payment for services for the current month was not made. In this case, the provider may limit access to an expanded list of programs. To clarify the circumstances, you need to contact the operator’s support service.
One or more channels are missing
Over time, the provider may terminate the broadcast contract with one or more channels. Because of this, the average user may lose the necessary TV programs. You can also consider the option in which a channel from one packet ends up in another. In both cases, it is recommended to visit the provider’s website to check the current list of available programs.
Autosearch does not find any channels
Most likely, your antenna is pointing in the wrong direction. Remember that the equipment must be located on the roof of the house and clearly pointed at the broadcaster. In addition to correcting the identified shortcomings, you can try updating the set-top box software or resetting the data through the settings.
The receiver does not allow auto search to start
This type of problem usually occurs due to a person installing the equipment incorrectly. For example, when connecting the antenna cable to the TV, and not to the set-top box. Correct this flaw and try pressing the auto search button again.
