It's not just owners of old cathode ray tube TVs who have to prepare for the digital revolution. Not every so-called flat-screen TV guarantees the reception of digital signals. But don't panic ahead of time!
“Connecting to digital television” is just a popular expression that is cultivated in the media. In reality, you buy a digital broadcast decoder, connect it correctly to the antenna and to the TV, and configure it correctly. As they say, connect and watch.
But read this article about how to connect a digital set-top box to your TV and figure out possible problems with receiving programs.
Briefly about digital set-top boxes
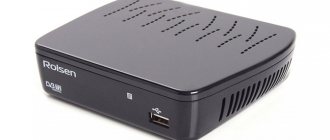
A television tuner (receiver, decoder), or more simply put, a T2 set-top box for a TV is a small box that can be easily hidden behind the TV receiver. It acts as a decoder, that is, it converts the analog signal into a digital one. Thanks to it, to watch TV of the new standard, you will not need to replace the antenna installation or TV. On the one hand, the decoder is connected to the TV, and on the other, to the antenna. The average cost of this equipment is much lower than the price of a new TV. Owners of old TVs without built-in receivers can choose one of the many DVB-T2 set-top boxes on the TV market.
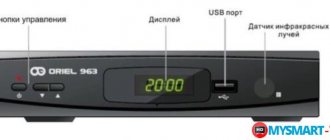
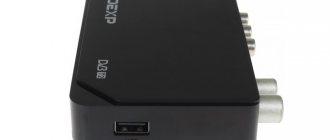
Fig 1 digital receiver.
The DVB-T2 receiver provides more features than a TV with a built-in decoder:
- you will be able to record programs;
- stop and play previous recordings;
- Tuners with advanced media functions allow you to listen to music in MP3, WMA, view photos, films in popular formats DivX, MPEG, AVI (including subtitles) and use the Internet via a wireless connection to a TV set-top box.
There are also so-called combo receivers, where both a terrestrial and satellite tuner are combined in one device.
But what you don’t have to “combine” with is an antenna. To receive digital television, the same antennas for the UHF range are used as before for analog TV. However, they must be of good quality and correctly positioned (more on this in the next episode). You will also soon learn how to properly connect a digital set-top box to your TV.
Do all Philips models support DTV?
Setting is possible on all models of the famous brand, provided that the TV was released no earlier than 2005.
Since 2011, devices have been produced with built-in tuners for signal reception; previous models receive digital broadcasting through a special set-top box, which is purchased separately and connected to the device. To check whether the TV supports digital processing technology, check the device markings: the presence of the letters “S”, “T”, “N”, “K” indicates that the TV can be configured to receive numbers. The letter "I" denotes the analogue broadcast type.
Antenna
Connecting a digital set-top box to a TV begins with a cable connection to a video signal receiver - an antenna. T2 broadcast can be successfully received on the same antenna that you still have from analog TV. If you showed classic television without any interference, then there is no reason to replace the antenna installation. However, if the antenna does not provide good reception, you should consider purchasing a new one. But before you do, check to see if the poor picture is due to a faulty antenna or misconfiguration.
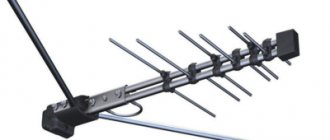
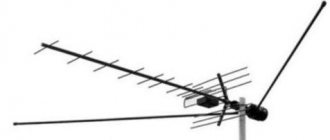
Outdoor antenna
Fig. 2 outdoor antenna
To watch HD DVB-T2 digital television, you must pay attention to its reception parameters in your region and configure the antenna correctly. First of all, check the broadcast direction, that is, the location of the nearest transmitter, in order to correctly align the antenna. Secondly, check the broadcast frequency of multiplexes to select the appropriate frequency in your TV set-top box. Third, the stronger the transmitter in your area, the wider its range. The quality of reception is affected by the local landscape and obstacles. Be sure to check that the antenna cable is in acceptable condition.
You may be interested in: Connect digital television
If it turns out that your old antenna does not provide you with good reception, whether due to a weak signal or terrain, you will be forced to buy a new antenna with better parameters. Which antenna is suitable?
In specialty stores you will find various modifications of antennas. They differ not only in the range of received frequencies (bands), but also in shape, size, quality and material of manufacture. But, as it happens, many proposals do not make decision making easier.
A little trick. Before deciding and purchasing an antenna, take a closer look at the roofs of neighboring buildings to take advantage of the experience of residents who have digital terrestrial TV reception.
When choosing an antenna, follow the instructions:
- If possible, use antennas without an amplifier (passive). They are less susceptible to interference. Each additional signal processing (amplification, division) is a source of noise and causes a deterioration in the quality of reception;
- in conditions of good “visibility” of the transmitter (few obstacles), it makes sense to choose a directional antenna. It has a significant advantage: it concentrates and amplifies the signal;
- in difficult reception conditions, when the transmitter is hidden, for example, by a forest belt, choose a wide-angle antenna. Thanks to its design, it has wider coverage than directional antennas and is capable of “capturing” signals from several directions, including reflected ones;
- if the situation with TV reception is completely unfavorable (far from the repeater, weak signal, a lot of obstacles), then there is no other option but to connect an antenna equipped with a preamplifier.
Indoor antenna
Fig 3 room antenna
Are you thinking about how to connect an indoor antenna for T2 reception? The use of indoor antennas for terrestrial digital reception has its limitations. If there is a strong air flow in your area, then you can easily afford an aesthetic and convenient indoor antenna. Unfortunately, indoor antennas themselves are characterized by low gain, and are very often equipped with amplifiers with high gain. As a result, even in the presence of a signal, reception at the indoor antenna is susceptible to local interference (steps around the apartment, operation of electrical appliances, passing cars outside the window). This is manifested by pauses in reception with “freezing” of the image or characteristic squares on the screen.
Therefore, despite its attractive appearance, this antenna may not be enough to receive digital television on a TV set-top box.
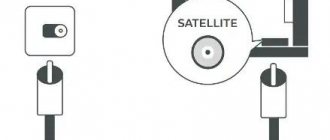
Is it possible to connect a satellite dish to a digital set-top box?
Fig 4 Satellite dish
As the name of digital terrestrial television suggests, it is broadcast over land. Therefore, to answer the frequently asked question: “Is it possible to connect a digital set-top box to a satellite dish?” There is a natural answer - it won’t work. The capabilities of the satellite dish do not include reception of a terrestrial television signal. It “understands” only the satellite signal to which it is directed and tuned.
Why doesn't my Philips TV find digital channels?
Subscribers have connection problems, for example, channels are not detected during automatic or manual tuning. Their absence during the search may be due to the following reasons:
- Incorrect frequency, network identifier specified;
- signal reception less than 80%;
- damage to the coaxial cable;
- equipment malfunction.
Changing the frequency scanning step in the settings also helps. You can go to “Channel settings”
and check the status in the
“Digital Channel” tab,
it should be enabled. Otherwise you can:
- Disconnect all cables
- Disconnect the wires.
- Turn on the device and perform manual configuration again.
If the problem is with the equipment, then you need to contact the operator or provider and report the problem. The consultant will transfer to a technician who will come at a convenient time to check the functionality of the equipment.
Useful: What to do if there is no digital television signal
Connectors and their purpose
Fig 5 Connectors on new TVs
Scart
A scart, also called a Euro connector, can be used to connect devices such as home theater. It is one of the connectors with a long history. Thanks to it, it is possible to connect a digital TV set-top box to an old TV.
Tulip RCA
RCA, popularly known as tulip, is an abbreviation for the name Radio Corporation of America, which introduced this connector to the market in the forties for connecting monophonic players to amplifiers. This connection uses asymmetric signals, is vulnerable to potential differences between devices, and is susceptible to electromagnetic interference.
YPbPr and YCbCr component interfaces
YPbPr (so-called component video) is an analogue image standard that until recently was popular in professional applications. Recently it has fallen out of use for digital television. The essence of this standard is to transmit a signal using three components (components), transmitted by independent cables, to reduce the impact of external interference and signal loss.
YCbCr is a color space model used for digital transmission and storage of images and video. It uses three types of data: a luminance component, and two differential chrominance components, represented by the difference between the luminance and the two RGB primary colors.
RF interface
This is the most familiar RF connector for antenna cables. The first jack you will notice when connecting the receiver to your TV. The encoded antenna signal will enter through it.
You may be interested in: How to connect a TV cable to an outlet
HDMI
The HDMI connector is typical for connecting a digital television receiver to a modern flat-screen TV. The most important performance characteristic of HDMI is that when transmitted by this interface, the video and audio signals are not degraded, distorted or changed. A low-quality or defective HDMI cable will not degrade the image quality: it will either transmit the signal without distortion or not transmit it at all.
What equipment is needed
In order to start using the set-top box, you will need the following equipment.
- Antenna. In order for the device to reliably receive a digitized television signal, an antenna is required. Analog will not work, since they use waves of a different length for transmission. Requires a digital signal receiving device with an amplifier.
- Interface for connecting to a TV. The second thing you will need is a device for connecting to an image output device. For older TVs this is an RCA cable, for new ones it is an HDMI cable.
Of course, in addition to the specified equipment, you will need the TV itself to which the connection will be made.
Some decoders do not use full HDMI, but a smaller version of it - mini HDMI. You need to pay attention to this before purchasing. Otherwise, you will have to additionally purchase an adapter.
Types of connections
Depending on the capabilities of your TV, there are several ways to connect a digital receiver.
Antenna cable
The first and main thing is to connect the digital set-top box to the TV via the antenna input. Many people do not understand that it is not enough to connect the decoder to the TV. You will have to remove the antenna plug from the TV and insert it into the RF socket of the decoder. It is marked on the device panel with the corresponding RF IN symbol.
To watch analog programs in parallel with T2, use the RF OUT antenna output, which is equipped with most tuners (an additional piece of cable is needed). How to choose an antenna cable can be found here.
HDMI connector
Owners of modern flat-panel TVs can connect the digital receiver to the TV using an HDMI cable. This combination provides the best picture and sound quality and allows you to display programs in high definition (HD). You can easily find the HDMI connector on the set-top box, as it has a characteristic flattened trapezoid shape.
How to connect a TV set-top box to a TV via an RCA cable
Just use regular tulip cables (or a built-in RCA cable) and connect the corresponding sockets in the decoder and TV receiver:
- connect the VIDEO OUT (CVBS) jack on the decoder to the VIDEO IN jack on the TV;
- connect the AUDIO L and R jacks on the set-top box to the AUDIO IN L and R jacks on the TV.
The colors of the plugs used can be any; it is important not to confuse cables of different colors between sockets. The same cable must run between the VIDEO connectors on the TV and tuner, and the AUDIO connectors on the TV and tuner. It is possible that one end of such a cable is made using a Scart plug.
Via HDMI
This is a practical and universal way to connect a tuner. Receivers equipped with this connector convert and transmit the digital signal into a video channel of the highest quality. Provided the devices are properly connected, a bright and rich image will be broadcast on the screen.
Transmitting content through this interface is intended for TV equipment with a large screen diagonal. You can play HD videos. The versatility of HDMI lies in the fact that such a cable simultaneously transmits audio and video.
Standard equipment for digital set-top box
Fig. 6 set-top box kit
The basic kit of any DVB decoder includes the following items:
- receiver;
- network adapter (power supply);
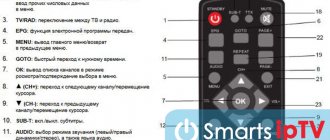
- remote control;
- batteries (type and quantity depends on the remote control);
- instruction manual with warranty card.
The receiver panels are equipped with:
- indicator LEDs;
- LED display to display the channel serial number;
- main control buttons;
- connectors that you will use depending on which TVs you will connect the digital set-top box to.
How can I reconfigure models before 2011 to receive numbers via a set-top box?
Owners of Philips TVs are offered two setup modes:
- A complete reinstallation, in which all previously configured channels are deleted, a list appears with digital channels at the top, followed by analogue ones. This mode is selected during initial setup after purchasing a TV.
- Update. Available channels remain, new ones are located after them.
Important! Connection is impossible without a remote control, no matter which setting method is selected. There are two search formats available for connection – automatic and manual.
Automatically
- The antenna cable is inserted into the appropriate socket.
- The TV turns on.
- On the remote control, select the Home button, in the form of a house.
- After going to the main menu, select the configuration section.
- In the list that opens, select “Channel settings”.
- Start auto mode.
- Select country. To do this, indicate one of them on the back cover of the device in the list of states located on a special label. If Russia is absent, choose Switzerland, Finland or Germany.
- After selecting a region, the “Digital Mode” section becomes available. To set up cable television, select “Cable”; for terrestrial television, click on the “Antenna” section.
- Next, the system will prompt you to select one of the available search methods. Select Automatic and click “Finish” when completed.
Attention! During scanning, the system may ask you to enter a PIN code. In this case, dial one of the standard combinations - four ones, four zeros or “1234”.
Manually
Due to technical reasons, auto-tuning in Philips TVs released before 2011 fails. To search manually, proceed as follows:
- connect the digital broadcasting cable, turn on the TV;
- On the remote control, press the Home button with the image of a house;
- go to configuration;
- open the installation window;
- in the list of sections, select “Channel settings”;
- set manual mode;
- click the “Start” button;
- go to the “Digital mode” item;
- if you are using a set-top box with an antenna, press the antenna button and select a cable for cable television;
- return to the previous submenu and select “Search”;
- manually enter the frequency readings, after finding, enter the next frequency reading;
- act in this manner until all channels are detected;
- When finished, click the “OK” button to save the settings.
Reference. Frequency values are taken from the digital service provider’s website.
The process of connecting a digital set-top box to a new TV
Let's look at the most common step-by-step algorithm: how to connect a digital set-top box to an LCD TV:
- unplug the TV's power cord from the outlet and do not connect it until you have completed connecting all devices;
- using a cable, connect the antenna to the decoder via the antenna input;
- connect the receiver to the TV using an HDMI cable using the appropriate connectors;
- connect all power plugs to the power source;
- An installation assistant will appear on the TV screen and guide you through all the configuration steps:
- menu language definition;
- country selection;
- selecting screen format (16:9);
- point the antenna in such a way as to catch the signal;
- Now you can search for TV channels of free digital TV (20 channels) by following the instructions for using the device or our advice.
What is a 20 channel set-top box?
“20-channel set-top box” is the name popularly given to a digital television signal decoder. It is a small device that is connected to a TV or other device for displaying images (for example, a computer monitor). The “popular” name is due to the fact that most models of digital decoders are capable of receiving two free multiplexes with 20 channels.
The set-top box usually not only can process a television signal, but also has a number of additional functions. These include:
- playback of audio and video files from a USB drive;
- receiving radio broadcasts.
Some models are full-fledged Android devices, so you can install mobile applications on them.
The devices are inexpensive. The price of budget options is 1,000 – 2,000 rubles. Thanks to this, almost anyone can purchase equipment.
Since all models of digital decoders have an RCA output, external audio equipment can be connected to them. This can be useful when using a TV with a weak speaker or poor sound quality.
Connecting to an old TV
Connecting a decoder to an old model TV receiver can be done in three ways:
- via a SCART connector by purchasing a simple DVB-T2 tuner with an identical output;
- you can connect a digital television set-top box to a very old TV, equipped only with a radio frequency antenna connector, using an RF modulator;
- through the AV input of the TV with an RCA-RCA cord (tulips, bells).
Figure 7 connectors on CRT TVs
YPbPr and YCbCb interface
You can also connect and configure digital television by connecting the tuner to the TV via the YPbPr and YCbCb interface. High-quality video signal transmission is carried out through three cables. They are called "component". With their help, you can set up a high-quality picture with good detail without any interference.
The main difference between YPbPr and YCbCb is the system of use. The first one provides the transmission of an analog signal, and the second one provides digital signals. The cables have different colors: red, blue and green:
- green is used to transmit pulses and image brightness parameters;
- red provides the difference between red hue and brightness;
- blue is needed to indicate the difference between brightness and the blue color palette.
Connect all three cables to the corresponding ports to set up transmission to the TV video channel. With an audio signal it is a little more complicated. You will need an additional cable - RCA. The white plug is the left channel, and the red plug is the right channel.
Now you know how to properly connect a tuner to a TV, as well as what interfaces are intended for this.
How to connect two or more TVs to a digital set-top box
Is it possible to connect two TVs to one digital set-top box? One digital adapter is designed to support one TV. But if the decrypted signal is divided using a cable splitter at the output of the tuner and sent to parallel TV receivers, then you can simultaneously connect a second TV to a digital set-top box and watch the same channel on two TVs without the need to purchase an additional set-top box. This method will also work for multiple TVs in your home. (The set-top box must have a built-in modulator or install an external one). RF modulator connection diagram.
Fig 8 RF modulators
Is it possible to switch to digital and what are the features of such broadcasting?
First of all, let's see whether it is necessary to purchase a set-top box for digital reception and whether TV will be shown without it. To answer this question, you need to remember how “digital” and “analog” differ from each other. Without going into technical details, the main difference between them is this:
- With analogue broadcasting, the characteristics of the signal generally correspond to what will be displayed on the screen and speakers of the TV: the sound range directly corresponds, the image takes into account the technical conditions of reception and transmission (frame frequency, number of lines, etc.).
- With digital broadcasting, all information about sound and image is encoded in the form of short electromagnetic pulses that do not directly correspond to the sound and video. Image, sound and some additional features (teletext, etc.) appear after a special electronic unit has performed decoding.
Transmitting an encoded digital signal can dramatically reduce the range required for broadcasting. Where previously only 1-2 analogue television channels could be accommodated, digital transmission can accommodate the same number of multiplexes, each of which includes 10 channels.
However, you have to pay for everything: to receive “digital”, you need an additional electronic unit, which is simply not present in old TVs designed for analogue broadcasting. This block, a digital tuner, is built into the design of the TV receiver in modern models. In older models this is not the case - and therefore you have to use receiver attachments.
How to connect a second digital television receiver
To watch different digital TV channels in different rooms, and thereby maintain peace in the family, you need to connect a second digital TV receiver to the existing antenna. This can be done by splitting the antenna signal using a splitter. If you have an antenna without an amplifier, then a regular cable splitter will do (don’t skimp on its quality). And owners of active antennas need to use a signal splitter with power passing to the antenna from one of the receivers. Digital television connection diagrams.
You may be interested in: TV signal amplifier for apartments and houses
What to do if you don't have the necessary connectors?
If the connectors on the set-top box and the TV do not match, you should use adapter cables. For example, adapters from RCA to SCART are available for sale. Such a cable has one end equipped with “tulips”, and the other with a standard European “comb”.
It is very simple to check whether the adapter is working correctly: you need to press “Menu”, “OK” or a similar button on the remote control of the set-top box. Even if it is not configured and there is no channel reception, something should still happen on the TV screen. If there is no effect, it means that the TV is not receiving a signal, and you need to look for another connection option.
Setting up channels
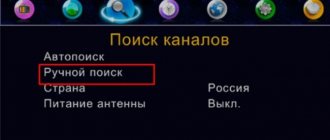
The easiest way to search for channels is auto scanning, which is performed by the decoder. To do this, on the set-top box remote control, select the MENU button, and then scroll up and down to find the “auto scan” option.
Fig. 10 search for channels on the set-top box
In different receivers, the menu interface may differ and the auto channel search command may be called differently. The operating principle, however, is always the same. After you have started automatic channel scanning, wait a few minutes until the TV receiver finds all available stations. Then press the EXIT button to return to watching TV.
Contrary to expectations, setting up a digital adapter may not be so easy and enjoyable for you. Especially if you are not fluent in the electronic menu.
If there are more channels available in your area than you were able to tune in, you should check different antenna positions and run the automatic search function on that channel again until the tuner finds channels from the given multiplex. Also try searching for them manually. It would be a good idea to search and clarify, for example, on the Internet, the frequencies of the desired channels. Add the brand and model of the tuner to the request and run the “search” command. Perhaps your problem is familiar to other Internet users and there has been a solution to it for a long time.
If the tuner still does not “see” the channels, but you are sure that you are within its range, and the antenna connection to the set-top box is correct, try selecting the “restore factory settings” option and repeat the program search maneuver. In practice, it happens that the search operation needs to be performed several times.
Checking the signal quality
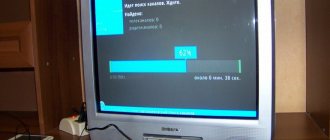
If after connecting the receiver and setting up TV channels, interference appears, then you need to check the signal quality to determine which node caused the problem. Press the “Info” button several times; the number of presses directly depends on what kind of receiver you are using.
Two scales will appear on the TV screen - these are the main indicators of the quality of the digital TV signal. A parameter of at least 70% is considered normal, otherwise the signal is weak, so you need to change the position of the antenna.
You must change the direction of the antenna, and your assistant at this moment will monitor the quality of the broadcast image. As soon as the interference disappears, fix the position of the antenna.
If, while checking the signal quality, you notice that the strength and intensity indicators exceed the 70% mark, but there is interference and ripples, then you should reconfigure the receiver. It is possible that the problem arose due to the fact that you changed some settings of the set-top box. Repeat the receiver settings, and then check the image quality again.
Frequent connection problems
Broken image
If the image is pixelated or interrupted, then it is not a fault of your receiver, but the signal that is sent to it is too weak. This is often accompanied by a temporary loss of sound or a complete lack of reception and the appearance of the “No Signal” message.
Look for a better antenna direction, try using the reflected signal. Another reason for a weak signal is the absence or interruption of contact in the cable or connector. Check the cable connecting the antenna to the decoder. Make sure that it is not damaged or broken and that the connectors at its ends are installed correctly and securely.
If the pixelated image only appears on some channels, you may have a problem with your specific multiplexer.
Image black and white
The probable cause is that you connected the cable to the wrong connector. You should also check the image settings in the tuner and select PAL or AVTO mode there. The receiver itself may also be faulty.
Some channels are missing
If you only receive some of the terrestrial channels, then either your antenna is not installed correctly, or some channels have changed transmission parameters and need to be searched again. To solve this, run automatic update of the channel list.
All channels are missing
The extreme case where you get literally no DVB-T2 channels has many causes. But check the most likely ones:
- If so far you have received channels without any problems, then this may be maintenance work on the repeater. This is a momentary loss of signal;
- If you have just connected a digital TV set-top box to your TV, then check that the equipment is connected correctly and the signal source is selected on the TV. Did you do everything correctly? Run an automatic channel scan.
Another possible problem
Some satellite, cable and digital set-top boxes can generate a signal for HDMI, but, nevertheless, you have to set a reduced resolution in the menu of such a tuner, otherwise signal reception will deteriorate significantly.
For modern models
Modern TVs have advanced configurations. Setting up is more difficult and requires entering additional data. Before starting, it is advisable to request the broadcast frequency from the operator.
Manual method
The method is practically no different from setting up models developed after 2011. It all comes down to the standard instructions:
- Check the serviceability of the digital broadcasting cable.
- Click on the house, called “ Home ”
. - From the list of sections, select “Configurations”
. - Go to “Channel settings”
and activate the manual interaction mode. - Click on the “Start”
, the
“Digital Mode”
.
Then select the digital broadcast transmission method “Cable”
or
“Antenna”
. - Switch to the previous section, indicate the frequency and confirm the action performed.
- Finish searching for TV channels and save the settings.
The network frequency for Philips digital channels can be obtained from your provider. Without a list of frequencies, you will not be able to manually install TV channels. It is worth remembering that lists on the Internet may be unreliable.
Useful: How to set up digital TV via a set-top box
Automatic method
Automatic tuning on modern TVs differs from previous generation TVs. How to perform automatic setup yourself:
- Check the network cable connection. Turn on the device and go to the menu.
- Choose "Settings"
and start searching for TV channels. Then click on the section
"Reinstall channels"
. - Select the country, in the next window mark the DVB - C
.
Open the “Others”
. - Return to the settings, click on “Fast”
scanning, in the frequency line indicate 290.00 MHz and speed 6.875, the QAM value is 256. - Go to the previous menu, activate automatic tuning, save channels.
The instructions indicate general frequency parameters. It is better to check individual indicators with your cable operator. If you enter the data incorrectly, automatic configuration will be useless.