So, you have finally concluded an agreement with a new provider, and a cable with a plug has been installed in your apartment - a real window to the world. All you have to do is connect it to your computer - and the Internet is at your service. However, if it was enough to insert the plug into the socket, you would not need to read this article.
Let's look at how to connect the Internet to a computer via cable, in the simplest case. Let's say you have only one computer, and you will use it as a router (if you suddenly need to distribute the Internet to a smartphone or tablet). Or (as an option) you are going to subsequently connect to your computer from different parts of the world, so you turn off the router to simplify remote access.
Let's say you have a network card on your computer (it doesn't matter whether it's separate or built into the motherboard), and you've just connected an Ethernet cable to its input. We assume that you are using the most current Windows 10. Although for the correct settings of Windows 8/8.1 or even 7, these instructions are also suitable: the principle is the same.
Of course, you can always call a professional to do all the necessary work for you. But specialists are not always free. In addition, you will not only save money on calls on your own, but also learn how to set up the Internet on your computer via cable. In our world, such knowledge can come in handy at any time.
Wired connection
Wired connection of a TV to a computer in most cases looks simpler and more straightforward. However, sometimes difficulties arise with the availability of appropriate connectors and the quality of data transfer. In addition, some users do not like the use of long wires laid around the apartment to connect.
If it is possible to use several connection methods, it is recommended to use the one that provides the highest transmission quality. When connecting, the computer and TV must be turned off. Then you need to turn them on and perform the settings in this state.
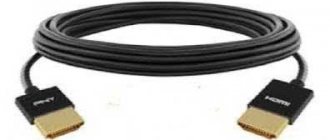
HDMI
Connection via the HDMI port provides high quality video and audio transmission. This will require the presence of such a port on the television receiver and on the computer. This port is universal, and with its presence there are no difficulties with broadcasting. For example, it can transmit video content in accordance with the Full HD standard.
After connecting your computer to the TV, you must configure the PC correctly. To do this, use the key combination Win+P. A window will open to select the operating mode of the second monitor. The following options are available:
- When you select repeat, the picture on the second monitor will copy the one located on the computer display screen.
- If the extension is indicated, this means that the computer is working with two screens.
- You can use Computer Screen Only mode. With this choice, the image will not be displayed on the TV screen.
- When “Second screen only” is selected, the picture will be shown on the large screen instead of the monitor. When using duplication, you need to take into account that the image on the monitor has a lower resolution, so the image on the TV will not be of sufficient quality. In this situation, it is more convenient to select the output mode only on the second screen and set the parameters in the settings that correspond to the capabilities of the television screen.
Sound
When connected via HDMI, the sound should connect automatically, but in other cases you will need to connect directly to the computer's sound card. To do this, you may need a standard single 3.5 mm Minijack wire - on both sides. There are also similar audio outputs with an adapter for RCA bells.
Wireless connection
A wireless connection can be organized using a home router or by directly connecting devices to each other. If one or both devices cannot directly work with wireless communications, purchase appropriate adapters for them. Connection via WiFi or via Bluetooth can be used.
WiFi - DLNA server
To connect your TV to your computer using this technology, you will need the appropriate software. For example, “Home Media Server” is suitable for this purpose. To configure the application, launch and perform the following actions:
- Go to the "Devices" tab to see the available options.
- The program, if there is a node providing wireless communication or a connected adapter, will detect the TV. This may take a few seconds.
- Select a TV from the resulting list.
- Specifies the folders that will be accessible. They contain video files for display. The program will scan and compile a list of media files.
- From the TV, go to the folders open for work and launch the desired file for viewing.
Miracast
This technology allows you to display video files on your PC from your computer to your TV and can show a broadcast opened on a browser page.
The disadvantage of using this method is that it requires a lot of CPU resources. Therefore, it is used on the latest model computers.
You can connect devices using a router. If you install the Wireless Display program on your computer, you can transfer images and sound directly between devices. But both nodes must have wireless connectivity or the appropriate adapters connected.
Why do you need to connect the system unit to the TV?
By connecting a computer to a TV, you can turn a classic TV into an analogue of a smart device. But why do this? This makes sense when, for example, the computer monitor has failed. In addition, the TV display can serve as an additional monitor, which is also convenient. And it’s much more practical to buy a TV if you don’t already have a TV or monitor.
Plus, on a big screen, almost any picture, photo and video material looks much more impressive. A solid-sized TV allows you to get a much more vivid impression of watching movies or playing gameplay.
Most modern and not so modern TV models can be turned into a main or additional PC monitor. Depending on what connectors are on both devices (system unit and TV), you just need to choose the optimal connection method. Fortunately, a variety of options will allow you to cope with the task without much difficulty. How this can be done is discussed in the next section.
Adapters and converters
Various connectors can be used to transmit video and audio signals. To ensure data transmission through them, sometimes it is enough to use an adapter. In this case, use a cable that has suitable plugs. In this case, the contacts in them are connected in such a way as to ensure the transmission of signals to the required contacts. This is possible provided that the corresponding pins are present in both connectors.
In some cases the situation is fundamentally different. For example, the video card in the computer system unit has a DVI-D, and the TV has a VGA port.
If you look at the description of the DVI-D contacts, you will notice that some of the contacts responsible for the analog component of the sound and which are needed for the operation of the VGA connector are missing. It is not enough to simply connect the contacts in the correct order. And it is necessary to provide complex signal conversion. To work, you will need not an adapter, but a converter.
Actions under the contract (change of tariff plan, suspension/resumption of service)
You can change your tariff plan in your Personal Account, at the sales office or through the user support department.
To change the tariff plan through the sales office or user support department, you must fill out an application that can be submitted to:
The tariff plan will be changed from the next billing date. In order for you to be assigned a new tariff plan, you must submit an application 5 calendar days before the billing date. You can check the planned tariff change in your Personal Account in the Statistics / Services section.
Please note that the appointment of some tariff plans is paid; you can clarify this information on the website, at the sales office or from the user support department specialists.
If you go on vacation or a business trip, you can suspend the service under the contract.
To do this, you must fill out an application for suspension of service and submit it to:
If you sent your application by email, we recommend that you check in your Personal Account the purpose of suspending the service.
If you do not suspend service under the contract, a subscription fee will be charged and no recalculation will be made.
If service under your contract was suspended voluntarily, you can resume service in your Personal Account (Internet) or upon application. An application for service renewal can be submitted to:
If service under your contract was suspended due to lack or insufficient funds, you need to repay the debt, after which you can resume service in your Personal Account (Internet) or upon application. Please note that after paying off the debt, you must also top up your balance for the month ahead.
You can find out the amount of debt in your Personal Account or by contacting the user support department.
The contract number can be viewed in your Personal Account.
Image output settings
To set up image output, you need to complete all the necessary steps to connect your computer and TV. After turning on the screen, you need to press the Input button on the remote control.
On the TV, in the settings, a page will open where you can select the image source. The user can see a list of available options or a set of corresponding icons.
Video and audio data, once connected, can be transmitted wirelessly (via Miracast or DLNA server) or through a specific port (HDMI or other). The name of the corresponding method will be in the list for selection. The user must indicate the method he used.
After specifying the data source, the TV will begin to work, providing the desired content.
How to set up telecom on windows 7
For automatic setup for Windows OS, you need to download the “VPN Authorization Setup Wizard” or use the manual settings described below:
1)Open “Start” and go to “Control Panel”
2)Next, select the “Network and Internet” section
3)Open “Network and Sharing Center”
4) In the “Network and Sharing Center” select “Set up a new connection and network”
VGA output
This interface is found on many laptops, but is much less common on TVs. If there is still a VGA input on the back panel of the TV, then you can use the most common cable to the screen from a PC to connect.
If there is no connector, then to connect the laptop to the TV you will have to use adapters: VGA-HDMI, VGA-Scart or any other of your choice.
Another feature of this connection is that the VGA connector transmits exclusively video signals. To transfer sound from your laptop to your TV speakers, you will have to purchase an additional cable.
Mostly the VGA connection is used to view photos on a large LCD screen. As for resolution, the maximum parameter is 1600x1200.
This type of screen switching is also suitable for video games. After all, you can play with headphones, so there is no need to use an additional cable.
Sometimes this interface is found on netbooks, for example, on Asus Eee PC, Acer and others. Therefore, in order not to watch movies on a tiny display, netbook owners connect the device to the TV using VGA. It is also advisable to transfer the sound to TV speakers, since they are more powerful.
Advantages:
- a high resolution;
- ease of connection;
- The interface is available on many laptops.
Flaws:
- a separate cord is required for sound transmission;
- Not all TVs are equipped with a VGA interface.
Overall, HDMI is a more practical solution.