Sony PlayStation is rightfully one of the most beloved and famous gaming consoles. Starting from the earliest models, the appearance of Sonya in the house is a real holiday for both children and adults. Modern realities impose their own adjustments on games - technologies are changing and it is no longer so easy to connect an old console to a new TV with digital connectors. We'll tell you how to connect your PlayStation to your TV and enjoy the delights of video games.
How to connect Sony PlayStation to TV - step-by-step instructions
The good thing about Sony PlayStation is that connecting it to your TV is not difficult at all. There are many ways to do this that allow you to connect different models of set-top boxes to different TVs. In this case, you do not need a specific TV - most often, the presence of connectors on the TV allows you to connect the console, if not in one way, then in another way.
Follow simple steps:
- Before connecting the console, check what connectors are on your TV.
- After that, pick up the right cable at the store (or use the one that came with the console, usually HDMI).
- Connect the TV and console.
- Turn on the TV.
- Turn on the console and wait for it to load.
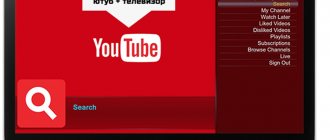
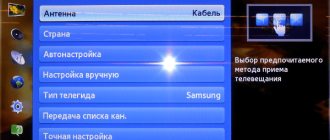
- In the TV settings, find the connector through which the set-top box is connected and select it.
- Follow the instructions on the screen.
In most cases, this is enough to start playing.
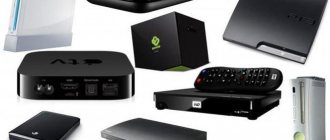
PS4 connection
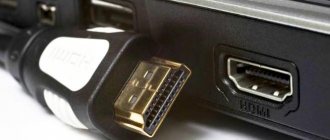
Let's start with the fourth generation Playstation model. PS4 hit the market in 2013 and has an HDMI (High Definition Multimedia Interface) adapter that easily connects to any modern TV. Theoretically, you can connect the PlayStation 4 to the TV without wires, but many prefer a wired connection as it is more reliable. In addition, this gives maximum picture quality and allows you to avoid game breaks in the most interesting place.
PlayStation 4 can be connected to your TV using several interfaces.
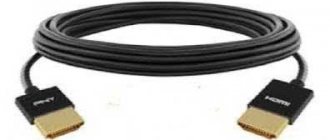
HDMI
The most common and simplest way. All modern TVs and consoles have had this input for a long time. One cable transmits both picture and sound; no additional connections are needed. HDMI provides the best image quality without stuttering or artifacts. The cable comes with the console. Connecting is very simple:
- connect the console to the network;
- connect the console and TV with an HDMI cable;
- on the TV, select the signal source – HDMI input;
- Done – install the games and play.
PS4 is not suitable for connecting to older TV models - by 2013, manufacturers removed the AV MULTI OUT connector. But we can come up with something.
S-Video
One of the possible connection methods. With it, the picture of modern HD games may “limp”, but for an old TV it will be fine. The decoded picture is of better quality than in the case of the “tulip”. This cord will most likely have to be purchased separately.
The HDMI-VGA adapter on PS4 does not work due to the banal incompatibility of digital and analog signals.
Connecting Sony PlayStation 3
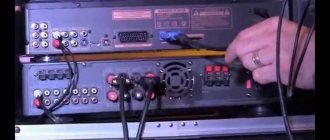
PS3 appeared 7 years earlier - in 2006. It has a full set of “tulips”, due to which you can connect the PlayStation 3 to your TV without an HDMI input. HDMI is also present, but sometimes the cable may not be included with the console. Connects in the same way as in PS4.
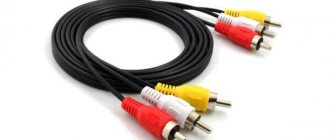
RCA interface
The method is an alternative to the above. Suitable when the TV only has an AV connector. According to reviews, the image does not slow down and loads just as quickly. The cable is included with the console and does not need to be purchased separately.
Check if your TV has the necessary connectors and if you can connect additional devices via AV. On the set-top box, the socket for such a cable is marked AV MULTI OUT.
Connection via an RCA cable follows the standard scheme:
- one end of the cable must be inserted into the TV connector (the one with the branching) according to the colors of the inputs on the TV;
- the other end with the plug goes into the AV MULTI OUT connector on the set-top box.
HD/AV
Allows you to connect PS3 to old TVs. The cable is not included in the standard set and must be purchased separately. The method allows you to play games at maximum resolution. All inputs are marked: for audio output look for L and R, for video - PR/CR, PB/CB, Y.
S-Video
Fits PS3 as well as PS4. This method is rarely used due to low resolution and poor detail. The cable is not included in the standard console kit and must be purchased separately.
Scart
Old TVs can be equipped with this interface instead of RCA. To connect the set-top box, you will need an AV-SCART cable. The quality will be relatively low, but you can't expect much from an old TV.
VGA
Quite an exotic way for those who want to spend money and suffer. Most often you have to buy several converters, one special or homemade. The first and second cases are costly, the last one is unsafe. However, in the case of connecting to a computer monitor, there is no other way. Only an HDMI to VGA adapter will do. The VGA interface transmits only video signals; audio will have to be connected additionally.
Expert commentary!
Old computer monitors when connected in this way may display the error: “The input signal is outside the operating range.” This means that the monitor does not support 1080p resolution. To solve the problem, reset the settings of the set-top box and set the resolution to 720p. The picture will be worse, but the error will disappear.
PS2 connection
A real rarity on the market is a console that connects only via AV cables (tulips).
Composite interface (RCA)
Provides high accuracy of the broadcast signal. The cable consists of three wires of different colors - similar to the colors of the inputs on the TV. After connecting to the TV, you need to select the signal source on the TV. The cable is supplied with the set-top box. Allows you to connect your PlayStation 2 to your TV without any problems.
Scart
Essentially the same composite connection, but using a different connector. The image quality is no different from what appears when connected via RCA.
High Frequency Connection
The set-top box is connected through the input of the television antenna. Not the most suitable option; it is better to purchase a special adapter for it.
S-Video
With this connection, the picture quality is better due to the separated components of the video signal. There are no defects or smudging. The cable has a four-pin plug, two audio “tulips” on one end and a plug on the other. Sold separately.
Connecting Sony Playstation 1
In September 2021, Sony released a remake of the 1994 PS1, but without a disc drive, fully adapted to modern TVs. You can connect a modern model via an HDMI cable; you don’t have to mess around with the original Sonya either - there are standard audio and video inputs, depending on the model, S-Video and an AV MULTI OUT port are supported. You need to inspect your model for the presence of these ports.
Sequential installation steps
- Unpack and remove all cables and joysticks from the box. Keep the box and warranty card in case of unexpected repairs or sales.
- Plug the Micro-USB cable into the power adapter.
- Plug the power adapter into a power outlet, but don't plug it into the PlayStation Classic yet.
- Plug one end of the HDMI cable that came with it into the correct connector on your console.
- Plug the other end into the HDMI port on your TV. You won't see anything on the screen yet, but don't worry.
- Plug one of the joystick's USB cables into the left USB port on your classic console. If you play together, connect both joysticks.
- Plug the Micro-USB cable into your PlayStation Classic console. You'll see a small orange light on the box next to the power button light up. This means that the PlayStation Classic is in standby mode and ready to use.
- Turn on PlayStation Classic. If everything goes correctly, the old PlayStation logo will appear on your TV screen and you will hear the sound of noise interference (a retro feature from the PlayStation Classic).
Which TV can you connect PS4 to?
The latest model of Sony Playstation can be connected to almost any TV, because manufacturers make a lot of adapters for convenient use of TV in different situations. But there are special requirements for the PS4 TV to ensure that the picture is as high quality as possible:
- Technology type and screen refresh rate. High-quality acoustics and clear images are only possible on modern LED models with a screen refresh rate of at least 100 Hz.
- Screen resolution. Reference – 4K. Only in this case the picture will meet expectations.
- Viewing angle. Excess side lighting when choosing a TV for PS4 leaves its mark on the gaming experience. The image is distorted and difficulties arise in group games.
- Input-Lag. Displays the time it takes for the TV receiver to implement the signal on the screen. Responsible for the parameter of the TV response to the player’s actions.
- PQI update index. The larger it is, the better for gaming.
- Screen size. Here, of course, it’s up to the player’s taste - some like a smaller screen, some like a larger one. A good picture on anyone will involve you in the process.
- Interface. To quickly connect your PS4 to your TV, it is better if it has an HDMI cable and an appropriate input.
What's not in the box?
Unlike the original PlayStation, there aren't many wires in the box you hold in your hands. The first thing that catches your eye is the lack of a power adapter. No, they didn’t forget to put it in, it’s just that the manufacturers of the PlayStation Classic decided that in the age of modern technology, every smartphone owner has a USB cable that will fit perfectly with the PlayStation Classic.
You can always purchase an adapter later, but now use the charger for your smartphone and you can start playing today!
Possible connection problems
The most common possible problems that arise are:
- Green/black/blue screen. Monochrome is adjusted to a normal picture using the “anti-aliasing processing” parameter. You need to set "TAA".
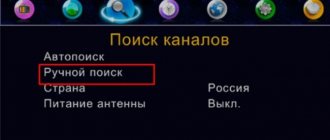
- Inability to recognize the console automatically. Solved by manual adjustment using the remote control. You can also reboot both devices.
Playing through the console is fun and interesting. To enjoy the game and not worry about errors, you need to properly configure the entire system. Properly connecting your Sony PlayStation to your TV will ensure an enjoyable experience without interruptions or anomalies.
see also
Your TV is broken and you don't know what to do? Take this short test and find out the best way to repair your TV.
A few important points
So, you turned on the set-top box. Navigating through the different games is as simple as using the left or right buttons on the D-pad, pressing the X button to launch the game. If you wish to return to the main menu, simply press the small reset button above the power button. This action will return you to the main menu, but will keep the game you were playing in a paused state so that you can return to it later from where you want.
Another button on the external Classic panel is the disc tray open button. On the original console, pressing it would open the CD drive lid so you could insert another game's disc or a second disc, as happened in some cases, such as Final Fantasy VII being on more than one disc. But on the PlayStation Classic, this is used to virtually replace the disc when a game is requested. This nuance makes us perceive the Classic as the original console. Finally, there's a memory card icon on the home screen for deleting and sorting saved games.