Instructions for installing the module into the TV come with the module.
To set up channels on your TV, you must refer to the instructions for your TV.
(Since the menu for each TV is individual, it is impossible to prepare a single setup instruction) You can only give recommendations for setup (if your TV does not offer auto-tuning for NTV-plus, as, for example, on some LG models)
In the search (settings) section for satellite channels:
Satellite name EUTELSAT W4 36.0E, or Eutelsat 36A/36B
LNB frequency (or local oscillator frequency) 10750. If in your settings there are two of them (high frequency and low frequency), then both should be. 10750
Transponder (or search frequency) - 12322 / 27500/ R(V)
Search type - network (network)
The general procedure is as follows:
Rewrite the serial number of the module (starts with Latin letters), and the smart card number (indicated on the card under the barcode)
Install the module in the TV according to the instructions for the module, insert the smart card.
Connect the cable from the installed satellite dish to the TV, set up NTV-PLUS channels, according to the instructions for setting up satellite channels on your TV.
Make sure that the list of channels found includes “INFOCANAL” NTV-PLUS and it is working.
Register the contract (activate the equipment).
IF YOUR TV DOES NOT SET UP CHANNELS OR REPORTS ABOUT A MODULE COMPATIBILITY ERROR, IT IS EXTREMELY NOT RECOMMENDED TO ACTIVATE THE EQUIPMENT. FOR CONSULTATION, IT IS BETTER TO CONTACT A TECHNICAL SPECIALIST FIRST.
Source
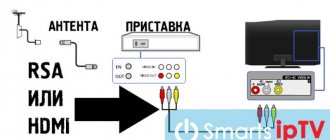
Have you bought a new TV? And do you have an NTV+ satellite dish installed? Many subscribers of NTV+ satellite television prefer the absence of a receiver, a bunch of wires and remote controls. In the case of the CAM module, you only need a cable from a satellite dish connected to the TV. The main condition is the presence of a satellite DVB-S2 tuner in your TV. So, let's consider the situation when you have a tuned antenna and purchased an NTV+ module, what to do next?
1. First you need to connect the antenna cable and scan the channels.
The satellite connector can be labeled SAT, Satellite and is a “cheater”.
On TVs of different brands, settings are made differently, so here is a list of general steps for scanning NTV+ channels:
- Selecting the Eutelsat 36.0E satellite
- We set the LNB settings: Lower range 9750 (or 10750), Upper range 10750
- Find the Manual search item
- Selects any frequency (NTV+ transponder), for example 12130 V 27500
- Turn on the Network search item (Network search)
- Click search
2. Only after you have scanned the channels, you need to register the NTV+ agreement.
- Go to the official NTV+ website using the link https://service.ntvplus.ru/activate/
- We check all the boxes and enter the contract number, card number and select the receiving equipment and serial number
- Enter your personal data
- Selecting a channel package
3. Insert the Module into the switched off TV, turn on the TV, wait for the module to initialize and set it to any channel (for example Russia 1). We wait up to 1 hour for the picture to appear.
More detailed information on setting up different brands of TV.
Source
Setting up NTV Plus channels via the ci module on a Sony TV
To set up channels on your TV, you must refer to the instructions for your TV.
(Since the menu for each TV is individual, it is impossible to prepare a single setup instruction) You can only give recommendations for setup (if your TV does not offer auto-tuning for NTV-plus, as, for example, on some LG models)
In the search (settings) section for satellite channels:
- Satellite name EUTELSAT W4 36.0E, or Eutelsat 36A/36B
- LNB frequency (or local oscillator frequency) 10750. If in your settings there are two of them (high frequency and low frequency), then both should be. 10750
- Transponder (or search frequency) - 12322 / 27500/ R(V)
- Search type - network (network)
The general procedure is as follows:
- Rewrite the serial number of the module (starts with Latin letters), and the smart card number (indicated on the card under the barcode)
- Install the module in the TV according to the instructions for the module, insert the smart card.
- Connect the cable from the installed satellite dish to the TV, set up NTV-PLUS channels, according to the instructions for setting up satellite channels on your TV.
- Make sure that the list of channels found includes “INFOCANAL” NTV-PLUS and it is working.
- Register the contract (activate the equipment).
IF YOUR TV DOES NOT SET UP CHANNELS OR REPORTS ABOUT A MODULE COMPATIBILITY ERROR, IT IS EXTREMELY NOT RECOMMENDED TO ACTIVATE THE EQUIPMENT. FOR CONSULTATION, IT IS BETTER TO CONTACT A TECHNICAL SPECIALIST FIRST.
Source
Software capabilities for SMART TVs and set-top boxes
The NTV-Plus application allows you to watch channel packages provided by the company both on a TV with a built-in Smart TV function, and on a regular TV receiver with a connected SMART set-top box. In this case, the user can:
- watch the broadcast;
- rewind video;
- pause playback to watch the video later on the same or another device;
- access the program archive;
- receive video on demand;
- select programs and films from a thematic catalog or search for specific content using keywords;
- add packages;
- subscribe to news, programs and individual topics;
- purchase broadcasts of sporting events for viewing on air or replaying in recordings;
- pay for services using a bank card;
- enter promotional codes to receive discounts.
It is also worth noting that some channels do not support online broadcasting of their content due to legal restrictions, so you will have to watch them only via satellite broadcast. The full list opens on the NTV Plus portal in the “Channels and Tariffs” section when you check the “Show channels available online” checkbox.
Setting up NTV Plus channels via the ci module on a Sony TV
Have you bought a new TV? And do you have an NTV+ satellite dish installed? Many subscribers of NTV+ satellite television prefer the absence of a receiver, a bunch of wires and remote controls. In the case of the CAM module, you only need a cable from a satellite dish connected to the TV. The main condition is the presence of a satellite DVB-S2 tuner in your TV. So, let's consider the situation when you have a tuned antenna and purchased an NTV+ module, what to do next?
1. First you need to connect the antenna cable and scan the channels.
The satellite connector can be labeled SAT, Satellite and is a “cheater”.
On TVs of different brands, settings are made differently, so here is a list of general steps for scanning NTV+ channels:
- Selecting the Eutelsat 36.0E satellite
- We set the LNB settings: Lower range 9750 (or 10750), Upper range 10750
- Find the Manual search item
- Selects any frequency (NTV+ transponder), for example 12130 V 27500
- Turn on the Network search item (Network search)
- Click search
2. Only after you have scanned the channels, you need to register the NTV+ agreement.
- Go to the official NTV+ website using the link https://service.ntvplus.ru/activate/
- We check all the boxes and enter the contract number, card number and select the receiving equipment and serial number
- Enter your personal data
- Selecting a channel package
3. Insert the Module into the switched off TV, turn on the TV, wait for the module to initialize and set it to any channel (for example Russia 1). We wait up to 1 hour for the picture to appear.
More detailed information on setting up different brands of TV.
Source
Setting up the CAM module CI+ Tricolor and NTV+ on your TV
Since I live in a small town, where before the advent of digital TV there were only three channels, I used satellite TV, tried different operators and different DVBS2 receivers. Ultimately, I settled on the Tricolor operator and the CI+ CAM module, since the Tricolor operator is adjacent to NTV+ on the same satellite, sometimes I also use the CI+ module from NTV. Today we will review these two modules and how to configure them on a Samsung TV
Both modules look almost alone
In order for the module to show channels, it is not enough to just plug it into the TV, you also need to purchase an access card. Tricolor has a “Super Start” card, perhaps now there are others
Why do I use CI+ CAM modules? Everything is simply more convenient, the TV works without any set-top boxes, additional remote controls, there is no operator advertising when switching channels, etc. Of course, there is also a minus: if your TV does not support, for example, 4K, then you will not be able to watch it, but if you use a set-top box, you will be able to watch them.
Let's now move on to installation on TV, I will install a module from Tricolor since the subscription to NTV has already expired. We unfold the TV and at the back we see this slot for DVB cards.
You need to insert our CI+ CAM module into it, with the sticker facing out
After that, we move on to setting up the TV:
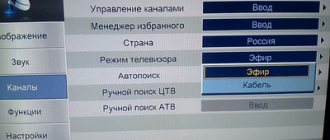
Go to the Menu and select the Channels section
There we select the Antenna section and there you need to select Satellite
Next, go to the Sputnik.System section, there we enter the default PIN code, it is 0000
Next, go to the Select Satellite section and select the satellite there, which is shown in the picture below
After this, we need to return to the Channel menu and select Manual setup, the satellite we have selected will be displayed there and the Scan button and press it.
There we need to create our own transponders, see how to do this in my Video at the bottom of the article.
After adding transponders, we will have the signal level and the name of the Tricolor Network, now all we have to do is select Search Network, turn it on there and press the Search button
After the search is completed, we will see how many TV/Radio channels were found and the setup is complete, I had 266 of them at that time, now there are more of them
Next, you can sort the channels as you prefer, see how to do this in the Video review, also in the description of the video there is a link to the list of transponders that are needed for setup.
What can I say in general, I chose this particular viewing through the module because I think it is more convenient, the Tricolor operator seemed to me the best for reasonable money, an impressive list of channels, and problems with their equipment that many complain about are solved by this module. Now with the advent of digital TV, the popularity of satellite is fading, but...
If you liked the article, rate it with a like and kind comments!
Source
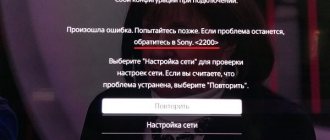
Common problems and their solutions
The channels were showing, but then they stopped
Sometimes it happens that digital channels that have only recently been accepted suddenly disappear. What to do in this case?
But most likely the reason for the disappearance is the TV settings (for example, due to a power surge). In this case, it is recommended to use two methods:
- rescan the range (manually or automatically). It is possible that channels will be detected;
- a complete reset to factory settings (how to do this on a specific digital TV model can be found in the operating instructions). After this, you need to reconfigure the TV receiver, including searching for channels.
No signal
If no channel shows, you need to take the following steps:
- Check the antenna connection. The plug may have fallen out of the socket.
- Verify the integrity of the antenna cable visually and, if possible, by “ringing” it with a multimeter.
- Check antenna orientation. Digital TV broadcasts in the decimeter range, and UHF antennas, as a rule, are sensitive to the direction of the signal source, so they must be installed with a clear orientation towards it. The exact bearing to the nearest repeater can be found on the interactive map of CETV.
If none of these steps yield results, you need to seek help from the experts. Most likely, this is a malfunction of the TV.
Other possible problems and their solutions:
Setting up Tricolor TV channels on Sony Bravia TVs with a CAM module
Preparing to set up your Sony Bravia TV:
Set up the dish and point it at the EUTELSAT W4 (36B) satellite. Details about the Tricolor satellite coverage area and the direction of the satellite dish in your locality are indicated on the Tricolor website. Write down the local oscillator frequency parameters indicated on the satellite dish converter.
In our case, the upper frequency is 10.75 GHz
Make sure the TV is turned off. Connect the cable from the satellite dish to the TV's satellite dish input, marked with the icon:
Install the smart card with your subscription into the CAM module (DRE-Crypt CI+ module) provided by the satellite TV operator:
Install the CAM module (CI module) into the appropriate slot on your Sony Bravia TV, marked with the icon:
Note: it may be necessary to first remove the safety plug from the CAM connector of the DRE-Crypt CI+ module of the TV
Setting up your Sony Bravia TV
1. Turn on the TV and go to the section
Settings -> Digital Configuration -> Auto Satellite Tuning
2. Confirm that Auto Satellite Tuning will begin.
3. Select your satellite dish configuration. With regular individual satellite antennas, you should select the Fixed Antenna or DiSEqC option (default). Click Next
On the scan page selection page, leave the default settings and confirm - “Next”
4. Select the first satellite (Satellite 1) and press the center button on the remote control to enter the settings menu:
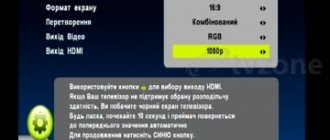
5. Select “LNB Configuration” and enter it:
6. In the “Lower LNB range” and “Upper LNB range” items, enter the corresponding values of the converter local oscillator (see paragraph 2 of the “Preparation” section). In our case, “LNB Low Range” by default coincides with the corresponding local oscillator parameter. But “Upper range LNB” is not. Enter the appropriate values for this parameter in megahertz (10.75 GHz = 10750 MHz) and confirm:
7. Return to the previous sony menu and pay attention to the “Transponder” item. At this point, you can directly configure the parameters for receiving software packages. The default transponder settings in the TV menu coincide with the settings of the Tricolor TV transponder in the western region.
| Transponder frequency | 12226 MHz |
| Polarization | Horizontal or Left |
| Symbol Rate (SR) | 27500 ksym/sec |
For this reason, no settings changes are required at this point. It may be required if the signal parameters are changed by the satellite TV operator or if TV is configured in other regions.
If the antenna is connected and the initial parameters are entered correctly, the screen will display an indication of the signal quality and strength.
Return to the list of satellites and click "Start".
8. Scanning of radio and TV channels begins, during which the progress and number of found TV channels (programs) are displayed.
9. The Sony Bravia TV setup is complete. Depending on the current set of programs transmitted by the satellite TV operator, the number of channels found may vary. Now you can either exit the setup menu or immediately sort the channels by pressing the corresponding button according to the prompt.
Attention! Some of the detected TV channels may not be available for display if they are paid and are not included in your subscription plan with the satellite TV operator.
Source
Setting up NTV Plus channels via the ci module on a Sony TV
Instructions for installing the module into the TV come with the module.
To set up channels on your TV, you must refer to the instructions for your TV.
(Since the menu for each TV is individual, it is impossible to prepare a single setup instruction) You can only give recommendations for setup (if your TV does not offer auto-tuning for NTV-plus, as, for example, on some LG models)
In the search (settings) section for satellite channels:
Satellite name EUTELSAT W4 36.0E, or Eutelsat 36A/36B
LNB frequency (or local oscillator frequency) 10750. If in your settings there are two of them (high frequency and low frequency), then both should be. 10750
Transponder (or search frequency) - 12322 / 27500/ R(V)
Search type - network (network)
The general procedure is as follows:
Rewrite the serial number of the module (starts with Latin letters), and the smart card number (indicated on the card under the barcode)
Install the module in the TV according to the instructions for the module, insert the smart card.
Connect the cable from the installed satellite dish to the TV, set up NTV-PLUS channels, according to the instructions for setting up satellite channels on your TV.
Make sure that the list of channels found includes “INFOCANAL” NTV-PLUS and it is working.
Register the contract (activate the equipment).
IF YOUR TV DOES NOT SET UP CHANNELS OR REPORTS ABOUT A MODULE COMPATIBILITY ERROR, IT IS EXTREMELY NOT RECOMMENDED TO ACTIVATE THE EQUIPMENT. FOR CONSULTATION, IT IS BETTER TO CONTACT A TECHNICAL SPECIALIST FIRST.
Source
Satellite television
- MIGSAT.RU »
- FAQ »
- Setting up channels in a satellite receiver on NTV plus
Setting up channels in a satellite receiver on NTV plus
If you receive TV channels using standard settings for digital receivers included in the list located in the recommended HTB equipment section, and you have an individual satellite antenna installed, then your satellite receiver will be reconfigured to the new parameters automatically. It is enough to turn it off - turn it on with the button on the remote control. If the reconfiguration does not occur, then turn off the power to the terminal and reconnect the 220 Volt power supply. If, after rebooting the receiver, automatic tuning of all or part of the NTV-PLUS channels does not occur, you will need to perform the following steps.
1. Reset the receiver settings to factory settings:
| Receiver model | Menu path to reset settings to factory settings |
| Opentech OHS 1740V | Menu - Installation - Reset settings - Yes - 0000 |
| Sagemcom DSI87-1 HD | Menu - Settings - System Configuration - Factory Reset - 0000 - Yes |
| Sagemcom DSI74 HD | Menu - Settings - System Configuration - Factory Reset - 0000 - OK - OK |
| NTV-PLUS 1 HD VA | Menu - Settings - Default settings - Yes - 0000 - OK |
| NTV-PLUS 1 HD VA PVR | Menu - Settings - Default settings - Yes - 0000 - OK |
| Humax VAHD-3100S | Menu - Settings - Installation - 0000 - Factory settings - Yes - 0000 |
| Humax VA-4SD | Menu - Installation - 0000 - Factory settings - Yes - 0000 |
| Humax VA-5SD | Menu - Settings - Installation - 0000 - Factory settings - Yes - 0000 |
2. After turning on the satellite receiver, it will automatically tune in NTV-PLUS channels.
For Humax VA-4SD terminals, after turning on, you must confirm the use of the NTV-PLUS automatic setup procedure by clicking - Yes.
3. If, after these steps, automatic tuning to NTV-PLUS channels is not completed or is not completed completely, it is recommended to repeat the procedure for resetting the satellite receiver to factory settings.
For Humax VA-4SD receivers, it is recommended to repeat the automatic setup procedure up to four times, if the first three attempts fail.
If you are the owner of a Humax VHDR-3000S tuner, and restarting the terminal did not help, we recommend doing the following:
Go to Receiver Menu > Installation > NTV-PLUS auto search.
Baud rate 27500
Press the button> SEARCH
Baud rate 27500
Clicks the button> SEARCH
4. If, after resetting the settings to factory settings again, the receiver cannot automatically configure/update all or part of the TV channels, it is recommended to check the system’s receiving path in the following order:
Check the quality of the antenna tuning using the values / indicators of the quality scale in the tuner menu:
a) turn on the terminal to a channel on which there is no image,
b) check the value/indicator of the signal quality scale in the corresponding menu item:
| Receiver model | Menu path to check the level and quality of the received signal |
| Humax VHDR-3000 | Menu - Settings - System - Signal information |
| Humax VAHD-3100S | Menu - Settings - System - Signal information |
| Humax VA-5SD | Menu - Settings - System - Signal information |
| Humax VA-4SD | Menu - System - Signal Information |
| Opentech OHC1740V | Menu - Installation - Channel search - Edit TP - Q scale |
| Sagemcom DSI87-1 HD | Menu - Technical information - Signal strength |
| Sagemcom DSI74 HD | Menu - Technical information - Signal strength |
| NTV-PLUS 1 HD VA | Menu - Settings - Manual channel search |
| NTV-PLUS 1 HD VA PVR | Menu - Settings - Manual channel search |
c) if the value on the Quality / Q scale is less than 80%, adjust the antenna to achieve the maximum level.
— Check the quality of the coaxial cable and the condition of the F-connectors connecting the cable to the antenna converter and the receiver.
— Replace the antenna converter.
— Replace the coaxial cable connecting the antenna converter to the terminal.
Manual adjustment to new parameters will be required if you use:
— CI+ CAM Viaccess or NEOTION CAM CI+ 1.3 MV module with an LED LCD TV that does not provide the NTV-PLUS auto-search function (it is necessary to reconfigure the channels in the TV itself according to its operating instructions);
— Digital terminals that do not provide the NTV-PLUS auto-search function; digital terminals that provide an automatic configuration function, but are configured by the user with the option disabled;
— If you receive the specified TV channels using non-standard settings for digital terminals included in the list posted on the TV Company’s website, as well as channels from other satellites, then we recommend that you contact the installers of your equipment to reconfigure the channels.
— If your digital terminal is connected to a cable IP network or a collective antenna and has not been reconfigured automatically as a result of turning it off and on, or if you need to set up a digital terminal with an individual list of TV channels, then we recommend contacting the installers of your equipment to set up TV channels.
Author: silver from 10/27/2017, views: 12754
Source
What is CAM
CAM is a special device that allows you to access paid satellite TV channels. Similar modules are available not only from NTV, but also from other Russian providers, but not all users know about them.
CI modules from NTV Plus are officially produced for use with modern televisions that have an appropriate slot and a built-in DVB S2 satellite tuner.
In fact, each user can purchase this device and insert it into their set-top box if it supports the CI Plus broadcast standard. Modern TVs, with a diagonal of forty inches or more, mostly come off the assembly line with a tuner already built inside, and support all modern modules.
More recently, devices that allow you to use the NTV CAM module and watch content in Ultra HD quality could be counted on the fingers of one hand.
Installing the application
Before downloading and installing the program, you need to take into account several features of SMART technology and the OS used in it. Thus, Smart TV on the Tizen platform from Samsung and webOS from LG should be released no earlier than 2015. Older models are not supported by the application. The Android version on TVs and set-top boxes must be at least 6, and the tvOS version on 4th generation Apple TV devices must be at least 11.
Owners of equipment from different manufacturers can find the application in question in the relevant sources:
- Samsung Apps;
- LG Content Store;
- Google Play;
- App Store.
You can navigate through menu sections using the remote control. To install the service, you need to go to the appropriate catalog category or enter the query “NTV Plus” in the search bar (use the on-screen or external keyboard), select the required item and start the installation.
CI Plus standard and customization
Many users wonder what the CI Plus standard is and whether it will fit the standard Common Interface slots available in most receivers.
CI Plus is a modern standard for CAM CI devices, designed for comfortable access to paid TV content. It is highly reliable and has improved protection against pirate attacks, but it will not work with older console models that do not support CI Plus.
It is not recommended to go into the device menu and tinker with the settings - only if the subscriber clearly understands what parameters are being changed and for what purpose.
Deleting and sorting channels
If for some reason you do not want to watch one or more channels found, you can remove them from the list. This is done as follows:
- Open the menu.
- Select Settings, then Digital Configuration.
- Go to “Uninstall programs”.
- Find the unwanted channel in the list.
- Press "OK" on the remote control. The channel is deleted.
If you need to sort the order of channels, the procedure looks like this:
- Open the menu.
- Select Settings and Digital Configuration.
- In the menu that opens, go to the “Sorting programs” item.
- Enter the channel number you want to change and press the select key. The program will be highlighted.
- Use the Up and Down keys to move the channel to the desired position.
- The procedure is repeated for all channels that need to be sorted.
Compatibility
Are modules from different TV providers compatible? The answer is no, they are not compatible. Despite their external similarity and the use of the same slot, they differ in the type of encoding.
For example, NTV modules use the Viaccess encoding type, while another popular provider Tricolor uses DRE Crypt. That is why devices of this type are usually sold immediately with an access card. This is not always convenient, since, like any equipment, they have the unpleasant property of breaking over time. One of the advantages of NTV is also the fact that the provider’s modules can be purchased without any problems without a card.
Advantages and disadvantages
Let's start with the advantages of the device:
- it is no worse than the receiver, and allows you to watch similar channels in high quality;
- a subscriber with this device receives the same access to his personal account and personal account;
- the subscription fee is the same, but unlike the set-top box, the module takes up minimal space;
- Channel switching is carried out on the TV remote control; the subscriber does not need to do other manipulations on control devices.
As an alternative to a regular CAM receiver, the NTV module is not suitable for everyone. To fully use it, you need a modern satellite set-top box that supports the CI Plus broadcast format, or a modern TV with an internal tuner that again supports the above format.
The choice of receiver or module has absolutely no effect on the quality of image and sound, and the functionality regarding watching satellite television will be the same in both cases.
Source
Tariffs and services
The NTV-Plus application itself can be downloaded for free, but you must pay for an additional set of channels. The subscription can be renewed monthly or purchased for the whole year. Satellite TV subscribers have access to all previously purchased packages. Current prices can be found on the main NTV Plus website. The only condition for viewing content on a SMART TV is a connection (“Online TV”) in your personal account. Thanks to it, the viewer gets the opportunity to watch satellite channels on all devices with Internet access. Until the end of 2021, this option is provided free of charge during the first month from the moment of connection, then its cost will be 199 rubles for 30 days.
If the user has not entered into an agreement with the company, he needs to register on the site and log in to the program on the TV. If you have already created an account (for example, to watch channels online or through an application for mobile devices), re-registration is not required.
The table below shows how much it will cost to watch TV without a satellite dish and receiver.
| Package name | Description | Price (RUB/month) |
| Informative | A selection of channels for curious viewers | 199 |
| Children's Premium | Channels for children and cartoons from Megogo | 299 |
| Movie | Domestic and foreign films and TV series | 299 |
| Cinema + Amediateka | TV series from Amediateka have been added to the Cinema package | 499 |
| Cinema + "Megogo" | Films and TV series from the Megogo catalog have been added to the Cinema package | 499 |
| Match Premier | Sports channel in HD format | 299 |
| Supersport | Selection of sports channels | 499 |
| Premium Sport | All available sports channels and broadcasts | 599 |
| Amediateka | TV series in HD quality | 599 |
| Cinema Premium | Movie channels, a collection of more than 6 thousand films and films, as well as TV shows from Amediateka | 899 |
At the same time, to watch interactive television through the NTV-Plus service, you need to take into account several nuances.
- To watch 16 all-Russian TV channels for free, just add one of the packages listed above.
- New users are often offered a free trial period (1-3 months). You can find out about promotions of this kind on the NTV Plus TV website.
- Services are available in the Russian Federation. Abroad, you will need to subscribe to the “International” package, which costs $3.99 per month. It is available on iOS and Android devices and includes 25 popular channels of information and entertainment. The program determines the user's location independently.