Home / Technology
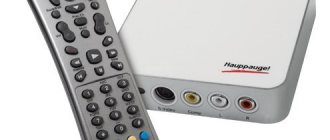
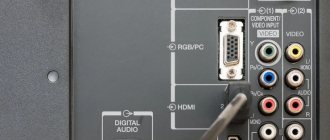
Connect the receiver using an AV cable to the TV, and the antenna to the receiver. Make sure you can see the receiver menu on the screen. If its menu is not displayed when the receiver is turned on, use the TV remote control to select the appropriate input (AV, HDMI, Scart). When you turn it on for the first time, simply follow the instructions on the screen. If you are not sure about something, do not change the preset settings. You can always change them later, in operation mode.
1. First select your language preference. Press the blue “Next” button on your remote control.
2. Set the desired image settings. Click Next.
3. If the antenna is active (i.e. with a built-in amplifier), turn on the antenna power. It is also advisable to enter one of the frequency channels that are used in your coverage area and adjust the antenna, achieving a high level and quality of the signal on the scale at the bottom of the screen.
4. By clicking next, wait for the channel search to finish. The names of channels will appear in a special window as they are added. The receiver is in auto search mode and scans all available frequencies. After finishing the channel search, the receiver will go into TV mode and you will see a broadcast of the first TV channel in the list (for example, “Inter”).
Manual channel search
If you haven't found all the channels available in your region, use a manual search. See the channel table to determine the nearest transmitter and frequency channel numbers. For example, you need to scan the 49th frequency channel.
1. Press the "Menu" button on the remote control and select Settings -> Channel Search.
2. Select the required frequency channel and adjust the antenna position, achieving high signal level and quality indicators. Don't forget to turn on the power to the antenna if it is active (with a built-in amplifier). Be sure to select Manual Search to scan only the frequency you want.
3. Wait until the search is completed (if it is successful, you will see a list of added channels on the screen) and exit to TV mode.
4. Make sure that all found channels are showing. If not all channels have a picture and a “Searching for Signal” message appears on the screen, try adjusting your antenna for optimal reception of all channels. Didn't achieve 100% results? Choose more
If you purchased a new TV, changed your cable operator or broadcast type, then the first procedure you will encounter is setting up TV channels on your TV.
Depending on the method of signal reception, there are three main types of broadcasting:
- terrestrial
- broadcast from a TV tower is transmitted to a regular antenna; - cable
- channel packages from the operator's distribution center are transmitted to subscribers' apartments by wire; - satellite
- the signal from the satellite is transmitted to a parabolic antenna (dish) and converted by the receiver.
In turn, terrestrial and cable television can be analogue and digital. The second has higher image and sound quality, but viewing it may require additional equipment in the form of a digital set-top box (tuner), especially if we are talking about an older TV model.
This article discusses automatic and manual tuning of analog channels on a TV (for cable channels everything will be identical).
Possible problems during setup and methods for eliminating them
- Pages take too long to load.
Move the router closer to the TV.
- There is no Internet connection.
Reboot the TV or adapter, disconnect and reconfigure.
- The adapter settings are incorrect.
This problem can be solved by manually setting up the Internet. You can use the WPS system - it allows you to connect automatically.
- Poor, unclear image, interference when playing video content.
The main reasons for this phenomenon are either low data transfer speeds or a weak processor installed in the router. The way out of the situation is to replace Wi-Fi equipment with a more powerful one or increase the data transfer speed.
- Automatic switching off and on of equipment.
Here you need to check its settings. If the cause is not eliminated, experts recommend changing the firmware or firmly fixing the socket.
It happens that the equipment runs out of memory - this problem can be solved simply: you need to periodically clear the cache and the device will function normally.
But it also happens that you have to turn to the services of specialists. In case of independent disabling of functions or, for example, interruptions in sound. Often such problems arise due to software failures or failure of some part of the technical design.
It is also worth remembering that if a Smart TV is purchased second-hand, then the settings of the previous owner are installed on it. It is recommended to reset them to factory settings and reconfigure not only the connection to your home network, but also the standard ones (brightness, channels, contrast, etc.).
Signal information
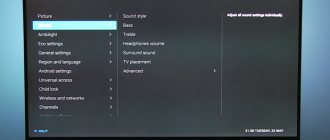
If after tuning twenty channels they show noise, you can look at the input signal level. To do this, find the Signal Information item, where the strength and quality of the received signal will be shown. The higher the scores, the better.
Options
To configure the built-in DVB-C tuner to receive digital cable television programs, you must use the following parameters (selected in the TV menu):
- The initial broadcast frequency is 298 MHz (298000 kHz);
- A total of 16 transponders with a step of 8 mhz;
- Symbol rate - 6875 Ksim/sec;
- Modulation - 256 QAM.
These parameters are suitable for tuning based on the network search principle; if the TV does not support it, then you need to use a full search or select frequencies for manual tuning in megahertz: 298, 306, 314, 322, 330, 338, 346, 354, 362, 370, 378, 386, 394, 402, 410, 418.
The following are conditional examples of TV settings.
Digital TV setup example
SAMSUNG TVs
Decoding of SAMSUNG TV models:
- Country - Slovakia, Slovenia or Others;
- Auto search for digital and analogue channels;
- Source - Cable;
- Search mode - Network.
General algorithms for setting up digital and analog channels for various models of SAMSUNG LCD TVs:
- Click on enter the menu;
- Select in the menu - “Channel” (icon “Satellite dish”);
- Select the signal source - “Cable”;
- Select - “Auto-tuning”;
- Select - “Digital”, “Digital and Analog” or “Analog” (depending on the preferred television signal); Click “Start”. Setup takes approximately 5-10 minutes.
Detailed description of setting up digital channels on SAMSUNG brand TVs starting in 2010:
- In order to set up digital TV channels for the vast majority of SAMSUNG models, press the “Menu” button on the remote control, the TV menu will open in which you will need to select the “Channel” section (Satellite dish icon).
- Make sure that the Cable option is selected in the Channel - Antenna menu
- To select a country, go to the “Channel—Country” menu item. The TV will ask for a pin code, if you have not changed it, then enter 0000
- To have the necessary DTV search parameters, make sure that the following settings are selected in the “Channel—Country” menu: Country -> Digital channel: Other; Analog channel: Eastern Europe
- Open the “Channel-Cable Search Options” menu: Start frequency: 298 MHz (298000 kHz); Ending frequency: 418 MHz (418000 kHz); Baud rate: 6875 KS/s; Modulation 256 QAM;
- Open the “Channel—Auto-Tuning” menu: Signal source: “Cable”; Channel type: “Digital and analogue.”; You choose the type of channels at your discretion; you can find only digital channels, or digital and analog, or only analog. Click "Next"; Search mode: “Network”.
- Click "Next". Once the channel search is complete, click OK. After an automatic search, all digital channels existing on the cable network will be found. Only those broadcasting in unencrypted form will be shown. It is most convenient to remove the remaining channels.
- Open the “Channels-Channel Manager” menu or press the “CH LIST” button on the remote control.
- Select the desired channel (or several, using the “C” (yellow) button on the remote control), press the “TOOLS” button on the remote control and select “Delete”.
- After confirmation, the selected channel will be deleted.
- To sort the channels, select the one you need (in the “Channel - Channel Manager” menu, or press the “CH LIST” button on the remote control), press the “C” button, then the “TOOLS” button, the “Sorting” menu and move it to the desired position place in order.
- If you have a SMART TV: Look at the “smart hub” button on the remote control, click and select the channel icon, then see the list of channels, select editing in the upper right corner.
LG TVs
General algorithms for setting up digital and analog channels for various models of LG LCD TVs:
- Press the button - “Menu”;
- Select “Options” from the menu;
- Select - “Auto-tuning”;
- Select the country - “ Finland ”; (possibly France, Switzerland, Sweden)
- Select the signal source - “Cable”;
- Select - “Digital”;
- Click - “Search”.
Setup takes approximately 5-10 minutes.
Detailed description of setting up digital channels on LG TVs:
- In order to set up high-definition digital TV channels on the vast majority of LG models, press the “Menu” button on the remote control, you will see the TV menu in which you will need to select the “Options” section.
- Specify the country "Russia".
- Go to the “Settings” menu, “Auto search” item and specify the method of connecting to the TV “Cable”.
- In the window that opens, go to “Settings” and enter the following parameters: Search type: “Quick”; Frequency: 298000 (kHz); Speed characters: 6875; Modulation: 256 QAM; Network ID: auto.
- If you did everything correctly and saved all the changed parameters, then during the search your channels will be detected.
- An important feature of LG TVs is the Automatic Channel Update function . It must be disabled , otherwise the TV will periodically reset the channel list you have configured. To do this, go to “Digital cable settings - Channel auto update”: Off
To sort channels, select “Settings” -> “Auto search” -> “Cable” -> Uncheck (√) from “Auto numbering” -> “Run”. After setting up all channels, the necessary buttons will appear in the “Program Editor”.
SONY brand TVs
Since not all SONY models are equipped with a digital tuner for cable TV (DVB-C), you need to check the model of your SONY TV. Models equipped with a DVB-C tuner are marked KDL-**EX*** or KDL-**NX*** - for example KDL-2EX402R2, the first 3 letters in the model name (KDL) indicate that the TV is digital.” In models KLV-**BX***, etc. There are no DVB tuners.
General algorithms for setting up digital channels for various models of SONY LCD TVs:
- Press the “MENU” button (for some models it is called “HOME” on the remote control (hereinafter referred to as the remote control). This button is usually blue;
- Select the item “Settings”;
- Find the “Digital Configuration” menu in the list of settings and enter it;
- Select “Auto search for digital stations”;
- A source selection window will open - select the TV connection type. Select "Cable";
- In the scan type selection item, select the “Full Scan” mode.
- Or by selecting the “Manual” item, enter: Frequency: 298 MHz (298000 kHz); Access code: "Auto"; Symbol rate: 6875.
- Next, click “Start” and wait until the TV finishes searching for channels.
Pay attention to the bottom of your TV's OSD menu. The bottom menu bar displays hints on which remote control buttons to perform certain actions in the TV menu.
PHILIPS brand TVs
- Press the “Home” button on the remote control
- Select “Search for channels”
- Select “Reinstall channels”
- Select the country “Germany”
- Select “DVB-C cable”
- In the list of operators, select “Others”
- Press right on the remote control and select “Settings”
- Set frequency scanning to “Full”
- Set the transfer speed to “Manual”
- Set the transfer speed to “6875”
- We will turn on analogue channels only if they are needed
- Click “Done”, return to the previous menu
- Let's start the search
Alternative option
To set up a PHILIPS brand TV, first read the stickers on the back of the TV, where separately for each tuner (DVB-T and DVB-C) there is a list of countries in which, according to PHILIPS, there is digital broadcasting (at the time of release of the TV, but If you update the firmware through their official website, then this list may change in subsequent firmware). If Russia is not in the list, then select Slovakia, Slovenia or Others.
General algorithms for setting up digital channels for various models of PHILIPS LCD TVs:
- Click on the icon - “House”;
- Select - “Install”;
- Select “Search for channels”;
- Select - “Reinstall channels”;
- Select - Country - Russia or Others. If Russia is not in the list, then select Slovakia, Slovenia or Others;
- Select digital mode - “Cable (DVB-C)”;
- In the line “Network frequency” we enter the frequency - 298 MHz (298000 kHz);
- In the “Transmission speed” line, enter the speed - 6875 Ks/s;
- In the line “Frequency scanning” - 256 QAM.
Setup takes approximately 5-10 minutes.
Detailed description of setting up digital channels on PHILIPS brand TVs:
- Press the "Menu" button on the remote control;
- In the TV menu that opens, select the “Configuration” section;
- Select the "Install" tab;
- After clicking the "OK" button, you will move to the second menu field, then go to the "Channel Settings" tab;
- After clicking the “OK” button, the third part of the menu will open, where you need to select “Automatic”. installations";
- Next you will see a message about updating the channel list. Click "Start";
- Select "Reinstall channels";
- In the “Country” section, you must select Russia, but if this country is not in the proposed list, then select Slovakia, Slovenia or Others;
- Since you are connecting to digital television via a DVB-C cable network, you must select “Cable”;
- Before you start searching for channels, select “Settings” to manually correct the search parameters;
- Set the baud rate to manual mode. In the tab, change the transmission speed manually from the control panel to the desired one. In some TV models, the flow rate is indicated in the “Character 1” tab; “Character 2” is left at 0;
- Now set the network frequency to manual mode and enter from the control panel:
- Frequency: 298.00;
- Data transfer rate: 6875 ks/s;
- QAM: 256.
- After clicking the “finish” tab, you will again be taken to the channel launch menu, now you can start scanning.
If you did everything correctly and saved all the changed parameters, then during the search your channels will be detected.
TVs of the PANASONIC brand
Setting up digital channels on PANASONIC brand TVs:
- Press the “Menu” button;
- Select the item “Settings”;
- In the window that appears, select “Menu analogue. settings";
- In the window that appears, select “Add TV signal”;
- In the table that opens, put a tick in the “DVB-C” line;
- Click “Start auto-tuning”;
- After searching for all digital channels, going to the main menu in the “Settings” item, the line “DVB-C setup menu” appears. By selecting this item, you can adjust the setting manually (set the frequency to 298 MHz (298000 kHz) and speed to 6875 Ks/s).
The menu of your TV may differ from the model offered. In this case, you need to find tabs that are similar in meaning. If your TV asks for a search step, enter 8 MHz.
- Press the “Menu” button;
- Select the item “Settings”;
- Go to the subsection “DVB-C Settings”;
- Select the “Auto Configuration” subsection;
- In the “Auto Configuration” menu enter the following values: Frequency: 298 MHz; Symbol rate: 6875 Ksim/s; Note that there is no “modulation” parameter. Search mode: “All channels”; Scan mode: “Fast” (or “Full”); Network ID: "auto".
- Click on “Start scanning automatically”.
Channel scanning lasts from 3 (“Fast”) to 10 minutes (“Full” scanning), after which the TV automatically displays a list of all channels configured by this tuner. The channel list will be displayed automatically, or it can be found in the DVB-C setup menu.
SHARP brand TVs
Setting up digital channels on SHARP brand TVs:
Models: 46 (52, 65) XS1, LE700. If your TV model provides reception of digital channels, but there is no “DTV MENU” item, then first select another country - Slovakia, Slovenia or Others.
- Press the “DTV” button;
- Press “DTV MENU”;
- Select “Installation”;
- Select “Auto installation”;
- Click "OK".
Setup takes approximately 5-10 minutes.
DUNE HD media players
DUNE HD TV-102W-C can also act as a set-top box for watching digital television (cable (DVB-C) and Internet television (IPTV). Settings:
- Go to the main menu by pressing the “TOP MENU” button on the remote control;
- Select “Settings”
- Select “Applications”
- Select “Cable TV” or “DVB-C”
- In the “Cable TV” or “DVB-C” section, enter the following values: Network scanning: No; Initial frequency, kHz: 298000; Final frequency, kHz: 418000; Interval: 8 MHz; Modulation: QAM 256; Symbol speed, kS/s: 6875
- Confirm the scan by pressing the “OK” button
- To view channels, go to the main menu by pressing the “TOP MENU” button on the remote control
- Go to the “TV” section
- Select “Cable TV” or “DVB-C”
- To start watching TV, select any of the found channels
What is better to buy - a Smart TV or a set-top box with Smart TV function
Both options are designed to make the TV smart and multifunctional. But still, there are functional differences between them. The most important difference between Smart TV and set-top box is optimization specifically for the functionality of the TV. This system cannot be used on a smartphone or PC - it is designed specifically for television. And a set-top box with the Android TV function can be integrated with other devices running on this platform. For example, from an Android smartphone you can integrate your account onto your TV, thereby getting something like a large tablet.
Another obvious difference between these devices is the price. Smart TVs are many times more expensive than regular TVs. Therefore, if the issue of saving is important, then you can purchase a regular TV model and a separate set-top box with Smart TV capabilities. Its price is more than affordable, so the savings in this case are obvious.
The Android OS is not ideally adapted to the big screen. It is also not designed for remote control and in most cases you need to purchase a mouse and keyboard for the console. And the Smart TV system is optimized for high-resolution screens and remote controls.
For people who have never used the capabilities of Smart TV and are far from the intricacies of the settings of this system, it is better to purchase a Smart TV from LG or Samsung. These models have the simplest controls and settings. Turn a regular TV into a “smart” one - this option is more suitable for experienced Internet surfers who want to get the most out of their capabilities and synchronize their gadgets with the TV.
Modern technologies open up new possibilities for television. Let's look back at some 10 years ago and remember what it was like. Analog signal with limited reception capabilities - residents of small towns watched only those TV channels that were received by television towers. It was a color picture, in most cases, with poor image quality. Now this is a thing of the past: we have the opportunity to watch our favorite channels in perfect quality.
Source
Signal information
If after tuning twenty channels they show noise, you can look at the input signal level. To do this, find the Signal Information item, where the strength and quality of the received signal will be shown. The higher the scores, the better.
Almost the entire country has switched to digital television, which means that twenty digital terrestrial channels are available in almost any locality. Now in any city or village you can watch 20 channels in high definition completely free of charge, no need to pay a subscription fee or buy expensive equipment for satellite reception. All you need is an antenna and a TV that supports the DVB-T2 format.
Checking the TV for DVB-T2 reception.
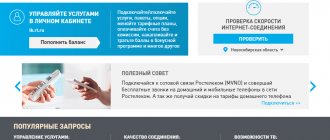
First, let's check whether your TV supports DVB-T2, since it is in this format that digital television is broadcast in the Russian Federation. This information can be found in the instructions for your TV; check the product passport, it should contain this information. There is also another way , using the Internet, to do this we go to the website See the figure of the Russian Federation. Here we find the item Check if your TV receives digital terrestrial TV, enter the make and model of the TV, and see whether it is possible to receive digital numbers or not.
How to set up your TV to receive channels
When installing digital television, sometimes the channels are not tuned in. In order to adjust them correctly, you need to know the algorithm of actions. Each brand requires a special approach. The principle of digital TV is to reproduce a sound signal and an image using a code contained in a digital signal. It cannot be affected in any way by external stimuli or any interference. Analog is highly susceptible to external stimuli. It loses power, can give a blurry picture, or disappear altogether.
Reviews 1. Reviews 1 Characteristics Product review:. Attach an image. Attach YouTube video.
Materials from the Articles sectionDt 838 reviews Receiver and amplifier Low voltage of a computer power supply How to check a microwave transformer 29760 HF reviews DIY LCD projector Sources used:
- https://psd2cms.ru/kak-nastroit-kanaly-na-starom-televizore-tomson/
- https://tv-nastroy.ru/kak-nastroit-20-kanalov-na-televizore.html
- https://all-audio.pro/c28/stati/kak-nastroit-televizor-tomson-na-tsifrovie-kanali.php
Connecting Smart TV Thomson
12.5.2020 ThomsonT32RTL5130 How to install the thomson T32RTL5130 application Downloaded the VOKA TV application to the TV. In the folder of downloaded programs (Downloads folder), the application is visible, it is there, but the TV does not see it, and therefore the application is not installed automatically. How can I install it manually? TV application. Downloaded from the official website of the provider of this service - IP TV and designed specifically for installation on an Android-based TV.
To install applications that are not in the installed store, you need to download it on your computer, write it to a USB flash drive, insert it into the TV port and install it from the flash drive through the corresponding item in the television menu.
THOMSON T32D19DHS-01B TV review: smart, fast and loves the Internet
Our technicians configure the Thomson TV for analog and digital channels of terrestrial, cable and satellite television, adjust the brightness, color and geometric characteristics of the screen, wire or wirelessly connect the Thomson TV to the network, connect external players or recording devices. Everyone knows how to set up a Thomson TV. For your convenience, a consultation on setting up TVs has been organized. What remains for our client to do is to connect the HDMI cable to the Thomson TV set with the devices turned off. Click this button to temporarily mute the sound. ON button. Menu button.
How to properly set up digital channels on your TV The principle of digital TV is to reproduce an audio signal.