NTV-Plus is the first satellite television operator in Russia. The number of channels depends on the selected tariff plan, but their number exceeds 270, and all are digital. Moreover, starting from 2016, you can use the operator’s services without an antenna connected to the TV.
To connect satellite television, they take a special set-top box, and it is already “connected” to the dish or configured via the Internet (cable connection, Wi-Fi).
How to connect NTV+ to a TV, how to install and configure an antenna - this article is about that. Most of the work is easy to do, but if you lack skills, it is better not to take risks and entrust this task to specialists.
Equipment set
Decoder
To connect to a minimum configuration service package you need:
- antenna;
- decoder;
- digital set-top box or CAM module (coding system adapter);
- TV.
Often, when connecting, it turns out that the “native” cable is not long enough, so it is better to immediately take a similar, longer one. You will need tools with which to mount fasteners, adapters, lay wires, and so on.
You don't always need to buy a separate antenna. Sometimes previously installed equipment is compatible with the connected service, but it is better to immediately check with the operator about this.
If you need to connect NTV Plus via the Internet, that is, without installing a dish, you just need to leave a request on the service’s website or call the operator and agree on a package of services. Next, a company representative comes to the user and connects the set-top box (the house must be connected to the Internet).
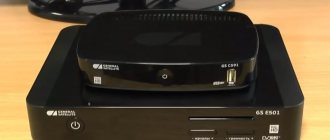
What decoders does NTV+ offer: receiver, KAM module, digital set-top box.
Standard receiver
The receiver is not suitable for watching television online.
A classic, one might say outdated, but still relevant type of equipment with the following advantages:
- suitable for any TV;
- expands the functionality of the TV panel (even if there were no functions initially), making it possible to record broadcasts, view media files, and so on.
The receiver has a number of disadvantages:
- a separate remote control is used for control;
- requires free space, connects to the outlet, occupying it;
- complex menu with many interfaces that are easy to get lost in (difficulty setting up);
- not suitable for watching TV online.
CAM module
CAM module
Many TV models have a connector on the side that looks like a SIM card slot in smartphones, but larger. It's called CI+.
A KAM module is inserted into it - an adapter with an already installed plastic card issued by the operator. This SIM card unlocks digital channels.
Advantages of using a KAM module to connect NTV+:
- compactness;
- does not require free space (apart from a few centimeters in the TV case);
- no separate remote control is needed for control;
- The antenna is connected to the TV, without a set-top box.
Minuses:
- for TVs with CI+ connector;
- The newer the TV panel model, the richer the functionality.
Interactive console
To access digital television, you need to call a specialist who will connect the service.
Often, special hybrid set-top boxes are used to connect digital television. They are most relevant for residents of megacities, where dense buildings “interrupt” the signal or there is simply no way to install an antenna on the roof of the house.
That is, anyone living in a small or big city can access digital television even without having a dish. All you need to do is call a technician who will connect the service and make sure that the Internet is connected to the house.
NTV+ plus uses the VA-1020 set-top box, but alternative models are also suitable. Equipment advantages:
- In addition to the fact that they “receive” a satellite signal, they can also work from the Internet. This greatly expands the functionality. Thus, the user gets the opportunity to pause the broadcast, search for films in online cinemas, and so on;
- serves as a complement to the TV, expanding its capabilities;
- Suitable for new and old TV models.
Minuses:
- the set-top box requires free space and access to an outlet;
- separate remote control;
- price (if you take into account Internet fees and access to paid content).
Based on the TV model and preferences, they choose one of the methods of connecting to the service. The interactive option is one that works in conjunction with the Internet.
If you only plan to watch satellite television, a KAM module will suffice. A regular receiver is a universal, affordable solution, and can be used for any TV, regardless of the newness of the model.
Satellite receivers
A receiver is a device that converts a satellite signal into a television picture format. Among the receivers most compatible with the Eutelsat 36B/36C satellite are the following receivers:
- NTV-PLUS 1 HD VA.
- HUMAX VAHD93100S.
- Humax VA-4SD.
- Humax VHDR 3000S.
- Sagemcom 87-1HD.
- Sagemcom DSI74 HD.
- Opentech OHS1740V.
Receivers
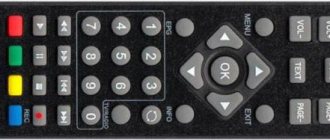
Without leaving an armchair or sofa, the viewer can easily control satellite TV using the remote control. Receivers contain electronic circuits that allow you to set delayed viewing of your favorite programs. You can also pause the demonstration of the program and make a video recording of it.
Antenna installation
Antenna installation
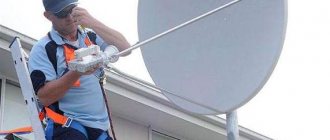
Having registered and received a set of equipment, the user can install it himself or contact the company’s specialists for this. However, many try to do all the work themselves, considering calling a specialist an expensive service.
Installing an antenna is a responsible task, so you should start by studying the instructions, and also make sure that all the components are in place, the cables are of sufficient length, and so on.
Selecting a location
NTV+ operator dish
The NTV+ operator dish includes several elements that need to be put together, following the instructions. The optimal location for its placement is an open space, not blocked by trees, wires, buildings and anything else that may interfere with signal reception. Usually this is the roof or wall of the house.
In this case, open air is the very place where the plate will be exposed to atmospheric phenomena. Therefore, it is worth considering in advance the possibility of heavy winds, and placing equipment under a stream of rainwater is not a good idea.
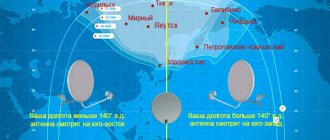
There are several coverage areas, depending on the geographic location. Each region has its own recommendations on which direction the dish should be pointed in order to reliably receive a signal from the satellite.
You can find out about them by reading the relevant forums, but there is a simpler way, one might say, a life hack - just look at how your neighbor’s plates stand.
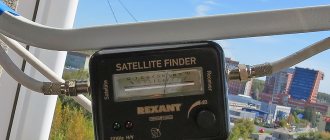
Someone uses a compass and a map of the area to determine the direction of the satellite. Smartphone apps that determine location, such as SatFinder, also help.
It is better not to rush to “tightly” fix the antenna, since during setup you may need to change its position. The final tightening of the bolts is left for last, when all work is completed.
Pole mounting
Anchor self-wedging bolts
When installing a satellite dish, firstly, you must adhere to safety rules, since the work is carried out at height. Secondly, pay attention to the fastening of the support itself.
The stability and quality of the received signal and the safety of people passing below depend on how the entire structure is secured. If the antenna is not secured securely, it is likely to fall, causing the mirror to become deformed. There is no point in repairing the equipment; you will have to buy new one.
When mounting the antenna on a brick or concrete wall, do not use wooden plugs, caps, plastic dowels or nails. The bracket is attached to all accessible holes so that it fits tightly to the surface.
Self-propping anchor bolts are best suited for this task (it is more convenient to work with anchors with a wrench rather than with a screwdriver). For installation on a roof made of metal tiles or metal profiles, self-tapping screws with press washers are suitable.
At this stage, they don’t really tune in to the satellite - the dish is set approximately. For this reason, you don’t have to rush to tighten the fasteners tightly.
Cabling
It all depends on the wishes of the user. Usually cables are laid outside the house - this way they do not spoil the interior. The route itself is hidden in a groove to protect it from atmospheric influences.
When laying the cable, you should make sure that it is long enough. Otherwise, intermediate signal amplification may be required.
Connecting cables
Versions of the HDMI connector
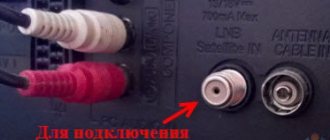
The wire from the antenna is connected to a special connector on the TV, usually there are no problems with this. It’s more difficult to choose how to connect the set-top box, due to the variety of options:
- RCA, which are also called “tulips” for their colors. The receivers have a composite output for an adapter with a 3.5 mm jack (minijack, like on headphones). Classic TV inputs - each signal has its own socket. The connection is not complicated - just stick to the cable colors. RCA only works with an analog signal (the picture is not of the best quality), so it is not suitable for digital broadcasting;
- HDMI. The optimal interface for displaying “digits”. The connection is made with one cable, while the picture quality remains at a high level;
- SCART. An obsolete connector that reads analog and digital signals. The difficulty when choosing this option is to find an adapter for HDMI or “tulips”.
Installing an access card
This card is an analogue of a SIM card for a phone; it decodes the signal and opens blocked channels. First, it is inserted into the adapter - the CAM module, and then the latter is placed in the TV slot called CI +.
Fine tuning
The quality of the signal largely depends on weather conditions.
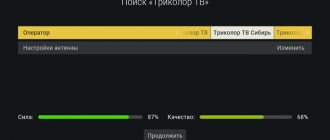
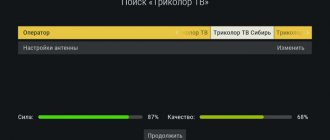
To do this, you will need 2 people: one is near the receiver, setting it up, the second is positioning the dish in such a way as to achieve the best signal reception. The receiver itself is connected to the TV and select “Signal Information” from the menu.
Next, the antenna is tuned to the satellite. It is slowly rotated around its axis, millimeter by millimeter, until the signal becomes stable, like the image on a TV. Having achieved a stable and powerful reception, the plate is finally fixed.
The quality of the signal largely depends on weather conditions, so it is better to set up the dish on a sunny, windless day. Clouds, wind, rain will only become obstacles.
Antenna device assembly
Red black: plus minus, how to determine polarity
Each antenna delivery kit contains a detailed diagram of the assembly of the dish with bracket.
To assemble and attach the plate to the wall of the building you will need:
- hammer drill or drill;
- anchor dowels;
- set of wrenches;
- knife for stripping cable insulation.
The support bracket is secured with dowels, driving them into the holes made with a hammer drill. In wooden walls, fastening is carried out using self-tapping screws using a screwdriver or through holes are drilled with a drill, followed by fastening the support with threaded rods and nuts.
A reflector and an external bracket are screwed to the support platform, at the end of which a converter is installed. The tilt angle of the head is set according to the marks on the converter body. The end of the cable is stripped and an F-connector is attached to it, which is then inserted into the head socket.
Equipment setup
When determining the position of the plate, it is better to enlist help. One person moves it, the second looks at how it affects the quality of the signal. The procedure is repeated until the optimal position of the receiver is found - this is a signal with a level of more than 70%.
Search channels
The dish setup is complete, you can start searching for TV channels. Search can be manual or automatic. For those who are doing this work for the first time, we recommend automatic search, which is launched from the main menu of the receiver.
True, the method does not always give the desired result, so knowledge about manual settings will not be superfluous:
- Menu > Default Setup > Channel > Antenna > Reset All Settings.
- After selecting the “Antenna” item, a window appears where you need to enter a code (by default it is “0000”).
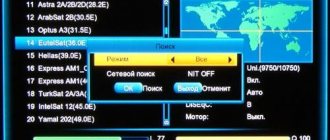
- The menu that opens will contain a list of satellites. The user removes all tags, but leaves “EutelsatW4 36E”.
- To manually start searching for channels, you will need data for the transponder and LNB levels. The value of the first is 12130 R, for levels – 0 (lower), 10750 (upper).
After entering the data, you just have to wait for the result. As a rule, the process is not fast.
Subscription fee
Payment for the use of NTV+ satellite television is made in several ways:
- Online
- Off-line.
Online payment
It is paid either with or without a commission - it depends on direct payment or through an intermediary. Monthly fees are accepted without commission through bank cards, from a smartphone account number or in cash at banks: Gazprombank, AKB Promsvyazbank, AKB Rosbank, URALSIB, Sberbank and VTB24. You can also pay your bill at their ATMs.
Through the online banking system, the payment will be accepted with a commission by Bank Vozrozhdenie.
Off-line
NTV+ offices will accept subscription fees without commission. They are located in official representative offices, showrooms and regional centers.
Retail chains such as Euroset, ION, MAXIMUS, Svyaznoy, Tekhnosila, ELEX and Eldorado will charge a commission fee.
How to connect to NTV Plus via the Internet
Hybrid set-top box
If there is no dish, you can enjoy television with just a hybrid set-top box. How to connect it:
- The equipment is placed in a stable place.
- Insert the access card into the slot (chip side down).
- Connect the set-top box to the TV (via RCA or HDMI).
- A cable is connected to the set-top box (if the Internet connection is wired).
- The receiver is connected to a power source.
- Register on the official website of the service.
provides 24/7 access to content. The service is available from any device connected to the Internet. What are its advantages:
- access to paid channels;
- no need for third-party software (smartphones on iOS and Android have their own applications);
- one-time payment;
- "Favorites" list;
- free access to the Match TV channel.
If you need more channels, activate one of the paid packages, including both basic and thematic ones.
Including NTV+ in Spectrum TV
It has been operating in the Russian satellite television market since 2003. The company installs equipment, configures installed dish antennas, both for individual use and for apartment buildings. The company is the official installer of NTV+ (IN 9708066).
Note! In addition to installation and configuration, Spectr TV repairs NTV plus satellite equipment. The company has been repeatedly noted for its high level of service.
Possible problems and difficulties
At each stage there are difficulties:
- it is not possible to adjust the dish so that it reliably catches the signal;
- The supplied antenna cable is not long enough;
- the receiver finds few channels;
- I can’t connect the equipment to the TV, and so on.
To avoid these problems, you should start everything by carefully studying the instructions for the devices. If possible, they hire company representatives who will quickly do everything and give a guarantee, although it will cost a lot.
Setting up NTV Plus is not a difficult task, but it is a responsible task that requires care. During the work, it is necessary to correctly install, secure and direct the satellite dish, and enter the correct data to search for TV channels. If you do not have the skills to work with television equipment, it is better not to risk the safety of the equipment by entrusting this task to specialists.
Some historical facts
NTV Plus is the digital equipment of the Russian television company NTV. She became the founder of satellite television in Russia. At first, the broadcast was analogue, but only a few years later, broadcasting began to be carried out in digital format. “Digital” made it possible to receive high-quality television pictures without interference.
Since 2000, the main video signal transmitters have been the Eutelsat W4, W7 and Bonum 1 satellites. For more than 15 years, satellite TV NTV Plus has been widely popular among television viewers in Russia and other countries. The broadcast is mainly carried out in Russian for a Russian-speaking audience not only in the Russian Federation, but also in many countries around the world.
Self-connection
If the client decides not to use the services of the company’s specialists, and prefers to do everything on his own, then first of all it is necessary to carefully study the instructions. It is included in the equipment package; the entire process of installing and connecting an NTV satellite dish is described there in detail.
To install a satellite dish, it is important to choose a convenient place, with a minimum of interference that prevents direct signal reception - tall buildings, trees, and so on. The wall of the house or the roof is best suited
We must not forget that the plate must be protected from bad weather - snow, hail, rain, so it is important to choose the safest points.
Using the instructions, the satellite dish is assembled and installed on the bracket. Consumables for installation are supplied included.
Next, a cable is connected to the receiver, and it is connected to the TV. The receiver must be de-energized, otherwise the equipment may burn out.
Transponders for HD
For lovers of satellite TV in HD quality. A number of special devices with HD frequencies are available:
- 12399 R: KHL TV HD, Discovery Channel Russia HD, Film Premiere HD;
- 12207 R: TLC Russia HD, Eurosport 1 HD, History Russia HD, Amedia Premium HD;
- 11930 R: Viasat Nature/History HD, Viasat Sports HD, FOX Russia HD, Viasat Sport East HD, TV 1000 Comedy HD;
- 11823 R: Match! Football 1/2/3 HD, Nickelodeon HD, MTV Live HD, Our Football
It must be said that the transponders listed above have frequencies in the range of 11800-12400 MHz. The reason is that they make it possible to maintain a high-quality HD signal without degrading the coverage area or interruptions.
Right polarization allows you to produce a clear, complete and stable signal, which, importantly, does not at all affect the channels from multiplexes No. 1 and No. 2
Difficulty connecting
When a homeowner decides to install and configure a satellite dish with his own hands, he may encounter certain difficulties, such as:
- incorrect orientation of the sectoral reflector of the satellite signal;
- improper fastening of the plate;
- purchasing a receiver that does not meet NTV+ settings;
- the smart card does not match the receiving device;
- inaccurate focusing of the converter irradiator;
- the diameter of the dish does not correspond to the reception of electromagnetic flux from the satellite in this region;
- incorrectly chosen form of payment for services.
All this can be avoided if you contact the specialists of NTV Plus or an affiliated company. Professionals will deliver all the equipment using their own transport, determine the most advantageous location of the reflector, securely fasten the dish, and set up the receiver and TV.
NTV Plus subscribers have the opportunity to watch not only domestic programs, but also receive the most popular foreign TV channels on their televisions. The NTV Plus company is constantly improving the quality of satellite equipment components, replenishing it with new models of receivers, converters, etc. The constantly changing system of discounts allows the consumer to expand the range of received TV channels.
Right circular polarization
Frequencies of this type of transponder:
- 12322 R: Nostalgia, NTV-Plus Sports, KVN TV, Our Cinema, Much TV, Men's Cinema, A Minor TV, TV Kitchen, TV India, Cinema Club, Auto Plus.
- 12437 R: Russian Bestseller, Russian Novel, Arkhyz 24, RTR Planet, Country, Live, Sarafan;
- 12245 R. In addition to television, there are also radio channels: Komsomolskaya Pravda, Radio Station Vanya, Chanson, Russian Radio, Autoradio, Maximum, Echo of Moscow. A good choice for those who like to watch interesting TV and listen to the radio. It is worth highlighting that the ability to listen to the radio is only available here;
- 11900 R. Mainly information channels, such as Gubernia and Euronews, as well as divisions of Viasat and TV 1000. Suitable for viewers who want to watch their favorite films and keep abreast of the latest events;
- 11785 R. NTV Plus informational, Our football, U, RBC, TNT, federal channels Zvezda and NTV, channels of the MATCH holding!
All of the above devices have a number of common parameters:
- FEC value - three quarters;
- streaming speed - 27500 SR;
- encoding type – Viaccess;
- MPEG-4 8PSK standard;
- DVB-S2 modulation.
