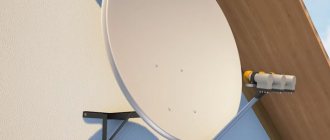
A homemade satellite dish for a TV is a fairly common design in the vast expanses of our homeland.
Usually it is a curved metal circle. The signal, reflected from its walls, arrives at a receiver located on a pin extending from the center of the circle. What can satellite dishes be made from? Of course from scrap materials. Let's explore the options and varieties of satellite dishes using various materials that we can make with our own hands in this article.
UHF antenna
Homemade antennas that pick up a decimeter signal can be of a variety of configurations.
Option 1
The simplest option is a ring-shaped decimeter antenna; it is relatively easy and simple to assemble.
You will need:
- Plywood.
- Cord.
- Soldering iron.
Instructions:
- Make a ring from the connecting cable, size 53 cm.
- Cut another piece of cable to make a loop, size 17.5 cm.
- You need to solder a loop to the ring and a cable that will be inserted into the screen.
- Attach the structure to the plywood.
- Point the assembled device towards the TV tower.
Thus, a UHF antenna is assembled with your own hands.
Option 2
Another possible method for making a UHF TV antenna is called “Eight”.
Tools:
- Wire (copper, aluminum).
- Glue gun.
- Cable.
- Wire cutters.
Instructions:
- Using wire cutters, cut 2 pieces of wire, length 56 cm.
- At the end of each you need to make a 1 cm loop.
- Bend the wire and connect the loops. Solder the connecting cable to the resulting squares of copper wire. Solder the central core to one of the squares, and the braid is soldered to the other. The distance should be 2 cm.
- The resulting structure must be secured in the cap of a 20-liter bottle and filled with glue.
- The device is ready.
This is another way you can make an antenna yourself.
Overview of options
DIY Plexiglas Plate
This method requires relatively significant financial costs, the plexiglass itself costs a lot of money, and you will need a large chamber to heat it, but the result is perhaps the most aesthetic.
Plexiglas is convenient for our purposes because when heated it can take on a given shape. To make a homemade satellite dish, take a piece of plexiglass about 4 mm thick, cut a circle with a diameter of a little more than half a meter, heat it, as soon as the glass softens, bend it into the shape of a plate. Carefully cover the entire inside with foil. The antenna for satellite TV is ready with your own hands.
Satellite dish made from umbrella and foil
For the signal receiver, 3 cm of the protective braiding is removed from the antenna cable with a knife and cut to the copper wire transmitting the TV and radio signal. Here it comes to an empty tin can. An oval is cut out of this valuable material, a hole is punched in the middle, the same copper wire is inserted into it and soldered. To prevent corrosion in the future, experts recommend covering the joint with plasticine.
We have come up with a signal receiver that should be tied to the handle of a silver umbrella with electrical tape, but in such a way that our homemade receiver does not directly touch the metal cane, otherwise noise interference will occur. Plasticine can again serve as an insulating gasket between the parts.
The power supply to the receiver-amplifier occurs via the antenna wire. The resulting antenna must be fixed and also aimed at the source of the television signal.
Satellite dish made of thin metal sheet
We take a thin, no thicker than 1.5 mm sheet of galvanized iron with a thickness of 1...1.5 mm with sides of 100x100 mm. A plate with a diameter of about 80 mm is made from this material. To eliminate mistakes, first cut a cardboard sheet of the same perimeter into 16 equal parts in the form of sectors.
In this case, each next one will shift relative to the previous one by 22.5 mm. We draw 4 circles with the following radii: 75 mm, 254 mm, 400 mm and 538 mm. The largest circle will already extend beyond the sheet of cardboard. The parts that go beyond the boundaries just need to be cut off. Circles will be needed to bend the template along them.
Wire satellite dish
For this option, prepare a fairly large ball and copper wire about 3 mm in diameter. An inflatable ball with a diameter of at least 1 meter will act as a blank to give the shape of our plate. We mark the largest diameter of the antenna on it with a marker. Twist the first small ring from the wire and place it on top of the ball. Twist the second ring a little wider and place it on the ball.
The second circle should be of such a size that the distance between it and the small top one is 2-3 cm. We connect the rings with wire pieces using solder, or fasten them with thin wire. We continue in the same spirit making and arranging the rings on the ball until we reach the largest diameter of the plate. We will get the frame of the future satellite dish, which then needs to be covered with foil. We complete the product with a constructive solution inside the first smallest ring for securing the plate.
Sheet steel parabolic antenna
We draw a parabola on a cardboard drawing, from which we will then transfer it to a sheet of steel. We weld the frame of the product from metal rods. We bend these rods along the knife. We weld the bearing into the middle of the installation. We install a pipe vertically under it. Having secured it well, we place the knife on the bearing of the large washer. Pour a fairly thick concrete solution into the resulting antenna blank.
After pouring, 4 days should pass, the minimum time for the concrete blank (our matrix) to dry. Now let's start gluing the antenna. To simplify our task, we divide the antenna into 8 sectors. Uniform distances between the parts of the matrix are important. For the pattern you will need equal-sized strips of fiberglass and an epoxy primer.
Lubricate the concrete matrix with machine oil and install the washer into the pipe. We cover the matrix with resin, put strips of fiberglass on top and smooth them thoroughly. Then cover with foil. The new product is ready for use as a receiver-amplifier.
Parabola made of plexiglass or plexiglass
One of the distinctive properties of this material is that plexiglass, when heated moderately, becomes plastic and can take the shape of the object (blank) on which it is placed. Therefore, you can take a plexiglass blank with a thickness of 3...5 mm and a circle diameter with a size slightly larger than the diameter of the original factory-made plate. After the plexiglass has softened under the influence of heat, it is carefully leveled on the blank, trying to give it the most similar shape. After the plexiglass has cooled, its concave surface is evenly covered with thin foil, which will work as a reflector. The disadvantages of this method of manufacturing a satellite dish include the high cost of plexiglass and the need for a heating chamber with a large internal volume.
How to choose a satellite: review of models and prices
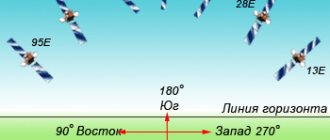
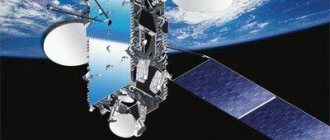
Before purchasing satellite equipment, it is important to first select an operator. The satellite type of television operates from various orbiting satellites that pick up the signal from stations and transmit it over large areas to Earth
The design of such equipment is not as complicated as it might seem
The antenna detects the signal and then transmits it to the converter and then to the tuner. And only after this the decoding process occurs, and the signal is transmitted to the TV in the form of sounds and images.
Construction assembly option
Channels in Russian are transmitted from certain satellites
To receive a signal from a specific object, it is important to set the receiving frequency correctly. To do this, you need to know how to set up a satellite dish yourself
About 30 channels in Russian can be received via the Yamal 201 satellite. From operators it is worth choosing among such as Tricolor - TV, NTV - plus or Raduga - TV.
The table shows prices for certain models of satellite dishes.
| Image | Models | price, rub. |
| Lumax 0.6 m with bracket | 1450 | |
| Tricolor STV – 0.55-1.1 0.55 | 1290 | |
| Tricolor FullHD GS-E501/C591 | 10300 | |
| Supral 60 cm with bracket | 1640 | |
| Option 0.6 m | 900 | |
| Wisi b/kr | 5900 |
In the form of a frame
To make such an antenna you will need aluminum plates, a metal mesh for making a reflector (from a barbecue, for plaster, etc.), bolts with nuts or rivets for fixing frame parts, a cable with a plug for connecting to an indoor TV, a drill, a screwdriver and pliers.
Rice. 10: frame antenna
The antenna manufacturing process is as follows:
- Cut the aluminum strips to the required size and drill holes at the ends for bolt connections.
- Assemble the frame as shown in the figure above, the joints are overlapped. To prevent oxidation of these points, it is advisable to cover them with paint or varnish.
- Connect a television cable with an antenna connector to points A and B on the antenna.
- Attach the frame to the reflector, most importantly, pay attention that the latter does not short-circuit the electrical circuit of the antenna itself.
- Install it on the mast and place it in the designated place.
If the signal turns out to be weak, you can get a more powerful antenna by connecting an antenna amplifier to the circuit.
Antenna operating principle
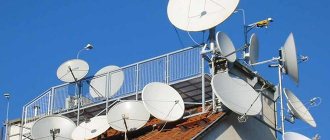
A satellite dish is a dish-shaped type of parabolic antenna (multifield, Opticum AX 1000+, Maximum, Opticum X80 Premium, Orton X80, BIG BISAT), designed to receive microwaves from communication sources that transmit signals to television, radio, and sometimes Internet satellites (Intelsat 15, Intel, Eutelsat 36A/36B (36°E), TT-budget S-1401 SkyStar 3, Sky tv digital).
Photo - Satellite dish
The parabolic shape of the offset dish reflects the signal to the antenna at the focal point. A device called a horn feed (Satfinder) is attached to the dish coordinator; its adjustment is fully automatic. This part is essentially an amplifier, the front converter heads (LNB) collect the signals from the focal point and “drive” them to the down-converter block. The horn converts electromagnetic or radio wave signals into electrical waves and tunes their spectrum.
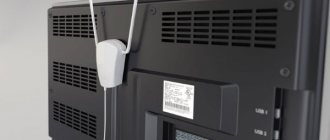
Now another amplification technology is actively used - winding a metal mesh or additional turns of wire on a plate (see photo). This setting helps increase the antenna's absorption capacity and sensitivity even to weak signals.
Photo - Amplifier on the antenna
Modern dishes intended for use in home television typically range in size from 43 cm to 80 cm in diameter and are configured in one position to receive Ku-band from one orbital position. Before the existence of live broadcast satellite services, home users typically used a motorized C-band dish up to 3 meters in diameter to receive channels from different satellites. Overly small plates can cause network problems, but they have a longer shelf life, are easier to set up, and are durable.
Video: choosing a satellite dish installation location
Basic concepts of a potential master
Even if we are dealing with a traditional television antenna, in such cases the installation requires some knowledge and skills.
Satellite equipment is much more complex in comparison with conventional TV reception. If for conventional equipment there are two main concepts - cable and plug, a system where satellite reception is carried out has a number of technical concepts:
- TV satellite.
- Satellite antenna.
- Converter.
- Multi-feed holder.
- Bracket.
- Receiver.
Let's take a closer look at each of the components of satellite equipment.
A television satellite is the source of the signal that the antenna needs to receive. Accordingly, in order to receive a constant signal, it is necessary to constantly point the antenna towards the satellite.
A device in geostationary orbit of the Earth is, in fact, a standard space satellite, but the main functionality of such a device is broadcasting a television signal
There are different satellites and different antenna designs, but the tuning principle is almost the same for all.
For this technology of television reception, a satellite antenna is used, which is a disk “dish” of different diameters, equipped with a converter device.
Part of the equipment is an antenna that ensures reliable reception of a television receiver signal from a satellite. Considering the frequency of the transmitted signal, the antenna looks slightly different than traditional reception designs
The disk antenna has a special design that allows you not only to receive a television signal, but to additionally concentrate it and direct it to one point - to the converter.
A module of small geometric dimensions, usually cylindrical in shape, attached directly to the “front” part of the satellite antenna is called a converter.
One of the components of a satellite dish that needs to be given special attention during installation, ensuring a high degree of tightness of the structure
A special rod holder is used to secure the module. The converter, in fact, is the primary signal amplifier, from which the signal is sent via cable to the receiver.
A device called a “multifed holder” is the same rod holder, only slightly modified. Allows you to place several converters to work with different satellites.
The so-called “multifed” is, in simple words, an extended rod. This is a holder for several converters at once, designed to receive signals from different satellites
The bracket is, in fact, a mechanical structure that is assembled from component parts and fixed in the intended installation location of the satellite dish. As a rule, such a place is the wall of the building, less often the roof.
The design of the bracket involves more than just a conventional stationary mount. The mechanical part has a simple but quite effective vertical and horizontal shift system
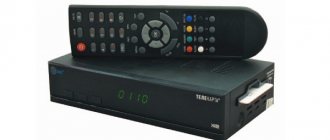
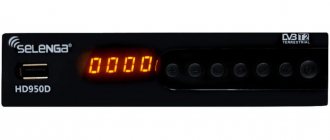
The electronic module for processing the received television signal, followed by displaying information on the screen of the television receiver, is called a receiver.
There are various designs of receivers depending on the manufacturer. However, a specific manufacturer, as a rule, completes the equipment taking into account the matching of the antenna and the device.
The receiving module is also a “receiver” of the signal, which does not need to be installed like a satellite dish, but requires some settings on the part of the end user
Therefore, it is quite problematic to coordinate any receiver (receiver) with any “non-native” antenna. This point should be taken into account before installing a satellite “dish” under a modern TV in your home.
Fine tuning of the satellite dish
So we already have a signal from the satellite, the channels have been scanned, but some are missing, the picture is blurry or not shown at all. In this case, we have a weak signal or no signal at all from certain transponders. For everything to work perfectly, you need to fine-tune the satellite.
To do this, switch the receiver to a weak or non-working frequency (transponder, channel) so that the signal indicators are visible. Next we adjust the converter. We move it in the holder back and forth and twist it left and right relative to the clockwise until the signal improves. We switch to other frequencies of this satellite and achieve the optimal result. We make every effort to receive the maximum number of received TV channels from a particular satellite.
Important. Remember that Amos should be found to the right of center when looking at the antenna from the front, and Hotbird - to the left
Now the antenna is fully configured for three satellites and all that remains is to connect it correctly.
To do this, cut three pieces of cable of the required length (about 1.5 m) and attach them to the converters. You can connect to the disk as you please, but I prefer order
– Amos – 1 LNB
– Astra (Sirius) – 2 LNB
– Hotbird – 3 LNB
– Receiver
We secure all cables with electrical tape or zip ties, and hide the disks from moisture in a plastic box (optional).
We stretch the cable into the room to the tuner connected to the TV and plug everything into the network to configure the disk drive ports in the receiver. Select the desired satellite (menu - installation), disk drives with 1.0 and the desired port. Click the menu and see a note about saving settings
After completing the procedure for the desired satellites, the antenna setup can be considered complete.
When setting up an antenna with a connected disk, you must specify the disk port for the satellite.
If there are no scanned channels, then for tuning you should select the desired frequency (you can get it on the Lingsat on the Internet).
Setting up a direct focus satellite dish
Common Applications
In colloquial speech, the concepts of satellite and parabolic antenna are identified, but only specialists know what it is and why such a device is needed, in a narrow professional aspect. There are various equipment designed to receive a signal from one of the many satellites orbiting the Earth. A parabolic antenna is one of the types of receiving devices, which has its own distinct differentiations.
A parabolic dish is often associated with a satellite dish.
Their presence is due to the need to receive television and radio signals or provide Internet access. The functionality can be highly directional or universal, providing communications, space communication centers and networks; weakly directional ones are used in satellite navigation and similar phones.
Radiation pattern of a parabolic antenna
How to set up a satellite dish yourself?
To set up a satellite dish you will need these tools.
– Extension cord for three outlets.
– A drill or hammer drill with a drill of the required diameter for attaching the bracket with anchors or dowels.
– Wrenches 13mm. and 10mm (preferably two)
– Phillips screwdriver.
- Hammer.
– Electrical tape or plastic ties.
– We assemble the antenna, carefully tighten the bolts, do not forget the washers and engravers.
– We screw two multifeeds to the converter holder (one to the right, the second to the left of the center of the antenna) along with three converters. We don't tighten it too much. We also do not tighten the antenna mount too much.
– We attach the bracket to the wall and hang the antenna so that it faces south, southeast, you can spy on your neighbor.
– We extend the extension cord and take the TV and tuner with us. We connect the TV, receiver and antenna central converter (one, directly to the receiver). Even on the ground, you can try to catch the desired satellite if you doubt the reception (since there may be an obstacle, a tree, etc. in the direction of reception).
Now the tuners sold are sold with channels already stitched and there is no need to scan and sort them, and it’s easier for us to configure. To do this, turn on the TV and satellite receiver, turn on the desired channel (for example 2+2) on the Astra (formerly Sirius), since we will tune this satellite at the focus (center) of the antenna. We press the info button on the remote control, after inserting batteries into it, we see two scales. (For beginners this is the most difficult process). If the necessary channels are not available on the satellite, but we have certain frequencies. We enter them, if they are not already registered, and right in editing the transponder frequencies we look at the required signal power and quality scales.
First of all, before starting the process, you should choose the right location for installing the satellite dish. We need to consider several factors. To receive a radio signal, the signal from the satellite must reach the receiving mirror and nothing should interfere with it.
In the example given, on the lower floors the reception will be interfered with by trees and the neighboring house. Therefore, the installation of the satellite dish needs to be done higher, in most cases the easiest way is on the roof.
It is very important to clean the cable well and connect the F connector correctly. Whatever the short circuit between the braid and the central core, otherwise you can damage the receiver
We begin the installation by connecting the cable to the converter in focus (in the center) and the satellite receiver.
It is important to connect the cable to the desired LNB_IN output in the satellite receiver
Sometimes there are mistakes.
You can connect the entire assembly and configure the disk ports, but this will be more difficult. After connecting all the wires, we connect the 220 volt power supply and proceed to the process of setting up the satellite.
Smoothly tilt the antenna up - down, right - left, in the same direction as your neighbor's (approximately south). The desired channel must be received - there will be sound and image, but this is not the main thing. The scales will light up, and we will use them to navigate.
We achieve maximum performance, give preference to the signal quality scale. You can rotate the converter in the mount clockwise and counterclockwise, as well as forward and backward. When the result satisfies us, press exit and switch to other channels of this satellite, check their reception level (info). If everything is normal, then you can tighten the antenna mounting bolts, and then the converter. It is advisable to adjust the converter by scrolling it left and right, as well as moving it back and forth in the multifeed mount.
Please note that when tightening the bolts the signal may go away. Therefore, we twist it evenly but firmly so that the antenna does not sway from the wind.
Now the antenna is configured and all that remains is to configure the converters in the multifeeds. To do this, disconnect the cable from the central converter and connect it one by one to the required heads in the multifeeds. On the tuner, turn on the channels from the satellite that needs to be configured and press info. We also move the loosely attached converter up and down, right and left until the desired result is achieved and tighten the bolts.
Step-by-step instructions for installing the plate
You must first assemble the satellite antenna structure as described in the attached instructions. As a rule, antennas are supplied disassembled. Therefore, the structure should be assembled using the accessories supplied.
Next, we will consider the step-by-step installation of a satellite dish.
Step #1 - attaching the antenna holder bracket
Again, taking into account working with a branded product, where all installation elements and components are designed for the appropriate load, work is being done to install anchor bolts in the wall of the building.
One of the options for antenna brackets that are used for reliable, strong installation of a satellite dish. Initially, a support pipe is attached to the wall, and the antenna bracket is directly attached to the pipe.
This work is done in a standard way, using a tool for working with concrete. After introducing the anchors, a support rod is attached to the installed anchors, and a metal bracket is attached to the rod.
Step #2 - installation of the antenna converter
Installation of the pre-signal amplifier - converter is carried out strictly according to the instructions, where all the details of the placement of this component are noted.
The converter itself should be secured in the support ring so that the device is perfectly sealed. Even a small penetration of moisture inside threatens to disrupt the operation of the device.
Step #3 - connecting the cable to the converter
At the current stage, the cable, which is usually also included in the kit, is connected to the converter module. The connection is made using the special “F” connector included in the delivery package.
An example of a well-connected cable on the converter side. The successfully sealed connection area is clearly visible, which will ensure stable operation of the amplifier for a long period of time.
The connection area must be carefully sealed, for example, with silicone sealant.
The cable from the switching point is pulled carefully and without unnecessary effort along the body of the converter holder rod. It is fixed at regular intervals with plastic ties or other means.
Step #4 - securing the satellite dish
The prepared “plate” is installed on the bracket, while the adjusting screws are not tightened all the way - they are left loose.
This approach is necessary for the simple reason that further (after installation) the procedure for fine tuning to the satellite will follow. Accordingly, the “plate” will have to be moved both vertically and horizontally.
An installed, fully customized household “dish”, ready to reward its master with a high-quality television picture received from a satellite
Separately, it is worthwhile to provide instructions on installing the F-connector on a coaxial cable. This operation has its own characteristics.
The final area of the cable (approximately 15 mm long) must be freed from the first insulating layer. But the insulation must be removed taking into account maintaining the integrity of the screen braid present under the insulation layer.
Then the second layer of insulation is removed at a length of about 10 mm. This frees the central copper core.
Next, screw the connector onto the stripped end switch until it stops, passing the copper conductor into the corresponding hole.
Prices and companies
In any case, a specialist will be able to install the antenna faster and better than an amateur.
Also, many antenna owners do not want to “play” with its installation, and therefore we suggest considering how much it costs to set up and install a satellite dish in different cities of Russia and Ukraine. Price table, cost of installing an azimuth satellite dish 43 cm, 0.55-0.6:
| City | Price, rubles |
| Almaty | 2400 |
| Barnaul | 2500 |
| Vladivostok | 2500 |
| Volgograd | 2400 |
| Donetsk | 2500 |
| Rostov-on-Don | 2400 |
| Ekaterinburg | 2400 |
| Zaporozhye | 2500 |
| Irkutsk | 2400 |
| Karaganda | 2300 |
| Kyiv | 2500 |
| Minsk | 2500 |
| Moscow | 2500 |
| Odessa | 2400 |
| Permian | 2400 |
| Samara | 2300 |
| Saint Petersburg | 2500 |
| Saratov | 2400 |
| Kharkiv | 2400 |
| Ulan Ude | 2400 |
| Novosibirsk | 2500 |
Independent and professional setup of the satellite antenna Yamal (Yamal 201 90E), Tricolor TV Siberia (Tricolor), HotBird (HotBird), GAL, Orion, Samsung DSB-S300V is carried out within several hours, under normal weather conditions. The most popular models now are: SatelliteAntennaAlignment (Germany), ABS-1, LMI 75, ExpressAM2 80, Turksat 1C/2A 42E, Satgate, StrongSRT90 Multisat, HDHumaxVAHD-3100S, PBIDVR-1000S, OpenboxSF-20.
Choosing a suitable location for equipment
First of all, you should choose the optimal location for the satellite dish. What should be understood by the term “optimal”?
Of course, a completely free area in the direction of the transmitting satellite. That is, in a given direction the presence of any objects such as:
- buildings;
- trees;
- advertising posters, etc.
It is also recommended to ensure that the remaining equipment (receiver, TV) is placed as close as possible to the installation point of the satellite dish. These are not critical requirements, but fulfilling these requirements will help simplify the setup of the equipment.
Tuning antenna diagram: 1 – direction “north”; 2 – direction “south”; 3 – azimuthal direction; 4, 7 – angle at the installation site relative to the satellite location; 5 – television satellite; 6 – satellite signal
Traditionally, “plates” are placed on the wall of a building next to a window opening, or installation is done on the side of the wall that is part of the balcony (loggia) structure.
The instructions prohibit installation directly inside the balcony area, especially a glazed one. The equipment should also be installed at points where there is no possible fall of precipitation in the form of snow and ice from the roof.
HDTV Antenna
This device's signal range can reach up to 490 MHz, which means that the picture quality will be very high. But for manufacturing you need to purchase a transformer.
You will need:
- Transformer.
- Foil.
- Glue.
- Knife.
- Roulette.
- Cardboard.
- Stapler.
- Marker.
Instructions:
- Cut it out.
- Cover the resulting figure with foil and seal the back side with a marker.
- Then a reflector is made, dimensions: 35 cm height, 32 cm width. One of the sides must be sealed with foil.
- Cut 2 rectangles in the middle; they are needed to assemble the signal catcher. The size should be 3.5 cm.
- All elements are glued to a rectangle, and when everything hardens, drill a hole for the cord.
- Connect the device to the transformer.
- Insert the cable into the connector.
The device is ready for use.
What kind of homemade antennas are there?
If we talk about the principle of operation, then all antennas can be divided into two large categories:
Active antennas. These are devices that have a high-frequency radio wave amplifier and require an additional power source. They have a large gain, and as a rule, the noise figure is also not small.
Passive antennas are amplified due to their design features. They have a lower gain, but due to the frequency tuning of the antenna and narrow radiation pattern, they can produce a high-quality signal.
Also, if we talk about the frequency range, all television antennas can be divided into three categories:
- meter range antennas
- UHF antennas
Broadband covering several bands.
Copper wire
This option is suitable for people who want to install a regular indoor antenna at home or in the country for viewing federal channels. Anyone can construct such a device; no special knowledge is required.
This is the most basic method, so you only need copper wire 70–90 cm, 2–3 mm thick. An indoor antenna is made as follows:
- Strip both ends of the copper wire.
- Attach one end to the battery, and insert the other into the TV connector.
The signal will appear immediately, and from 1 to 5 channels will be available to the user. With this simple method you can make a home antenna in 5 minutes.