Satellite television is an excellent alternative to traditional wired signal transmission channels. Reception of TV channels directly depends on the operation of the tuner - a special radio receiver. Its purpose is direct processing of a television signal.
You can configure the satellite dish tuner yourself.
The cost of a basic set for television reception is low, it can be compared with the price of a simple home telephone. Digital technologies for working with television have become more accessible, and working with them does not involve as many problems as before. Only a properly selected tuner configuration can satisfy the needs of the discerning user.
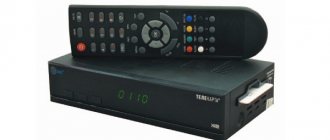
Receiver selection
First you need to decide which device you are working with. Almost every modern TV contains a TV tuner in its design. At the same time, external tuners are aimed at satellite signal reception and operate in other frequency ranges. Their purchase is justified if you want to receive a wider range of channels on TV yourself.
You may want to start tuning your tuner for a variety of reasons. It could be:
- Buying a new tuner.
- Poor firmware performance.
- Device obsolescence.
- Externally caused damage.
IMPORTANT. Typically, in these cases, you will see a warning about no signal.
The features of receivers are determined by the categories to which they belong. Satellite dish tuners can be divided into categories depending on cost. It is their cost that determines the availability of additional functions:
- Free-to-Air category. These are the most inexpensive devices. They are used with antennas that receive broadcasts of free-to-air channels. They can be distinguished by the manufacturer and the number of memorized channels.
- Devices with card readers. Includes a special port for the channel payment card.
- Devices with built-in HDD. The presence of a hard drive allows you to record broadcast signals from the antenna. You can update the firmware of such devices from a PC.
- HDTV receivers. Receivers for high definition television and satellite communications. They are distinguished by their high cost.
- Other types. For example, devices with two tuners and a hard drive.
all about satellite television
Setting up a satellite dish and other satellite equipment may also be a very important matter. But most ordinary users are faced with another, more important question - how to set up new satellite channels , or restore those already deleted for some reason.
In today’s article I will try to briefly talk about the main aspects and subtleties of setting up satellite channels.
Receiver setup
Connection
Before setting up any tuner yourself, make sure it is connected to the satellite dish and all other connected devices. Next, connect the device to the TV. Lastly, the device must be connected to a 220 V power supply using a socket.
Each such device has a maximum of possible peripheral connectors. Modern methods involve the use of HDMI. You can also use scart, tulips, and an output for a standard antenna.
ADVICE. If you are using only an antenna cable, please note that the “female” connector must be connected to the tuner, and the “male” connector to the TV. The device instructions in the photo show the type of connectors. When the receiver is connected, determine the choice of channel that will be convenient for you. Select "Search" in custom mode. The receiver must be turned on. Make sure the number lights up on his screen.
After this, the satellite tuner interface becomes available. You can enter it using the tuner itself.
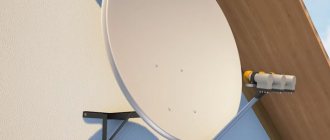
Installing the Bracket and Antenna
In order to install the bracket, you will need a hammer drill or a special impact mechanism designed for drilling holes in brick or concrete.
Experts recommend installing the antenna bracket on anchor bolts with a wedging function. When the bolt is tightened inside the wall, its petals diverge in all directions. This way it is possible to create a truly reliable mount.
Be sure to pay attention to the following features of bracket installation:
- If the walls are made of brick, M8 or H10 anchor bolts are best suited.
- When working with brick walls, it is better not to use anchor bolts with a diameter of more than 16 millimeters.
- If the structure is made of high-strength old brick, the use of anchor bolts for holes with a diameter of over 20 millimeters is permitted.
- Experts recommend leaving most of the brick around the hole for the bolts, since the fasteners are held quite poorly in the mortar.
- You should not install the bracket closer than the length of 4 bricks to the corner of the building and the height of 4 bricks to the roof of the structure. This may cause cracks to form.
- It is not recommended to use anchor bolts to mount the antenna on walls made of cinder concrete or low-density blocks.
- Strong tightening of anchor bolts can lead to the formation of high compressive forces, which often leads to partial destruction of the brick.
To install the bracket, it is necessary to mark the wall. After this, you need to drill in the appropriate places. Next, you should stretch the anchor bolts along with the bracket. They must be tightened all the way. Finally, you need to check the fasteners for strength.
Working with the menu
An approximate view of the menu is reduced to a list of items: “Settings”, “Antenna”, “Channel search”. You need to independently find in the configuration such options as LNB, DISEqC, “0/12V”, “Flash tone”, “Positioner”. Be sure to check the following points:
- Is there a signal exchange with the correct satellite?
- Find out if the satellite head settings are set correctly:
- for C-Band (LNB, frequency 5150).
- for a circular head - circular LNB 10750.
- for linear... - universal 9750/10600.
As a rule, such information is in the notes in the instructions for the satellite head. After that, find in the menu and set DISEqC for the desired satellite. You'd better remember or write down which outputs correspond to which antenna.
And also pay attention to other settings:
- Disek port - has several inputs that are switched to connect satellite heads to them.
- Power LNB is the technical name for the satellite head. It is used to control the power of the satellite head or devices of the Disek standard.
- 0/12V - used to switch the power of two devices (mono pendant, Disek).
How to add a channel
Perform a transmitter scan on the desired satellite in the receiver.
To determine transponder settings, identify and view the satellite broadcast channel. Review the settings in the list of transponders.
To make settings:
- Go to the list of settings for the CIS/Russia.
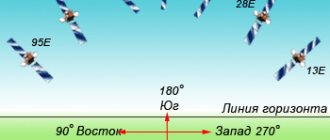
- Select satellites Yamal, Amos, Sirius, Hotbird, ABS1.
- If the list does not contain the channels you need, enter in an Internet search:
Lingsat 5e or 4w, 75e, 53e, 40e
The information you need will be present in the list of satellite parameters.
Transponder scanning
The data that comes from transponders is needed to receive data from TV channels. It is necessary to scan the signal from the transponders so that the list of required channels becomes up-to-date. You can find the transponder options in the same place as the transponder selection menu.
The search strings on the properties of TV channels and radio indicate the search method:
- Selecting channel type.
Here you select channels by broadcast type, for example:
- TV Only - television only;
- or TV and Radio - for TV and Radio.
- Search method.
Channel options by encryption type - for example, All - search for all channels, including decoded or closed. Or Free to Air - only non-encrypted channels.
- Type of search:
- Find the transponder.
- Network search - a network of transponders for an individual satellite.
- Search for satellite channels. A string whose conditions depend on the selected suspension type. Here you can choose an antenna with a motorized suspension or a satellite dish. If a catcher with a motorized suspension based on the USALS principle is selected, the receiver will be able to move the antenna if a position is assigned to them.
Assembling the antenna
The antenna assembly process must be carried out in full accordance with its operating instructions. During this process, it is very important to handle the mirror carefully and as thoroughly as possible. Under no circumstances should you cause any mechanical damage to it that could change its geometry. First of all, this applies to mirrors that are made of aluminum. After assembling the antenna, it is imperative to check the tightness of all fasteners without exception.
The most important point of assembly is the installation of a satellite converter ( LNB - low-noise block downconverter). The correctness of its polarization directly affects the quality of the signal that the antenna will ultimately receive. In order to increase it, it is necessary to experimentally manually adjust the heads around their axis. The converter must eventually be secured in the most advantageous position.
Note! If it is not possible to adjust the converter after installing the antenna, this process must be completed in advance. Some additional information about assembly can be obtained from the seller of the fixture.
Before the installation process, experts recommend tying the antenna to safety cables. This way you can prevent it from accidentally falling from a height.
Connecting a stereo tuner
A stereo tuner in most cases is a device that supports stereo sound on the output device. The most commonly used cable with this is a three-prong cable. The first is responsible for video, the second and third are for the left and right audio channels L and R.
ATTENTION. Tuners with stereo support are the bulk of devices at the moment. Stereo sound can come from one channel, for example, on the right - this is the accompaniment of a TV show, and on the left - an arbitrary radio station.
To independently prevent sound interference, satellite receivers support a special function. It is implemented as a separate button or function in the Menu. The button itself is often called Audio. It allows you to fine-tune the configuration of audio channels.
How to enter a new frequency, transponder and scan for new satellite channels
In most cases, we go to the menu - installations or satellite settings.
First of all, we turn on the disk settings and select the desired port for a specific satellite.
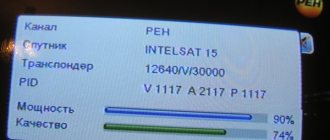
You can look at the disk itself, near the antenna, or select it experimentally - the signal and quality (usually two bars at the bottom) in this case should become colored.

