Card sharing technology for profitable TV viewing
This is the latest technology in the field of satellite television, which will allow you to get many of the channels you are interested in from a paid list for very little money. Today, many people do not spend their evening time without television.
Moreover, the more channels are available, the better, and the more you want to get them. However, many are faced with the fact that the cost of purchasing a smart card for access to such channels is unreasonably high. Of course, this is due to a number of reasons:
- The company's use of satellites for signal transmission.
- Use of expensive equipment.
- User support.
However, the average consumer is only interested in receiving the most profitable service for a minimum fee. And in this case, few people like to pay big money for the opportunity to watch TV. Of course, in this case, you can simply refuse, but if you are accustomed to comfort and a large number of channels, then this will not be easy.
Therefore, you can use card sharing technologies to surely get high-quality services, but for absolutely ridiculous money. This is not fiction or deception. This is a working technology that is very beneficial for all parties involved.
Registration on the cardsharing server
Once the Internet and the receiver are available and they are physically connected to each other, you can register on any sharing server. After registration, you will be informed of the server parameters, which you will need to configure on the receiver or computer.
Please note that activation of your account often does not happen instantly - most often new users are activated once a day at night. Therefore, cardsharing will most likely become available to you only the next day.
To evaluate the quality of the service provided, some sharing servers provide a free trial period for one day, during which you can set up cardsharing and make sure it works. Other sharing services provide full access to their server for a short period for a nominal fee - usually 3 days for 1 dollar - and you don’t mind losing more time and a dollar, and there is no load due to “freeloader testers.” Therefore, do not be afraid of such restrictions - this is the order of things today.
Technical connection features
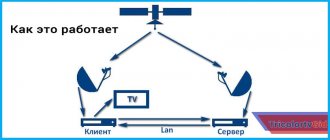
Setting up sharing is possible due to the fact that one of the devices in the chain, called a server, has an official smart access card, and officially uses the capabilities of a provider to decrypt satellite signals. It is this device that distributes the signal to others, which is called sharing. However, it's not that simple.
In order for this technology to work properly, certain conditions must be met:
- Devices must connect to the server via the Internet or local network.
- The server must always have stable access to the network so as not to let other users down.
- Other users must configure their receivers themselves.
Of course, it will not be possible to use this technology without a satellite dish. You still need to catch satellite signals, but you can use sharing on your TV instead of a standard connection.
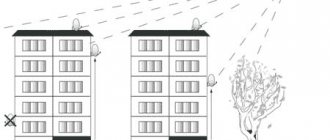
The first thing you do to ensure that the card sharing setup is successful is to connect your satellite dish. It must also be correctly configured to receive signals from the desired satellites. It is also necessary to take into account many other nuances - terrain features, antenna direction, the absence of obstacles in a certain area of the territory that could interfere with receiving a signal from the satellite.
But the antenna receives all signals in encrypted form. This is done so that satellite TV providers can charge customers for decryption, that is, for the use of paid channels. However, you do not need an access card, because you will be setting up sharing at home. And this is a cheaper and simpler action.
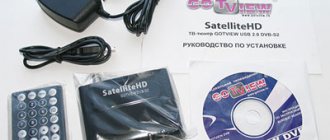
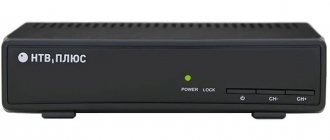
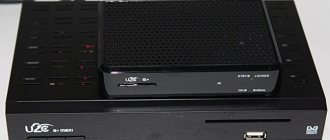
Next, you need a good receiver. This is a device that processes signals and outputs them to your TV. It is into this that, as planned by the providers, a special card is inserted to decrypt the signal.
However, you won't use it. You need a device that supports sharing and can connect to servers remotely.
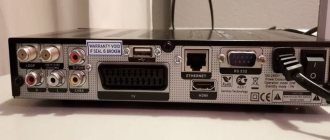
This is usually done through the network port located on the receiver body. There are two connection options here - either to a modem to gain access via the Internet, or to the server directly to use a local connection. You will most likely use the first option, since the server to which you will connect will be geographically located at a considerable distance from you.
If you have a good enough receiver model, then you can make the connections without any problems, even on your own. But before that you need to select the server to which you will connect.
The server is something without which setting up cardsharing would be impossible. This is a device that sends a signal to other receivers so that they can connect and participate in the distribution.
Receiving settings by the receiver via DHCP
For such a connection, you need a DHCP server, which can be a router or a DSL modem (most of these devices have this feature), configured in router mode. After connecting the receiver with a LAN cable to the router.
Open the menu, then settings (blue button) and the item “Network settings” . Select the connection type as Ethernet (network cable) , and select DHCP as On . After selecting these settings options, press the OK button on the remote control and the receiver will receive all the necessary settings from the router - IP Address , Subnet Mask , Gateway , First DNS and Second DNS .
Features of setting up connections
So, if you have purchased all the necessary equipment and chosen a service provider, then your next step is to connect to its server to receive a signal and use satellite channels at home. So, how to set up cardsharing so as not to make a mistake, not get unnecessary problems and not damage the equipment?
In fact, there is nothing complicated in this process. All you need is a lot of patience in order to adequately follow the instructions that the server owner will provide. The instructions are usually posted on the website through which you will connect, and do not present any technical difficulties. Usually these are clear, intelligible instructions with screenshots that you can easily navigate. So, here are the steps to connect.
| Step | Description |
| Account creation | It is necessary so that you can deposit funds into your account, connect any package and receive the necessary settings for your receiver for it. |
| Depositing funds | Usually, it is done remotely, via the Internet. You can pay for services either from your card, indicating its details and confirming the payment, or through any online payment service supported by the service. For example, Yu-money. |
| Package selection | Usually there are several packages with different channels to choose from. You can choose any one you like best and connect to it. Typically, packages have different numbers of channels and different prices. |
| Receiver setup | Setting up the receiver occurs after the package has been activated for your account. This is easy to do and you can easily do it yourself if you follow the instructions carefully. |
Thus, you can not only get inexpensive TV, but also get a convenient personal account for managing your tariff plans and packages.
How to set up cardsharing
Setting up cardsharing with your own hands does not require much effort or deep knowledge. You buy a package and enter the settings into the tuner . But first, the MGCamd 1.35 emulator is installed in the receiver. It emulates a real satellite operator map. the card sharing server information is entered into the emulator .
Cardsharing and Setting up cardsharing.
How to connect to cardsharing?
If you have a satellite receiver and a properly configured satellite dish, you can easily connect to cardsharing . All satellite receivers support sharing ; differences can only arise in adjustments and add-ons. also need the Internet , which ensures the stability and consistency of the signal. Here are the example protocols that are included in the main cardsharing servers:
- mgcamd.
- cccam.
- cs357x.
Analogue of Samsung Allshare: using the Home Media Server program
Finding a server on the device used to play content
The search must be performed in accordance with the user manual of the media device (for example, the instructions for your Smart TV). If the server is not found and all connections are made correctly, then in the program settings (in the Server ) check that the list of allowed client devices is empty or the device’s IP address is in the list of allowed ones. When using a network protection program (firewall, antivirus), check its rules for the hms.exe (if the server runs as a Windows service, then for the hmssvc.exe ), if possible, switch the network protection program to learning mode, restart the program "Home Media Server (UPnP)." And if you use other media servers, disable them while setting up the Home Media Server program.
The server does not open on the device for playback
If the server is found, but there is no way to open it in a media device, then go to the settings of the “Home Media Server (UPnP)” program in the Device : mode “DLNA 1.0”, “DLNA 1.5”, “Authorization Service”, “Russian” names of the main folders" (using these settings will help solve problems with opening the server), and in the Server , set a constant server port (from 1024 to 65535).
Navigating through the media resource database on a media device
If the device supports the Russian language, then in the program settings (section Device ) enable the “Russian names of the main folders” mode, this affects the names of the main folders of the media content database. If the Russian language is not supported by the media device, then select the “Translit” mode for encoding Russian names; the “Russian names of the main folders” mode is turned on/off at the user’s request (if disabled, then the names of the main folders of media resources will be in English).
Slow navigation through the media content database may be due to the operating characteristics of the media device, the inclusion of the “Exclude empty folders when transferring information to UPnP devices” mode, the presence of slow removable media in the system, frequent changes in media resource directories and the enabled “Automatic directory scanning” mode when they change while the server is running." The “Exclude empty folders when transferring information to UPnP devices” mode can be turned off, the “Removable media” folder can be deleted in all sections of media resources (Movies, Music, Photos).
Navigation through directories of media resources in the structure of their storage on disk can be done through the folder “Watch Folders” (Russian language is turned off), “Catalogues of media resources” (Russian language is turned on). If some media content is not visible on the device, but is shared in the program, then this may be due to the mime type transmitted by the server for this media resource. The Mime type can be changed in the program settings - Settings button - "Media resources" section - "File types" - selecting a file extension - Change button.
Total
Summarizing everything written above, to connect cardsharing and be able to watch paid channels for a reasonable fee, you need to do the following:
- Get yourself a wired Internet connection or purchase a 3G modem
- Buy a receiver with card sharing capabilities
- Connect the receiver to the Internet or to a computer with the Internet
- Register on any sharing server
- Set up cardsharing on the receiver and computer
- Pour yourself a cup of tea or other strong drink and enjoy watching previously unavailable channels
Later we will touch on each point in more detail, and will try to tell you in an accessible language what to buy, how to connect and configure.
