Coffee capsules Nescafe Dolce Gusto Café Au Lait, 16 pcs.
435 ₽ More details
Coffee capsule Nescafe Dolce Gusto Latte Macchiato with caramel flavor, 3 packs of 16 capsules each
1305 ₽ More details
Cell phones
Modern life is quite difficult to imagine without television. Watching television programs has become an integral part of everyday life. Many people use auxiliary devices to follow their favorite programs and series everywhere, for which a car TV tuner was created, which allows you to enjoy your favorite channels in your car. In this case, it is necessary to consider what digital television for a car is, and also find out about a common equipment model - the dvb t2 tuner.
It's better to buy a more expensive device
How to choose a TV tuner in a car
In order to choose a TV tuner for a car, you need to follow a number of recommendations. Let's consider the basic rules that allow you to choose a reliable and high-quality digital TV tuner:
- First of all, you need to select receivers that are compatible with the device present in the vehicle.
- It is also necessary to take into account the cost (good and high-quality devices will not have a low price).
- It is important to choose a device that provides a high-quality signal in any terrain.
- You should also select devices of the appropriate brand, which is well-known and enjoys at least some popularity.
- For high-quality images, it is recommended to choose devices that adhere to the dvb standard.
- You should also decide for yourself which device to choose (a stand-alone TV tuner or one that constantly consumes power).
- It is important to pay attention to the connection (some devices are made in such a way that it is extremely difficult to understand their installation).
In this video you will learn how to connect a TV tuner:
In general, a device such as a TV tuner for a car radio is a wonderful device that you can connect and configure yourself, however, so that later operation does not distract from constant configuration, it is recommended that you first read the user manual.
Important. When choosing a car radio with a TV tuner and navigator, it is also important to take into account the built-in software, since there are often cases when you come across copies that are not adapted to the Russian language.
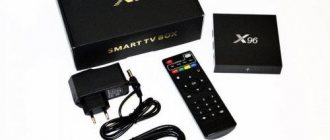
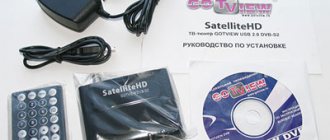
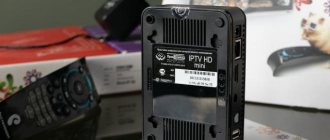
Digital
Before considering the connection, as well as answering the question of how to connect such a device in a car, you should familiarize yourself with the most popular digital models, namely their characteristic differences:
- for these models, both autonomous power supply and reception of electricity from the source are provided;
- digital models are equipped with a powerful signal receiver that receives a large number of television channels;
- these models come with all the necessary connectors to be able to provide power and connection to any receiver;
- there is also a fairly simple setup system that allows you to quickly find all channels and save them in memory;
- the difference between digital devices also lies in their memory (there are devices capable of storing a large number of channels);
- depending on the selected digital device model, a standard remote control is included;
- Also, if necessary, you can always use manual tuning to select the optimal broadcast range with your own hands.
All equipment settings are carried out on the monitor display, which acts as a TV. Here, a regular widescreen radio can act as a translator, provided that it is equipped with the appropriate outputs.
Important. When choosing a digital device, you should first check the outputs present on the car radio or portable TV model installed in the vehicle.
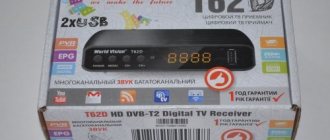
DVB t2
Modern television broadcasters are designed to receive various image formats. Here, a lot depends on the quality of the transmitted image, as well as the broadcast sound. In this case, for vehicles, a type of format such as DVB T2 is often used. This standard requires consideration in more detail, since it is characterized by the following distinctive features:
- this is an improved decoder model that replaced the previous generation format;
- This format is characterized by high channel capacity, which allows you to transmit widescreen images;
- when choosing a digital device, you should find out in advance that it supports this broadcast standard;
- Such a decoder is characterized by an improved signal with a modified architecture, which older devices cannot reproduce;
- Also, you should pay attention to the sound, since here it has improved parameters;
- It is additionally important to ensure a high-quality connection, since much depends on the power supply.
Don’t forget to find out about the broadcasting standard
. For the formats of this sample, it is important to select the appropriate conductors that will properly power all components of the system, and also allow the signal to be rebroadcast.
Important. If you are independently installing digital TV tuners with a broadcast picture in DVB t2 format, you must properly approach the installation and location procedure, since the overall performance of the entire system directly depends on this moment.
Location and installation of monitors inside the car
The market for automotive products, including additional equipment for cars, is very diverse, and before choosing a specific model of a vehicle monitor, it is worth deciding on the car owner’s preferred location for its placement. The most common locations for installing a monitor in vehicles are sun visors, headrests and the ceiling area of the car. Each of the placement options has both advantages and certain disadvantages. For example, installing a monitor in the headrests of the front seats is relevant for car owners who constantly drive with passengers in the back seat, however, viewing even a “glimpse” of an interesting program is initially excluded for the driver. If you want to install a monitor in this way, for ease of use and aesthetic balance of the interior, you will need to buy two screens, and the size of the display is determined by the dimensions of the headrests themselves.
The advantage of overhead monitors is a decent range of product selection based on display parameters, a wider viewing angle, which allows even the driver to watch TV, although not while driving. Another advantage of this installation is the ability to fold the monitor level with the ceiling when there is no need to turn on the TV. Sun visors are the least popular location for the monitor, since monitors of small parameters are installed in them, which reduces the ease of viewing programs for both passengers and the driver. Only after weighing all the pros and cons, having decided on the driver’s reference area for placing the device, should you begin to select it, since this criterion directly affects the monitor model required by the car owner. For a specific installation location, it is planned to purchase a suitable modification of the monitor. Let's take a step-by-step look at how to connect a TV in a car, focusing on the most popular and convenient locations: in the headrests and on the ceiling.
Mounting a TV screen in a headrest
Before purchasing a TV screen for a car that is supposed to be installed in the headrest, it is important to measure the dimensions of the headrests themselves so that the display parameters are slightly smaller than the diagonal of the area where the devices are located. Professionals do not recommend installing TVs on the headrest whose dimensions exceed the parameters of the upper part of the seat, since any unsuccessful movement by the front passenger or driver can cause mechanical damage to the screen. In addition, a larger TV screen than the seat headrest will have a negative impact on the interior of the cabin. The process of mounting a TV is not particularly complicated, however, it requires accuracy and scrupulousness from the performer so that the result of the work is not only technical success, in the functioning of the monitor, but is also positioned positively from an aesthetic point of view. To work, the performer will need, in addition to monitors, the following tools and materials:
- Felt pen or marker.
- Screwdriver Set.
- Wiring insulation tape.
- A knife, cutter or other device with a sharp blade for cutting out an opening for the monitor.
- Technical glue.
After preparing all the necessary materials, you can begin to work, carefully following the instructions for mounting the TV in a car headrest:
- The first production necessity is fitting the monitor to the headrest and applying contour markings, which predetermine the area where the screen will be installed. To do this, you will need to draw the boundaries of the future opening for the TV on the headrest, leaning the screen tightly against it.
- Next, you need to remove the headrest from its regular place, since cutting work directly in the car will be inconvenient.
- The upholstery is removed from the headrest after first making shallow punctures in the corners around the perimeter of the area for installing the screen. This can be done using a regular needle.
- According to the marks, the outline of the opening for the TV screen is drawn on the headrest and a blind hole is cut out, the depth of which should be equal to the thickness of the TV.
- After trying on the screen, making sure that it fits smoothly into the recess, it is worth making another opening, this time through, to lead the cable from the monitor to the tuner.
- The next task: cut a slot similar to the size of the screen on the headrest upholstery, according to the markings made earlier. You need to cut the hole a little smaller, leaving about half a centimeter on each side, in order to wrap the upholstery inside when mounting the TV screen directly: this approach will allow you to hide the trimmed edges of the upholstery, which will affect the presentation of the installation.
- Next you have to put the upholstery on the headrest, wrap its edges inside, after making small cuts at the corners of the opening.
- The monitor is secured in the mounting location using technical glue or reliable double-sided tape. It is important to fasten the TV screen securely to eliminate the possibility of it falling out during operation of the machine during sudden braking or extreme maneuvers.
To get an image on the TV, all you have to do is connect the cable from the monitor to the tuner, and connect the adapter to the cigarette lighter.
Installing an overhead car monitor
Installing a ceiling-mounted TV falls into the category of more complex tasks. To install the monitor, the contractor will need to partially dismantle the trim on the ceiling of the car to free up the section of the roof where the screen will be directly installed. Next, you need to start making the plate on which the car ceiling-mounted TV will be mounted, or installing it if it was prepared in advance by the car owner. The plate must be sized to match the base of the purchased device and is made of plywood or metal, with experts leaning towards the latter option to ensure sufficient stability and reliability of the final structure. It is necessary to fix the platinum on the reinforcing ribs of the ceiling with self-tapping screws or self-tapping screws, acting with extreme caution so as not to perforate the roof with fasteners. The base of the TV is attached to the installed plate using the hardware supplied with the device: the monitor itself will subsequently be connected to it.
The next stage of work is connecting and checking the operation of the device. The process is carried out according to the instructions of the TV manufacturer, using the supplied wires. You can supply power to the device either by connecting the wires in the engine compartment or from the cigarette lighter, after installing a special adapter in it. When connecting electronics, you should be extremely careful, since incorrectly connected wiring can result not only in damage to the device, but also cause a car fire. If you do not have experience working with electrical wiring, it is better to entrust this work to professionals. After connecting the device, you need to check the functionality of the TV, then disconnect the connectors and begin installing the ceiling lining in its original place. During the installation process, it will be necessary to make holes in the casing for the installed wires, which requires precise measurements and scrupulousness so as not to make unnecessary openings and spoil the ceiling covering.
The final stage of work: connecting the disconnected connectors and final checking the effectiveness of the installation. If the work on installing the casing was carried out carefully and without haste, then the likelihood of unpleasant precedents, with the device not working properly, is reduced to zero.
Installation
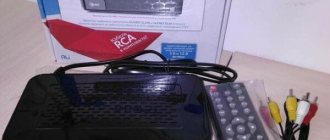
Installation of a TV tuner in a car is always accompanied by configuration, since installation involves the complete installation of the receiver in the car, verification and a trial test. Let's take a closer look at how this device is installed in your car in practice:
- The first thing you need is to choose a suitable place for the receiver, as well as the tuner, in the car.
- The next stage will be a test connection, as well as startup and diagnostics of all equipment for operability.
- After everything is connected and confirmation of functionality is received, you need to proceed to the installation.
- The system elements are located as far as possible from all electrical appliances of the vehicle.
- Leave enough space between equipment so that the wires do not have to be pulled.
- Next, all components are fixed using fasteners in places prepared in advance.
- Subsequently, the power and connection are pulled so that there is no easy access to it.
- After connecting the system to power, another test run and performance test are performed.
At the end of the installation, you need to configure the channels; for this, the digital receiver is converted to the appropriate format, which is also set on the radio or TV. An automatic or manual search for channels is performed, as well as their subsequent saving in the device’s memory.
Important. When setting up the equipment, it is recommended to use the recommendations of the user manual. This will allow you to complete the installation step by step without missing important points.
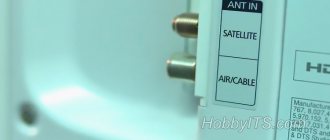
Car antenna
To receive a television signal in a car, an antenna is usually used, which is mounted on the windshield or rear window. These antennas are a frame, or a two-way dipole,
If you install four such antennas on the front, rear and side windows, this will significantly improve the quality of the received signal, especially when the car is moving. You can use antennas with a circular radiation pattern - the Crown antenna. In this case, one antenna is sufficient. Such antennas include a ring dipole and a vertical rod. Here you can find tests of the most common car antennas.
In conclusion, it remains to conclude:
1. Receiving digital television in a car while driving and in a parking lot is quite possible if equipment (antennas) is installed that can provide a circular radiation pattern.
2. The quality of reception can be improved if you use active antennas ( with a television signal amplifier ).
3. The quality of reception depends to a lesser extent on the model of the digital receiver, since there is a sensitivity standard for DVB-T2 digital television receivers.
Modern life is quite difficult to imagine without television. Watching television programs has become an integral part of everyday life. Many people use auxiliary devices to follow their favorite programs and series everywhere, for which a car TV tuner was created, which allows you to enjoy your favorite channels in your car. In this case, it is necessary to consider what digital television for a car is, and also find out about a common equipment model - the dvb t2 tuner.
Let's sum it up
Having decent quality TV in the car is no longer a myth, and modern technological solutions allow you to watch TV in excellent quality while on the go. The most relevant installation of a TV in a vehicle is for car owners who spend a lot of time in the car, regularly go on business trips in their car, or often travel with friends or family. To receive reliable and high-quality television broadcasting, the car owner will have to spend money on purchasing a tuner and a car monitor, while installation of the devices can be successfully completed independently, according to the device manufacturers’ manuals and detailed instructions presented in this article.
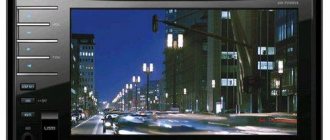
Screen diagonal
For installation in passenger cars, it is more advisable to choose TVs with a screen diagonal from 7 to 17 inches. But for minivans, minibuses or passenger buses, a TV with a diagonal of 17 and above is quite suitable. In addition to the screen diagonal itself, consider the fact that the screen can be standard or widescreen. When watching movies from DVDs and TV shows, preference should be given to a widescreen TV.
The higher the screen resolution, the better. Models with a viewing angle of 100 - 110 degrees horizontally and 50 -60 degrees vertically are more suitable for comfortable viewing
Main advantages
In their reviews of car tuners, car owners cite a number of broad capabilities and advantages.
- Comfort for passengers and driver. Your favorite digital broadcasting is always available - TV shows and movies, children's channels for little travelers, TV series and much more.
- For control from the remote control - an external infrared receiver. It can be driven by both the driver and passengers of the car.
- Tuner coding in accordance with the requirements of the standards of Russia, CIS countries and European countries.
- Antennas that are practically invisible from the outside provide convenient reception.
- Your car will become more convenient and prestigious for comfortable travel.
- Affordable cost of connecting and installing a digital tuner to the standard radio.
Mounting location
Car TV, DVD player, also car radio and car TV, built into the front panel
Small screen car TVs are most often built into the dashboard. Often, the socket of the standard radio is used for this. Such devices cost around $300-400 and in addition to the TV tuner necessary for their operation, they have a CD and DVD player. Their advantage is also that for their installation it is absolutely not necessary to resort to the services of a specialist. Installation is very simple. But there are also disadvantages - viewing the TV located on the front panel of the car will only be convenient for the driver and front passenger.