In modern interiors, the rule of minimalism is usually applied. The fewer objects are visible in a room, the more spacious and comfortable it seems. This also applies to the choice of location of electrical outlets. When planning a renovation, it is advisable to determine in advance at what height the sockets for the TV will be, since such household appliances are almost always in the house and often in more than one copy. The correctly selected location of the outlet unit does not spoil the interior and facilitates the operation of the TV and connected additional devices.
Myths about installation requirements
The established requirements are basic when installing sockets and switches in residential and other premises. In this case, you can use a free arrangement method, that is, fix the elements in an order that is comfortable for the user. This option is often considered the only one, but we must not forget about the standards that ensure safety.
Video: DIY installation of switches indoors
All elements of the electrical circuit are important and require safety during installation and operation. Compliance with requirements and standards is a decision necessary to achieve high quality work.
Sequence of DIY work
Let's look at how to install a TV outlet yourself.
When is gating necessary?
Grooves are used on monolithic and brick walls with large surfaces. This is true for external load-bearing coverings and partitions without the presence of power cords in them. The thickness of the drilling is large, such walls cannot be damaged. To groove internal planes, you will need permission from the construction department.
Installation options without grooves
This open installation involves installing sockets on an external wall without drilling channels and holes for socket boxes. The wires will run outside along the plane.
Also, the optimal solution is to install surface-mounted electrical installations. This option is great when the renovation has already been done and you don’t want to spoil the finish. The connector can even be installed on top of tiles.
Selecting wire cross-section
The indicator is measured in square millimeters and shows throughput. To ensure safe operation of the receiver, purchase a cable with a reserve cross-section, then the insulation will not be damaged by the load.
The wire cross-section is not equal to the diameter. The latter is measured with a ruler, put into a formula and the cross-sectional area is calculated.
The wiring cable is always rounded up. For example: when calculating it turned out to be 2.2 square meters. mm. This means that you need to take a 2.5 square cable.
Fastening and fixing
There are 2 options for connecting the connector.
The star pattern means that the old wiring is removed and the new wiring is placed through the splitter. It is designed to branch a signal, divide it into packets and amplify it. Electrical sources are placed at the entrance of the wire into the living space from the entrance. Then the antenna conductors are wired. Used frequently. Advantages:
the wires are located in a technically safe place, which is important during installation and routine inspection; the signal is stable; The separated packages continuously supply current to the TV sockets.
The second installation method is daisy chain. The main cable extends to any TV, and then branches into 2 or more parts to other devices directly at the connector. With this connection scheme, there is a saving on cables. The disadvantage is that the quality on the first TV will be higher than on subsequent ones.
How much wire is needed
Now there are different methods of data transmission that require their own connection to the network. Instead of 1 socket, install a block that contains at least 4 connectors.
Types and characteristics of socket boxes
Modern sockets, both in appearance and in the installation method, differ significantly from those installed in Soviet-era houses.
If previously they were simply embedded in the wall without the possibility of replacement, today installing them and, if necessary, changing the socket is not particularly difficult.
Selecting a socket box based on wall material
The main selection criterion is the material of the walls into which the socket boxes will be installed.
On this basis, there is the following classification of boxes:
- structures intended for installation in walls made of solid materials: concrete, reinforced concrete, aerated concrete, brick;
- glasses for walls made of composite materials: plasterboard, plastic boards, chipboard, plywood and others.
In the first case, the socket box is a round glass without any additional elements. It is fixed to the wall using mortar.
There are mounting holes in its walls or bottom for electrical wiring. When installing a socket box, it is enough to remove the jumpers and push out the plug.
To install several sockets located nearby, you can use glasses, on the side of which there is a fastening mechanism. The socket boxes are connected to each other using special grooves and combined into blocks.
Drywall boxes contain special plastic or metal clamping tabs designed to secure elements into hollow walls. The clamps are attached to screws, which rotate to adjust their position.
What shapes are the products produced in?
Round socket boxes have become most widespread. It is very easy for them to make a hole in the wall using a variety of tools.
Round glasses can be used both for mounting a single socket or switch, and they can be combined into groups, connecting to each other using docking units.
Square boxes, although not used as often, have certain advantages. Their volume is much larger, so you can hide a lot of wires in them.
They are often used to install elements of the “smart home” system. There are single and group square-shaped socket boxes designed to install up to five sockets.
There are also oval boxes on sale, which, like square ones, have a large internal space. They are convenient because you can immediately connect a double socket to them. All the products described above are mounted in walls and used for hidden wiring.
There is another type of mounting boxes that stand somewhat apart - plastic linings or, in other words, multiboxes, designed for open installation on the baseboard. They are designed for one or more outlets and are usually square in shape.
External socket boxes have two modifications - designs with installation to the middle of the baseboard or to the floor. Since multiboxes are mounted on top of the baseboard, their distinctive feature is their aesthetic appeal and original design.
Installation box size
An important parameter of socket boxes is their dimensions, which are selected based on specific installation conditions. The fork dimensions are 60-70 mm in diameter and 25-80 mm in depth.
Standard designs have external dimensions of 45 x 68 mm, but it must be taken into account that the internal depth in this case will be 40 and the diameter 65 mm.
Glasses of increased sizes, the depth of which is about 80 mm, are advisable to use when there is no distribution box in the electrical wiring, and its functions are performed by the electrical outlet itself. As for square products, as a rule, they have a size of 70x70 or 60x60 mm.
Material for making mounting boxes
The most popular are socket boxes made of non-flammable plastic. They can be installed in concrete walls and structures made of composite materials.
There are also metal boxes, which were used everywhere in the past, but today they have almost been replaced by plastic products.
Metal socket boxes are usually installed when installing electrical wiring in wooden houses. They are made of galvanized or non-ferrous metal and cannot be welded, so the connection to a metal pipe is made by soldering.
What screen should be on a TV in 2021: there are 5 types
A TV is one of the most expensive devices, along with a laptop. His choice is a difficult process. And if you take the wrong device, you will have to suffer. Naming is more complex than that of smartphones, so naming is more difficult. How to determine the optimal device screen is in the Life material.
What types of TV screens are there?
There are two main types of matrix for a TV or any other device for consuming content - LED (aka LCD and LCD) and OLED. The third is microLED, but so far it is rarely found in consumer devices.
Each variety has its own pros and cons: the first is more durable, and its colors are more natural; the second has much more saturated colors, but the color rendition may be distorted. Let's take a closer look at the types and subtypes of matrices. There are five of them in total.
LED - a matrix that is a thing of the past
Where it is found: in budget and middle class TVs.
In LED, the pixels themselves do not glow, so a substrate is placed under the screen. This means that the pixels burn at the same brightness level. In addition, the substrate requires additional space in the case, which means it will be thicker.
QLED is a subtype of LED similar to OLED
Photo © VCG / VCG via Getty Images
Gadgets. The main thing on the topic
Google has banned the installation of APK files on Pixel smartphones: how freedom is being destroyed in Android
February 18, 21:40
How smartphones and watches track your health
February 13, 21:40
6 embarrassing questions before buying an external battery: some charge slowly and are incompatible with a laptop
Where it is found: in mid-range TVs, where engineers save on components.
LED subtype with an additional layer of quantum dots. Such matrices have deeper and more saturated colors, and therefore better reveal the capabilities of HDR. They cost a little more, but in terms of color rendering they are close to OLED.
OLED is the best technology right now
Where it is found: in flagship and pre-flagship TVs.
The most modern and uncompromising type of matrix. LEDs are used here; they glow on their own, without additional illumination. Colors become brighter and more contrasting. Blacks on OLED are deep and rich, while on LCD they can be gray or purple. The absence of a backing allows you to make the TV thinner. The disadvantages of this type of matrix are that pixels can burn out and color reproduction can be inaccurate.
Mini LED - advanced OLED
Photo © David Becker/Getty Images
Where it is found: on flagship TVs.
Why do TVs cost as much as cars? Their cost is influenced by 4 factors
OLED subtype. In this type of matrix, engineers eliminated the main disadvantages of OLED, namely, they further reduced power consumption and slowed down the process of pixel burnout. It is especially actively used in Apple products, and this year at CES 2021, LG presented a line of TVs with matrices of this type.
Important to know before starting work
Safety conditions
It is important to do all work on installing sockets and switches, laying electrical communications only after a complete shutdown of the current in the network. Turn off the machine or traffic jams
And do not connect until the installation work is completed.
Take the indicator and make sure that the outlet or wiring you are going to work on is de-energized. Professionals suggest using two indicators at once. This will ensure that unwanted consequences are avoided.
Points to consider
- You should monitor the condition of the wire insulation and do not use damaged wires.
- It is strictly prohibited to cut live wires with wire cutters.
- In places where wiring has already been laid, you cannot chisel, drill or cut walls.
Any contact of a screwdriver with the zero and phase wires inevitably provokes a short circuit in the network.
Socket installation standards:
- not lower than 20 cm from the floor;
- for every 6–10 sq. m. of living rooms, one socket is made.
Rules for installing sockets and switches
In order for the installed system to serve for a long time, it is important to choose the right wires and cables to be connected and lay them out correctly
To do this, you should take into account:
- The power of all future energy-consuming appliances in an apartment or house. The performance of all devices is simply added together. It is necessary to know what the maximum power allocated by the network is.
- The choice of wire or cable type depends on the method of laying it: open or internal. It is necessary to decide which gasket is suitable for a specific electrical installation location.
- When laying wiring, do not lay the wires in bunches.
Choice
In order for the built-in unit to be better combined with the countertop and at the same time be as functional as possible, several key conditions must be taken into account.
- The total power of all electrical appliances that are supposed to be used. This is necessary so as not to cause overvoltage in the apartment (house).
- The one-time load that a particular block can withstand. This information must be included in the instructions for the device.
- Number and type of connectors required. This indicator depends on whether the kitchen should have a TV, the Internet, or only household appliances.
- Availability of additional functions. For example, pushing out the plug when turning off the device. This is not only very convenient in itself, but also helps you avoid leaving appliances on.
- The color and pattern of the lid of the built-in unit, which should either match the countertop or go well with the details of the kitchen unit. For example, with handles.
- Manufacturing company. The functionality, style, durability and safety of the device depend on this item.
It is best to buy devices from companies whose brand has long been known. In this case, you can be sure of the high quality of the devices, since well-known companies value their reputation. In addition, this option allows you to obtain a guarantee from the manufacturer, so that if a defect is detected, you can exchange or return the product without much difficulty.
You also need to pay special attention to the block markings. It can be used to determine the authenticity of the brand.
Large companies make it using stamping, and not with ink stamps or in the form of a sticker.
It is worth checking the equipment of the device. All connections and fastenings must be included in the kit. Otherwise, you must immediately notify the seller of the shortage. After all, after purchase it will be difficult to prove the absence of components.
And finally, the main thing is to check the functionality of the outlet. The seller is obliged to demonstrate the serviceability of the unit by connecting it to the electrical connector.
Marking a concrete wall
In order to drill a hole correctly and without errors, before cutting the socket into a concrete wall, you must clearly mark its position on the wall.
Wherein:
- The center of the axis is marked on the wall surface for routing wires and placing holes. For this, a pencil and tape measure are used;
- If it is necessary to install adjacent sockets or a device block, a certain distance must be maintained between the elements. It is recommended to choose an average distance between the axes of the socket boxes of 71 mm;
- Two axes are drawn in the center: vertical and horizontal. The lines must be of sufficient length to ensure that the installation of the socket box is as even as possible.
Marking grooves for laying wires.
Sockets behind the cabinet
So, what sockets do we need behind the appliance cabinet?
First, electrical outlets. Calculate how many devices you will plug into the sockets at maximum. I listed what could be in the cabinet. Don't forget the socket for the TV if it is turned on by a cable running through a pipe. And add one socket in reserve.
Another option: remove just one or two electrical outlets and install an uninterruptible power supply in the cabinet for all the equipment located there. Uninterruptible power supply is a regular UPS with sockets.
This, firstly, will give us many sockets at once, and secondly, it will protect some equipment from short-term or long-term power outages. In the event of a power outage, you will have time to manually turn everything off; no equipment likes a sudden power outage, especially a projector. The projector's power cable can also be routed into this cabinet.
But the uninterruptible power supply is large. If the space in the cabinet does not allow it to be placed, then we make it with sockets; if necessary, the uninterruptible power supply can be placed in the area of the switchboard.
Secondly, the Internet. Count everything in the cabinet that needs to be connected to the Internet with a cable, you will get the required number of Internet outlets. Usually this is 2-4 sockets. Or you can stretch one cable and install a switch (switch) on the required number of ports. But then it is necessary that this one cable be of high quality, and it is extremely important not to break a single core of the twisted pair, otherwise either the speed will drop or we will lose the Internet in this place altogether. You can put a Wi-Fi access point or a Wi-Fi router (in access point mode) in the cabinet; there is a pretty good place for this.
In a small apartment, you can generally use this place as a low-current cabinet and connect the Internet from the staircase directly there.
If the house has mainline or satellite television, then we provide one TV outlet.
Connection diagrams for switches and sockets
After completing all the preparatory activities, at the very last stage of installation, you can begin the process of connecting our electrical points. In our article we will look at various options for connecting and combining connections for sockets and switches.
Connecting the socket
The simplest connection is to install a socket. There is practically no specific knowledge required here. The main thing is to follow our advice and not be a hero.
- To connect the socket we should use a three-core wire. In which one core (yellow-green) is intended to perform protective grounding. One wire (blue) is intended for connecting the neutral contact and the last (any color) is for connecting the phase contact.
- To connect the socket, we install a phase and neutral wire to its power terminals. We connect the protective conductor to the corresponding contact, which is usually located separately or can be identified visually.
The photo shows a diagram for connecting sockets
Connecting multiple outlets
The installation diagram of sockets and switches often involves the placement of several devices side by side. In this case, to save effort on gating and wires, it is easier to connect one from the other.
In this case, such a connection diagram must be taken into account when calculating the wire cross-section.
- In order to make such a joint connection of two or three sockets, we connect the first socket in the same way as stated in our instructions above.
- After this, we just need to make jumpers from the power contacts of the second socket to the power contacts of the first socket.
- We do the same with the protective wire.
- If you plan to connect a third, fourth, and so on socket, then we perform a similar operation with all of them.
https://youtube.com/watch?v=YZ—N5Zr0GI
Switch connection
Connection options for various switches
- To make the connection, we need to decide on the phase and neutral wires in the junction box. This is easy to do if you adhered to the PUE standards when installing the group wire.
- From the neutral wire in the junction box we connect one of the terminals of the lamp.
- We connect the input of our switch from the phase wire in the distribution box. It is usually located at the top. If it is a two- or three-pole switch, then there is one, and on the opposite side there are two or three terminals, respectively.
- Then we connect the wire to the switch terminal and connect it to the lamp. Here we connect it to the second terminal of the lamp. If we have a two- or three-pole switch, then we perform the same operations for other lamps. If we have one chandelier powered from a two-pole switch, then it should have three terminals. We connect the lead from the switch to the third contact of the chandelier.
Connecting the socket and switch
There is also a diagram for installing a socket and switch. It allows you to place two of these installation devices side by side with a switch connected to the outlet. This allows you to save wire and relieve the distribution box from a large number of connections.
Connecting a switch from an outlet
- To make such a connection, in the first stage we connect the socket using the principles described above.
- Now we connect the supply wire to the phase contact of the socket, to the switch input.
- And we lay the wire from the switch terminal and connect it to one of the lamp terminals.
- If the lamp that turns on the switch is located near the installation site of the switch, then the neutral and protective terminals from the socket can be connected directly to the lamp. If it is sufficiently remote, then we connect the neutral and protective wires from the distribution box, as in the conventional connection of a switch.
How to extend the life of your TV
Why you shouldn’t hide your TV in a closed cabinet, why you need a long antenna cable, whether you need to limit the operating time of your TV – tips on how to properly care for your TV so that it lasts longer, equipment repair specialist Petr Zinevich shared.
There is no need to limit the operating time of the TV unless this is written in the instructions. Photo: rizzarr.com
The TV that is constantly on is less likely to break down. For any equipment, the most difficult mode is starting and supplying voltage. At this moment, most often something breaks. Therefore, paradoxically, a TV that is constantly plugged into an outlet breaks down less often than one that is turned on and off with a plug or a mechanical button. However, fire safety regulations prohibit leaving equipment connected to the network. In this case, when turning off the device, you should only grasp the plug with your hand and not pull it out by the power cord. Otherwise, the likelihood of damaging the plug and power cord greatly increases.
Be sure to turn it off during a thunderstorm. If a thunderstorm begins and lightning flashes, then you need to turn off household appliances completely: unplug the power cord from the outlet, disconnect the antenna and all other connections. Lightning can damage equipment along any electrical wire. So, if weather forecasters predict a thunderstorm, then when leaving home, do not forget to pull the plug from the socket and disconnect other wires from the TV.
Optimal height
If you decide to place the TV on the wall, the installation height of the socket block is determined automatically - it is hidden behind the television panel. The solution differs from the standard parameters for placing conventional power points. This method of installing telesockets is designed to completely mask input holes, connectors, and visible cable sections.
Wires hanging on the wall can ruin the design of the most sophisticated interior, and besides, their open location poses a risk of breakage (cut by small children, chewed by a dog, etc.).
Option for correct TV installation: it is pressed as close as possible to the wall, all wires are hidden under the cladding, sockets are in a hidden space, right behind the screen
The mounting height of the sockets is based on the mounting height of the TV, which may vary slightly. Typically, television and video equipment is placed at eye level of a person sitting on a chair or on a sofa. The optimal distance is considered to be 1.2-1.4 m (from the floor surface to the center of the outlet). In relation to the TV - slightly below its top edge.
But there are also exceptions. For example, a kitchen video device is most often mounted a little higher, in free space, and accordingly, sockets should be installed above the specified height.
Height of the switch from the floor according to European standards
We always associate the prefix “euro-” with something new, more reliable and of higher quality.
“Eurostandard” and “European-quality renovation” mean modern technologies and materials in construction, more comfortable layouts and the location of all communications, including sockets and light switches. All new buildings are now built to these standards. According to the European standard, the optimal location of switches for all family members was calculated. Not too high for children and not too low for adults. The height of the switch from the floor according to the European standard is 0.8 - 0.9 meters. This level was not chosen by chance. This is the approximate height to which an adult’s hand can reach down.
At the same time, the child will also be able to reach this level. SP 31–110–2003, paragraphs 15.34, 15.36 say the following about this.
Both the Soviet and European standards are not an unquestioning indication. You can choose the installation height of equipment in your home depending on your convenience and the location of furniture and electrical appliances. In a room intended for sleeping, it is more convenient to install switches near the bed at a level that can be reached from a lying position. This is approximately 60 - 70 centimeters from the floor.
In the work area, in addition to the main one, additional lighting is provided. These are various table or wall lamps. It is more convenient to place their switches at a distance of 10 - 20 centimeters from the height of the table. This way you can adjust the lighting without interrupting your studies.
The location of sockets and switches must be thought out in advance before finishing work. Once they are completed, it will be almost impossible to move or add additional ones without damaging the new renovation. It is imperative to take into account the location of furniture in the rooms and electrical appliances on them.
Installation methods
The steps required for successful installation of a socket box into a plasterboard wall are extremely simple, but do not forget that the required order must be followed, otherwise the installation may result in the loss of a sheet of plasterboard, and its replacement is a costly procedure (financially and in terms of time).
The first action that needs to be taken when installing any products (electrical ones especially) is applying markings. First of all, this is necessary in order to connect wires or other communications to this place, as well as for ease of installation and calculation of the material.
We will need logic, knowledge of the location of communications, a pencil, a tape measure and a level (to save money, you can also use a ruler, the main thing is to catch the point). It is worth noting that markings must be applied taking into account what type of socket or switch there will be (for how many consumers).
In SNiP there are no restrictions on the height of the socket, but there is a restriction on its distance from doorways (at least 20 cm), as well as on its distance from the tabletop (20 cm). It is also recommended not to make sockets that are too low (at least 20 cm from the floor) due to the risk of short circuits from moisture. In turn, a short circuit can lead to a fire.
Next, we proceed directly to the manufacture of the technological hole. Drywall is soft, so you can use a regular paint knife, but it is best to use a drill with a special round attachment. This must be done to avoid unnecessary chipping or damage to the sheet.
Drilling with a ballerina must be done extremely carefully, since there is a possibility of breaking a sheet of drywall if you press hard on the tool. This is due to the fact that we press on a certain point with a sharp object with a large area, which can lead to a break.
Another method is drilling. It consists in the fact that (instead of a special ballerina attachment) a regular drill is used. The material is drilled along the contour indicated in the previous paragraph, then it needs to be sanded so that the hole is perfectly smooth and of high quality. When the connector is ready, throw the wires into it. It is worth drilling carefully, at minimum speed.
Now we proceed directly to the installation of the socket itself. We lead the wires into the openings of the socket box, specially provided for by the design on the back side of the product, after first removing the plugs. After installing the wires, we begin installing the socket box. To do this, we press the box tightly, tightening the screws clockwise (each evenly) until they are completely fixed, but do not squeeze, because this can also destroy the sheet and form a chip or crack.
For better fixation, you can drive two additional screws into special holes. There are no tabs there anymore, so you need to use ordinary drywall screws (wide thread pitch).
If you are not going to move on to the next step right away, it is better to tape the ends of the cable or put special caps on them to protect the cable from corrosion, which can negatively affect the quality of the wiring.
At this point, the installation of the socket box in the gypsum board is completed. The next step is installing a socket and switch. The principle is no different from how electrical devices are installed in a regular socket box. The only special condition is that you should not hammer into the socket, as you can break the sheet, which will lead to its replacement and the installation of a new socket box.
Anyone can install a double or 3-post socket box correctly if you follow our advice. You just need to insert it correctly and secure it.
Smart TV or regular
Essentially, Smart TV is a set of applications built into the TV shell for broadcasting various content from the Internet. Recently, manufacturers have been offering full-fledged Android with Google Play and their own sets of applications as a platform.
The weak point of such solutions is management. Entering queries and moving the cursor using the remote control is long and inconvenient. A solution could be to use a smartphone or tablet as a control element. Check the availability of this option when choosing a model.
However, if you buy a TV without a Smart TV and an Internet connection, you can make it smart later using an external set-top box from Apple or based on Android. Or use an intermediary like Google Chromecast to stream content from your smartphone or computer.
Which option is better? Choose according to your preferences and price. It is quite possible that a separate set-top box will cost much less than a built-in Smart TV in a TV.
The downside of an external set-top box is that it will take up one HDMI port, which could be adapted for something else.
The advantage of external attachments is that they can be changed based on needs. You can also install third-party firmware on them. The speed and frequency of software updates depends on the specific model of the set-top box.
The choice of external set-top box is also determined by your budget. The price of a device, as a rule, directly depends on its capabilities and set of functions.
The only critical criterion is whether your TV supports the resolution. Very cheap set-top boxes may not work well or will not support Full HD resolution at all.
Pay attention to this
Optimal height
If you decide to place the TV on the wall, the installation height of the socket block is determined automatically - it is hidden behind the television panel. This installation method allows you to completely mask the inlets, connectors, and visible sections of cables.
Wires hanging on the wall can ruin the design of the most sophisticated interior, and besides, their open location poses a risk of breakage (cut by small children, chewed by a dog, etc.).
The mounting height of the sockets is based on the mounting height of the TV, which may vary slightly. Typically, television and video equipment is placed at eye level of a person sitting on a chair or on a sofa. The optimal distance is considered to be 1.2-1.4 m (from the floor surface to the center of the outlet). In relation to the TV - slightly below its top edge.
But there are also exceptions. For example, a kitchen video device is most often mounted a little higher, in free space, and accordingly, sockets should be installed above the specified height.
Image gallery Photos from
To make the connection, it is enough to separate the front panel from the mechanism by picking up its edge with a screwdriver
To connect the conductor, the socket mechanism is equipped with a self-clamping spring terminal, and for a tight fit of the TV cable screen it is equipped with a plate
When connected, the mechanism of the specified TV socket is shown in the photo. The connection steps for all TV sockets are similar, the only difference is in the connection diagram to the terminals
Legrand TV socket
The simplest way to connect a TV point
Connection procedure
The principle of connecting a television outlet
Coswall CS-OFSO-3DE-SW – triple socket
Another universal model that works with a rated mains voltage of 100-240 V. The product has a rectangular shape and is equipped with 3 sockets. The socket is ideal for installation in an office or next to a desktop computer.
The design has rather large dimensions - 222x118x65 mm. And the thickness of the front model is only 2.5 mm, so the structure will not stick out from the wall. In reviews, users praise the good opening mechanism. If in most similar sockets the socket “flies out” instantly after pressing the button, then in the case of CS-OFSO-3DE-SW it slides out smoothly, which means it will last longer without breaking.
Pros:
- 3 connectors;
- silver cover;
- smooth opening;
- metal case;
Minuses:
- no USB port provided;
- weight.
VIEW ON ALIEXPRESS
Which sockets to choose for your TV
TV sockets are divided by purpose: power, Internet, multimedia, etc.
In addition, they differ in design:
- pass-through - with 1 input and 2 outputs (for connecting the next device);
- terminal;
- single (simple).
Sockets are also selected according to the installation method - for hidden installation or external. In the latter option, the wires are usually laid in cable ducts.
Combination type sockets are available for sale:
- tv-rj45 - television and Internet;
- TV-RD - TV and radio;
- tv-sat - terrestrial and satellite television;
- tv-rd-sat - TV, radio and satellite.
A mixer block is often installed with such outlet units. It combines signals from different cables.
Terrestrial and satellite TV are connected via separate cables. You can connect the sockets to each other using a cable - in a pass-through circuit, in a star circuit, or use single nodes. Sockets can be selected according to color, material and design along with power connectors.
Projector, TV and audio system
Not the rarest option: they mostly use the TV, but if they want to watch a movie, the screen is lowered and the projector is turned on. But at the same time, the multi-channel audio system must work with both the projector and the TV.
There are two options: either we take a receiver with two outputs, or we install a separate HDMI matrix. Receivers with two HDMI outputs are not uncommon; they are not found only in the lowest price segment; on average (from about 45 thousand rubles) they are available. You can conveniently switch the output from the projector to your TV.
An HDMI matrix should not be confused with an HDMI switch (switch), which has several inputs and one output. On the contrary, we need to have 2 exits. The HDMI matrix has several inputs and several outputs; we can switch the video signal as convenient for us. Control from the remote control or via RS232 or RS485 interface. In principle, for tasks that do not require sound amplification, you can use a matrix instead of a receiver.
Which cable to choose for the kitchen
Next, you need to calculate the cross-section of the common supply wire of the electrical panel and the outgoing wiring to each pantograph. Follow the rules here:
for device loads up to 3.5 kW - copper cable VVGng-Ls 3*2.5mm2
for device loads up to 5.5 kW - copper cable VVGng-Ls 3*4mm2
with a total load of all devices up to 10 kW - copper cable VVGng-Ls 3*6mm2
with a total load of all devices up to 15 kW - copper cable VVGng-Ls 3*10mm2
Why there should be a brand VVGnG-Ls is discussed in detail in the article below:
Even if you have a house with an old grounding system (without a third protective conductor), still do the wiring with a 3-core cable. This will save you in the future from additional costs for reconstruction and replacement of wires.
As a last resort, the third wire will be a backup for zero or phase, in case of a possible break or other damage.
Instructions for installing TV sockets
You should start by installing the cables. To do this you will need a number of devices:
- If the incoming signal is weak, it will be necessary to amplify the tele-pulse, which will strengthen the signal and improve the image;
- Also a TV wire separator, because the signal will be sent common, and only then will it be divided among all TV viewers;
- A TV signal combiner will bring together signals of different frequencies and transmit the impulse via a conductor to your TV;
- Next, antenna plugs are needed to secure the television cable by soldering, which will create a reliable connection.
The next stage is installation. First of all, you should decide on the type of fasteners, which are divided by type of socket installation:
- Overlapping
- Closed installation
- Checkpoint
Next you will need working tools for installation:
- the TV socket itself;
- perforator;
- screwdrivers of different types;
- fasteners;
- devices for removing insulation.
Device installation procedure:
- A hole is made in the wall according to the dimensions of the device.
- Direct installation and fixation of the device.
- Removing the wire insulation, we control the process, especially preventing damage to the core, otherwise the cable may bend and break.
- We secure everything with a screw.
- We fix it with the outer cover.
If all operations are carried out correctly and carefully, then the device is completely ready for use.
General recommendations when choosing a location for an outlet
The safe operation of the TV device is ensured by compliance with the basic limitations determined by the rules regarding the installation of electrical equipment:
- Connectors and cable routes must be located so that they do not interfere with the installation of the TV;
- Connection boxes and wiring must be completely hidden in the wall;
- Each outlet in the apartment must correspond to the functionality of the TV. It will be difficult to make additional connections, and immediately installing unnecessary nodes is not cost-effective;
- Connections should be easy to access. It must be taken into account that parts wear out over time, which will require repairs. And replacement of components will happen quickly and without damage to property, only if the socket unit is installed correctly;
- Sockets should not be located close to heating devices and equipment that creates interference. In kitchens it is placed at a distance of at least 0.5 meters from the gas pipe.
In the online store "Retrosockets" you can purchase all the electrical equipment necessary for the renovation of residential premises. The catalog contains vintage electrical sockets made of ceramics and porcelain, models for TVs, and all types of cables. The goods are transported by transport companies to all regions of Russia. Delivery in Moscow is carried out by couriers.
How to connect a TV cable to an outlet
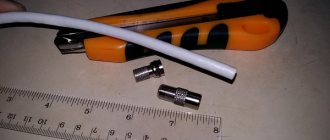
Carefully, being careful not to damage the braid and center conductor, strip the ends of the cable. To do this, use a knife to make two circular cuts: the first (small) - at a distance of 2 cm from the edge of the outer insulation and the second, cutting through the insulation between the central core and the braid - 6-8 mm from the edge
Remove the cut sections of the shells.
Insert the cleaned end of the cable into the terminal block, which is located at the rear of the case. Tighten the screw mechanism using a screwdriver (check for secure contact). Insert the device into the socket and secure it with the screws that adjust the side clamps. Screw on the decorative frame.
Modern products do not require special cable preparation when connecting; it is enough to insert the cleaned core into the clamping mount, where it is automatically pressed against the contact terminal, and a wedge-shaped stop penetrates under the insulation and closes the contact.
Components
Regardless of the type of model, it consists of the following parts:
- Housing (printed circuit board);
- The front part (panel) protects the mechanism from damage (the color can be chosen to match the interior);
- Adder, allows you to connect a satellite and radio transmitter;
- The clamp is used to secure the socket in the mounting box.
Antenna cable difference
For a high-quality connection, in addition to correctly selected sockets, you will need an antenna coaxial cable, which has a special structure. Unlike 2- or 3-core electrical wire, it has one core to carry the TV signal and a protective shield that acts as a barrier to surrounding electromagnetic fields.
Externally, a television cable is a thick elastic round wire, usually with black or white PVC insulation. For in-wall installation, the color of the external insulation does not matter.
Structure of a coaxial antenna cable: copper conductor for transmitting a TV signal, dielectric insulation, braided protective metal screen, outer plastic sheath
A thin insulating layer adjacent to the central core breaks the galvanic connection with the shielding braid. The screen, in turn, protects against electromagnetic interference and prevents the emission of sensitive high-frequency signals, while also serving as an additional conductor. If any of the components fail, video transmission will be disrupted.
Here are several types of cables that are suitable for laying under plaster or other finishing material:
- SAT 50 (SAT 703);
- RG-6 (and for external use);
- RG-11 (F1160BVM COMMSCOPE).
When purchasing, be sure to check the strength of the sheath, and during packaging and transportation, try not to bend the cable so as not to damage the integrity of the copper core and screen braid.
How to choose a wire?
One of the first points to start repairing leashes is choosing a wire. More precisely, it is worth deciding whether to use a cable or a wire. In fact, the difference between the two in terms of performance is barely noticeable. Often it all depends on how the manufacturer himself positions his product.
Cable, cord and wire are concepts that are often confused with each other. According to textbooks, a cable is several separate cores isolated from each other, united by one solid insulation. For example: VVG (copper cable in PVC sheath and PVC insulation), which can have from one to four cores. In different cables, the cores have different cross-sections.
A wire can also have several separate cores isolated from each other, united by one solid insulation. For example: PPV (Flat Copper Wire with PVC insulation) or PUNP - two and three cores with a cross section of 0.75 - 4 mm².
The cord has approximately the same structure, only the current-carrying conductors are flexible because consist of a bundle of thin wires, and covered with a more flexible insulation and protective sheath. For example: PVC (copper wire with twisted conductors in PVC braid) with a cross-section from 0.5 to 2.5 mm².
In addition, you should remember that it is better to use copper cable for wiring in the apartment. This will increase the reliability of the wiring, and consequently reduce the likelihood of a fire. That is why such electrical wires for a wooden house are the best solution. Everyone knows that wood itself is more susceptible to burning. This means that the risk of fire is higher when compared with an apartment or a stone house.
When choosing, you should also consider the material from which the wire is made. If it is made of aluminum, then it is endowed with less conductivity of electricity and quickly begins to break in places of kinks. In addition, the wire oxidizes, and this oxide has increased resistance. This means that the quality of current conduction will only deteriorate. The main advantage of such wires is their relatively low cost.
Copper wires have significantly better qualities, for example:
- They are not as susceptible to oxidation.
- Conduct current better.
- More adapted to the external environment.
- Not so prone to breakage at bends.
At the same time, the cost of wires is slightly higher compared to aluminum ones. But such an expense pays for itself. Due to the quality of copper wires, wiring will have to be changed much less frequently.
The electrical cable in the apartment should be flexible enough. Typically, city wiring has a large number of connections and bends. If we are talking about cables used outside a residential apartment, then such flexibility will no longer be required from them.
Option 2 – Pull-out sockets
Retractable hidden sockets provide a chance to reliably hide access to electricity from children and pets and thus not spoil the ideal interior. Also, devices built into the countertop or furniture body significantly save space and make it possible to connect a large number of devices.
You can install models of this type yourself:
- Read the instructions included with the built-in kit;
- Mark the dimensions of the hole where the hidden structure will be installed;
- Carefully cut a hole;
- Secure the sockets with special fasteners, which are necessarily included in the kit;
- Pull out the cord and plug into the nearest power source.
- Check functionality.
Smart set-top box MTS: make your TV smart without special expenses
There is a wide choice of smart TVs, but many are thinking about an inexpensive alternative - purchasing a Smart set-top box with access to a modern online cinema service and other features. Some people don’t want to change their usual TV model, while others are interested in expanding the capabilities of the device. Thousands of applications, an archive and recording of TV shows, a huge library of films, TV series, cartoons, games and voice input - all this will be available thanks to the small and easy-to-use MTS Smart set-top box. Let's tell you more about it.
Why do you need an MTS smart set-top box?
A smart set-top box opens the way to digital content: you can watch not only broadcast TV shows, but almost any films, TV series and cartoons thanks to the KION online cinema.
You definitely need such a console if...
...you don't have a smart TV, but you need SMART TV features
The reasons why you don't want to buy a new TV can vary. For example, purely financial: modern TVs are expensive. Or, for example, you rent an apartment in which the owner has household appliances, which, for obvious reasons, you would not want to replace at your own expense. The set-top box costs only 3,990 rubles and this price already includes 3 months of subscription.
...you have a smart TV, but it's outdated
Modern Smart TVs have access to online cinemas - you can watch movies and TV series on them without additional devices. However, your smart TV may be outdated: the apps and interface are sluggish, there's a noticeable delay in everything you do, and it's annoying. There is no point in buying a new TV because of slow applications, but connecting a small box with 2021 hardware to it is a more rational solution.
Rules for selecting power supply devices
First of all, you need to figure out what and where the furniture will be located, as well as electrical household appliances in the room; for clarity, it is optimal to draw a plan diagram in the correct proportions, on which to indicate all the pieces of furniture and electrical equipment that need to be connected to the electrical network.
Then indicate all the sockets (electrical, television, telephone and computer), it is advisable to make a small reserve. It is preferable to install sockets for devices that do not change their location (TV, system unit, etc.) so that they have constant access, but at the same time, it is better if they are hidden behind this equipment.
Sockets for non-permanent use, installed in open areas of wall structures, should be optimally placed at the same height - thirty centimeters from the floor surface; their number must be selected taking into account that a household vacuum cleaner can reach any room.
Sockets located above a computer desk, chest of drawers, bedside table, etc. are optimally installed at a height of 10-18 cm from the furniture surface. In order to correctly select the installation height of the switch, you first need to determine in which direction the door leaf will open in this room and install the switch on the edge of the door frame where the handle is located. At a height from the floor of approximately 75-95 cm, depending on your height, that is, this distance is determined in practice.
The position of the switches is strongly tied to the type of room, for example, in a narrow corridor or on a flight of stairs, they are usually installed at the start and finish, in the bedroom or living room; it is optimal to install switches near the entrance to the room, as well as at the bedroom places to control lighting while lying down.
Select the height of the switches according to the same rules, taking into account from what position they will be used more often, in other words, if it is at the exit from the room, then we take a height of 75-95 cm, taking into account your height, and if near the bed, then a switch is needed Place it at such a height that it can be easily reached with an outstretched arm.
In those areas where you do not yet know how furniture or electrical devices will be arranged, we recommend installing sockets at a height of thirty centimeters, and switches ninety centimeters from the floor surface; most often this is the most optimal height for switches and sockets.
By putting into practice these simple recommendations, common sense and not forgetting about basic safety, you can find the best location and height of sockets and switches in your apartment. Don’t forget a simple rule: it’s better to calculate and determine everything well in advance than to redo everything all over again later.
Recommendations for different rooms
Kitchen
There are a lot of household appliances in the kitchen, so there should be enough sockets so that you don’t have to turn on appliances, especially powerful ones, through an extension cord. Traditionally, they are placed at three levels: 10-15 cm, 110-120 cm and 200-250 cm from the floor.
For appliances that are located on a table or other work surfaces, that is, for a microwave, toaster, multi-cooker and similar small-sized appliances, sockets are placed at a height of 20 cm from the work surface or 110-120 cm from the floor level. This level is determined by the dimensions of the kitchen units, the countertops of which are usually 0.9 m high.
It is advisable to install electrical outlets near the sink with protective covers. They are made at a distance of about 80 cm from the sink.
For washing machines, dishwashers and refrigerators - 10-20 cm from the floor.
Sockets for kitchen hoods and lamps built into furniture are located 2-2.5 m from the floor, and should be at least 20 cm from the center of the hood. Electrical sockets located at this level are not visible from the floor; they are hidden behind cabinets, and to get to them, just stand on a chair. This is convenient because they are not used very often.
In the kitchen, it is necessary to place electrical outlets for appliances in such a way that there is no overload. If a washing machine and dishwasher are installed, they can be connected to the same RCD, but it is not advisable to turn them on at the same time. The refrigerator needs a separate line with grounding; you should not connect it through an extension cord.
An approximate layout of sockets in the kitchen is shown in the figure. If space allows, provide additional ones in the corners, above the dining table, and if there is a TV in the kitchen, then where it will stand.
Bathroom
The humidity in the bathroom is always high, so electrical equipment with enhanced protection against moisture is used here - no less than IP44, electrical sockets must have a splash-proof cover. Switches are usually installed outside the bathroom rather than inside.
According to the Electrical Equipment Installation Rules, sockets must be located at least 60 cm from the shower stall door, and the same distance is maintained from the sink.
Choose any convenient height from the floor, but in the bathroom you cannot place electrical sockets at a height of less than 15 cm from the floor, so that water does not get into them during a possible leak.
Recommended height for different devices:
1 m - for a washing machine, 1.8 m - for an electric water heater, 1.1 m - an additional socket for a razor, hair dryer, electric toothbrush, it is important here that you feel comfortable using these devices.
Bedroom
In the bedroom, it is convenient to place general lighting switches on both sides of the double bed at a height of 0.7 m, so that you can use it without getting up. There are also sockets nearby, into which you can turn on lamps or night lights standing on the bedside tables, or charge your phone.
Another one at a height of 0.15-0.2 m above the dressing table is also useful for connecting a hair dryer and curling iron. If the bedroom also serves other functions, you will need more sockets.
Other rooms
If there is a work, desk or computer desk in the room, then there should be enough sockets to accommodate all the necessary equipment and a table lamp. They are installed at a height of 0.15-0.2 m above the tabletop and 30 cm above the floor. For a computer, TV, printer and similar stationary equipment, it is better to place sockets behind it. This needs to be taken into account when you develop a layout plan for this electrical equipment.
In a long corridor, it is advisable to place switches at both ends. When installing a switch near a door, consider which way it opens.
Adjusting the hole to the size of the socket box
Before installing a socket in a concrete wall, check the dimensions of the hole prepared for the device to see if it fits. The diameter of the hole was initially made larger than the diameter of the socket box, which eliminates problems with width. All efforts are most often aimed at adjusting the required depth.
For this:
- The depth of the hole is adjusted to such a size that the socket box is recessed into the niche by 5 millimeters;
- This depth reserve is needed to lay material in the hole, to fix the part - alabaster or cement mortar. In addition, some space will be occupied by the bend of the wire that fits into the outlet;
Installation of a socket box.
How to determine a place to install a TV on the wall in the living room
The choice of height for placing the TV on the wall also depends on the purpose of the room. The device can be installed in any room. If it is the only one, it will most likely be placed in the living room. This is mainly the largest room in the apartment, where the whole family gathers to spend time together. Guests are received here and ceremonial feasts are organized. Deciding where and at what height to hang a TV in the living room should be based on ensuring maximum comfort for all family members when watching their favorite programs from different points in the room.
The installation location is determined based on the location of the furniture. The TV is most often installed on the wall, opposite which there is a soft corner, sofa or armchair. If there are several windows in the room, the TV is placed on a blank surface. If you hang it between window openings, it will cause inconvenience, as glare of light will be reflected in it.
Most often, I place the TV in the living room opposite the armchairs or sofa.
Do not place the TV near a fireplace or other heating devices. It should not be exposed to direct sunlight. It can become very hot, which will negatively affect its operation and reduce its service life. The distance from the fireplace to the TV should be at least 1.5 m. You can conduct an experiment and measure the temperature first near a cold fireplace, and then during its operation. At a distance where it has practically not changed, you can install equipment.
At what height to hang a TV in the living room: useful recommendations
To determine at what height from the floor to hang the TV in the living room, you should sit comfortably and look directly at the wall. The head should not be thrown back so as not to create stress on the cervical spine. The direction of the eyes will point to a point that should become the middle of the screen.
The optimal distance to the TV from the floor for the living room is 1.4-1.6 m. The height of the upholstered furniture and the average height of family members are also taken into account. With a standard sofa height, the optimal screen level for children and adults will be different, so the average height of the TV is determined.
The TV in the living room is hung at a height corresponding to the eye level of a sitting person.
If you plan to watch TV from the sofa, you can position it slightly below the recommended level. If the hall is combined with a dining room, and watching programs is often done while sitting at a table, the unit can be hung a little higher.
Many people install the TV in special furniture niches. However, this decision is not always correct
Here, the size of the screen and the height of the sofa from the floor are also taken into account. Imbalance may occur, causing discomfort while viewing
To mount the TV in the living room, it is better to give preference to a universal bracket, thanks to which you can adjust the position of the screen both vertically and horizontally.
The average optimal height for a TV in the living room ranges from 140 to 160 cm
Installation of socket boxes in drywall
To work with drywall, you will need a special type of mounting box with a special claw, which will allow you to press it to the sheet like a vice or clamp. To carry out installation, you need to drill a hole. This can be done with a special core drill for drywall. You can cut a circle with a mounting knife. Since the wires are hidden behind the drywall, no gating is required. The embedded cable should be pulled out into the resulting hole and inserted into the broken window of the socket box. You need to insert the mounting box into the wall and tighten the screws, retracting the clamping tab.
Fastening the socket box in plasterboard
Eurostandard for modern kitchen
Every modern kitchen is literally filled with various household appliances and equipment. Therefore, installing sockets and switches according to European standards in this room is of great importance. The height and location of electrical installation products are not limited by anything, except for the basic requirements of the PUE. In all other matters, you should be guided by the ease of connection and further operation of the installed equipment.
The installation height is significantly influenced by the size and configuration of the kitchen furniture. In this regard, based on practical experience, several levels were formed to determine the installation height of sockets and switches in kitchens:
- At the first level (10-15 cm), sockets are installed for basic equipment - an electric stove, refrigerator, dishwasher and other powerful units. This height provides free access to sockets, and after installing the furniture, this can only be done from below.
- The second level (110-130 cm) is intended for installing sockets that will plug in electrical appliances most often used in the kitchen - blenders, kettles, multicookers, etc. For them, this is the most acceptable and standard placement. The main place for their use is the working surface of kitchen furniture.
- The third level is the highest (2-2.5 m). This is where lighting and exhaust ventilation are installed and connected. In this case, the possibility of free access to sockets is also taken into account. It is quite possible to get them from an ordinary chair, and from the floor they become invisible, thanks to wall cabinets.
This technique ensures the most rational distribution of all connection points along the kitchen walls. At the same time, the laying of cables is marked in accordance with the power of a particular equipment. In such cases, it is important not only the installation height of sockets and switches, but also the possibility of creating a certain power reserve in case of installing additional or more powerful equipment.
Water and gas pipes add certain complications, so it is recommended to draw up a plan in advance indicating not only the wiring, but also the location of all points in relation to windows, doors, furniture and communications.
Installation procedure for a simple TV socket
Before installing the socket, it is necessary to install a cable (for a simple single socket, the only cable leading from the switchgear). It is masked either in a closed way - under plaster (plasterboard, decorative panel), or openly - on the surface of the wall, in a cable channel. The second option requires external (overhead) sockets.
For a sample, let's take a high-quality product from a French manufacturer.
Before installation, use a drill with a round attachment to cut a hole and insert a plastic box (socket box). A cable about 15 cm long should come out of the hole.
Next, we disassemble the body of the product into parts.
We insert the cable in the direction of the arrow and fix it with a special clamp, tightening the screw.
Checking with a tester will eliminate the occurrence of a short circuit due to accidental contact of the braid with the conductor.
The result of assembly and installation is no protruding wires or unprotected connectors.
Installation of the pass-through module will be slightly different.
Why do you need to install overhead sockets on the baseboard?
Nowadays, the fashion of hiding wiring in baseboards is becoming increasingly widespread. This installation option has a number of advantages:
- There is no need to disturb the finish in order to expand the electrical wiring network;
- Safety increases due to the fact that the wires do not “hang”;
- Sockets become almost invisible due to their location, which gives the room more aesthetics;
- There is significantly less work on gating, which saves effort and money;
- The socket can be placed in almost any part of the house or apartment.
Placing an outlet on the baseboard will decorate the interior of the room. Installing a surface-mounted socket with your own hands is a fairly simple process, which means you don’t need to seek help from specialists.
It is recommended to buy baseboards and sockets with socket boxes from the same manufacturer. This ensures that the dimensions of the outlet match the rest of the materials.
Types of TV sockets
A modern antenna socket has filters to suppress noise. This reduces the amount of interference and improves the quality of reception.
- To receive satellite broadcasts, you need a model marked SAT.
- FM marking for radio reception.
- For analogue, cable and digital signals, the marking is TV.
There are single and integrated into blocks, terminal and pass-through devices. Depending on the installation method, they are manufactured in two versions - surface and hidden. The latter provide appropriate mounting boxes.
Types of television sockets
Single TV
A single model with one connector is a common electrical installation device for connecting a TV to an antenna. It is not equipped with matching devices, which is why it is susceptible to the effect of signal reflection back into the cable, which affects the image quality.
Checkpoint
The pass-through socket is actually a splitter. The signal entering it goes not only to the socket, but is also redirected further, to the next socket or to the end one in the chain.
Passage scheme
Installation of antenna sockets according to this scheme connects them in series into a group. The number of sockets depends on their models and brands. For example, for “Schneider” models from the “Unika” category, the maximum number of pass-through sockets is 3. The reason is that in each such socket the signal is attenuated in a certain way.
The final rosette in this plan is the final one. The presented image reflects the combined plan. Here the sockets are connected using the single and pass-through method. Where the splitter comes out, on the left side there is a standard single antenna socket (TV1- in the diagram). On the right side there are three pass-through sockets (TV2-TV4). Also at the end of the circuit there is another socket - terminal (TV5).
If the signal from the provider is very strong, you can arrange a circuit of 10 sockets (maximum).
This connection method allows you to seriously save on the purchase of an antenna cable. There are also some weaknesses here:
- The initial feed-through socket may have broken contact or may be of poor quality. As a result, subsequent sockets remain without a signal.
- High price tags.