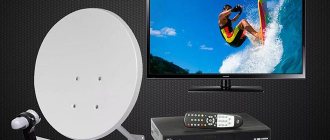
Digital broadcasting continues to develop rapidly. In the segment of digital equipment that provides television, today there are more and more interesting and functional models that allow you to obtain higher quality images and also have other useful features. These include receivers 4100c, 9500, 9600, globo hd x403p, etc. Channels are gradually moving to new broadcasting standards, and users who are used to watching certain programs do not want to give them up. And with the latest generation of receivers, they still remain quite affordable.
Connecting the GLOBO XC 80 set-top box to a television receiver
If the receiver is equipped with the connector shown in Fig. A, and the signal cable is equipped with a permanent connector for connection to the connector shown in Fig.
B, it is recommended to use an adapter (Fig. C) (sold separately). Attach it to the RF input of the receiver, and the signal cable, in turn, connect to the input of the adapter. If the signal cable is equipped with detachable connectors (F-connector/TV-connector), it is enough to remove the television connector (as in the figure). Attention: in order to avoid damage to the set-top box, we strongly recommend connecting the set-top box to the TV with the set-top box disconnected from the power supply.
7. Turn on the TV. Connect the input of the TV receiver to which the set-top box is connected (see the operating instructions for the TV receiver). After some time, the received channel to which the set-top box is tuned will appear on the screen. If the channels are not displayed, the wrong external image source may be selected.
Check the connection with the instructions for your TV. If the message “channel encrypted” or “service unavailable” appears, check whether the conditional access card is installed correctly in the receiver (chip down), wait 5-15 minutes, the image will appear on the screen.
When connecting to a digital set-top box, it is transferred to the subscriber already configured for channels
, which are currently broadcast on cable TV networks. If you change broadcast parameters, reset the receiver settings, or add new channels, the digital set-top box must be configured again.
Digital channel broadcast parameters
| № | Frequency | Flow rate | Modulation (QAM) |
| 1 | 738 000 | 6875 | 256 |
| 2 | 746 000 | 6875 | 256 |
| 3 | 754 000 | 6875 | 256 |
| 4 | 762 000 | 6875 | 256 |
| 5 | 770 000 | 6875 | 256 |
| 6 | 778 000 | 6875 | 256 |
| 7 | 786 000 | 6875 | 256 |
| 8 | 794 000 | 6875 | 256 |
| 9 | 802 000 | 6875 | 256 |
| 10 | 810 000 | 6875 | 256 |
| 11 | 818 000 | 6875 | 256 |
| 12 | 826 000 | 6875 | 256 |
—>
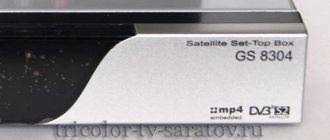
Brief instructions for setting up the GLOBO XC80 digital set-top box
- Press the “Menu”
on the remote control of the set-top box. - Select “Install”
and click “OK” - Select “Quick Search”
and click “OK” - Set search parameters:
- Frequency
Transmission speed
- Scan mode
- Network search
- LCN sorting
- To start searching
- Select “Start Search”
and click “OK” - When the search is complete, click “OK”
474.00 MHz
(value is entered using numeric buttons)
6875 KS/s
(value is entered using numeric buttons)
256 QAM
(value is selected using the “” button)
YES NO
After the scanning is completed, click “OK” and then click “Exit”
to exit the Menu.
Note: If the set-top box has already been configured before, then it is advisable to delete all channels (reset to factory settings) before setting it up.
If you have any questions related to, please contact the technical support service by phone (24 hours a day)
Setting up home sharing on Globo Opticum HD X4 (Globo Opticum X406) receivers
Globo Opticum HD X4 receivers are inexpensive and highly capable receivers for receiving satellite television in regular and HD formats.
The model has a built-in CI slot and a card reader, which becomes universal after flashing. There are 2 USB ports and a LAN input for connecting to the Internet or home network.
We will not describe all the capabilities of this model, which can be found in our reviews on the website www.satinternet.ru, but we will describe the process of setting up home sharing using the IP protocol.
As you will understand from the description, the setup process is quite simple, and if you have our instructions, it will not take much time.
We will describe the procedure for setting up home sharing for the case of watching Telekart Vostok satellite television using a Telekart card, Irdeto encoding.
Home sharing will be carried out on two Globo Opticum X406 receivers connected to each other via LAN inputs with a twisted pair cable.
Before setting up, receivers should be flashed. To do this, download the firmware from a file sharing service, unpack it onto a flash drive and insert the flash drive into the USB port of the receiver. Next, go to MENU - EXTENSIONS - USB - go to the software, select the firmware file X406p_V1.09.12499_10-07-2014_TEMP_for_ensure. bin, click OK, then YES, and wait for the software update process to complete.
Cable cutting.
To connect two receivers we need a UTP cable (twisted pair).
The cable used to connect a computer or receiver to a router (which is mostly now sold in computer stores, already crimped and of different lengths) will not work in this case. The cable is crimped as a “Crossover”. This type of cable termination is used to connect two computers to each other.
If possible, it is better to buy an already crimped cable. If this is not possible, then you will have to crimp the cable yourself. You can crimp the cable either using special pliers or a screwdriver. In the second case, special attention should be paid to the quality of the crimp so that all wires are connected to the contacts.
If you purchase receivers from us, you can always order a pre-crimped cable of any length.
Before setting up receivers, you should connect them with a cable, turn on the power, and scan the channels. Next, you need to activate the network connection. To do this, press the F1 and 111 buttons on the remote control. In the window that opens, select item 5 - “Internet”. If an error message appears, then either one of your receivers is not turned on, or the cable is crimped incorrectly.
Server Tuning
The server is the receiver into which the access card is inserted. Keys will be distributed from it to the second receiver.
To configure the server, go to “Extensions”
Next, select “IP Settings”
And here we enter the IP address of the server. For example 192.168.0.101. In order to be able to enter an IP address, the DHCP item should be set to “Off.” Be sure to enter the “Netmask” parameters, otherwise the settings will not be saved. The DNS1, DNS2, Gateway parameters are not important in this case. Be sure to set the port parameters. For example, 1000. Next, click “Confirm” and exit.
Go to the “Home Sharing” menu item. Here we select the “NewCS” protocol, enter (if not already) the DES key. To do this, click OK on this item and enter the numbers: 0102030405060708091011121314. You should select and enter “Name” and “Password”. They can be anything, but they are the same for the server and the client. For example, 001. Next, “Automatic start” to the “Yes” position, and below “Start”
Server setup is complete.
Client setup
The client is the receiver to which the keys for opening encrypted channels are received from the receiver-server.
Go to the menu item “Extensions”
Next “IP Settings”
Here we enter the client's IP address. For example 192.168.0.102. In order to be able to enter an IP address, the DHCP item should be set to “Off.” Be sure to enter the “Netmask” parameters, otherwise the settings will not be saved. The DNS1, DNS2, Gateway parameters are not important in this case. Be sure to set the port parameters. The port must be the same as that of the server. For example, 1000. Next, click “Confirm” and exit.
Next, select the “Server” menu item. Here you should enter the IP address of the server in the first line. In our case it is 192.168.0.101. To do this, press the OK remote control button at this point and use the numeric keys of the remote control to enter the server’s IP address. Don't forget to put points. We also enter the port value (in our case 1000), “DES key”, “Name” and “Password”. We select the protocol, the same as that of the server - NewsCS/Mgcamd. Click “Confirm”. If everything is correct, we see the message “Connected...”
If you press the “INFO” button on the remote control, you can get a ping connection.
Client setup is complete. After making the necessary settings, if everything is done correctly, you can start watching satellite television channels independently on 2 TVs using two receivers and one access card.
Video instructions
Globo X406 - setting up home sharing. Server
Globo X406 - setting up home sharing. Client
Review of the DVB T2 receiver Globo GL30. Connection and configuration.
Let's look at the Globo GL30 receiver, connect it to the TV and try to configure it.
- How to update channels on Telecard: yourself from the remote control
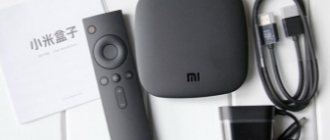
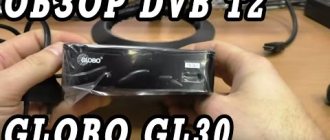
So, we have a box with a receiver in front of us.
On the front side of the box we see the main panel of the receiver, as well as a mention that an RCA cable is included in the kit.
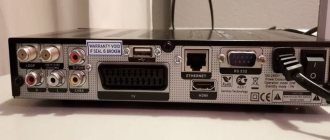
On the back of the box is a photo of the receiver panel with connectors with brief information on connecting the connectors.
Let's open the box with the receiver and take a look at the contents.
The first thing we see is the remote control, which has a fairly universal design. This remote control can be found in many receivers of other models.
AAA batteries are also included.
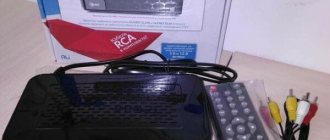
Next we see the RCA cable, which is mentioned on the front side of the box.
And here in front of us is the receiver itself.
In most receivers, the power supply comes separately, however, in this case, the power supply is built into the receiver.
- Self-configuration of a digital set-top box for 20 channels.
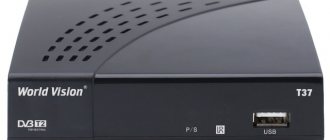
The receiver itself is quite compact; there is a USB connector on the front panel.
There are no connectors on the sides - there are only holes for natural ventilation.
On the rear panel of the receiver there are connectors for connecting a television antenna, HDMI and RCA cables.
So, let's connect the HDMI monitor to the receiver with a cable.
Then we connect the antenna cable.
And only after that we plug the receiver into the outlet.
A green indicator on the receiver lights up, indicating that the set-top box is turned on.
We look at the screen. We have a non-standard menu.
Let's start setting up the console.
- Connecting to a TV and setting up a digital DVB-T2 set-top box
1 step. Select the setting language – Russian.
Step 2. Select the screen size. It is most convenient to set automatic selection.
Step 3. Selecting the antenna voltage
Step 4 Let's start scanning channels
The scanning process takes several minutes.
If no channels were found during automatic scanning or scanning was interrupted, you can use the manual scanning function or repeat automatic scanning.
The scan has passed, we check the operation of the channels.
Let's take a closer look at the settings.
Currently available are the editor and channel search, as well as system settings.
After connecting the external media, the External media and Media player tabs will become available.
When you select the media player menu, you can navigate through categories: recordings, movies, images, music.
In the channel editor menu you can find a list of TV and radio channels, favorites, and there is also the option to delete all channels for rescanning.
In the system settings you can find all the necessary functions that any receiver has, for example, image settings, sound settings, clock settings, language settings, parental controls and others.
In order to reset the settings to factory settings, you can select the appropriate function in the system settings.
This is required so that the next time you turn it on, the setup occurs again, and also to check whether the default password is set on the receiver, usually 000000.
After a factory reset, you need to go through all the setup steps again.
source
Firmware update from satellite
To do this, go to the receiver settings. Select "Settings"
Next, you need to select “Information” in the left menu (at the very bottom).
Select "OTA update from satellite" and click OK. If there is new firmware, it will start downloading
Globo GL30 Review
Globo GL30 TV set-top box is a compact receiver for watching free digital television of the DVB-T2 standard. Equipped with HDMI and audio outputs. Supports Full HD and many other formats. It is possible to update the software via a USB drive. The dimensions of the receiver are 12*10*3 cm, weight is 200 g. The body is metal.
The Globo GL30 set-top box includes:
- Remote control.
- Connection cable "tulips".
- Two batteries.
- Connection instructions.
The Globo GL30 console is considered the best of all the presented models. The number of memory channels is 999. The receiver is equipped with a program guide function and TimeShift, parental controls, the ability to create your own channel list, subtitles, teletext, and the ability to record programs on external media.
Disadvantages include the lack of video capture and FM tuner. The metal casing heats up quickly.
The price ranges from 850 to 1500 rubles.
Globo GL60 review
The Globo GL60 set-top box is designed for watching digital and analogue television. Just like the previous model, there is an electronic program guide, subtitles, parental controls, and TimeShift. There is a built-in power supply. The receiver is equipped with a USB port, so you can play files from external media and record video.
- Instructions in Russian.
- Connection cable.
- Control panel and settings.
- Batteries.
The advantages include:
- Supports almost all video modes (720p, 1080i, 1080p).
- Availability of delayed viewing function, recording timer, possibility of current and further viewing of programs.
- Compact size (180x30x100 mm).
Receiver digital globo hd x403p
Among standard equipment without Linux today, this is the smallest satellite digital receiver.
Has a DVB-S2 tuner, supports channels in high quality HD. There is also an Ethernet port that allows you to connect to FTP servers and record via a USB port. Another important point is the presence of a card reader and CI slot. The design of the globo hd x403p took a lot from the 9500 and 9600 models, which were very popular among users.
The functional content is also up to par. There is one card reader that supports official cards in Viaccess and Irdeto encodings. And if problems arise with it, for full compatibility you can connect a CAM module thanks to the presence of a CI slot. What else is attractive about this equipment?
- The modern dvb S2 tuner installed in this Globo model (as well as the 4100c) makes it possible to receive channels from dvb S and dvb transponders. The powerful processor decodes channels equally well for both standard definition and HD quality. At the same time, it also supports blind channel scanning. There is no need to rewrite dvb transponders from satellites, since the receiver finds dvb on its own in automatic mode.
- Globo hd x403p can also work as a digital video recorder if you connect a hard drive via a USB interface. At the same time, it will be able not only to record channels in standard and high definition, but during this process it allows you to watch TV from the same transponder
- There is support for pausing, after which you can resume watching the program from the moment you stopped.
- The model is very easy to integrate into a local network, and depending on the settings, use either a static address or the one that comes from an external router.
- In addition to music and photos, you can also play movies from external media.
- Television is not the only thing you can get using a digital receiver. Setting up via the Internet port makes it possible to update software, expand the functions of encrypted channels, and use sharing services.
Review: Digital terrestrial receiver Globo GL60 mini - A successful successor to the successful Globo GL30
My uncle once asked me to buy a digital set-top box for a grandmother I knew in the village. And not just any, but Globo GL30. Why this particular model? I have purchased it several times before, including for this relative at his request. One each for him and his mother in the district, for him to work in the district too, for his daughter in the city. In total there are 4 consoles! ? The model has proven itself well both in terms of reception quality and ergonomics. And the quality seems to be the same - for someone to break, this never happened.
I accepted the task and began looking at the electronics store website for the model I was looking for. I found it, but bad luck - out of 3 stores in the city it remained in only one, and then only as a display sample. I somehow don’t like the “showcase”, even if I’m not buying it for myself. Dust, shabby, or even completely tattered and understaffed - that's what you can run into. And you want, as they say, “to be first”? What do you think I should do? Should we really take the “showcase”? I thought about it until I came across a new product under the Globo brand on the website. Model GL60 mini. Price 1499 rub.
In appearance it almost exactly repeats the “thirty”. And the remote control is actually a copy. Globo's is generally wonderful - large, grippy, with normal-sized buttons. Moreover, it is available in all stores and in sufficient quantities. I conclude that the GL30 was discontinued and a new product was launched.
Essentially everything is the same as its predecessor, functionality in particular. Only on the “face” they made a decorative element.
Also included is an RCA cord (tulip). Of course, the box contains a remote control, batteries and papers.
Built-in power supply. The connectors are the same.
The box is almost exactly the same.
Ventilation on the bottom, there are also service stickers on the fastening points:
We connect it to the TV, turn it on.
The set-top box also turns on immediately, without standby mode (the green light is on):
Next you are prompted to select a language:
Screen proportions (if in doubt, it is better to leave “Auto”):
Whether or not to enable 5V at the antenna input (for those antennas that support it):
That's it, let's go look for channels.
The search is quite quick - as you would expect, all 20 DVB-T2 channels were found, and radio on these frequencies to boot. In addition, the tuner found over-the-air channels broadcast by Rostelecom in the DVB-T standard (without two). Total 39 TV channels, 7 radio channels.
In general, they are paid and therefore encrypted, but sometimes the encryption is disabled. Apparently, I ended up with encoding turned off. It is, of course, impossible to watch them - the picture “crumbles” terribly, but this happened on all consoles without exception.
Convenient and affordable
The digital receiver x403p is exactly the budget option that allows you to get maximum functions with a minimum investment. There are sharing services, Internet use, and a large selection for watching channels (including dvb S) provided by satellite television. Moreover, they are also miniature in size. Some things are borrowed from previous models - 4100c, 9500, 9600, modified and improved. The 4100c, 9500, 9600 got a high-quality case, a clear interface, software and a convenient control panel.
Firmware can be updated separately for new and old generation TVs. Simple and clear instructions.
The remote control is very well thought out - for example, the buttons used to record are separated into a separate block so as not to press them accidentally. The shape of the remote control itself is slightly curved, so it is comfortable to hold in your hand.
The receiver, as mentioned above, is quite compact, but does not heat up much. High level of signal reception. In general, all receivers in this series, including 4100c, 9500, 9600, are at the proper level. There is an organizer, and the records are organized very conveniently. And for minor family members there is a blocking function. Unwanted viewing exits are simply locked with a password.
Firmware for receivers appears regularly, with updated functions. By the way, you can create firmware for this model in many ways:
- Via satellite (if it has relevant data).
- Over a local network or via the Internet.
- Using the Ali 3602 Erom Upgrade program, the equipment is flashed via COM.
There is also a main way to update the firmware - via USB output. There are a number of reasons for this:
- A simple algorithm of actions.
- Built-in protection against “foreign” receiver.
- With just one click of a button, you can backup firmware, codes, screensaver, etc.
- Factory settings must be reset both before and after flashing.
Depending on what letters are contained in the firmware, you can judge whether it contains an emulator or supports official cards in different encodings.
Review of the DVB T2 receiver Globo GL30. Connection and configuration.
Let's look at the Globo GL30 receiver, connect it to the TV and try to configure it.
So, we have a box with a receiver in front of us.
On the front side of the box we see the main panel of the receiver, as well as a mention that an RCA cable is included in the kit.
On the back of the box is a photo of the receiver panel with connectors with brief information on connecting the connectors.
Let's open the box with the receiver and take a look at the contents.
The first thing we see is the remote control, which has a fairly universal design. This remote control can be found in many receivers of other models.
AAA batteries are also included.
Next we see the RCA cable, which is mentioned on the front side of the box.
And here in front of us is the receiver itself.
In most receivers, the power supply comes separately, however, in this case, the power supply is built into the receiver.
The receiver itself is quite compact; there is a USB connector on the front panel.
There are no connectors on the sides - there are only holes for natural ventilation.
On the rear panel of the receiver there are connectors for connecting a television antenna, HDMI and RCA cables.
So, let's connect the HDMI monitor to the receiver with a cable.
Then we connect the antenna cable.
And only after that we plug the receiver into the outlet.
A green indicator on the receiver lights up, indicating that the set-top box is turned on.
We look at the screen. We have a non-standard menu.
Let's start setting up the console.
1 step. Select the setting language – Russian.
Step 2. Select the screen size. It is most convenient to set automatic selection.
Step 3. Selecting the antenna voltage
Step 4 Let's start scanning channels
The scanning process takes several minutes.
If no channels were found during automatic scanning or scanning was interrupted, you can use the manual scanning function or repeat automatic scanning.
The scan has passed, we check the operation of the channels.
Let's take a closer look at the settings.
Currently available are the editor and channel search, as well as system settings.
After connecting the external media, the External media and Media player tabs will become available.
When you select the media player menu, you can navigate through categories: recordings, movies, images, music.
In the channel editor menu you can find a list of TV and radio channels, favorites, and there is also the option to delete all channels for rescanning.
In the system settings you can find all the necessary functions that any receiver has, for example, image settings, sound settings, clock settings, language settings, parental controls and others.
In order to reset the settings to factory settings, you can select the appropriate function in the system settings.
This is required so that the next time you turn it on, the setup occurs again, and also to check whether the default password is set on the receiver, usually 000000.
No password has been set.
After a factory reset, you need to go through all the setup steps again.
Watch the video below
Source
Globo X90 does not turn on
[adace-ad id=”5226″]
There are many reasons why the receiver cannot start. The device clearly does not shine with build quality and software - the Globo X90 is considered a budget set-top box.
Turns on only after disconnecting from the network
One of the most common problems. The fact is that the receiver does not turn on from the remote control when it has been left in stand by mode for a long time. Those. When you turn on the TV you will see an error
Only the firmware will help here. Try updating with new firmware from satellite. If it doesn’t help, you’ll have to look for the cable and flash it manually. Read below how to do this.
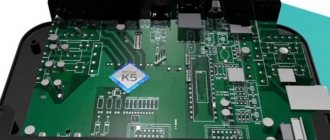
Board overheating
Since the receiver is assembled in the Middle Kingdom, there is no need to talk about the quality of assembly and soldering. Controller failure due to overheating. The standard situation, given the size of the board and the case itself, is that it heats up very well. Prevention here is simple - do not put the receiver in drawers and cabinets, and also be sure to keep the ventilation holes open (they are on top)
Switches off every half hour
If the tuner turns off after a certain period of time, check whether the set-top box settings allow auto-shutdown by timer (yes, like on TVs, only on the receiver)
Fuse burns out
Another subtle, literally, point in the Globo X80/90 receivers is the fuse, which likes to blow out from power surges in the electrical networks of our apartments. It can also burn out if the antenna cable is shorted - do not allow water to get on the coaxial interface (S/PDIF)
Capacitors are drying up
Electrolytic capacitors also suffer from voltage surges. One or several at once. capacitors, diode bridges and resistors
A common problem with receivers is poor-quality electrolytes in the power supply. When the capacitor capacity is lost, the voltage at the output of the power supply drops (can be checked with a multimeter). The normal value is 3.3-3.4 volts. Solved by replacing the capacitor on the power supply (33uF 400V)
The capacitor in the power circuit often dries out and swells. If this happens, the receiver will no longer turn on (the indicators will not light either). There is only one treatment - to re-solder the capacitor, preferably to a higher quality one with a high degree + with a voltage reserve
Since our Chinese comrades generously smeared the motherboard with glue to more securely fix the capacitors, there comes a time when it becomes conductive and flows under the radio components. This causes big problems (cyclic reboot, inability to read the card, etc.)
4 lines are lit on the display - no picture or sound
Four horizontal lines on the receiver's display indicate the absence of a channel list, and not the absence of a signal, as one might think (the absence of a signal is indicated by a red LED). To solve this problem, you need to re-upload the firmware to the receiver (see section “Firmware via cable”)
Doesn't turn on, boot doesn't light up when turned on
When you turn on the receiver, the word boot appears on the display - this means that the set-top box is loading and will turn on soon. But this doesn't always happen. Often the problem is the power supply (you can check by connecting an external power supply to the 3.3 V line) - the culprit is the 22.0x50v capacitor (dries out). SMD electrolytes also often dry out - for prevention it is worth checking them too.
A failed flash memory firmware of the receiver is also the reason why boot is not lit on the display when turned on. This can be solved by flashing firmware via the receiver's JTAG interface.
If the tuner does not have a JTAG connector, then you can flash the flash memory using a programmer (“flasher”). Step by step:
1. Download firmware for SPI Flash
2. Flash the flash memory using a programmer. To consider this chip as a programmer you need to know the code or master code.
They write online that flash memory needs to be desoldered for firmware. This is true, but firmware through the programmer is possible without dismantling the microcircuit. Video of how to flash with a programmer:
3. After flashing the SPI Flash firmware, we update the firmware of the receiver itself using a regular cable. Download the bootloader, firmware dump and update the software (more details in the “Firmware via cable” section)
If, after all, there is no programmer, then you will still have to unsolder the microcircuit, solder the receiver where there is a JTAG interface, flash it and solder it back into your receiver.
How to flash via the JTAG interface, read this material
Doesn't turn on, but now boot is lit on the screen
The opposite situation is when the receiver, by all indications, should turn on, but boot, on the contrary, does not light up. This can happen after the set-top box freezes and then reboots, or after an unsuccessful firmware update from a satellite (the signal may have been interrupted due to bad weather, etc.). All this suggests that the firmware has crashed - it can be re-uploaded, and if the bootloader is damaged, then only firmware via JTAG will help
Thursday, October 1, 2015
Testing the Globo GL 100 set-top box and setting up digital terrestrial TV
- high-quality metal case with wide slots for cooling and securely fixed outlets for plugs;
- dual-band VHF/UHF receiver;
- presence of a remote control with wide buttons;
- support for all image formats from 576i to Full HD (1980*1080, 50 Hz);
- the presence of a composite cable (“tulips”) and an HDMI cable included;
- adequate console menu;
- presence of LED screen;
- preferably a certified receiver in the Russian Federation;
- the presence of a USB port with support for different media standards in words, not on paper.
In the end, my choice fell on the Globo GL 100. The production is carried out by a Russian company registered in Kaliningrad, but like everything else, it orders set-top boxes in China. Next time I update the post, I will definitely indicate the name of the factory. I purchased the set-top box from M.video without a discount because I was in a hurry. When purchasing on the website and paying with a bank card, you can get a 5% discount, but if you delay the purchase until the afternoon, you will most likely be able to pick up the goods the next day, although there are more than enough boxes with attachments on the counter - that’s just how the ordering system works. Their bonus system only works when you present a card, but I lost mine somewhere and am just accumulating points?
The set-top box is positioned as the only one that has passed RTRS certification. Naturally, this is just a marketing ploy, because not a word is said about it on the manufacturer’s website or on the RTRS website. There seems to be support for Dolby Digital Plus, but video with the AC3 codec on flash drives has not yet been tested - a typical situation for all Chinese assemblies.
Review of the Telekarta Globo x90 receiver
Globo X90 is a digital receiver, which is a fusion of a satellite simplex (one-way - reception only) modem and a specialized computer. The operating system of such “set-top boxes” is stored in integrated circuits of non-volatile memory with electrical reprogramming (flash memory). Specifically, Globo X90 is a satellite receiver of the DVB-S standard with the MPEG2 codec. The Globo X90 is no longer in the official list of Telecard equipment. The advantage is that it has two video outputs - SCART and RCA. Many people still have the previous series - Globo X80. Structurally, they are almost identical, so many tips and problems will be valid for both models.
View instruction manual
Characteristics of the globo x90 receiver:
[adace-ad id=”5228″]
- Used for satellite television "Telecard"
- Resolution: SD (PAL 576, NTSC 480)
- Card reader - CAM module
- Has a Russian-language interface
- EPG (Electronic Program Guide) present
- Polarization: Linear, Circular, Unicable
- Data exchange via Diseqc protocol: 1.0, 1.1, 1.2 and USALS
- Video interfaces: SCART and RCA (“tulips”)
- Audio interfaces: SCART (mono, stereo), RCA (left/right)
- Additional outputs: 12V, RS232, coaxial SPDIF
- Dimensions 180x40x100 mm (Metal body)
Satellites for Telecard. Coverage area
The Telecard coverage area can be viewed on the official website. In total, three satellites are used in the Russian Federation: Intelsat-15 (85°E), Horizons 2 (84.8°E) and Express AM5 (140°E)
How to catch a satellite?
To correctly align your satellite dish, you need to go to https://www.dishpointer.com/. In the Enter Location line, enter the name of your locality, or click on the sight icon. Then the site will automatically determine your position...
...and insert the coordinates of where you are:
On the right, select the desired satellite. In our case it is Intelsat-15. After clicking the Search button, a map will open with a straight line along which you need to set the satellite dish. The service determined our location. Now you see which way to point:
The plate needs to be mounted as high as possible, because... There should be no obstacles for it - trees, pillars, other houses.
Here is a view towards the satellite. No interference.
Is it possible to use Globo X90 under Tricolor?
Unfortunately, there is no firmware for Tricolor for this receiver. Even if you insert a Tricolor card into the CAM module and configure the satellite, nothing will work. You should not try to flash your Globo X90 with custom firmware, which is recommended on various forums - you will ruin the receiver. Logging into the emulator will not help here.
What is the master code for the set-top box?
To access system settings, the receiver will ask you for a code. By default it is 0000. But if your receiver has been reflashed, then try the following combinations - 9339, 9766, 9976, 9776. To access adult channels, the code can be 4000.