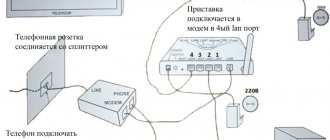
In modern families, there are two extremes: either there is not a single television in the house, or the number of television receivers is equal to the number of rooms in the apartment. Moreover, people of the second type would like to be able to watch different programs on each TV at the same time. Our article is just for such TV users. She will tell you how to connect two receivers to one Tricolor dish and enjoy your favorite programs, regardless of the preferences of the rest of the household.
What you need
To connect, you will need several parts:
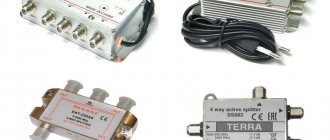
- two-output splitter (splitter). This is a device that allows you to divide the signal from the antenna into two or more streams. It has an input on one side and two or more outputs on the other - for connecting television receivers.
- 5 connectors corresponding to the splitter;
- 2 adapter plugs;
- antenna cable.
Important:
When purchasing a splitter, do not confuse the number of outputs! A three-way (three-output) splitter is used to connect three receivers, but not two! If you still have a three-output one at hand, you can solve the problem by connecting a ballast resistor (resistance 75 Ohms) to the free output. And if there is a plan in the future to install and connect several TVs to this antenna, then it is better to immediately buy a splitter with several outputs and temporarily drown out the empty outputs with the same resistance.
Divider installation
There is an option to use a splitter or splitter. These parts divide the signal from the antenna into 2.
This branching option has screw sockets. One end of the cable is stripped, inserted into the nut, the second with a similar plug is connected to the TV. There is a special hole in the splitter screw socket for the central antenna cable. You need to insert the end of the cable there, tighten the nut, and press the copper sheath tightly against the body of the device.
The procedure for connecting a satellite dish to two TVs is different for each model.
Instructions
Purchase a special cable of appropriate length, as well as a splitter with two outputs. The image quality will depend on the cable.
If one TV is already connected to the antenna, then the end of the cable must be removed from the TV and inserted into the output port on the separator, tightening the nut tightly.
Cut off a small end of the cable from the common skein, put standard plugs (heads) on the ends, and clamp them.
In the same way, connect the plugs to the large (remaining) piece of cable that will be used to connect the channel splitter and the second TV.
Plug all the plugs into the corresponding connectors on the body of the splinter and the TV.
Hide the cable that goes to the second TV under the baseboard or somewhere else so that it does not get underfoot. If possible, it is better to drill into the wall to run the cable to the second TV. This will make it possible to use a shorter cable length.
After connecting the antenna to two TVs, check the image quality on both receivers. If the quality is not very good, then check the fastening of all plugs at the ends of the cable and tighten them tighter.
Work progress
We will try to talk about the connection in such a way that even someone who does not understand radio engineering at all can cope with the task. This is done step by step like this:
- Selecting details
. The first thing you need to do is buy a splitter. They come in a variety of varieties, including those that require soldering and those that do not. If you know how to solder, then it is better to take those that involve soldering. This connection is always more reliable than any other, it produces less signal loss and preserves its quality.
If you do not have soldering skills, then you need to choose an appropriate splitter, as well as one suitable for a specific type of cable. A win-win option would be a splitter with built-in sockets for coaxial cables.
Having chosen a splitter, select the appropriate connectors. F-connectors are now very popular due to the fact that they are reliable and easy to install.
- Choosing a location for the splitter
. It is optimal to position the device so that the antenna cable can easily reach it and, if possible, have the shortest distance to both TVs. - We cut the existing antenna cable
. It is necessary to cut so that the cable can freely reach the splitter. The old plug is cut off along with a piece of cable. - Cutting the cable and installing the F -connector.
For those who know how to solder, there is no point in telling them how to cut a cable and solder it to a splitter - they know it themselves. What follows is written for the average user who is not familiar with the radio business.
So, we cut the cut end of the wire as shown in the figure: we strip the edge and wrap the braid. The middle core insulator should protrude slightly, and the middle core itself should protrude by at least 5 mm. The tool for removing insulation from a coaxial cable at home is an ordinary kitchen knife.
Important:
The cable must be standard; DG 113 or SAT 703B are more often used. Under no circumstances should the cable braid be connected to the central core, otherwise the signal will not pass through at all.
Install the F-connector. It is also called wrap-on because the connector is wound onto a soft wire. The connector for connecting the cable and splitter is ready.
- We cut off two pieces of wire
so that the length is enough for each TV. - We mount F -connectors
in the same way to connect television cables and splitter outputs. We do the same at the other ends of the cables.
As a result, we use all five connectors, including:
- one from the antenna, to enter the splitter;
- two televisions, for exiting from it;
- two televisions free.
- We connect the connectors to the splitter.
- We connect two free connectors with adapters
. An adapter is a device with an F-connector attached at one end and a coaxial plug at the other for connecting to television receivers. Typically this device is generally referred to as a plug. - We turn on the television receivers.
Let's check how both receivers work. If everything is done correctly, the image should be normal. Now you can easily enjoy an excellent picture on two receivers at once, without interfering with each other.
Using the diagram below you can see the path along which you need to connect 2 TVs to one antenna:
Connection instructions
The installation algorithms for additional equipment are similar. First, let's look at how to connect a second TV to a second Tricolor receiver via a satellite splitter.
Important! During the installation process, all equipment must be disconnected from the power supply, including televisions to which set-top boxes are connected.
Installation of a second console through a divider
To install a second receiver using this connection method, the subscriber, in addition to the satellite splitter, will need:
- high frequency television cable;
- two F-connectors;
- sharp knife;
- wire cutters
Work begins by stripping both ends of the cable. The outer sheath is carefully removed with a knife, the foil and braid, which shield the main core, are wrapped on the surface of the cable. For ease of work, a piece of core is released, the length of which is 15-20 mm.
F-connectors are then installed on the stripped ends. You need to act carefully, trying not to jam the bent braid. Under no circumstances should it come into contact with the central core of the wire. The vein itself protruding from the connector is cut with pliers to a length of no more than 2 mm.
Read: what channels are included in the Night package and how much it costs to connect.
The cable coming from the satellite dish is treated in the same way. It is then connected to the connector marked IN on the divider. The wires coming from the receivers are connected to the connectors marked OUT. At this point, the installation work can be considered complete.
Installing a second set-top box via a converter
Connecting 2 Tricolor TV receivers via a converter begins with installing the converter itself on the plate. The old device is removed from its mounts, and a new one with two outputs is installed in its place. Moreover, its location, orientation and angle of inclination must completely coincide with the listed characteristics of the old equipment.
Next, a cable from the old receiver equipped with an F connector is connected to one of the outputs of the installed “adapter”. The second end of the cable is connected to the old receiver, to the LNB IN connector. A new receiver is connected to the second output in the same way. The cable for connecting it is prepared in the same way as when installing a satellite divider. At this point the assembly process can be considered complete.
Important! When connecting more than two set-top boxes, the equipment assembly process will be the same. The main thing is to purchase an adapter with the required number of outputs.
How to install an antenna with an amplifier
But what if after connecting the splitter the image quality deteriorates? This may mean that the antenna on two TVs does not provide the required signal, while the separating device also takes over some of its share. The solution can be an antenna with an amplifier, it is also called a Polish one. Such an antenna for two TV receivers connected to the device will improve the signal quality in both TVs. To do this you need:
- In an existing circuit with a splitter, remove the F connector from its entrance.
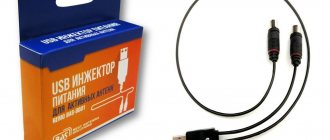
- In its place , put the plug with the power supply
from the antenna and amplifier kit. - Install an adapter with an antenna socket
at the input and insert the plug from the antenna with an amplifier there.
This should improve the signal quality.
Special offer from Tricolor-TV - set for 2 TVs
This operator makes a unique offer to customers - a special set of equipment for two TVs. This is considered the optimal connection option, because it is possible to satisfy the interests of all residents of one apartment without significant financial costs.
The most complete kit, which will allow you to connect everything without unnecessary hassle, includes:
- an antenna (“dish”) equipped with a converter with two outputs;
- receiver GS E501, which combines the functions of two tuners (or another receiver model with similar capabilities);
- attachment GS C-591;
- 2 remote controls and 2 power supplies;
- access card;
- cables for connecting equipment to the antenna;
- “twisted pair” for connecting the set-top box to the receiver;
- HDMI cables for connecting TVs to set-top boxes;
- documents and instructions.
If you have a receiver with two tuners installed, you can purchase a client set-top box. It costs less than a regular receiver, but you will need to pay separately for the viewing service on two TVs. In addition, the operator offers to exchange, with an additional payment, the existing equipment for a new one.
There is no need to install a double converter on the antenna instead of a single head with one output. It will be enough to install an antenna divider near the receiver, where the coaxial cable fits.
Easy connection
A smart card is inserted into the main receiver (CS E501); there is only one in the sales kit. Two coaxial cables coming from the two converter outputs on the antenna are inserted into LNB IN inputs No. 1 and 2 on the same device.
The device plays the role of a server that is capable of decrypting the signal and transmitting it to the GS C-591 client set-top box using a twisted pair cable. After this, all that remains is to connect TVs with set-top boxes using HDMI cables, and you can start searching for channels.
You can configure both devices to adequately display the signal using the appropriate instructions, or use the tips in the video. If everything is done correctly and the operator’s services are paid, then both TVs will show channels independently of each other.
Advantages of this connection option:
- Firstly, there is no need to install a second antenna.
- Secondly, you don’t need to buy a second receiver if you buy a client set-top box, which costs less.
- Thirdly, connecting to one TV costs 1,500 rubles, and to two – 2,000. A system for two TVs costs 1 thousand rubles less.
Splitter with amplifier
There is a second option - look for a splitter with a built-in signal amplifier. This method is good when the TV initially showed well and a new antenna is not required. However, before purchasing a new device, discuss your specific case with a specialist.
Amplifiers, including those on the antenna, have different gains, and too much signal is just as bad as a weak one, and can also cause distortion. The telemaster will measure the signal level and give advice on purchasing an amplifier.
By the way, the problem with signal attenuation can even arise if you connect several TVs to one antenna. The more receivers, the more the signal attenuates. Therefore, when planning to connect several television receivers, weigh all the pros and cons.
Below are video instructions for connecting an antenna to two television receivers:
Instructions
Purchase RF coaxial cable. Given that the TVs will likely be located in different rooms, a cable longer than 10 meters will be required. Also buy a splitter. This is a gold-plated device that has one coaxial port on one end and two (or three) on the other.
Take necessary precautions as installing an antenna and running cables in your home may pose health risks.
Select a location for the antenna and install it. The higher it is placed, the better the reception will be.
Connect the antenna and splitter via RF coaxial cable. To connect, use the single incoming port on one end of the splitter.
Connect your TVs using the outgoing ports on the other (free) end of the splitter.
Secure the cables so that they are not damaged or stepped on. Use electrical tape to secure the cables.
Turn on your TVs to test the connection on each one. If one of your TVs has poor reception, make sure the cable is intact and secure.
Buy a second splitter if there are more TVs than available ports on the first splitter. Connect two splitters together by attaching a cable to one of the ports on the first and the only input port on the second. Splitters can reduce the signal strength. TVs to one antenna
, distribution amplifiers will be required to improve image quality.
It happens that there is a need for a TV
in every room so that everyone has the opportunity to watch their favorite show or movie. There is an easy way to solve the problem of connecting a second TV.
You will need
- Second TV
- TV cable
- Antenna splitter
- Antenna plug
- Yardstick
Instructions
Video on the topic
The presence of several televisions in the house will not surprise anyone now - this has long become the norm. But when purchasing another TV, it’s a good idea to think about how to connect it to your existing antenna
.
Instructions
To install the connectors, you will need minimal skills in working with a television cable, the presence of side cutters and a painting knife. First you need to peel the cable from the top layer of insulation without damaging the shielded braid, then move the braid and clean the central core. After this, you can put on the connector and connect it to the splitter. It is important to prevent the shielded braid and the central core of the television cable from coming into contact with each other.
Video on the topic
Helpful advice
When installing the splitter, strictly follow the order of cable connections indicated by the arrows.
In order for the TV
started receiving channels, it’s not enough to just bring it into the room and turn it on. You must also connect an antenna to it. The number of channels received and the quality of their reception depend on its correct choice.
Instructions
Remember the main rule: if the braid of the antenna cable is grounded (if the antenna is a collective one, this is always the case, and often it is grounded for individual outdoor antennas), simultaneously touch the metal elements of the TV connected to the outlet
and plugs when they are not connected to each other are not allowed!
You should also not simultaneously touch the metal parts of two devices that are plugged in and not connected to each other (for example, a TV
and a DVD player), as well as the cables connected to them, even if the antenna is not grounded.
In addition, do not touch the metal parts of the TV
and any video equipment, as well as the antenna cable and telescopic antenna if your body has acquired an electrostatic charge from the CRT
TV
(for example, when wiping it). Never install an outdoor antenna yourself , if you are not sure that you can provide its reliable lightning protection. Solder the cables of any grounded antennas only with soldering irons with good insulation.
Go to the banks. Their capacity should be from 0.75 liters to one liter. When opening cans, make sure that the keys do not come off or get lost. They will be needed to build the antenna.
A cable splitter cannot be used if the satellite operator uses different polarization for different channels (for example, Tricolor). In this case, connect a converter with two outputs.
How to choose a cable splitter
When choosing a cable splitter, consider the following parameters:
- Bandwidth
Different types of television signals (terrestrial, cable, satellite) have different frequencies, so the splitter must have the appropriate frequency bandwidth. For example, for terrestrial television, support for frequencies of 5 - 1000 mHz is sufficient, but for satellite television, a band of 5 - 2400 mHz is needed. That is, a divider for satellite TV can be used for terrestrial TV, but not vice versa. - Number of outputs
It is easy to understand that you need as many outputs as the number of TVs you plan to connect. There are television splitters with 2, 3, 4, 6 or 8 outputs. In order not to “wastely” weaken the signal, it is recommended to purchase a divider with the number of outputs needed right now. These devices are not that expensive, and when you buy another TV, you can replace the splitter with another one with the required number of outputs. If you still buy a device “for growth,” install a resistor on unused outputs that will absorb excess voltage in the circuit (up to 75 Ohms). - Cable connection method
– screw clamp: suitable for cables of any diameter and does not require soldering – thread: only for thin cables, does not require soldering – coaxial sockets: cable diameter is not important, connection via plugs – splitters requiring soldering: the most reliable connection, but need special skills - Signal attenuation indicator
Information about this can be found on the case or in the instructions for the television splitter. The lower the signal attenuation, the better. - Manufacturer
Recommended manufacturers of cable splitters: Lans, Rexant, Premier, Alda, Hama, Sat
If you want to have more television in your home, we recommend reading this article. In it you will learn how to connect two TVs to one receiver yourself.
What to do before connecting
Before connecting the second Tricolor receiver, it must be registered with the operator. You can do this either independently, through the company’s website, or by contacting the Tricolor support service. You can contact specialists via Skype or by leaving a request for a call back on the official website.
Important! You can register a second set-top box only if the first one has already been registered with Tricolor. In the case when subscribers buy equipment secondhand and install it themselves with pirated firmware, this option is not possible.
Having notified the operator about the purchase of new equipment, it is necessary to decide on the method of connecting it. This will determine which auxiliary devices you will need to purchase for installation.
Set-top box connection options
There are two ways to connect a second receiver to an antenna:
- using a satellite splitter;
- through a converter with two outputs.
The second connection option is more preferable, since with it the subscriber gets the opportunity to watch different channels on different television receivers at the same time. The first type of connection does not provide this opportunity.
Advice on selecting additional equipment
Neither the converter nor the satellite splitter is included in the standard set of Tricolor equipment. You will need to purchase them yourself. In this case, one should take into account this nuance - even if in the future it is planned to install more receivers in the house, you should not take adapters “with a reserve” of sockets.
The presence of empty outputs inevitably leads to signal loss. Whatever type of connection the subscriber chooses, if there are unoccupied outputs on the adapter, the quality of broadcasting on all TVs connected to it will noticeably drop. Therefore, it is wiser to purchase a converter or divider, the number of outputs in which strictly corresponds to the number of set-top boxes in the house. In the future, if it is necessary to expand the home television network, additional equipment is simply replaced with new, more suitable one.
What is important to know when connecting
This connection can be made in several ways, and it will depend on the receiver model. However, remember that watching different channels on two TVs at the same time is not possible and you will only be able to watch one channel on two TVs. This can cause discomfort, especially if there are two TVs in the same room, because you can only change channels directly next to the installed receiver. But this problem can be solved simply: you need to buy a remote control. Well, now let's move on directly to the instructions.
Connection using RF cable
Connecting a second TV to the receiver is quite simple using an RF (high frequency) TV cable via the RF OUT output, which is located on the back cover of the device. You will need a regular TV cable with input and output plugs. One end is inserted into the RF OUT output of the receiver, the other is connected to the TV antenna socket (it can be located on the back panel of the TV). That's all: all that remains is to search for television channels (for which you need to go to the settings menu of your TV).
Connecting the receiver to several TVs
New receiver models are often not equipped with a high-frequency modulator and RF OUT output. To connect several TVs to such a receiver you will need:
- portable RF modulator;
- “tulip” cable (LF RCA cable, usually this cable is supplied with the device);
- coaxial TV cable 75 Ohm of the required length;
- F-connectors and F-plug for input.
The modulator has its own power supply, and it needs another connection point for 230V. The connection steps are as follows: connect the “tulip” cable to the RCA output connector on the back cover of the receiver, and connect the other end to the RCA input of the modulator. If your device does not have an RCA output, then you can use a SCART-RCA cable.
Next, connect the TV cable to the RF OUT output (on the modulator) using the F connector, and screw a special 75 ohm plug to the RF IN input (most often labeled this way) (supplied in most cases with the device). Connect the opposite end to the IN connector of the divider. Using a divider, you can divide the signal into several TV devices in the room, since this equipment has more than one output. All that remains is to connect all the equipment to the power source and auto-search for TV channels (as with the first connection method).
Satellite TV for several TVs
Receivers for connecting two TVs
If one of the devices has not only an input, but also an output socket for an antenna (not to be confused with a modulator socket - it is designed to connect the device to a TV via high frequency), then you can connect a cable to this socket, which is designed to connect satellite antennas to receivers . Connect the second end of the cable to the input jack of the second receiver. You will get a serial connection of the converter and two receivers. If you receive encrypted channels, you will have to purchase a separate card for each receiver and pay a subscription fee. In addition, with such a connection, it will not be possible to watch channels with vertical polarization on one receiver, and with horizontal polarization on the other.
Connection with RCA cable
This method is suitable for owners of satellite equipment that supports multiple video outputs (HDMI and RCA). If an HDMI cable is connected to one TV, then you can use the RCA or SCART outputs to connect the second one. Just remember that to connect to the SCART connector, you will have to use a SCART-RCA adapter. Next, using the remote control, switch the input signal (AV or SOURCE) on the TV you are connecting.
You may notice that this connection is much easier to implement than the previous ones, because here you do not have to spend money on buying a DX modulator. But this connection has its drawback, and this is the limited cable length - only up to 15 meters (since with a longer length the image will disappear and the quality will significantly deteriorate), as well as the availability of a long cable, since it may have to be soldered from several.
Is it possible to connect two or more TVs to one antenna? Yes it is possible! And this need arises quite often, because no one wants to install antennas for the number of TVs in the house.
Hello, dear visitors! In this article I want to share how to solve this issue. I will try to explain everything in detail, with pictures and explanations.
When connecting several TVs to one antenna, you must do everything correctly, otherwise nothing will work. And how to do this correctly depends on what kind of antenna and dividers you use. But everything is in order.
Signal dividers
A splitter or signal divider can be divided into several types. The functional features of the device depend on the parameters required for connection.
Passive
The passive divider has a significant advantage over the second model: you do not have to use an additional power source. The incoming signal to the device is quite strong, and therefore the equipment copes well with the separation of the incoming frequency.
Active divider
The active version is similar in appearance to the previous version, but it has an additional amplifier built into it to compensate for the loss of quality due to the “separation” of the antenna. It is recommended to buy this option if the TV receives a weak incoming signal.
What you need to know and be able to do when connecting several TVs to one antenna
To do this job you will need some skills in connecting cables to different connectors - it is not difficult. If you haven't done this before, take a look at the pictures and description below.
Step one - Carefully cut off the top layer of cable insulation so as not to damage the braid wires, they will come in handy later. We wrap the braid and foil back onto the cable, as in the figure. In principle, the foil can be cut off; it is actually polyethylene. It is important to leave the braid.
Step two - We cut and remove about 1 cm of internal insulation from the wire, we also try not to cut the wire itself.
Step three - We screw the F-connector (Connector) onto the cable, right on top of the braid, making sure that no wires of the braid remain on top, next to the central core, otherwise there will be a short circuit. You need to screw the connector so that the inner layer of insulation is 1-2 mm higher than the lower edge of the connector nut. And the central wire itself ended 2-5 mm above the upper edge of the nut.
Step four - We screw the finished connection onto a splitter or other switching elements.
Well, we’ve learned how to connect, let’s move on.
The first thing you need to understand when deciding to connect several TVs or digital set-top boxes to one antenna is that the signal from the antenna must be reliable. If the signal is insufficient, there will be no success or you will have to combine the wiring with additional amplifiers.
If we talk about digital terrestrial television, the signal level is not difficult to find out.
To do this, you need to connect a TV with DVB T2 or set-top box to an existing antenna and go through the menu to manual tuning mode. Next, enter the number of the television channel that is broadcasting in your region and after a few seconds a signal should appear - it will be reflected in the form of a scale, if the level is more than 70%, then everything is in order. If you don't know the channel numbers for your region
Note: In some TV models, for example SONY, in order to see the signal, after setting the desired TV channel number in the settings menu, you need to go back a step in the TV menu - exit the “window” in which the TV channel number is set. Otherwise you won't get anything.
When you have decided on the signal level, it’s time to start wiring. Let's look at a few simple options.
How to connect 2 TVs to one antenna
The way in which the signal will be divided into several TVs depends on whether the antenna is used with an amplifier or without it. Let's consider both options in turn:
The simplest option is when an antenna without an amplifier is used
In this option, the antenna is simply connected to the TVs through a signal divider. The divider can have two, three or more connection points. In principle, you can use a regular tee, there is no coordination in it, everything is direct, but with a good signal it will work no worse.
A tee that will help separate the signal looks like this.
Tee
In this case, it does not matter which terminal you connect the antenna to, and which TVs. In it, everything is direct!
TV signal dividers with matching
Such dividers, in turn, differ in bandwidth, so for terrestrial television the bandwidth is 5 - 1000 mHz, and for satellite television, more bandwidth is needed, for example 5 - 2400 mHz. Accordingly, the divider for Satellite TV can be used for Terrestrial TV, but not vice versa.
If the signal in your area is good enough to not use an amplifier, don't use it, use a passive antenna! This will save you from various problems in the future. (Burnt amplifier, problems with the power supply, signal over-amplification, etc.)
Consider the option of connecting several TVs to one active antenna (with an amplifier)
An active antenna is an antenna that has an amplifier, and it needs power.
When using an antenna amplifier, it is important that the supply voltage to it does not break. But when using the scheme indicated above, this is exactly what will happen. Because, through a high-quality divider, power will not flow to the amplifier, since it uses transformer or capacitive isolation.
But there are several options. One of them is very similar to what is shown above. But, there is one BUT.
In this circuit, a divider with a power pass is used - Indicated by the inscription Power Pass, power will pass through such a divider to the antenna. One power supply is enough. The use of such a divider is also very convenient with the use of digital set-top boxes, when power is supplied to the amplifier directly from it and there is no need for an additional power supply. One problem is that this type of divider cannot always be found in provincial stores.
Option number three comes to the rescue.
It uses a regular divider, but a different connection scheme. The task is the following: you need to supply power to the antenna, but this must be done in the cable gap between the antenna and the divider. To do this you will need one more element, like this.
As you can see, on one side it has a needle and a thread; we screw this connector into the input of the divider. And the other side of the connector is the antenna socket; we connect the power supply separator there. It should turn out like this.
Thus, the antenna will be provided with power even when using a conventional divider, without passing through the power supply.
This option is also suitable for use with digital set-top boxes. In this case, there is no need to turn on the antenna power in the set-top box menu; it will be provided by a power supply, which is better to use an adjustable one, this will allow you to reduce the gain in cases where the signal is too strong.
The fact is that with active antennas it often happens that digital television either does not show at all, or only part of the channels, or the signal periodically freezes. The problem may be in over-amplification of the signal, but as soon as you reduce the supply voltage to the amplifier, everything returns to normal. This is what an adjustable power supply allows you to do.
In the manual adjustment mode according to the scale level on the tuned channel, we set the voltage on the power supply that will give the maximum level. Please note that changes on the scale after your actions are reflected after a few seconds, not immediately.
That's probably all, please don't consider it a hassle to share this article with your friends by clicking on the social media buttons. Thank you!
