Connections 3. turn on/off the receiver 12
Page 12
- Image
- Text
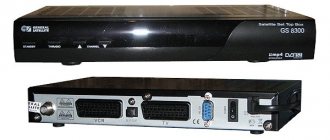
2. Connections
3. Turn on/off the receiver
12
ATTENTION!
Make all necessary connections only when the power to the digital satellite receiver and the devices connected to it is turned off.
2.1 Connecting a satellite dish
Connect the cable from the satellite dish converter to the
LNB IN
of the digital satellite receiver.
The connection is made using a type F connector
. The use of adapters is allowed.
2.2 Connecting to a TV with a SCART cable
Connect one end of the
SCART
(not included) to the TV jack of your digital satellite receiver, and the other end to the
AUX
(AV IN, SCART, etc.) of your TV.
2.3 Connecting to a TV with composite video input
To connect to a TV with a composite video input, connect the three
RCA
connectors (yellow, white and red) of the
3RCA-3RCA
to the color-matched audio (L\R) and video (CVBS) outputs on the rear panel of the receiver.
the three RCA
connectors on the other end of the cable to the color-matched audio and video inputs on your TV.
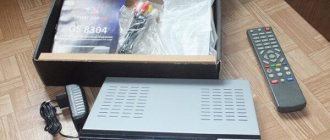
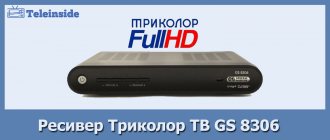
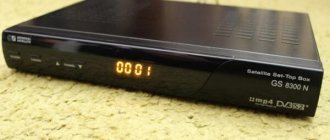
Model characteristics
The manufacturer has tried to improve
GS-8304, while maintaining the familiar characteristics for owners of set-top boxes of previous versions. The updated receiver for Tricolor TV has the following technical characteristics:
- device connectors: the usual antenna input, as well as 1-USB, 1-SCART and 3-RCA;
- built-in menu language: English and Russian;
- channel organization options: favorite lists or all channels;
- type of search for available channels: network;
- signal reception standards: PAL/SECAM;
- interface: 256 colors;
- frequency range: 950 MHz - 2150 MHz;
- additional available services: InfoCAS, TV Mail, TV Chat;
- video decoder: (ISO/IEC 13818), H.264 (IEC 14496-10), MPEG-2.
The functionality has also been expanded with such services as a TV guide, teletext, setting subtitles, and for those who like to fall asleep to the barely audible dialogues of TV series characters - a timer.
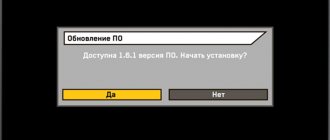
Turning off the receiver...
Page 13
- Image
- Text
2. Connections
3. Turn on/off the receiver
13
Turn on the receiver only after making all necessary connections!
1. Connect the power supply to the receiver. 2. Plug the power supply into a power outlet. 3. Press the STANDBY button
on the remote control or the front panel of the digital satellite receiver.
Turning off the receiver is done in the reverse order.
Installation Wizard 4. Installation Wizard 14
Page 14
- Image
- Text
4. Installation Wizard
4. Installation Wizard
14
, the “Setup Wizard” starts
. It is organized in such a way that in just a few steps you can enter the necessary settings and easily find all the channels you are interested in.
ATTENTION!
The installation wizard also starts after resetting the receiver to “Factory settings” (see p. Factory settings). The “Installation Wizard” can be interrupted at any step by pressing the “EXIT” button
. The initial parameters in the “Installation Wizard” depend on the operator’s requirements
satellite TV.
Step 1
Here you are asked to select the languages to use. Menu language
Move the cursor to this line if you want to change the language in which the menu will be displayed.
Select the required language using
/ buttons
or click "OK" button
to select from a selection of
giving list. Selecting a language in the drop-down list is done using the buttons
/
and confirm
given by pressing the "OK" button
.
Further steps of the Installation Wizard will be displayed in the selected language. Primary language of the audio channel
The language selected in this line will be selected by the receiver automatically as the audio language of the program.
The selection is made in the drop-down list, similar to selecting Menu Language
.
Secondary language of the audio channel
The language selected in this line will be selected by the receiver automatically as the audio language of the program if the language specified in the item “
Primary language of the audio channel”
is not among the audio languages available on this channel.
ATTENTION!
The correctness of the automatic selection of the audio language also depends on the information transmitted over the air by the operator. If the operator does not provide correct information about the name of the audio language, the automatically selected audio channel may differ from the preferences you specified.
Move the cursor to the “Next”
and click
the “OK” button
to proceed to the next step of
the “Installation Wizard”
.
Setting up television receivers with a built-in receiver
Currently, almost all well-known brands that produce TVs, such as LG and Samsung, offer models with a built-in receiver. This is convenient - no need to look for a place for separate equipment and hide wires. But there are also difficulties - you can only configure the tuner manually. The step-by-step diagram depends on the specific model of the television receiver and is specified in the instructions for the equipment.
The standard setup procedure looks like this:
- Menu.
- Manual setting.
- Network search.
- Transponder frequency is 12226.
- Symbol rate - 27500.
- Satellite name.
After this, you can proceed to searching for channels. At the end of the process, the list must be saved.
If none of the methods work, then all that remains is to call a toll-free number or go to the provider’s official website. It is possible that the only way out of the situation will be to invite a specialist who knows exactly how to set up broadcasting and can understand what causes the channels to go astray.
Installation Wizard 4. Installation Wizard 15
Page 15
- Image
- Text
4. Installation Wizard
4. Installation Wizard
15
Step 2
At this step of the “Setup Wizard” you need to specify the settings for audio and video output and TV standard. Move the cursor with the buttons
/
to the line required
different settings. Select the required setting using the buttons
/
or click "OK" button
to choose from you
drop list. Select from the drop-down list using the buttons
/
and confirm on-
by pressing the "OK" button
.
To return to the previous step of the Installation Wizard, select “Back”
and click
the “OK” button
. To proceed to the next step of the Installation Wizard, select “Next”
and press-
those "OK" button
.
Video output
Here you set the type of video signal output from the TV connector.
You can choose from RGB or CVBS. RGB
Select this setting if you are using a full SCART cable connection between the receiver and TV. This way you will have the best quality image.
NOTE!
Your TV must support RGB video display via the EURO SCART connector input. This setting sets the output of the video signal only from the TV connector of the receiver.
CVBS
This setting disables the control signal at the TV output that tells your TV that the receiver is operating in RGB mode.
In most cases, your TV will switch to displaying CVBS composite video. This type of video signal corresponds in quality to the signal of terrestrial terrestrial television. Audio output
Here you can set the audio signal that will be output from the audio outputs of the TV connector. You can choose from Stereo, Mono. If you select Mono, the audio will be output in monaural mode, even if the program has stereo audio. In this case, the same monaural signal is output from both connectors/pins.
NOTE!
The channel audio is output in stereo only if the channel has a stereo audio track and Stereo is selected in this item.
Installation Wizard 4. Installation Wizard 16
Page 16
- Image
- Text
4. Installation Wizard
4. Installation Wizard
16
Screen view
Possible options:
16:9
,
4:3
.
16:9
In this case, a control signal is output to tell the TV that the picture is in wide format with an aspect ratio of 16:9. A standard format image on a widescreen TV will be displayed in full screen with distorted proportions.
4:3
In this case, a control signal is output to tell the TV that the picture is in a standard 4:3 aspect ratio. A wide format picture on a standard TV will be displayed in letter box mode: the picture will be framed by black bars at the top and bottom of the picture, but the aspect ratio of the picture will be 16:9.
Television standard
Here you can set the color encoding standard for composite video.
Possible options: PAL
,
SECAM
.
ATTENTION!
The SECAM receiver output may not be displayed correctly on some TV models.
To return to the previous step of the Installation Wizard, select Back
and click
the "OK" button
.
To proceed to the next step of the Installation Wizard, select Next
and click
OK
.
Step 3
To set the system time and date, the receiver uses data transmitted by the broadcaster as part of the satellite signal. At this step of the Installation Wizard you are required to enter information about your time zone. To return to the previous step of the Installation Wizard, select “Back”
and click
the "OK" button
. To proceed to the next step of the “Setup Wizard”
new" select "Next"
and click
the "OK" button
.
Installation Wizard 4. Installation Wizard 17
Page 17
- Image
- Text
4. Installation Wizard
4. Installation Wizard
17
Step 4
At this stage of the Installation Wizard, the receiver searches for TricolorTV channels. By default, the settings for searching for TricolorTV channels are set.
You can also make the following settings:
LNB type
Select the type of converter (LNB):
single
,
universal
.
In the case of a single
LNB, the value of the operating
LNB local
oscillator frequency must be selected from:
5150
,
9750
,
10600
,
10750
.
If the required frequency is not available, enter the frequency manually using the Number buttons
~
.
If you have chosen the LNB type universal
, then switching between LNB local oscillator frequencies
9750
and
10600
MHz occurs automatically.
Power supply LNB Standard
— the standard value of the converter supply voltage is supplied to the LNB IN connector.
Increased
- the converter supply voltage increased by 1V is supplied to the LNB IN connector. Increased LNB supply voltage is used in rare cases of non-standard installations, mainly when the cable is too long.
Satellite
— select a satellite to search for channels.
TV Channel
- Select a reference reference channel for the selected satellite.
To start searching, click “Next”
.
The found channels will be displayed in two columns: All TV channels
and
All Radio channels
.
At the end of the search, a message will appear at the bottom of the screen indicating the number of TV and radio channels found. To complete the search, you must press the Yellow button “F3”
. Found
the channels will be stored in the receiver's memory. The search can be interrupted by pressing the Red “F1” button
, in this case the receiver will store
only the channels found before pressing the button. To complete the search, you will also need to press the Yellow button “F3”
.
Settings Features
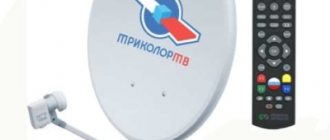
Before learning about Tricolor TV frequencies, you need to correctly connect and configure all the equipment.
You need to start with the location of the antenna. To receive all channels, including TNV. Later, you will need to become familiar with more settings, including lnb and others. When placing the antenna, make sure it faces south and that there are no high obstructions. Ideally, there should be a clear horizon in front of the antenna. Then the adjustment will bear fruit. It will be very good if you have the opportunity to adjust the position of the dish during operation in order to catch a cleaner signal. This setup is not only flexible, but also justified by operational needs.
The instructions will indicate how to assemble the antenna, after which you will need to move on to the next stage - setting up the broadcast and the channel table.
You will come across lnb when you set up a multifeed. In order for everything to work perfectly, the lnb value must be “single”. If lnb is assigned a different value, setting to Tricolor is not possible.
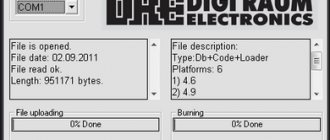
Many settings are made manually and cannot be adjusted automatically. So, you will need to independently configure your entire system to receive a specific satellite, and it all starts with system configuration. Here the Number value should be 1. In this case, it is important to observe the value of the bottom line 10750, the top line 10750. They can be different by default. However, you need to bring these frequencies into this unified form. If necessary, change the values manually.
Next, configure manual settings. Select the antenna number and frequency as indicated in the instructions. In this case, 1, Eutelsat W4, 12226. Select 27500 for the flow rate. This is the optimal value that is convenient to work with. After these simple manipulations, you need to look for a signal and navigate using the light indicators. There are no particular difficulties at this stage, but make sure that the mirror has a full view and that you do not block it.
Once you have already received a satellite signal, setting up channels will be very simple.
Basic functions 18, Basic functions
Page 18
- Image
- Text
5. Main functions
18
5.1 Switching channels
5.2 Volume adjustment
5.3 Sound track
5. Main functions
To switch TV and radio channels, you can use one of the following methods: 1. Dial the channel number using the numeric buttons
~
on the remote control.
2. Switch to the next/previous channel using the CHANNEL +/- buttons
on the front panel of the receiver, or
/ buttons
on the remote control.
NOTE!
Channels can also be changed using the channel list and electronic program guide.
Switching between TV and radio channels is done using the “TV/RADIO” button
on the remote control. To return to the previous channel you watched, press the button
"BACK"
.
The buttons are used to adjust the volume level
/
.
Buttons
/
work as in on-screen menu mode,
and in the normal mode of volume control while watching a TV channel. To temporarily turn off the sound, press the SOUND button
.
To turn the sound back on, press the SOUND button
again or one of the buttons
/
.
NOTE!
This function only works if this service is provided by the satellite TV operator.
If you want to change the audio language on the current TV channel, press the Green F2 button
. In the upper left part of the screen
A menu window will appear. Selecting an audio track is done using the buttons
/
. To confirm your selection
you need to click the “OK” button
.
To exit this menu, press the Green F2 button
or the EXIT button
. Type of audio output
What are transponders from Tricolor TV?
A transponder is a small element of satellite technical equipment that is responsible for signal transmission. In this case, there are several transponders, each of which is responsible for a specific line of channels.
At the same time, the Tricolor client receiver is designed to receive signals from several transponders at once in order to provide the client with maximum comfort when using the company’s services. Without this technical element, you will not be able to view channels, nor will you be able to receive broadcast signals.
Basic functions, Basic functions 19
Page 19
- Image
- Text
5. Main functions
5.4 Channel list
5.5 Information banners
5. Main functions
19
can be changed in the menu: “Settings” - “System Settings” - “AV Output Setting” - “Audio Output”
and select
"Mono"
or
"Stereo"
.
ATTENTION!
the PIN code to access most of the receiver's functions.
(A request to enter a code will appear on the screen).
The default code is 0000
(see point 9).
When watching/listening to a TV/radio channel, you can call up the channel list. To do this, click the “OK” button
.
There are two options for displaying the list on the page: wide and narrow. Switching between wide and narrow display options is done by pressing the Blue “F4” button
.
Moving through the list of TV/radio channels is carried out using the buttons
/
. After choosing, you must
desired TV/radio channel, you must confirm your choice by pressing the “OK” button
.
It is also possible to scroll through the list of 7 channels, which is done by pressing
/ buttons
.
To exit the channel list, press the "EXIT" button
.
Channel and program characteristics are automatically displayed in a brief information banner at the bottom of the screen after pressing the Red “F1” button
or when re-
switching from channel to channel.
The brief information banner displays: 1. Channel number in the list; 2. Channel name; 3. Name of the channel list;
How to tune channels to Tricolor on an LG or Samsung TV
If, due to a failure or certain breakdowns, channels have disappeared on LG or Samsung TVs, you can restore their settings by performing a simple manual search and various settings. The standard settings described above are suitable if the settings of all broadcast categories are lost. If one specific channel is out of order, it is worth performing certain manipulations.
Before setting up a channel, you should go to the Tricolor website and find its frequency in a special table. Next, the following sequence of actions is carried out:
- The desired channel is selected through automatic or manual search;
- The parameters of the mounted satellite are set;
- The frequency is indicated;
- The security code is indicated;
- The TV stream speed and polarization are indicated.
All other parameters are set automatically. After this, the search engine program finds the required channel, and if everything is correct, then the operation must be confirmed and exit the settings menu.
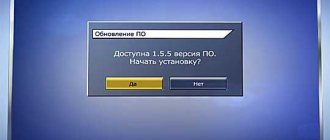
Important! In order to avoid certain failures in the future, so that the necessary programs do not disappear from time to time, it is worth updating the selected packages. For this purpose, you just need to visit Settings.
Main functions 5. Main functions 20
Page 20
- Image
- Text
5. Main functions
5. Main functions
20
4. “Signal quality” scale; 5. Number of the current audio track and their total number; 6. Symbol for the presence of subtitles on the channel; 7. Symbol of the presence of teletext on the channel; 8. Channel blocking symbol; 9. Symbol of a coded (paid) channel; 10. Name of the current program; 11. Start time of the current program; 12. End time of the current program.
NOTE!
The name of the current program, its start and end times are only displayed if the relevant information is transmitted by the broadcaster.
If you press the Red "F1" button
when displaying a short information banner, then display
An extended information banner is displayed. It looks like this:
1. Date; 2. Current time; 3.Window with a detailed description of the program. To view a full description, you can use the buttons
/
.
4. Scroll bar for a detailed description of the program; 5. “Signal strength” scale; 6. “Signal quality” scale; 7. Name of the conditional access (encoding) system used by the channel (broadcaster); 8. Data about the satellite, frequency, polarization, flow rate and FEC of the channel and the name of its provider; 9. Software channel identifiers in the digital stream.
Comments
Select → I found the instructions for my satellite here! #manualza
- Click →
I bought a scooter for my granddaughter. According to my assumptions, it is intended for children under 6 years old. I carefully read the instructions. Clause 10 reads: - It is prohibited to use this product while under the influence of alcohol or other intoxication...
Manualza!manualza.ru