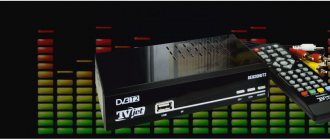
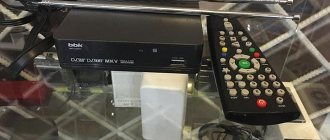
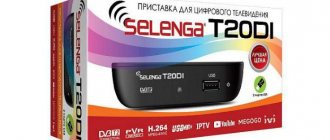
Like the new D-Color DC1002HD mini , the blue NEW PROCESSOR sign is the only sign on the box that indicates the presence of a Sunplus 1509A .
Neither a soccer ball, nor 2021, nor a green field are distinctive features. Blue only .
Unfortunately, the latest news is from July 20, 2021, and these models are not there yet either.
Also, on the websites of various stores, very old versions of the DC1002HD mini and DC1301HD are shown (even with a small remote control), so you can only get your bearings by going to a specific store in person and asking the seller to show the box. Sunplus 1509A is the company's new processor; its previous SPHE 1502A and 1505A processors are used in the Oriel, TVK, LIT and Mezzo cable set-top boxes, so their menu items are somewhat similar.
This processor is the first combined (3 in 1): demodulator + processor + 64 MB memory, i.e. similar to MStar MSD7T01 and ALi M3821 P. And if you go to , you can see that OEM manufacturers offer models in the same case on one of three processors to choose from: MSD7T01, M3821 P or Sunplus 1509A.
Sunplus 1509A software comes native with YouTube and IPTV , and, for example, World Vision had this processor as one of three contenders for their potential pure IPTV set-top box.
And IPTV is no longer 20 terrestrial channels, but as many as you like (of course, if you have unlimited Internet).
But there is not a word, not a sign, not even a hint about such possibilities on the packaging:
By the way, the new
DC1501HD is designed in exactly the same way, but with the usual red NEW PROCESSOR sign - it’s still the same MStar .
Moreover, there is also a new DC921HD in the same box - with a new green processor:
But this is still MStar:
Software version: MSD_170801V2.0 HW version: JN7T01.R836.DJN-1.V1.3
Looking at the packaging of the new DC1301HD and DC1002HD mini , neither the seller nor the buyer will ever guess about the truly new Sunplus 1509A processor and its initially advanced functions.
The OEM manufacturer is indicated on the side:
widely known - :
Previous versions were also ordered from them.
Similar blue D-Color models are on their website and can be seen below.
Well, let me remind you that on the Russian market only Lumax , DENN and D-Color provide a 2-year warranty :
The standard equipment includes a receiver in a metal case with a 1 m power cord, a remote control, audio-video cords 96 cm long, a pair of AAA elements, a bag of silica gel and an instruction manual:
The instruction manual is in the form of a folded booklet with color screenshots and small letters. 8 points describe in detail the functions of the YouTube . But not a word about IPTV (more on that below).
On the front panel there is a USB connector, a green indicator with a sign indicating Lock , and showing the channel number:
Lock is the fact of capturing a digital stream during satellite/cable/terrestrial reception.
And in the duty room there is a red operating mode indicator and a ticking clock :
The same modern indicator is used in the previously reviewed Pantesat HD-2258 T2.
The channel switching and on/off buttons will allow you to continue using the set-top box for some time if the batteries suddenly run out or the remote control breaks down.
On the back there is a standard set of connectors (the difference from previous versions is one self-tapping screw for the RCA sockets):
Transit RF IN > RF OUT always works, but as in many other set-top boxes, the power for the +5V active antenna is turned off in standby mode.
Let me remind you that RF OUT can be used to receive analog channels on the TV itself by connecting an adapter cable:
Or for connection - the next set-top box in the chain, but we must remember that by unplugging the main set-top box from the socket, the signal will no longer pass, so for independence it is better to use a splitter-splitter after the antenna, and with an active +5V antenna, it is advisable to use a splitter with a pass-through power supply (POWER PASS), for example:
On the sides:
and the bottom are perforated with numerous holes:
4 legs made of porous rubber, in addition to stability, also contribute to natural ventilation from below.
The holes on the cover are located just above the processor heatsink:
The protective transport film does not need to be removed - it does not interfere anywhere.
control is full-size, with additional buttons for volume control and channel switching:
there is ZOOM - for the scaling function, a separate USB - for direct access to programs previously recorded via PVR. For some reason, returning to the previous channel is duplicated - the RECALL and LAST buttons.
V-FORMAT button - switching video modes, this is especially convenient when connecting computer monitors - via an HDMI=DVI adapter or converter. As on ALi processors, switching occurs in a circle in a row through all possible video modes, starting with the standard VGA mode:
- 480p_60
- 480i_30
- 576p_50
- 576i_25
- 720p_60
- 720p_50
- 1080i_30
- 1080i_25
- 1080p_60
- 1080p_50
And another option is available through the menu - Automatically detect .
So, we connect the colored “tulips” to the TV, select the appropriate AV input on it and turn on the set-top box. boot lights up on the indicator , and on the screen:
The loading took 15 seconds, the start menu appeared:
Select Next , the Antenna Setup :
If your active antenna is powered from the input of the set-top box, then do not forget to first enable the Active antenna .
Click Start Search and the AutoSearch :
If no channels are detected, the following message will appear:
Database is empty
In such cases, you need to use the Manual search by selecting a frequency channel:
Slowly turn the antenna to achieve the maximum Quality .
As you can see, if necessary, the frequency can be entered manually.
There is also a beep [BEEP] - when the Quality is sufficient, a whistle starts. Those. You can adjust the antenna without looking at the screen, focusing on the sound.
Let's go through the menu - unlike previous Sunplus, there is a lower horizontal placement:
Moreover, when you go to the menu, the channel continues to broadcast in the background.
Installation section :
the Manual search
is located , as well as the power supply to the antenna input - Active antenna .
Section Channel :
In the Channel Manager you can edit them - move them, delete them:
and with the blue Rename , there is also a layout with small and large Russian letters (changed with the red button):
Space
button is just Space.
In the Favorite List , you can create 4 groups of favorite channels:
In the Preference you can select the menu language, for example, Kazakh , Georgian , Ukrainian :
The maximum
transparency is 60%.
Item Hard Hearing - it would be more correct to call it For the hearing impaired (however, this function has not yet been implemented in our system).
In the Settings there is a Timer :
where you can program the recording of programs:
Moreover, you can select the recording frequency in the Mode :
Once , Daily , Weekday , Weekly , Monthly .
Item network card configuration file [Ethernet Config] - could be called Wi-Fi Settings .
Item Version - as you can see, the firmware is quite recent from January 9:
And the DC1002HD mini is a week older - from . You can update if necessary.
In the AV the item “uniaxiality” could have been left in English - SPDIF:
options for the Aspect Ratio - Full display , 4:3 LB , 4:3 PS , 16:9 .
And the last section is Media Center , where IPTV and online video (YouTube) are located:
But let's return to DVB-T2 again:
The infobar shows the start and end times of the current and next program:
a red round icon for the age limit of the current program, highlights in yellow the presence of Teletext, there is also an icon if there are SUB subtitles, HD broadcasting, favorite channels and Dolby Digital audio broadcasting (not available on free-to-air).
The infobar, as usual, can be called up and forced by the INFO , and pressing it again will show the frequency of the current multiplex, a detailed description of the program (current and next), information about the operator, network name and signal - Q - Quality :
and if necessary, you can quickly adjust the antenna to the maximum.
OK button opens the Channel List :
Using the left-right arrows you can select one of 4 groups of previously defined favorite channels.
A short video with channel switching and menu overview:
When you press the EPG , we will see the Program Guide in three modes, switching with the red button, Daily :
Weekly:
Now/next:
Record
button you can immediately program the selected program and it will appear in Timers .
Additionally, when you press the INFO , it will show extended information about the selected gear:
Of course, you can record not only according to a schedule, but also directly by pressing the button with a white circle on the remote control, recording will begin:
and the red letter R - Record will flash in the upper right corner of the screen.
on the flash drive in the PVR :
Channel name - Program name (DateDDMMYYYY_TimeHHMMSS)
and inside with the same name there is a file with the .TSV (typical for Sunplus processors), for example:
01 FIRST CHANNEL - Tatyana's night. 5th and 6th ser(26042018_002548).TSV
and next to it is the service file PLAYLIST.PLT - 384 bytes.
.TSV is a regular transport stream broadcast over the air (H.264 MPEG-4 AVC), opens on a computer via VLC, and for other players you can simply change the extension to .mp4
As on ALi processors, every time a flash drive is plugged in, its performance is assessed for ~20 s - writing speed, after which a TEMPTEST.SPD of 1 byte in size (with 0 inside) remains PVR
When you press the TEXT teletext page of the channel:
OK
button you can change its transparency in 5 steps up to maximum:
If there is a subtitled program, movie, or cartoon, you can press 888 and see the subtitles:
Just like on ALi and Novatek, even without a flash drive, you can press the pause button >II and stop the moment:
ZOOM button turns on the zoom function, and the change with the green << is reduced by 2 times:
and yellow
>> - increases up to 4 times:
In the Media Center , selecting Multimedia takes you to the media player:
Here, by pressing the
MENU Settings , we will get to the previously inactive gray item Multimedia Configuration :
Background music
mode is enabled by default Music section will play .
As you can already see, in Multimedia there are tabs Movies , Music , Photos , as well as Recording Manager , Disk Manager and E-Books .
Like the original DC1301HD and DC1002HD mini models, the new ones, of course, also do not have a Dolby Digital license, so many films downloaded from the Internet will have no sound - solutions are discussed in detail in the article No sound for films from a flash drive - no Dolby Digital (AC-3) license inside the processor.
And, in particular, for example, if you connect via HDMI and the TV has a Dolby Digital license, then you can enable HDMI RAW :
and then Dolby Digital will go directly to the TV.
When watching movies again, the set-top box remembers where it stopped, so it will clarify:
To do this, a folder video_resume_play , inside which a temporary file of 4 bytes is saved with the name of your file and the extension .SPD
The Recording Manager tab shows previously recorded shows. By the way, in the menu in the Media Center there is an item PVR Configuration :
Here you can note that by default the Timeshift is disabled. You can enable it if necessary.
Disk manager in Multimedia allows you to format a flash drive in FAT32 or NTFS, as well as work with files - Move / Copy, Rename, Delete and Delete All.
E-Books tab opens regular text files with a .txt (UTF-8 encoding), but for some reason I don’t like the corner quotes “” - several words after them are cut off:
if "" is removed or replaced with a space or straight quotes, then it shows normally completely:
Setting up Wi-Fi and operating the YouTube and IPTV is described in detail in the second part of the review.
Well, for now, let's disassemble the set-top box, losing 2 years of warranty, although if you open the lid carefully, the Do not open it without professional can be kept intact. In addition, its upper part is glued to a protective transport film.
Moreover, the bottom under the power supply is even additionally protected:
Technological designation of chassis JNMB1509C.R836.E1301.VER1.0 :
And the DC1002HD mini differs only in the location of the LED2, which is missing in both. MINI 827 is the code for the DC1002HD mini on any processor.
The JN marking is exactly that.
Please note that here is the new Rafael Micro R850 (now found on other consoles, for example, the Gmini MagicBox):
It is, of course, relatively new, because... 3 years ago him. As you can see, the path from numerous tests around the world to end consumers is very slow.
Technical details : Rafael Micro R850 tuner, Sunplus 1509A processor, cFeon Q32C-104HIP EN25Q32C flash (4MB), quartz tuner and processor 27 MHz, DC-DC S10 BLU (+1.2V core) and LPS (+3.3V) converters, linear stabilizer AMS1117 1.8, LED driver CS650E0, PWM PN8368, transformer EE19-PN8368, capacitors DKS: in the power supply 15x400, 10x50, 1000x16, 470x10, and on the board itself there is one 220x10.
Power consumption when receiving 2 multiplexes (33 Mbit/s) with power to the active antenna ~3.74 VA (excluding USB).
Radiator dimensions 14x14x10 mm. Measured temperature +58°C.
Looking at the back of the board in the processor area, I noticed two contacts, it turned out that they do not go anywhere, because these are UART pins (signed in red):
8 - TX, 9 - RX, and GND can be connected to the − terminal of the capacitor. The parameters, as usual, are 115200 8N1.
Sunplus's log is very detailed - turning on and showing Channel One (archived) and turning it off to standby mode.
For example, it is interesting that the firmware determines which tuner:
AVL_Jmod_TunerDetect Stat,Time is************=1371
***TunerCheck_MXL60X Start*** MxLWare608_OEM_ReadRegister fail !!! MxLWare608_OEM_ReadRegister fail!!! ***TunerType is NOT MXL603/608/661***
***TunerCheck_R836 Start*** ***TunerType is NOT R836***
***TunerCheck_R850 Start*** ***TunerType is R850*** ***TUNER Type is 4
AVL_Jmod_TunerDetect End,Time is************=1399
Considering that the chassis was originally intended for .R836. but it costs R850 , which means that they are identical in pinout, but differ only in software.
Also, judging by the log, the company's AVL6609 is integrated as a demodulator. The fact is that, in fact, 3 years ago Sunplus Availink started its production of chips for set-top boxes and invested the same funds in it, acquiring a 16.67% stake in Availink:
Therefore, now you can find this designation for Availink-SPHE1712C processors.
In addition to the UART pins, I traced the pins to the RCA sockets:
- 98 - Video
- 108 - Audio Right
- 109 - Audio Left
As I mentioned above, the measured heatsink temperature is +58°C - and this is the normal temperature for a running processor. But sometimes people worry about their “hot console” and try to upgrade it by replacing the factory radiator with a larger one or even installing a small cooler (and the fan is a vacuum cleaner - it constantly sucks in room dust and rustles).
But of those who are so worried, rarely does anyone measure not only the temperature of the radiator, but also the back of the processor. For example, for this processor it is +65°C - because, unlike the top, there is no radiator at the bottom:
In addition, it is harder for warm air to escape below. And if additional cooling is to be done, then it will be done from below.
Moreover, consoles in metal cases make it possible to very easily remove heat from the processor by inserting a metal gasket between the board and the case:
a small metal cube, a pin, bushing or nut, of course, preferably aluminum, or even better, copper. But you can also use a regular steel nut, in this case M6, because its height is 5 mm - equal to the gap between the board and the case. The hole is filled with solder:
After lubricating the bottom with heat-conducting paste KPT-8, we center the nut:
To prevent it from falling off during assembly, we grab the edges with ordinary rubber glue “Moment”:
After hardening, lubricate KPT-8 and screw the board to the case.
Result: the radiator temperature became +53°C, i.e. fell by 5°, thanks to a regular nut placed under the bottom of the processor. And now it’s the bottom of the console that’s heating up, not the processor.
Of course, when there is a 2-year warranty , there is no point in opening a new set-top box and trying to modernize something in your own way, and the best thing is to keep the sales receipt, more or less presentation of the set-top box and the original equipment to return to the seller if it malfunctions.
But the vast majority of consoles have only a 1-year warranty and it will fly by very quickly, after which, if desired, you can modify it in a similar way. Especially for those who constantly watch movies in HD quality from a flash drive, as well as HD channels (if the IPTV function is available) - for greater stability during long-term operation.
Positive: the first model on the Russian market on the new Sunplus 1509A combined processor with YouTube and IPTV functions built in, an interesting modern menu, a large spacious metal case, 3 buttons on the front panel, a digital indicator with a stream fixation icon and a clock in standby mode, full-size convenient remote controller.
Negative: because This is, first of all, a set-top box with a processor without Dolby Digital support, some menu items are not translated incomprehensibly, the presence of this particular new processor and its important functions is not described in any way on the packaging.
The second part of the review describes in detail the Wi-Fi connection, YouTube and IPTV viewing capabilities on the new D-Color DC1301HD and DC1002HD mini.
4.1/5 — (15 votes)
You can ask questions about digital television on the DVBpro forum
Author: Alexander Vorobyov, Apr 28, 2021 | Permanent link to the page:
Digital receiver D-COLOR DC1301HD
New for May 2014, the DVB-T2 receiver DC1301HD amazes with its modern design and the highest quality of materials used in production.
Equipped with the latest processor, tuner and demodulator, the DC1301HD takes its rightful place in the DVB-T2 receiver market, ahead of many competitors in many respects. Device Features:
- Small dimensions (132x100x32 mm) and light weight;
- playback of digital video ( FULLHD 1920*1080 ) and STEREO quality audio;
- full compatibility with MPEG-2, MPEG-4, DVB-T and DVB-T2;
- High sensitivity tuner Maxlinear 603;
- Modern chipset and demodulator of the latest generation MStar 7802;
- Play AVI, MPEG, MKV, DivX, MP4, JPEG, MP3, WAV and USB PVR via USB2.0
- easy-to-use on-screen menu;
- storing up to 999 channels in memory;
- editing the list of programs (adding favorite programs, sorting and deleting);
- automatic program search;
- support for teletext function;
- timer function, automatic on/off (once, daily);
- electronic guide (EPG);
Options
- Input signal format: DVB-T2 (reception of open channels)
- Received frequency range: 174-862 MHz.
- Video format: MPEG4 AVC H.264 SD/HD
- Audio format: MPEG-1 Layer I/II, MPEG-2 Layer II, AAC
- Video resolution: 576i, 576p, 720p, 1080i, 1080p
- Screen format: 16:9, 4:3
- Stream bandwidth: 6 / 7 / 8 MHz.
- Accepted modulation types: QPSK, QAM-16, QAM-64 for COFDM 2K/8K
- Allowable bit rate: Video up to 15 Mbit/sec, Audio up to 384 Kbit/sec.
- Sound: 2 channels
- Number of channels in memory: 999
- Display teletext and subtitles
- TV guide (program overview) EPG
- Favorite channel lists
- Shift in TV viewing time (Timeshift)
- Record TV programs on the fly to a USB device
- Record TV programs using a timer to a USB device
Setting functions
- Multilingual menu, including Russian.
- Default language settings for audio, captions, and text.
- Automatic time synchronization
- Setting the time zone
- TV lock
- Automatic and manual program search
- Manual search for programs by channel number or frequency
- Firmware update via USB
Timers
- Types of timers: power on, recording to a USB device
- Trigger frequency: Once, Daily
Connectors and controls
- Antenna input,
- Antenna output (high frequency pass),
- RCA,
- HDMI
- USB (for playback, recording and software updates),
- Power indicator, channel numbering, control buttons on the front panel
Characteristics
- Supply voltage range: 170-250 V AC
- Power consumption: 8W MAX
Download firmware version DC1301HD 07/03/2014.rar
Information from the site d-color.ru

