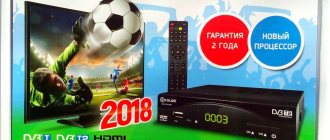
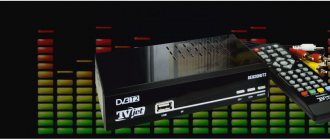
Oriel is a fairly well-known manufacturer of digital DVB-T2 set-top boxes. Since 2015, it has released about 10 models of receivers that can easily connect to a TV and receive digital signals directly from home. In addition, as an advantage, owners of such receivers also note the ability to access the Internet from the device itself. This allows you to update the software on time, as well as enjoy additional viewing of videos on various IPTV services and video hosting sites.
We will describe in detail and show in practice the procedure for connecting all models of Oriel set-top boxes. In addition, we will study the connection features for different types of models, and also provide a brief action plan if the device for some reason stops working normally.
Comparison table of Oriel DVB-T2 set-top boxes models
By and large, if you take the entire model range of released Oriel consoles, you will not find any significant differences in them. New devices may additionally be made of a metal case and may be equipped with Wi-Fi adapters. The rest: menu, format support, connectors, etc., remains the same.
| Options | 120/120D | 105/105D | 101 | 302/302D | 403D | 415D | 421D/421UD | 794 | 963 |
| Material | Metal | Plastic | Plastic | Plastic | Plastic | Plastic | Metal | Metal | Metal |
| Display on the body | + | + | — | — | — | + | + | + | + |
| Outputs for DVB-T2 | HDMI and RSA | HDMI and RSA | HDMI and RSA | HDMI and RSA | HDMI and RSA | HDMI and RSA | HDMI and RSA | HDMI and RSA | HDMI and RSA |
| WiFi | — | — | — | — | + | + | + | — | — |
| Remote control | + | + | + | + | + | + | +/+teachable | + | + |
| Nutrition | Internal 220V | External power supply 5V | External power supply 5V | Internal 220V | External power supply 12V | External power supply 5V | Internal 220V | External power supply 12V | Internal 220V |
| USB | + | + | + | + | + | + | + | + | + |
*Set-top boxes: 403D, 415D, 421D, 421UD – are additionally equipped with the ability to receive digital broadcasts from cable television.
CVBS
With this connection, the operation of the device is quite standard. The Oriel 963 digital set-top box is connected as follows:
- the yellow connector is for video;
- red represents the right audio channel of the stereo signal;
- white represents the left audio channel of a stereo signal or is responsible for mono sound.
Thus, if you are using a TV with mono audio, the Oriel 963 should only be connected using the white and yellow cables.
Diagram of options for connecting the Oriel set-top box to the TV
The Oriel set-top boxes come with RSA cables for connecting them to the TV via AV outputs. However, in practice, this option is not suitable for everyone and here it is necessary to further analyze all the options. The general connection diagram will be considered using the example of the most popular Oriel models - 421 and 963 . However, the connection principle itself will be identical for all models.
The choice of one or another connection option is arranged in descending order, depending on the capabilities of the cable itself:
- First of all, you need to check if there is an HDMI input on your TV. This transmission standard is more acceptable and should be chosen first. The cable provides the best display (picture) and is also more durable than others. The cost of 1 meter of high-quality cable is from 200-500 rubles.
- If this option is no longer available, then further connections will have to be made via RSA (Tulips). They come in several types, depending on the number of plugs on each side. For Oriel there is not much difference. The main thing is that the TV is adapted to the connection.
- Older TVs, in most cases, will not have HDMI and RSA. These TVs will most likely have a SCART input. On the 961 model, such a connector is present initially and all that is required is to buy the appropriate SCART-SCART cable. It will cost you 200-300 rubles.
If you have an Oriel set-top box model without SCART, then you should buy an adapter with Scart-RSA. It costs from 50 rubles and is sold in all stores
Connecting additional audio systems to the receiver
In addition, various Audio systems can also be additionally connected to Oriel set-top boxes. For example, if you previously used a home theater or simply bought more powerful speakers and would like to use them in the process of broadcasting digital channels.
To achieve this, all models had a built-in input for coaxial cable (Coaxial). Using it, you can include additional sound sources in the system and make the display of TV channels more voluminous.
Internal components
Some users notice that long-tested and proven technologies were used in the production process of Oriel 963 DVB-T2. Reviews often contain information that this model contains the budget Ali M3812 chipset, which can often be found in various set-top boxes of this kind and which has already proven itself well during operation in a variety of conditions.
It is also worth noting that, in addition to this processor, a device from Sony is also used, which includes a specialized demodulator, as well as a super sensitive tuner. Thanks to such components, users are provided with extremely fast channel switching, effective reception of even relatively weak transmissions, as well as an extremely clear image with a simple and understandable menu. All this is just the beginning of a long list of functions of the device itself, as well as the capabilities of the modern T2 television standard, which is provided to users with the help of this receiver.
Setting up digital channel search on Oriel
In order to catch all 20 digital channels, it is not enough just to know the instructions for the set-top box. Please check in advance whether you need a new antenna. The search process itself will be similar for all models of the company's receivers. Therefore, regardless of what model of console you have: 421, 963, 120, etc., the settings will be identical:
- First, select the signal display mode required in your case from the TV menu. It is taken depending on the method in which the console was connected. For example, if this was done using a tulip, then you should switch to AV mode.
- After this, you need to press the power button on the set-top box or its remote control.
- A welcome window will open. It will ask you to indicate your country and select a language. Typically this option is already set. It is better not to touch the remaining settings unless you know the exact ratios for the sides. Click OK.
- An automatic channel search should start. At the same time, the set-top box will pass through all frequency ranges in the visibility zone and find digital channels available for viewing. When finished, the list should save itself.
Files on external media
After the channels are configured, you can check the function of reading data recorded on external media. To do this, return to the main menu and select the “Record” item. After that, go to the software media player and select the connected hard drive or flash drive in the appropriate interface.
If everything is done correctly, the user will have access to multimedia files located on the media. You can try to run them, and this should work if they are presented in formats that the DVB T2 Oriel 963 receiver supports.
Connecting WiFi to Oriel set-top boxes
Some of the set-top box models presented in the table above have a built-in WiFi receiver and can easily connect to the Internet. This is very convenient and allows you to turn your device into a real multifunctional cinema. A wireless network allows you to:
- Watch videos on YouTube and Megogo.
- Find out the weather in your region.
- Connect to news feeds.
- Watch more than 20 channels using IPTV.
- Update the device.
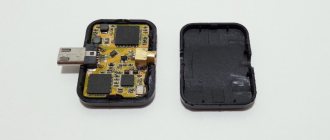
To connect, you will additionally need to purchase an adapter, which is a Wifi antenna and connected via USB.
Firmware update and factory reset
When a new version of the set-top box software is released, it may not start working correctly with those TVs that previously had good contact with it. Therefore, in some cases it may be necessary to change the firmware of the set-top box to a new one, or if something goes wrong, return everything to the factory settings.
This can be done through the receiver menu:
- To do this, go to “Tools” and select updating the receiver via USB or via OTA.
- In the first case, the new firmware version should be installed on a flash drive.
- In the second case, wifi is required.
- If you want to reset all settings to default, you should select factory settings.
Password for resetting the device and entering the update menu: 1234
Device Specifications
Let's study the main characteristics of the device in question. He has:
- Ali M3812 type processor;
— tuner CXD2861 from SONY;
— support for the DVB-T2/T broadcast standard;
— antenna input and output type IEC-TYPE;
— support for the frequency range from 174 to 230 MHz in the VHF standard, as well as 470-862 in UNF;
— video decoder with support for MPEG-2, MPEG-4 formats;
— audio decoder with support for standards such as AAC, AC3, PCM;
— support for broadcasting video streams in 4:3, 16:9 formats (you can select the optimal standard automatically);
— video outputs such as HDMI, SCART, and composite;
- Coaxial and stereo audio outputs.
These characteristics can be assessed as corresponding to leading models of receivers of a similar class. The device is connected to a network voltage of 100-240 V at a frequency of 50/60 Hz.
Reviews for Oriel consoles
Currently, the company occupies its niche in the field of sales of digital receivers. At the same time, users note the high reliability of the devices and adaptation to a large number of connection options. Some of the latest models of set-top boxes can be successfully connected to a TV using 3-4 connection methods.
This in turn makes these receivers universal. When selling them, you can be 99% sure that the device will be able to contact TVs and will not cause any problems during operation. The cost of the company's receivers today varies around 900-1200 rubles. This is affordable for most TV viewers. Moreover, for that kind of money you will also get the opportunity to connect to the Internet.
Oriel is a fairly well-known manufacturer of digital DVB-T2 set-top boxes. Since 2015, it has released about 10 models of receivers that can easily connect to a TV and receive digital signals directly from home. In addition, as an advantage, owners of such receivers also note the ability to access the Internet from the device itself. This allows you to update the software on time, as well as enjoy additional viewing of videos on various IPTV services and video hosting sites.
We will describe in detail and show in practice the procedure for connecting all models of Oriel set-top boxes. In addition, we will study the connection features for different types of models, and also provide a brief action plan if the device for some reason stops working normally.
Equipment
The Oriel company has never been famous for the variety and richness of the equipment included in its devices, and the Oriel 963 is no exception. User reviews indicate that the equipment here is standard for all DVB-T2 receivers from this manufacturer and includes the following components:
- remote control;
- batteries for the remote control;
- equipment operating manual.
Thus, if you want to get cables to connect the device to the TV, you will have to purchase them separately, which is not the most understandable step on the part of the manufacturer of Oriel 963. Reviews often note that in stores where this set-top box is purchased, they immediately offer purchase cables that are suitable for your TV model, so it is recommended to find out before you go to purchase this device.
Comparison table of Oriel DVB-T2 set-top boxes models
By and large, if you take the entire model range of released Oriel consoles, you will not find any significant differences in them. New devices may additionally be made of a metal case and may be equipped with Wi-Fi adapters. The rest: menu, format support, connectors, etc., remains the same.
| Options | 120/120D | 105/105D | 101 | 302/302D | 403D | 415D | 421D/421UD | 794 | 963 |
| Material | Metal | Plastic | Plastic | Plastic | Plastic | Plastic | Metal | Metal | Metal |
| Display on the body | + | + | — | — | — | + | + | + | + |
| Outputs for DVB-T2 | HDMI and RSA | HDMI and RSA | HDMI and RSA | HDMI and RSA | HDMI and RSA | HDMI and RSA | HDMI and RSA | HDMI and RSA | HDMI and RSA |
| WiFi | — | — | — | — | + | + | + | — | — |
| Remote control | + | + | + | + | + | + | +/+teachable | + | + |
| Nutrition | Internal 220V | External power supply 5V | External power supply 5V | Internal 220V | External power supply 12V | External power supply 5V | Internal 220V | External power supply 12V | Internal 220V |
| USB | + | + | + | + | + | + | + | + | + |
*Set-top boxes: 403D, 415D, 421D, 421UD – are additionally equipped with the ability to receive digital broadcasts from cable television.
Remote control
Since the front panel of the set-top box itself provides only channel switching buttons, the use of a remote control becomes much more relevant, and this is often noted by people who previously purchased an Oriel 963 digital television set-top box. Reviews indicate that in case of loss of the remote control, use the device becomes quite complex, not to mention the fact that its functionality is reduced only to providing access to digital television.
The remote control itself has a rather modern and stylish design. The buttons are carefully rubberized and easy to press, and also have a fairly convenient location. In addition to the main buttons needed to implement standard TV functions, there are also a number of additional buttons with which users can quickly access various functions. Thus, you can easily use everything that the Oriel 963 DVB-T2 receiver offers you. Reviews from many users often pay attention to the use of fairly convenient “pinky” batteries, which made the device quite compact, and also eliminated the need to store large batteries or accumulators, such as This happens in the case of other similar devices.
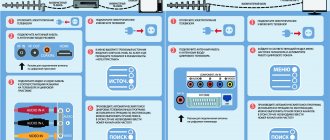
Diagram of options for connecting the Oriel set-top box to the TV
The Oriel set-top boxes come with RSA cables for connecting them to the TV via AV outputs. However, in practice, this option is not suitable for everyone and here it is necessary to further analyze all the options. The general connection diagram will be considered using the example of the most popular Oriel models - 421 and 963 . However, the connection principle itself will be identical for all models.
The choice of one or another connection option is arranged in descending order, depending on the capabilities of the cable itself:
- First of all, you need to check if there is an HDMI input on your TV. This transmission standard is more acceptable and should be chosen first. The cable provides the best display (picture) and is also more durable than others. The cost of 1 meter of high-quality cable is from 200-500 rubles.
- If this option is no longer available, then further connections will have to be made via RSA (Tulips). They come in several types, depending on the number of plugs on each side. For Oriel there is not much difference. The main thing is that the TV is adapted to the connection.
- Older TVs, in most cases, will not have HDMI and RSA. These TVs will most likely have a SCART input. On the 961 model, such a connector is present initially and all that is required is to buy the appropriate SCART-SCART cable. It will cost you 200-300 rubles.
If you have an Oriel set-top box model without SCART, then you should buy an adapter with Scart-RSA. It costs from 50 rubles and is sold in all stores
Connecting additional audio systems to the receiver
In addition, various Audio systems can also be additionally connected to Oriel set-top boxes. For example, if you previously used a home theater or simply bought more powerful speakers and would like to use them in the process of broadcasting digital channels.
Setting up digital channel search on Oriel
In order to catch all 20 digital channels, it is not enough just to know the instructions for the set-top box. Please check in advance whether you need a new antenna. The search process itself will be similar for all models of the company's receivers. Therefore, regardless of what model of console you have: 421, 963, 120, etc., the settings will be identical:
- First, select the signal display mode required in your case from the TV menu. It is taken depending on the method in which the console was connected. For example, if this was done using a tulip, then you should switch to AV mode.
- After this, you need to press the power button on the set-top box or its remote control.
- A welcome window will open. It will ask you to indicate your country and select a language. Typically this option is already set. It is better not to touch the remaining settings unless you know the exact ratios for the sides. Click OK.
- An automatic channel search should start. At the same time, the set-top box will pass through all frequency ranges in the visibility zone and find digital channels available for viewing. When finished, the list should save itself.
Manual search
If the set-top box, for some reason, could not find 20 channels or does not see signals at all, then you should reconfigure it in manual search. Its meaning is to set the device the exact frequency at which it will scan the entire flow of information and be able to provide you with the digital channels available on it. It's very easy to do this:
- Find out your frequency for DVB-T and DVB-T2 channels. To do this, go to the interactive map of CETV and look at the parameters of the television tower closest to you.
- Press the OK button on the remote control. The device should go to the menu.
- Select “Manual search” in the channel settings section
- After that, in the search mode, set “By channel” and select the number that was previously taken on the map. If the signal has not changed and the intensity graph shows 0%, then try also turning on the antenna power. It is used if you additionally use a signal amplifier.
Turning on channels
After you press the “Ok” button, automatic scanning of available terrestrial digital channels begins. It is worth noting that the search is carried out in two standards at once, and the procedure is quite fast. Detected channels are easily sorted according to their logical numbers, and after this scan, the device automatically switches the user to viewing mode, then the channel with the first logical number assigned by the Oriel 963 digital receiver is turned on. User reviews pay special attention to the convenient ability to obtain additional information about current or next program, parameters of the included channel, signal quality and strength, as well as many other useful functions.
Thus, upon purchase, Oriel 963 owners receive not just a device through which they can periodically view digital channels, they also get a full-fledged set-top box that reveals much more functions and turns even relatively old TV models into high-tech devices. It is for this reason that such devices have become so widespread recently and are gradually beginning to displace cable television from the current market.
Connecting WiFi to Oriel set-top boxes
Some of the set-top box models presented in the table above have a built-in WiFi receiver and can easily connect to the Internet. This is very convenient and allows you to turn your device into a real multifunctional cinema. A wireless network allows you to:
- Watch videos on YouTube and Megogo.
- Find out the weather in your region.
- Connect to news feeds.
- Watch more than 20 channels using IPTV.
- Update the device.
To connect, you will additionally need to purchase an adapter, which is a Wifi antenna and connected via USB.
Firmware update and factory reset
When a new version of the set-top box software is released, it may not start working correctly with those TVs that previously had good contact with it. Therefore, in some cases it may be necessary to change the firmware of the set-top box to a new one, or if something goes wrong, return everything to the factory settings.
This can be done through the receiver menu:
- To do this, go to “Tools” and select updating the receiver via USB or via OTA.
- In the first case, the new firmware version should be installed on a flash drive.
- In the second case, wifi is required.
- If you want to reset all settings to default, you should select factory settings.
Password for resetting the device and entering the update menu: 1234
Design and appearance of the device
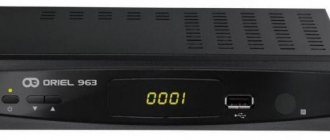
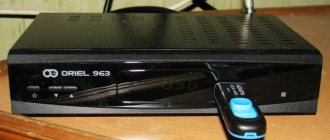
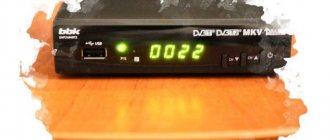
What does the Oriel 963 device look like? The device has a durable metal case, its front panel is made of plastic. As users note, the receiver has excellent build quality.
On its front panel there is a device activation button, above it there is an LED indicating whether the receiver is on or off. Nearby there are buttons with which you can switch channels. In the middle of the panel there is an indicator: when the device is active, it displays the channel number, and when waiting for user action, it displays the time. It can be noted that it is automatically synchronized using network resources. There is a USB port on the front panel. You can connect a flash drive or external hard drive to it in order to play files located on them or transfer data recorded by the set-top box to appropriate media.
On the back panel of the Oriel 963 device there is a network cable, input and output connectors for the antenna, a composite slot, coaxial audio output, SCART, HDMI connectors.
Reviews for Oriel consoles
Currently, the company occupies its niche in the field of sales of digital receivers. At the same time, users note the high reliability of the devices and adaptation to a large number of connection options. Some of the latest models of set-top boxes can be successfully connected to a TV using 3-4 connection methods.
This in turn makes these receivers universal. When selling them, you can be 99% sure that the device will be able to contact TVs and will not cause any problems during operation. The cost of the company's receivers today varies around 900-1200 rubles. This is affordable for most TV viewers. Moreover, for that kind of money you will also get the opportunity to connect to the Internet.
SCART
The main distinctive feature of this connection is that, in addition to audio and video, a specialized control signal must also be supplied through the SCART connector, through which the TV is automatically switched to AV mode. In other words, if you watch any standard analog channels on your TV, then after turning on this receiver, the TV will automatically switch to the SCART input and activate the digital channels received by this device. This is a fairly convenient connection option, which includes the Oriel 963 digital terrestrial receiver. User reviews also often indicate that many prefer to use such a cable.
Everything about setting up digital television of the DVB T2 standard
I assume that you have read the previous articles and followed the algorithm I described, but nothing worked for you. If this is not the case, then I recommend that you read all this, perhaps your problem is solved in the early steps. For example, you are simply not in the digital TV reception area or you have an old receiver.
Now let’s try to figure out what’s wrong and why your digital television is not showing. I’ll say right away that this article will focus specifically on setting up the set-top box and antenna . That is, we do not consider repairing the devices themselves, and assume that they are working properly.
How to connect it?
For Oriel 963, the instructions say that first of all you will need to connect the antenna. To ensure normal reception of an on-air digital signal, it is quite enough to use the most standard UHF antenna or an all-wave UHF+MV antenna. If you don’t have such a device at hand, but you are located directly next to the transmitter, then you can simply try connecting a wire or a piece of cable instead of an antenna. It happens that this option works, but the instructions for the Oriel 963 say that in any case, for high-quality reception, it is much more reliable and efficient to use the standard antenna rather than replacing it with any new components.
The auto search found nothing, and the set-top box says “No services”
If the auto search did not find anything, and the set-top box writes “No services”. Or the channels stopped showing, and instead of them there is also “No services” - the problem is a bad signal.
“No services” is a sure sign of a weak signal
You need to do a manual search on the frequencies on which your signal is transmitted. We take the frequencies here. The problem is that auto search with a weak signal simply does not find anything, while manual search will show you the strength of the transmitted signal, even if it is very weak.
Example from life
I already wrote that I caught the first number on simple “horns” in the city center, on the second floor and there are few buildings around. The signal quality is excellent. Intensity 80%, quality 60-80%
The higher the quality and intensity, the better
But when I moved to another area of the city, to an apartment on the 9th floor, a house in a low area and many other houses around – these horns did not catch anything. More precisely, the auto search did not catch anything. I was very surprised (the tower is located nearby), I entered the frequency manually through a manual search (which I advise you to do), and it turned out that the signal level was 10-15%! This is clearly not enough for reliable reception of digital TV.
If there are “friezes” (the picture falls apart into cubes)
We look at the signal level. To see the signal level, find the INFO button (or something similar) on the remote control and press it three times: you will see this:
Reception is on the verge of quality - only 36%
The same thing may happen to you if you are far from the tower, or there are many buildings around that interfere with reception .
Important: if both the intensity and quality are low, the signal must be amplified.
Either buy an antenna with an amplifier, or put the existing one outside, raise it higher, and so on.
Reviews about the device: ease of setup and operation
The device is configured, as users may note, using convenient and logical software interfaces. The structure of the set-top box control menu allows you to quickly access the desired option and activate it if necessary. Setting up the receiver in many aspects is carried out automatically, which makes the user's task easier.
The device in question, as we noted above, can be operated both using the remote control and by using the buttons located on the device’s body. This feature appeals to users, as it allows them to maintain the functionality of the device even if the remote control is missing.
How to set up the antenna itself
But if the intensity is high, but the quality is low, then it’s more interesting. You will need to adjust the antenna. That is, in fact, to turn it in different directions, in the literal sense. The digital TV signal is very sensitive to obstacles such as reinforced concrete walls or plastic window frames. The good news is that the “digital” is excellent even from the reflected signal. The only question is to find a position for the antenna at which everything will work well.
My antenna with amplifier Cadena General Satellite UVR-AV1000N MF+UHF
I did just that, bought an antenna with an amplifier, and connected it to the set-top box. Without an amplifier, of course, the signal level is the same as for horns. With the amplifier, the intensity increased to 80%, but the quality began to jump at the level of 20-30%, depending on where the antenna was pointed. And some pictures and friezes even began to pop up:
Frequent “freezes” are a sure sign of a bad signal or a change in atmospheric conditions
As a result, inside the room I managed to get a maximum of 35% quality with the antenna at arm's length. I already decided that that’s it, I won’t have “digits” and I bought a set-top box with an antenna in vain.
But then I placed the antenna on the windowsill. And I started setting it up there. Amazingly, I achieved 50-60% quality at the first multiplex, and 35-45% at the second! Only by changing the position of the round antenna. (The horns catch the meter range, and the circle – the decimeter range, so we adjust the circle ).
The horns are not needed at all, but I had to turn the circle for a very long time until I found the right position
At the same time, I found a position for the antenna in which both multiplexes were picked up. Since they are transmitted by different towers at different frequencies, they can be received differently. So, when you turn the antenna, check the channel from one multiplex and the channel from another. Optimally – First and Muz TV – switching is convenient)
Well, now everything is fine, and 50-60% at the first multiplex
Summarizing
You need to determine why digital television is not working. And if it's a matter of signal strength, then increase it . Or try to tune it by manipulating the antenna. That is, display information about the signal strength on the screen and begin to quietly turn the antenna. Most likely, you will be able to find an antenna position at which both multiplexes will work well.
If nothing helps at all, you can contact the support center for the federal digital TV program in your region, they will help you and give you advice completely free of charge. At least my email was answered the next day.
